追記:1/29 0:20
皆さんはlofi hip hop radioをBGMにしていますか?
またvoiceroid動画を見ていらっしゃいますか?僕はにっこーけんさんが好きです
また、PNGTuberというものも巷ではやっているようです
アバターや動画の一部しか動かないループアニメなどでもう少し取り回しが楽なフォーマットはないものかと日々考えています
アバターに関しては似たようなソリューションがあったので記事を紹介します
https://note.com/lilish_works/n/n956ef62ea2e9
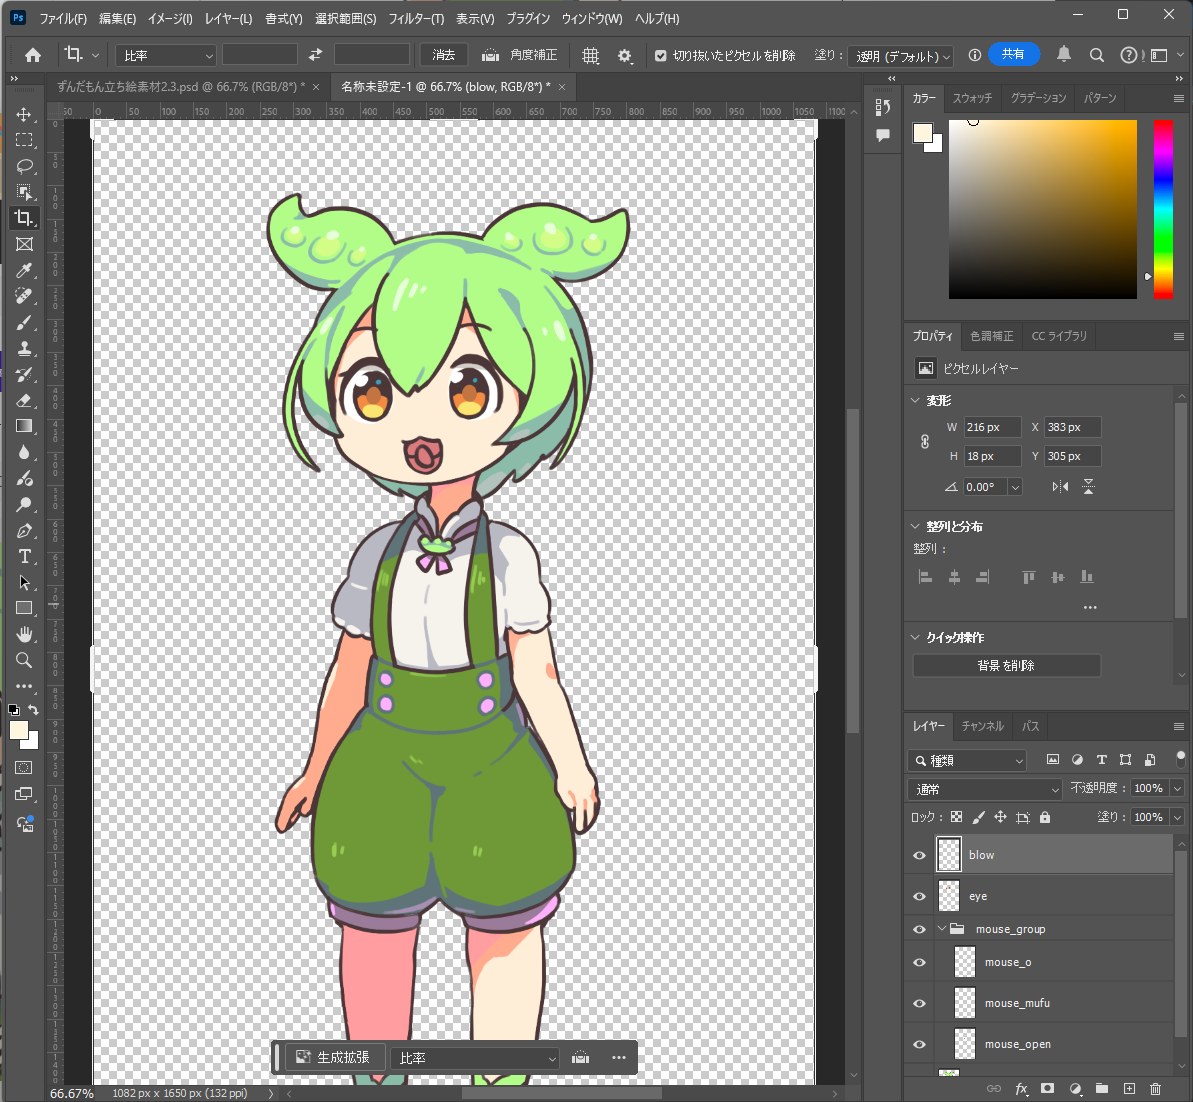
今回のプロトタイプでは、photoshopでレイヤーごとにPNGを書き出しjsonファイルに座標を書き込むスクリプトと、それらの画像を再生するプレイヤーをpygameで出力しました
今回は坂本アヒルさまのずんだもんを使用させていただきました
https://www.pixiv.net/artworks/92641351
ありがとうございます
photoshop上の様子
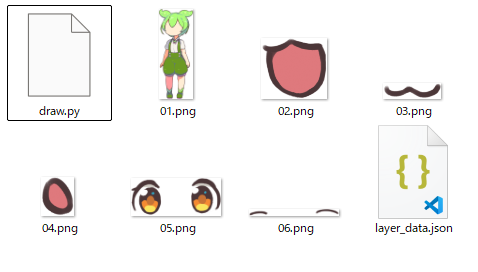
photoshopから書き出したファイル群
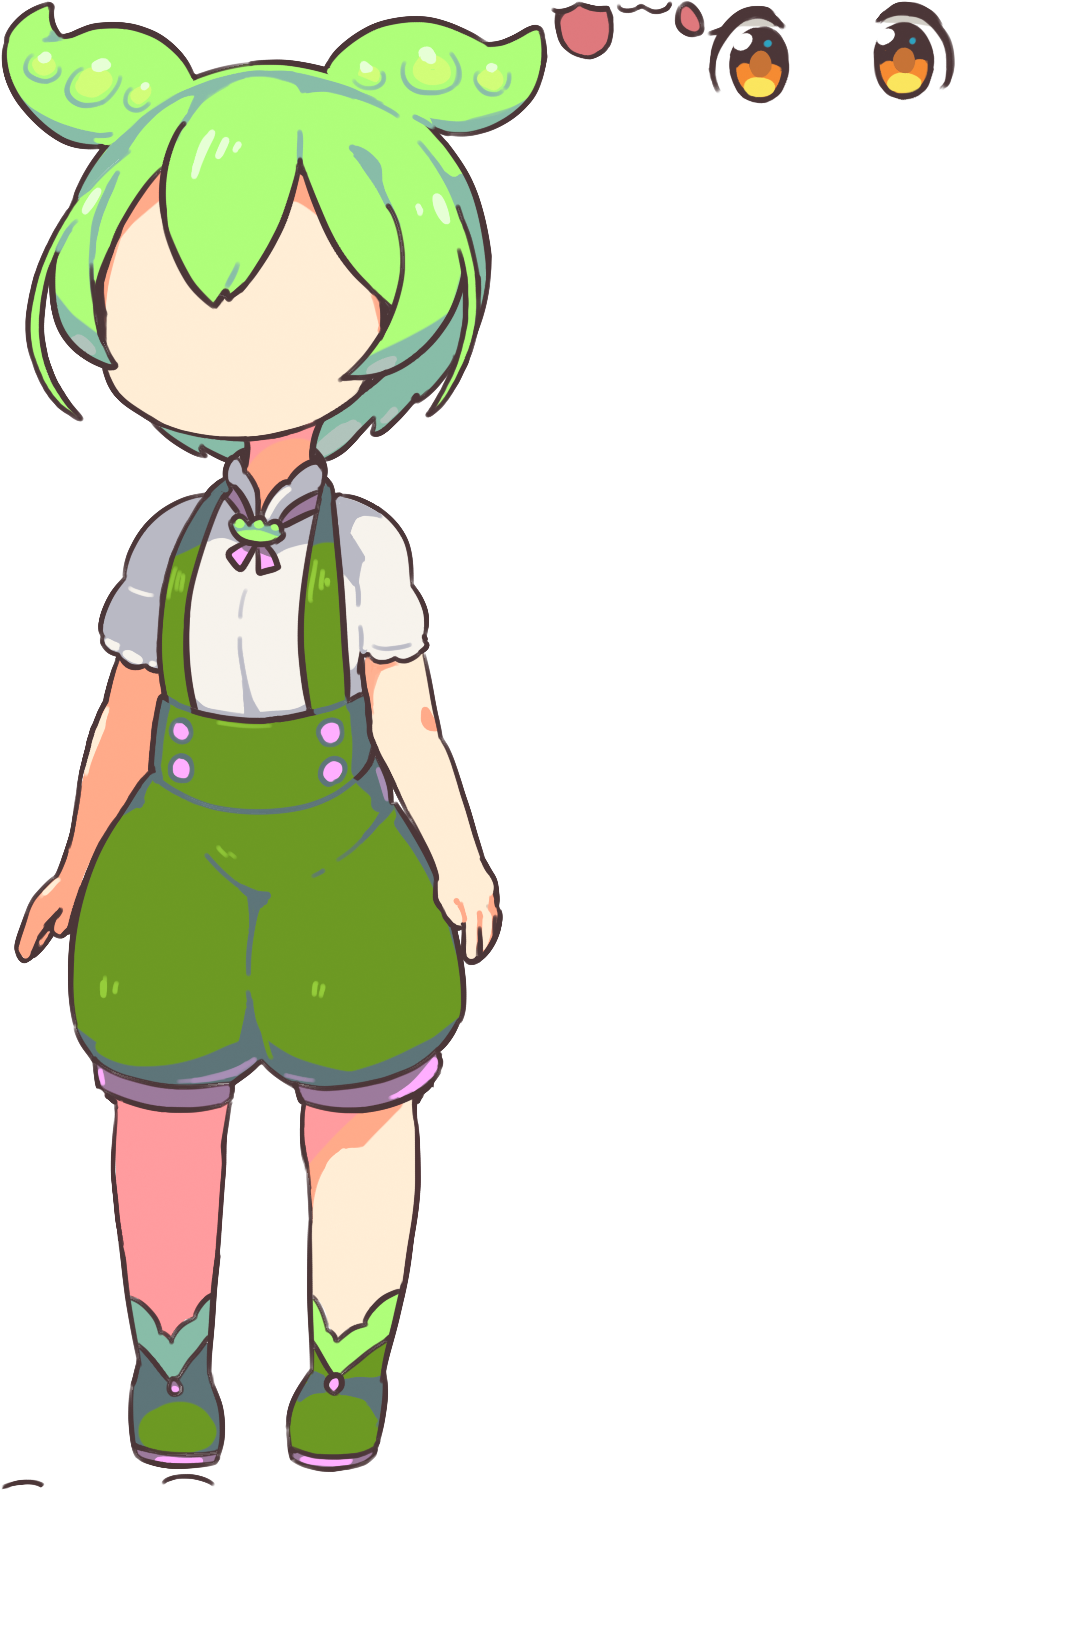
pygamesで再生したデモ

デモではレイヤーを再現できているのがわかります
{"canvasWidth":1082,"canvasHeight":1650,"layers":
	[
    {"fileName":"ファイルへのパス",
        "x":キャンバス左上からのX座標,"y":キャンバス左上からのY座標,
        "width":画像の幅,"height":画像の高さ},
    {"fileName":"01.png","x":258,"y":109,"width":549,"height":1473},
	{"fileName":"02.png","x":460,"y":474,"width":66,"height":61},
	{"fileName":"03.png","x":466,"y":496,"width":58,"height":16},
	{"fileName":"04.png","x":480,"y":487,"width":33,"height":39},
	{"fileName":"05.png","x":366,"y":351,"width":250,"height":107},
	{"fileName":"06.png","x":383,"y":305,"width":216,"height":18}
    ]
}
jsonは上記のように出力されます
次は1枚のテクスチャとしてパッキングしてもう少し取り回しをよくしたいと考えています
また、jsonのフォーマットを拡張して拡張しました
テクスチャのパッキングにはpillowを使います
pip install pillow
また、パッキングする際にjsonを一緒に書き出します
この時、もともとの連番pngを読み込んだ際のx座標とy座標を別で保存するようにします
パッキングした画像
吐き出されるjson
{
    "canvasWidth": 1082,
    "canvasHeight": 1650,
    "layers": [
        {
            "fileName": "01.png",
            "x": 0,
            "y": 0,
            "width": 549,
            "height": 1473,
            "basePosition_x": 258,
            "basePosition_y": 109
        },
        {
            "fileName": "02.png",
            "x": 549,
            "y": 0,
            "width": 66,
            "height": 61,
            "basePosition_x": 460,
            "basePosition_y": 474
        },
        {
            "fileName": "03.png",
            "x": 615,
            "y": 0,
            "width": 58,
            "height": 16,
            "basePosition_x": 466,
            "basePosition_y": 496
        },
        {
            "fileName": "04.png",
            "x": 673,
            "y": 0,
            "width": 33,
            "height": 39,
            "basePosition_x": 480,
            "basePosition_y": 487
        },
        {
            "fileName": "05.png",
            "x": 706,
            "y": 0,
            "width": 250,
            "height": 107,
            "basePosition_x": 366,
            "basePosition_y": 351
        },
        {
            "fileName": "06.png",
            "x": 0,
            "y": 1473,
            "width": 216,
            "height": 18,
            "basePosition_x": 383,
            "basePosition_y": 305
        }
    ]
}
次はアニメーションさせたいと思います
困っていること
- photoshopのjsxでレイヤー名が取得できずエラーになるので連番にしている
こうすればいいよ!というのがわかる方コメントほしいです
皆さんが知ってる似たようなソリューションあればぜひ教えてください!!
おまけ
以下のコードはChatGPTが出力したものです
デモでしかないのですが、何かの参考になれば
photoshopのスクリプト
// Photoshopスクリプト: レイヤーごとにPNGを出力し、位置をJSONで保存(map未使用)

#target photoshop

try {
    // ユーザーに出力先フォルダを選択させる
    var outputFolder = Folder.selectDialog("出力先フォルダを選択してください");
    if (!outputFolder) {
        alert("出力先フォルダが選択されませんでした。");
        throw new Error("出力フォルダが選択されていません");
    }

    // JSONデータを格納する配列
    var layerData = [];

    // 現在のドキュメントを取得
    var doc = app.activeDocument;

    // ドキュメントのキャンバスサイズを取得
    var canvasWidth = doc.width.as("px");
    var canvasHeight = doc.height.as("px");

    // PNGを保存するためのオプションを設定
    function saveAsPNG(file) {
        var pngOptions = new PNGSaveOptions();
        pngOptions.interlaced = false;
        doc.saveAs(file, pngOptions, true, Extension.LOWERCASE);
    }

    // 配列チェックの代替関数
    function isArray(obj) {
        return Object.prototype.toString.call(obj) === "[object Array]";
    }

    // JSON文字列を手動で構築する関数
    function buildJSON(data) {
        var json = "{";
        for (var key in data) {
            if (data.hasOwnProperty(key)) {
                var value = data[key];
                if (typeof value === "string") {
                    value = '"' + value + '"'; // 文字列はダブルクォートで囲む
                } else if (typeof value === "object") {
                    if (isArray(value)) {
                        var arrayItems = [];
                        for (var i = 0; i < value.length; i++) {
                            arrayItems.push(buildJSON(value[i])); // 配列要素を再帰的に処理
                        }
                        value = "[" + arrayItems.join(",") + "]";
                    } else {
                        value = buildJSON(value); // オブジェクトの場合は再帰処理
                    }
                }
                json += '"' + key + '":' + value + ",";
            }
        }
        json = json.replace(/,$/, ""); // 最後のカンマを削除
        json += "}";
        return json;
    }

    // レイヤーを個別にエクスポートする関数(逆順で処理)
    function processLayers(layerSet, parentX, parentY, layerIndex) {
        for (var i = layerSet.layers.length - 1; i >= 0; i--) { // 下層から処理
            var layer = layerSet.layers[i];

            // レイヤーがレイヤーセットの場合は再帰的に処理
            if (layer.typename === "LayerSet") {
                layerIndex = processLayers(layer, parentX, parentY, layerIndex);
            } else {
                if (!layer.visible) continue; // 非表示レイヤーはスキップ

                // レイヤーの位置を取得
                var bounds = layer.bounds;
                var x = bounds[0].as("px") + parentX;
                var y = bounds[1].as("px") + parentY;

                // レイヤーを複製して新しいドキュメントを作成
                app.activeDocument.activeLayer = layer;
                layer.copy();
                var tempDoc = app.documents.add(layer.bounds[2] - layer.bounds[0], layer.bounds[3] - layer.bounds[1], doc.resolution, "TempDoc", NewDocumentMode.RGB, DocumentFill.TRANSPARENT);
                tempDoc.paste();

                // ファイル名を連番で作成
                var fileName = ("00" + layerIndex).slice(-2) + ".png";
                var filePath = new File(outputFolder + "/" + fileName);

                // PNGとして保存
                saveAsPNG(filePath);

                // JSONデータに追加
                layerData.push({
                    fileName: fileName,
                    x: x,
                    y: y,
                    width: tempDoc.width.as("px"),
                    height: tempDoc.height.as("px")
                });

                // 一時ドキュメントを閉じる
                tempDoc.close(SaveOptions.DONOTSAVECHANGES);

                // 次の連番用インデックスを増加
                layerIndex++;
            }
        }
        return layerIndex;
    }

    // レイヤーを処理(連番のインデックスは1から開始)
    processLayers(doc, 0, 0, 1);

    // JSONファイルとして保存
    if (layerData.length > 0) {
        var jsonFile = new File(outputFolder + "/layer_data.json");
        jsonFile.open("w");

        // JSONデータを手動構築
        var outputData = {
            canvasWidth: canvasWidth,
            canvasHeight: canvasHeight,
            layers: layerData
        };
        jsonFile.write(buildJSON(outputData)); // 手動JSON構築関数を使用
        jsonFile.close();

        alert("レイヤーのエクスポートが完了しました!");
    } else {
        alert("処理されたレイヤーがありませんでした。");
    }
} catch (e) {
    alert("エラーが発生しました: " + e.message);
}
pygameの再生部
追記分
textureのパッキングボタンと、jsonの切り替えボタンが付きました
pip install pygame
import pygame
import json
from PIL import Image

# デフォルトのJSONファイル
current_json_file = "layer_data.json"

# JSONファイルをロード
with open(current_json_file, "r") as file:
    data = json.load(file)

# キャンバスサイズを取得
canvas_width = data["canvasWidth"]
canvas_height = data["canvasHeight"]

# Pygame初期化
pygame.init()
screen = pygame.display.set_mode((canvas_width, canvas_height))
pygame.display.set_caption("Layer Drawing")

# レイヤーの表示状態を管理する辞書
layer_visibility = {layer["fileName"]: True for layer in data["layers"]}

# フォント初期化
font = pygame.font.Font(None, 24)

# テクスチャ作成関数
def create_texture():
    texture = Image.new("RGBA", (canvas_width, canvas_height), (255, 255, 255, 0))
    texture_layers = []

    # 現在の配置座標を管理
    next_x = 0
    next_y = 0
    row_height = 0

    for layer in data["layers"]:
        if layer_visibility[layer["fileName"]]:
            img = Image.open(layer["fileName"])
            img = img.resize((layer["width"], layer["height"]))

            # 新しい行に移動が必要な場合
            if next_x + layer["width"] > canvas_width:
                next_x = 0
                next_y += row_height
                row_height = 0

            # 配置する画像の情報を追加
            texture.paste(img, (next_x, next_y), img)
            texture_layers.append({
                "fileName": layer["fileName"],
                "x": next_x,
                "y": next_y,
                "width": layer["width"],
                "height": layer["height"],
                "basePosition_x": layer["x"],
                "basePosition_y": layer["y"]
            })

            # 次の位置を計算
            next_x += layer["width"]
            row_height = max(row_height, layer["height"])

    texture.save("texture.png")
    print("テクスチャ画像 'texture.png' が作成されました!")

    # テクスチャ対応JSONの保存
    texture_json = {
        "canvasWidth": canvas_width,
        "canvasHeight": canvas_height,
        "layers": texture_layers
    }
    with open("texture.json", "w") as json_file:
        json.dump(texture_json, json_file, indent=4)
    print("テクスチャJSON 'texture.json' が作成されました!")

# JSONファイルを切り替える関数
def switch_json(file_name):
    global data, layer_visibility, canvas_width, canvas_height, screen, current_json_file
    current_json_file = file_name
    with open(file_name, "r") as file:
        data = json.load(file)
    canvas_width = data["canvasWidth"]
    canvas_height = data["canvasHeight"]
    screen = pygame.display.set_mode((canvas_width, canvas_height))
    layer_visibility = {layer["fileName"]: True for layer in data["layers"]}
    print(f"'{file_name}' をロードしました!")

# メインループ
running = True
while running:
    for event in pygame.event.get():
        if event.type == pygame.QUIT:
            running = False

        # マウスクリックで表示非表示を切り替える
        if event.type == pygame.MOUSEBUTTONDOWN:
            x, y = event.pos
            button_height = 30

            # レイヤー切り替えボタン
            for index, layer in enumerate(data["layers"]):
                button_y = index * button_height
                if 10 <= x <= 200 and button_y <= y <= button_y + button_height:
                    layer_visibility[layer["fileName"]] = not layer_visibility[layer["fileName"]]

            # テクスチャ作成ボタン
            texture_button_y = len(data["layers"]) * button_height + 10
            if 10 <= x <= 200 and texture_button_y <= y <= texture_button_y + button_height:
                create_texture()

            # JSON切り替えボタン
            switch_button_y = texture_button_y + 40
            if 10 <= x <= 200 and switch_button_y <= y <= switch_button_y + button_height:
                if current_json_file == "layer_data.json":
                    switch_json("texture.json")
                else:
                    switch_json("layer_data.json")

    screen.fill((255, 255, 255))  # 背景を白に設定

    # レイヤーを描画
    for layer in data["layers"]:
        if current_json_file == "texture.json":
            if layer_visibility[layer["fileName"]]:
                img = pygame.image.load("texture.png")
                cropped_img = img.subsurface(pygame.Rect(layer["x"], layer["y"], layer["width"], layer["height"]))
                screen.blit(cropped_img, (layer["basePosition_x"], layer["basePosition_y"]))
        elif layer_visibility[layer["fileName"]]:
            img = pygame.image.load(layer["fileName"])  # PNGファイルをロード
            img = pygame.transform.scale(img, (layer["width"], layer["height"]))
            screen.blit(img, (layer["x"], layer["y"]))

    # UIボタンを描画
    for index, layer in enumerate(data["layers"]):
        button_y = index * 30
        color = (0, 200, 0) if layer_visibility[layer["fileName"]] else (200, 0, 0)
        pygame.draw.rect(screen, color, (10, button_y, 190, 30))
        text = font.render(layer["fileName"], True, (255, 255, 255))
        screen.blit(text, (15, button_y + 5))

    # テクスチャ作成ボタン
    texture_button_y = len(data["layers"]) * 30 + 10
    pygame.draw.rect(screen, (0, 0, 200), (10, texture_button_y, 190, 30))
    texture_text = font.render("Create Texture", True, (255, 255, 255))
    screen.blit(texture_text, (15, texture_button_y + 5))

    # JSON切り替えボタン
    switch_button_y = texture_button_y + 40
    pygame.draw.rect(screen, (200, 200, 0), (10, switch_button_y, 190, 30))
    if current_json_file == "layer_data.json":
        switch_text = font.render("Switch to Texture JSON", True, (0, 0, 0))
    else:
        switch_text = font.render("Switch to Layer Data JSON", True, (0, 0, 0))
    screen.blit(switch_text, (15, switch_button_y + 5))

    pygame.display.flip()

pygame.quit()
pygameかなりいい感じ
pythonの描画めっちゃ便利だね