65
44

Delete article

Deleted articles cannot be recovered.

Draft of this article would be also deleted.

Are you sure you want to delete this article?

More than 1 year has passed since last update.

ElevatedButtonでよくあるボタンをつくる

Last updated at Posted at 2021-02-07

前提:さよならRaisedButton

Flutterでボタンを実装する上で大変お世話になったのがRaisedButtonというWidgetでした。・・・が、以下にもある通り廃止されてしまいました。
代わりに使うように推奨されているのがElevatedButtonです。
https://api.flutter.dev/flutter/material/RaisedButton-class.html

This class is obsolete, please use ElevatedButton instead.

ElevatedButtonでよくあるボタンをつくる

というわけで、ElevatedButtonでボタンを作っていきたいと思います。
RaisedButtonと比べると追加するプロパティがやや増えますが、パターンを覚えてしまえば怖くない。

##普通のボタン

button1.png
            ElevatedButton(
              onPressed: () {},
              child: Text(
                "1.Normal Button",
              ),
            ),

背景が黒色のボタン

button1.png
            ElevatedButton(
              onPressed: () {},
              child: Text(
                "2.BackGround Button",
                style: TextStyle(
                  color: Colors.yellow,
                  fontSize: 30,
                ),
              ),
              style: ElevatedButton.styleFrom(
                primary: Colors.black, //ボタンの背景色
              ),
            ),

styleプロパティを使います。

押したときの背景が黒色のボタン

button3.gif
            // 3.押したときの背景が黒色のボタン
            ElevatedButton(
              onPressed: () {},
              child: Text(
                "3.onPressed Color Button",
                style: TextStyle(
                  color: Colors.white,
                ),
              ),
              style: ElevatedButton.styleFrom(
                onPrimary: Colors.black, //押したときの色!!
              ),
            ),

先ほどと同様にstyleを使います。
primaryが背景色、onPrimaryが押したときの背景色になります。primaryと名前が似てるので注意。

ボタン非活性化

button4.png
            ElevatedButton(
              onPressed: null, // onPressedをnullにする
              child: Text(
                "4.Untouchable button",
              ),
            ),

onPressedをnullにするだけで実現できます。

大きさを変える

button5.png
            SizedBox(
              // 5.SizedBoxで囲んでwidth/heightをつける
              width: 330,
              height: 100,
              child: ElevatedButton(
                onPressed: () {},
                child: Text(
                  "5.330 x 100 Size Button",
                ),
                style: ButtonStyle(),
              ),
            ),

他にもやり方ありますが、SizedBoxでElevatedButtonを包んでみました。

枠線をつける
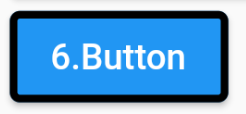
button1.png
            ElevatedButton(
              onPressed: () {},
              child: Text(
                "6.Button",
              ),
              style: ElevatedButton.styleFrom(
                side: BorderSide(
                  color: Colors.black, //枠線!
                  width: 3, //枠線!
                ),
              ),

背景を変えた時と同じstyleプロパティを使います。
sideにBorderSideを書いてあげれば、枠線の色や太さを指定できます。

65
44
0

Register as a new user and use Qiita more conveniently

  1. You get articles that match your needs
  2. You can efficiently read back useful information
  3. You can use dark theme
What you can do with signing up
65
44

Delete article

Deleted articles cannot be recovered.

Draft of this article would be also deleted.

Are you sure you want to delete this article?