AVSをMacに導入し、サンプルアプリを利用した時の詰まったポイントを書いておきます。
私が初心者だったこともあり結構大変でした。公式ページで詳しく書かれていない場所で詰まった点だけ記しておきます。
サンプルアプリと導入の方法はこちらで公開されているのでそちらを参照してください。
【余談】
まだ Amazon Dot の申し込みが通らない、、、、。機能作っても本体がないのは少し寂しいですね。とりあえず Amazon Dot が来るまでに欲しい機能を実装できたら良いなと考えています。Rasbperry pi 3 用には簡単にデプロイできるスクリプト用意されていたので簡単に構築して Alexa を楽しめるようです。私は結構導入に時間をかけたのでなかなか羨ましいですね。
参考サイト
前提
- Mac OS High Sierra
- openssl LibreSSL 2.2.7
Generate Self-signed Certificates
wikiのこのタイトルの節に書かれている通りにはできませんでした。
ssl.cnf を利用して generate.sh で必要な証明書を作成するのですが、generate.sh がうまく動作しませんでした。原因は openssl のバージョンだと思っています。私のバージョンは LibreSSL 2.2.7 でした。
[req]
distinguished_name      = req_distinguished_name
prompt                  = no

[v3_req]
subjectAltName          = @alt_names

[alt_names]
DNS.1                   = localhost
IP.1                    = 127.0.0.1
IP.2                    = 10.0.2.2

[req_distinguished_name]
commonName              = $ENV::COMMON_NAME                 # CN=
countryName             = YOUR_COUNTRY_NAME                 # C=
stateOrProvinceName     = YOUR_STATE_OR_PROVINCE            # ST=
localityName            = YOUR_CITY                         # L=
organizationName        = YOUR_ORGANIZATION                 # O=
organizationalUnitName  = YOUR_ORGANIZATIONAL_UNIT          # OU=
wiki にはこれの YOUR_ の部分だけ書き換えてと書かれています。
しかしこのままだと $ENV の部分がうまく動きませんでした。他のサイトを見てもこの書き方は合っているようなのでなぜ動かないかはわかりません。generate.sh では4個の証明書を同時に作っているのですが、その commonNameを変えるための作業です。ここを間違えるとうまく動作しないので気をつけてください。ちなみにエラーはこんな感じ。
$ ./generate.sh
Product ID: XXXX
Serial Number: XXXX
Password for Keystores (won't echo): Generating RSA private key, 4096 bit long modulus
.......................................................................++
.....................................................++
e is 65537 (0x10001)
error on line 14 of ssl.cnf
140735879410568:error:0E065068:configuration file routines:STR_COPY:variable has no value:/BuildRoot/Library/Caches/com.apple.xbs/Sources/libressl/libressl-22/libressl/crypto/conf/conf_def.c:573:line 14
Generating RSA private key, 2048 bit long modulus
...................................................+++
.....+++
e is 65537 (0x10001)
そこで私はprompt = yes、commonName = You_must_writeなどと設定しておきました。
[req]
distinguished_name      = req_distinguished_name
prompt                  = yes

[v3_req]
subjectAltName          = @alt_names

[alt_names]
DNS.1                   = localhost
IP.1                    = 127.0.0.1
IP.2                    = 10.0.2.2

[req_distinguished_name]
# commonName              = ${ENV::COMMON_NAME}
commonName              = You_must_write
countryName             = JP
stateOrProvinceName     = Kanagawa
localityName            = Yokohama
0.organizationName  = myself
organizationalUnitName  = one
prompt = yesとするとopensslは証明書作成時に ssl.cnf の設定をデフォルトとして設定を聞いてくれます。そこで commonName のみは generate.sh に書かれている内容を直接入力してください。
openssl genrsa -out certs/ca/ca.key 4096
COMMON_NAME="My CA" openssl req -new -x509 -days 365 -key certs/ca/ca.key -out certs/ca/ca.crt -config ssl.cnf -sha256

# Create the Client KeyPair for the Device Code
openssl genrsa -out certs/client/client.key 2048
COMMON_NAME="$productId:$dsn" openssl req -new -key certs/client/client.key -out certs/client/client.csr -config ssl.cnf -sha256
openssl x509 -req -days 365 -in certs/client/client.csr -CA certs/ca/ca.crt -CAkey certs/ca/ca.key -set_serial 01 -out certs/client/client.crt -sha256
openssl pkcs12 -inkey certs/client/client.key -in certs/client/client.crt -export -out certs/client/client.pkcs12 -password pass:$password

# Create the KeyPair for the Node.js Companion Service
openssl genrsa -out certs/server/node.key 2048
COMMON_NAME="localhost" openssl req -new -key certs/server/node.key -out certs/server/node.csr -config ssl.cnf -sha256
openssl x509 -req -days 365 -in certs/server/node.csr -CA certs/ca/ca.crt -CAkey certs/ca/ca.key -set_serial 02 -out certs/server/node.crt -sha256

# Create the KeyPair for the Jetty server running on the Device Code in companionApp mode
openssl genrsa -out certs/server/jetty.key 2048
COMMON_NAME="localhost" openssl req -new -key certs/server/jetty.key -out certs/server/jetty.csr -config ssl.cnf -sha256
COMMON_NAME="localhost" openssl x509 -req -days 365 -in certs/server/jetty.csr -CA certs/ca/ca.crt -CAkey certs/ca/ca.key -set_serial 03 -out certs/server/jetty.crt -extensions v3_req -extfile ssl.cnf -sha256
openssl pkcs12 -inkey certs/server/jetty.key -in certs/server/jetty.crt -export -out certs/server/jetty.pkcs12 -password pass:$password
一部抜粋ですがこの COMMON_NAMEと書かれている部分を順番に入力すれば大丈夫です。
こんな感じです
$ ./generate.sh
Product ID: test
Serial Number: hoge
Password for Keystores (won't echo): Generating RSA private key, 4096 bit long modulus
.....................................................................................................................................................................................................................................................................................++
......................................++
e is 65537 (0x10001)
You are about to be asked to enter information that will be incorporated
into your certificate request.
What you are about to enter is what is called a Distinguished Name or a DN.
There are quite a few fields but you can leave some blank
For some fields there will be a default value,
If you enter '.', the field will be left blank.
-----
You_must_write []:My CA  <- ここに1個目の値いれてる
JP []:
Kanagawa []:
Yokohama []:
myself []:
one []:
Generating RSA private key, 2048 bit long modulus
......................+++
.........................................................................................................................................................................................+++
e is 65537 (0x10001)
You are about to be asked to enter information that will be incorporated
into your certificate request.
What you are about to enter is what is called a Distinguished Name or a DN.
There are quite a few fields but you can leave some blank
For some fields there will be a default value,
If you enter '.', the field will be left blank.
-----
You_must_write []:test:hoge <- 最初に指定した Product ID と Serial Number を generate.sh を参考に入力
JP []:
Kanagawa []:
Yokohama []:
myself []:
one []:
Signature ok
subject=/CN=test:test
Getting CA Private Key
Generating RSA private key, 2048 bit long modulus
..............................................................................................................+++
.........+++
e is 65537 (0x10001)
You are about to be asked to enter information that will be incorporated
into your certificate request.
What you are about to enter is what is called a Distinguished Name or a DN.
There are quite a few fields but you can leave some blank
For some fields there will be a default value,
If you enter '.', the field will be left blank.
-----
You_must_write []: ......
これで証明書が無事作成されます。
環境変数は export を使う
これは初心者感まるだしですが少しハマったので一応。
wiki に環境変数を設定するように書かれています。
After you've installed VLC, set the following environment variables:
VLC_PATH: point this to the VLC libs folder.
Sample Mac OS X location: /Applications/VLC.app/Contents/MacOS/lib
VLC_PLUGIN_PATH: point this to the VLC plugins folder.
Sample Mac OS X location: /Applications/VLC.app/Contents/MacOS/plugins
これを以下のように .bashrc に書くだけだと子プロセスにはこの値が渡されないので mvn を動かす時あたりにひっかかります。
VLC_PATH=/Applications/VLC.app/Contents/MacOS/lib
VLC_PLUGIN_PATH=/Applications/VLC.app/Contents/MacOS/plugins
export を使って子プロセスでも環境変数を使えるようにしましょう。
export VLC_PATH=/Applications/VLC.app/Contents/MacOS/lib
export VLC_PLUGIN_PATH=/Applications/VLC.app/Contents/MacOS/plugins
できあがり
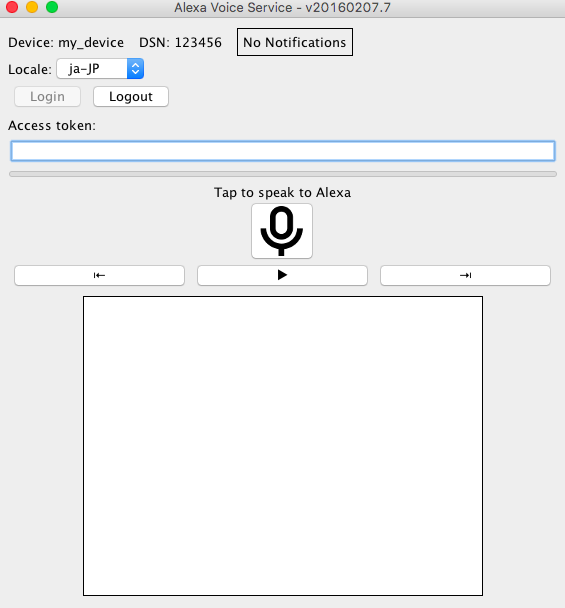
わたしは java client を使ったのでこんな感じのウィンドウが立ち上がります。マイクスピーカーを押すと Alexa を楽しめます。Amazon Dot と違い音楽がかけられなかったりと多少制限がありますが遊ぶには十分でしょう。
所感
機能は制限されますが、Alexa を無料で使えました。
AWS は Alexa を最近猛プッシュしています。今後AIスピーカーなどのプラットフォームシェアを獲得しようと頑張っているのだと思います。そのため、Alexa をプラットフォームとして提供するための AVS もこのように提供されており、多少つまりましたが総じて丁寧な説明もありました。Dot を買おうとしている私からしても、今後 Alexa が様々な機器に埋め込まれて色々な機能が増えたら良いなと思います。
まとめ
結構導入長かったのでやる人は頑張ってください。私は3,4時間はかけたので時給とかで計算すると Amazon Dot 買ったほうが安いですね。まあ勉強したということで笑