USD関連調査中
- https://github.com/vfxpro99/usd-resources
- https://graphics.pixar.com/usd/docs/api/_usd__overview_and_purpose.html
- https://github.com/google/usd_from_gltf
- https://github.com/ColinKennedy/USD-Cookbook.git
- https://github.com/ft-lab/Documents_USD
- USD とは
- USDを使ってみた話
Python編
とりあえず Python で USD を扱えるようにするのがよさそう。
NVIDIA のプリビルドを使わせていただきます。
USD 20.08, Python 3.6 を使う。
python3.6 インストール
C:/Python36 に入れた
USD のアーカイブを展開
C:/Python36/usd-20-08 に展開して、環境変数 USDROOT をここに設定した。
== Python 3.6 ==
(Tested on python 3.6.7)

- Add %USDROOT%\bin and %USDROOT%\lib to the front of %PATH%
- Add %USDROOT%\lib\python to the front of %PYTHONPATH%
- Install PySide2 and PyOpenGL to python, e.g., python -m pip install PySide2 PyOpenGL
PYTHONPATH と PATH を設定してやる必要がある。vscode でプロジェクトローカルに設定してやることにする。
vscode project
hello_usd フォルダ作る。vscode でフォルダを開く。
普段は python3.8 なので、このプロジェクトだけ python3.6 を使うようにして、python用の環境変数もローカルに設定する。
{
    "python.pythonPath": "C:\\Python36\\python.exe",
    "python.envFile": "${workspaceFolder}/.env",
}
.env の変数展開は settings.json などと同じようで、環境変数は ${env:XXX} とする。
PYTHONPATH=${env:USDROOT}\\lib\\python
PATH=${env:USDROOT}\\bin;${env:USDROOT}\\lib;$PATH
実験
import sys
import os
import pathlib
USDROOT = pathlib.Path(os.environ['USDROOT'])


def main(teapot: pathlib.Path):
    from pxr import Usd
    stage_ref = Usd.Stage.Open(str(teapot))
    prim = stage_ref.GetDefaultPrim()
    print(f'{prim.GetPath()}')
    print(f'type: {prim.GetTypeName()}')

    for child in prim.GetChildren():
        print(f'{child.GetPath()}, type: {child.GetTypeName()}')

        # if child.GetTypeName() == 'Mesh':
        for attr in child.GetAttributes():
            print(f'   {attr}')


if __name__ == "__main__":
    teapot = USDROOT / "tests/ctest/testUsdLuxListAPI/teapot.usda"
    main(teapot)
なんとなく動いた。
Pythond でやるぶんには、
- python3.6
- NVIDIA prebuild
の組み合わせがわりと楽。
Toolset
usdview
usdパッケージの bin/usdview が viewer の起動コマンドになっている。
https://github.com/PixarAnimationStudios/USD/blob/release/pxr/usdImaging/bin/usdview/usdview.py
usdview.cmd を少し改造して、環境変数を用意してやる。
set PYTHONPATH=%USDROOT%\lib\python
set PATH=%USDROOT%\bin;%USDROOT%\lib;%PATH%
@py -3.6 "%~dp0usdview" %*
usda, usdc, usdz を bin/usdview.cmd に関連付けてみた。
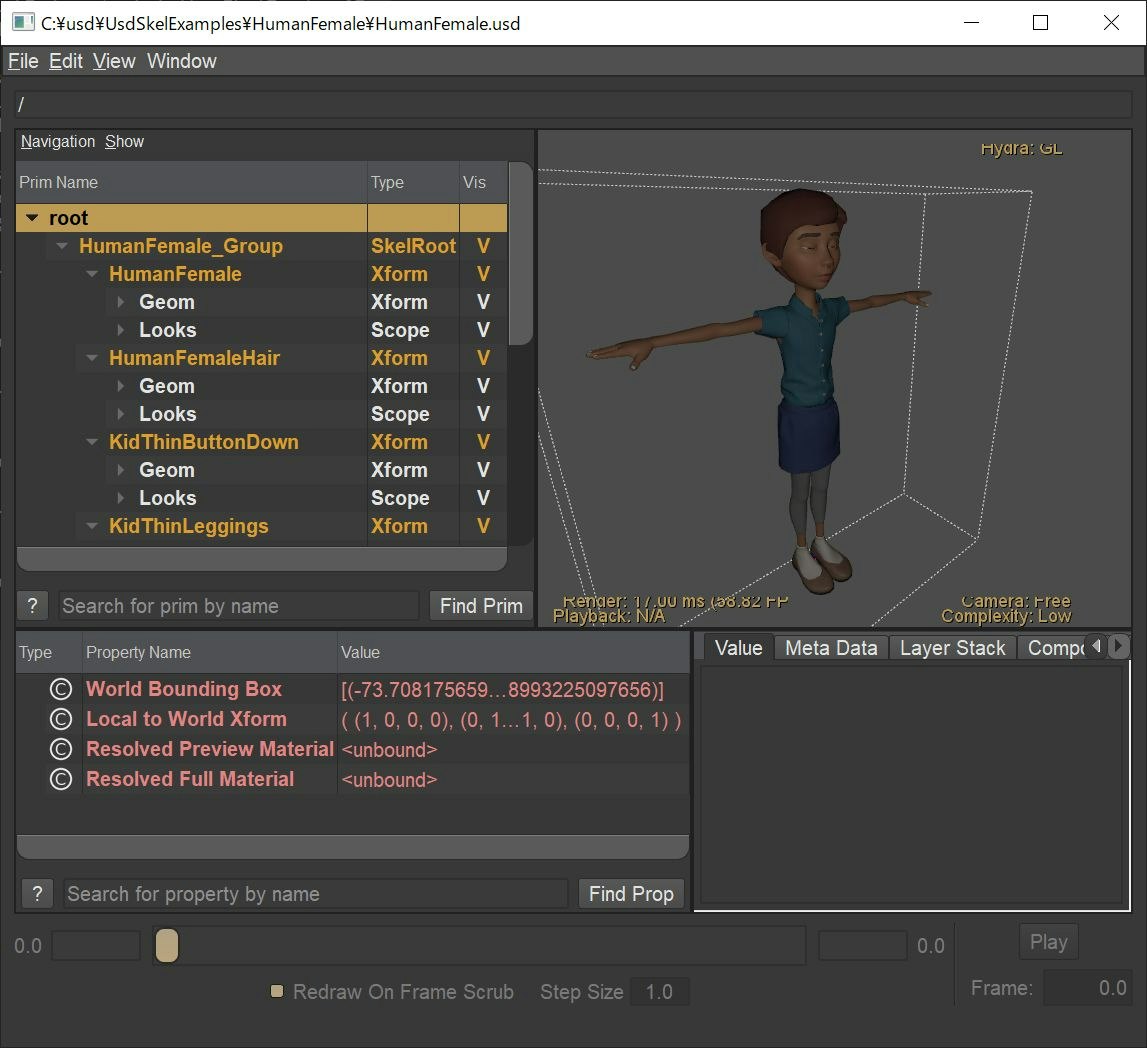
alt + drag(l, r, m) で視点操作
C++編
USD のソースを入手して build_usd.py でビルドするのが楽だった。
build_usd.py
- https://github.com/PixarAnimationStudios/USD/blob/release/BUILDING.md
- Pixar USD の Windows ビルド方法(2017/9 版)
USDのソースに付属する、 build_scripts/build_usd.py で自動ビルドする。
まず、 vc をインストールするとできる x64 Native Tools Command Prompt for VS2019 から dos 窓開く。
# cl.exe にパスが通っている。
> cl.exe
Microsoft (R) C/C++ Optimizing Compiler Version 19.27.29111 for x64
Copyright (C) Microsoft Corporation.  All rights reserved.

usage: cl [ option... ] filename... [ /link linkoption... ]
usdのソースフォルダに移動する。
pythonにPATHを通してから実行。
> set PATH=C:\Python36;%PATH%
> C:\Python36\python.exe build_scripts\build_usd.py
usage: build_usd.py [-h] [-n] [-v | -q] [-j JOBS] [--build BUILD]
                    [--build-args [BUILD_ARGS [BUILD_ARGS ...]]]
                    [--force FORCE_BUILD] [--force-all]
                    [--generator GENERATOR] [--src SRC] [--inst INST]
                    [--build-shared | --build-monolithic] [--debug]
                    [--tests | --no-tests] [--examples | --no-examples]
                    [--tutorials | --no-tutorials] [--tools | --no-tools]
                    [--docs | --no-docs] [--python | --no-python]
                    [--imaging | --usd-imaging | --no-imaging]
                    [--ptex | --no-ptex] [--openvdb | --no-openvdb]
                    [--usdview | --no-usdview] [--embree | --no-embree]
                    [--prman | --no-prman] [--prman-location PRMAN_LOCATION]
                    [--openimageio | --no-openimageio]
                    [--opencolorio | --no-opencolorio]
                    [--alembic | --no-alembic] [--hdf5 | --no-hdf5]
                    [--draco | --no-draco] [--draco-location DRACO_LOCATION]
                    [--materialx | --no-materialx]
                    install_dir
build_usd.py: error: the following arguments are required: install_dir
オプションがたくさんあるので、需要に合わせて選択する。
今回は、 hydra 関連のデバッグビルドをしたいという目的があるので下記のようにした。
> C:\Python36\python.exe build_scripts\build_usd.py --debug --build-monolithic --no-tests --no-examples --no-tutorials --no-docs --no-python --usd-imaging C:\usd_debug
Building with settings:
  USD source directory          C:\USD
  USD install directory         C:\usd_debug
  3rd-party source directory    C:\usd_debug\src
  3rd-party install directory   C:\usd_debug
  Build directory               C:\usd_debug\build
  CMake generator               Default
  Downloader                    curl

  Building                      Shared libraries
    Config                      Debug
    Imaging                     On
      Ptex support:             Off
      OpenVDB support:          Off
      OpenImageIO support:      Off
      OpenColorIO support:      Off
      PRMan support:            Off
    UsdImaging                  On
      usdview:                  Off
    Python support              Off
      Python 3:                 On
    Documentation               Off
    Tests                       Off
    Examples                    Off
    Tutorials                   Off
    Tools                       On
    Alembic Plugin              Off
      HDF5 support:             Off
    Draco Plugin                Off
    MaterialX Plugin            Off

  Dependencies                  zlib, boost, TBB, GLEW, OpenSubdiv
STATUS: Installing zlib...
STATUS: Installing boost...
STATUS: Installing TBB...
STATUS: Installing GLEW...
STATUS: Installing OpenSubdiv...
STATUS: Installing USD...

Success! To use USD, please ensure that you have:

    The following in your PATH environment variable:
    C:\usd_debug\bin
    C:\usd_debug\lib
10分くらいでビルドできた。
build したライブラリを使う
project(cpp_usd)
cmake_minimum_required(VERSION 3.0.0)

set (CMAKE_ARCHIVE_OUTPUT_DIRECTORY_DEBUG ${CMAKE_BINARY_DIR}/Debug/lib)
set (CMAKE_LIBRARY_OUTPUT_DIRECTORY_DEBUG ${CMAKE_BINARY_DIR}/Debug/lib)
set (CMAKE_RUNTIME_OUTPUT_DIRECTORY_DEBUG ${CMAKE_BINARY_DIR}/Debug/bin)
set (CMAKE_ARCHIVE_OUTPUT_DIRECTORY_RELEASE ${CMAKE_BINARY_DIR}/Release/lib)
set (CMAKE_LIBRARY_OUTPUT_DIRECTORY_RELEASE ${CMAKE_BINARY_DIR}/Release/lib)
set (CMAKE_RUNTIME_OUTPUT_DIRECTORY_RELEASE ${CMAKE_BINARY_DIR}/Release/bin)

find_package(pxr CONFIG REQUIRED)

link_directories(
    $ENV{VCPKG_DIR}/installed/x64-windows/lib
)

add_executable(cpp_usd
    main.cpp
)
target_include_directories(cpp_usd
PRIVATE
    C:/usd_debug/include
    C:/usd_debug/include/boost-1_70
)
target_compile_options(cpp_usd
PRIVATE
    /wd4244
    /wd4305
    )
target_link_libraries(cpp_usd
PRIVATE
    C:/usd_debug/lib/usd_ms.lib # monolithic でビルドしたので tf, gf, sdf, usd, usdGeom などがひとつにまとまっている
    C:/usd_debug/lib/tbb_debug.lib
)
実行時に C:/usd_debug/bin と C:/usd_debug/lib に PATH を通せば動いた。
vcpkg
ALEMBIC とか Python は無し。
./vcpkg install usd
できた。
をやってみる。
ビルドできた。
project(cpp_usd)
cmake_minimum_required(VERSION 3.0.0)

set(USD_DIR $ENV{VCPKG_DIR}/installed/x64-windows)
set(BOOST_INCLUDE_DIR $ENV{VCPKG_DIR}/installed/x64-winddows/include)

# tbb_debug.lib が #pragma で指定されるのでとりあえず
link_directories(
    ${USD_DIR}/lib
    ${USD_DIR}/debug/lib
)

add_executable(cpp_usd
main.cpp
)
target_include_directories(cpp_usd
PRIVATE
    ${USD_DIR}/include
    ${BOOST_INCLUDE_DIR}
)
target_compile_definitions(cpp_usd
PRIVATE
    TBB_USE_DEBUG=0 # tbbがコンパイルエラーになるのでとりあえず
)
target_compile_options(cpp_usd
PRIVATE
    /wd4244
    /wd4305
    )
target_link_libraries(cpp_usd
PRIVATE
    ${USD_DIR}/lib/tf.lib
    ${USD_DIR}/lib/sdf.lib
    ${USD_DIR}/lib/usd.lib
    ${USD_DIR}/lib/usdgeom.lib
    ${USD_DIR}/lib/trace.lib
)
しかし、はまる。
Coding Error: in CreateAnonymous at line 313 of C:\vcpkg\buildtrees\usd\src\2cd10d91c8-241e05f4dd.clean\pxr\usd\sdf\layer.cpp -- Cannot determine file format for anonymous SdfLayer
Coding Error: in Open at line 994 of C:\vcpkg\buildtrees\usd\src\2cd10d91c8-241e05f4dd.clean\pxr\usd\usd\stage.cpp -- Invalid root layer
vcpkg はデバッグビルドも作れるので、デバッガをアタッチして追跡した。
環境変数 PXR_PLUGINPATH_NAME により、plugInfo.json ある場所を指し示す必要がある。
${env:VCPKG_DIR}\\installed\\x64-windows\\lib\\usd${env:VCPKG_DIR}\\installed\\x64-windows\\plugin\\usd
            PXR_BUILD_LOCATION=usd
            PXR_PLUGIN_BUILD_LOCATION=../plugin/usd
フォルダ構成が変わると動かなさそう
まだ、動かない。次のエラー
Coding Error: in _Load at line 248 of C:\vcpkg\buildtrees\usd\src\2cd10d91c8-241e05f4dd.clean\pxr\base\plug\plugin.cpp -- Load of 'c:/vcpkg/installed/x64-windows/lib/usd.dll' for 'usd' failed: 指定されたモジュールが見つかりません。
Coding Error: in _Load at line 248 of C:\vcpkg\buildtrees\usd\src\2cd10d91c8-241e05f4dd.clean\pxr\base\plug\plugin.cpp -- Load of 'c:/vcpkg/installed/x64-windows/lib/usd.dll' for 'usd' failed: 指定されたモジュールが見つかりません。
c:/vcpkg/installed/x64-windows/lib/usd.dll じゃなくて c:/vcpkg/installed/x64-windows/bin/usd.dll 。
pluginfo.json の中身を修正。
"LibraryPath": "../../ndr.dll",
// 修正
"LibraryPath": "../../../bin/ndr.dll",
ついに動いた。
USD詳細
ビルド後の構造
lib
  usd.dll
  sdf.dll

  usd
     plugInfo.json # PXR_PLUGINPATH_NAME 環境変数で指定できる

     usd/resources/plugInfo.json
     sdf/resources/plugInfo.json

plugin
  usd
    plugInfo.json # PXR_PLUGINPATH_NAME 環境変数で指定できる

    usdShaders.dll
    usdShaders/resources/plugInfo.json
のような感じでフォルダ構成変える場合は、PXR_PLUGINPATH_NAME 環境変数と plugInfo.json の中身に注意が必要。
間違っていると、
auto stage = pxr::UsdStage::CreateInMemory(); // plugin ロードに失敗して null になる
というようなことが起こる。
plug 初期化
// plug.dll
Plug_InitConfig
// "C:\\vcpkg\\installed\\x64-windows\\debug\\bin\\plug.dll" <= GetModule
// sharedLibPath = "C:\\vcpkg\\installed\\x64-windows\\debug\\bin 基準ディレクトリ
Plug_SetPaths
  PXR_PLUGINPATH_NAME
  sharedLibPath + PXR_BUILD_LOCATION=usd
  sharedLibPath + PXR_PLUGIN_BUILD_LOCATION=../plugin/usd
Source
extras
  imaging
    examples
      hdTiny # hydra のサンプル
  usd
    examples
    tutorials
C++編 (hydra)
Blender-2.83
UsdSkel 対応がまだっぽいので、ボーン入りのモデルを出せないような気がする。
- https://developer.blender.org/rBec62413f803ee506633f0e52d1e52b0980c0ed0d
- https://github.com/blender/blender/blob/master/source/blender/io/usd/intern/usd_capi.cc#L188
USDのImport/Exportは、python の addon ではなく c++ 実装になっている。
USDのPythonバインディングは、特に有効にしてないぽい。Boost-Python めんどくさいからな。わかる。
Unity
- https://docs.unity3d.com/Packages/com.unity.formats.usd@1.0/manual/index.html
- https://github.com/Unity-Technologies/usd-unity-sdk
こちらは、SkinningMesh まで、使いそうなところはもう入っていそう。
usd を swig で wrap して、C# から使えるようにしている
メモ
未知
- MorphTarget
- 独自マテリアル の読み書き
usd は c++ の dll なので容易に他の言語から関数呼び出しできないのがややこしい。
C のインタフェースがあるといいのだけど。
unity版の swig から python 版とか作ってみるのも手かもしれない。