はじめに
APIから画像URLを取得し、URLSessionを使ってダウンロードした画像をCollectionViewに並べたところ、チラつきが気になったので
通信はせず、画像をアプリのディレクトリ内に保存する方法を模索しました。
初めてで苦戦したので、復習も兼ねてメモしておきます![]()
手順
画像を保存するパスを生成
// DocumentディレクトリのfileURLを取得
func getDocumentsURL() -> NSURL {
    let documentsURL = FileManager.default.urls(for: .documentDirectory, in: .userDomainMask)[0] as NSURL
    return documentsURL
}

// ディレクトリのパスにファイル名をつなげてファイルのフルパスを作る
func fileInDocumentsDirectory(filename: String) -> String {
    let fileURL = getDocumentsURL().appendingPathComponent(filename)
    return fileURL!.path
}
getDocumentsURL() で取得したパスに、任意のファイル名をつなげてファイルのフルパスを作ります。
file:///Users/ユーザー名/Library/Developer/CoreSimulator/Devices/A6929390-F6CD-406F-A73E-D52EF3F4446E/data/Containers/Data/Application/6ED98F5D-651C-4870-823A-854A3F142030/Documents/http:〜.com=img=ogp.png
ちなみに今回は、もともとの画像URL(http://〜/ogp_tw_fb.pngとか)をもとに一意のパスを作りたかったので、画像URL内の「/(スラッシュ)」を「=(イコール)」に変えた上で、フルパスを生成しています。
(スラッシュのままだとうまく保存されませんでした)
let url = "http://〜/ogp_tw_fb.png" // もともとの画像URL
let myImageName = url.replacingOccurrences(of:"/", with:"=") // 変換
let imagePath = self.fileInDocumentsDirectory(filename: myImageName)
ファイルに書き込み
func saveImage (image: UIImage, path: String ) -> Bool {
    let pngImageData = UIImagePNGRepresentation(image)
    do {
        try pngImageData!.write(to: URL(fileURLWithPath: path), options: .atomic)
    } catch {
        print(error)
        return false
    }
    return true
}
UIImagePNGRepresentation()でUIImageをPNG形式のデータにし、write()で指定のファイルに書き込みます。この際、もとの画像フォーマットを気にする必要はありません。
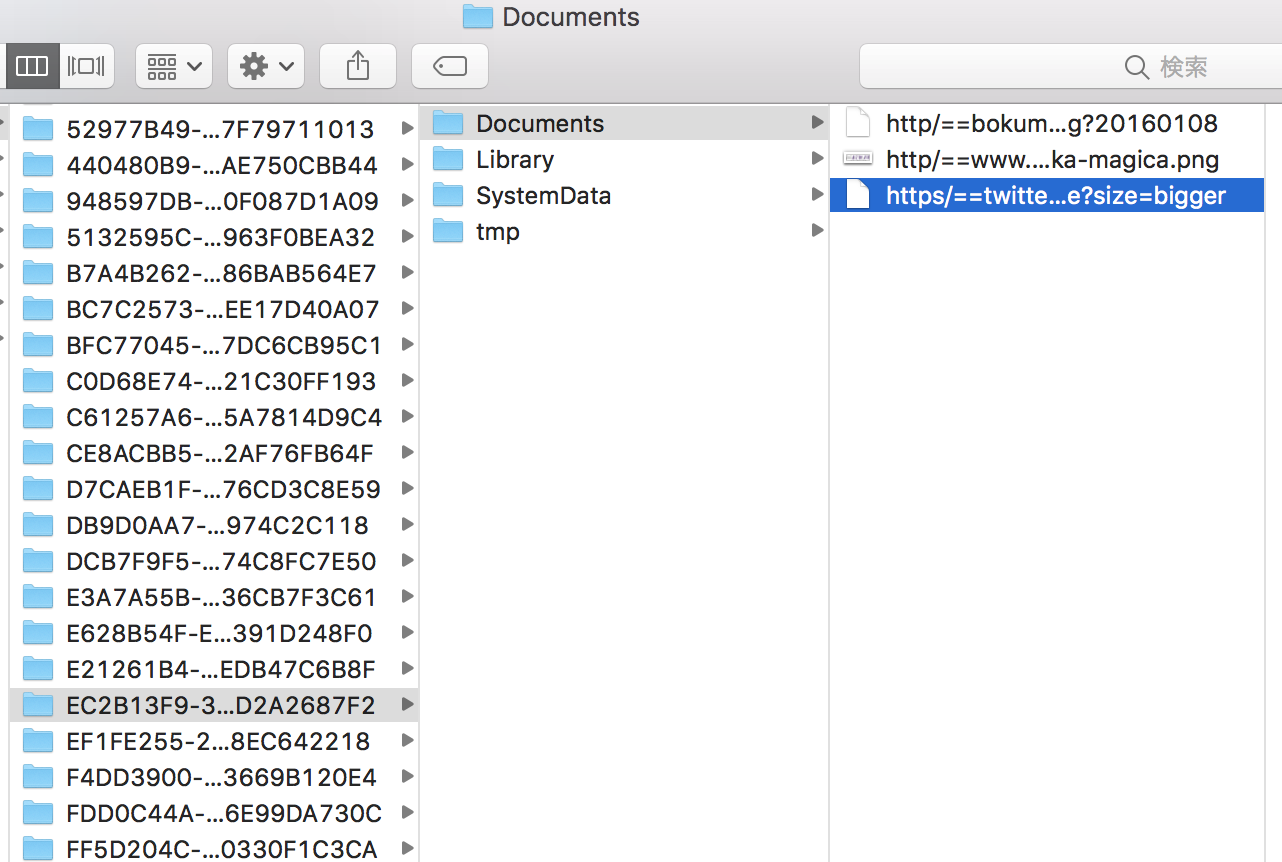
これがうまく実行できると、こんな感じでばっちりアプリ下のDocumentディレクトリに保存されているのが確認できます。

CoreDataに保存
if self.saveImage(image: image, path: imagePath) {
    let context = (UIApplication.shared.delegate as! AppDelegate).persistentContainer.viewContext
    let imageFileEntity = ImageFile(context: context)
    imageFileEntity.url = url
    (UIApplication.shared.delegate as! AppDelegate).saveContext()
}
次の判定フェーズで使うので、ファイルに書き込むと同時にCoreDataにも保存します。
事前に適当なエンティティとアトリビュートを作成しておきましょう。

アプリ内に画像が保存してあるか否かの判定
func exsistImageFile(url: String) -> Bool{
    let context = (UIApplication.shared.delegate as! AppDelegate).persistentContainer.viewContext
    do {
        let fetchRequest: NSFetchRequest<ImageFile> = ImageFile.fetchRequest()
        fetchRequest.predicate = NSPredicate(format: "url = %@", url)
        let count = try context.count(for: fetchRequest)
        if count > 0 {
            return true
        }
    } catch {
        print("Fetching Failed.")
    }
    return false
}
該当の画像がアプリ内に保存してあるかどうかを、CoreData内を検索することで判定します。
fetchした結果が1件以上あれば、保存してあると判定してtrueを返します。
画像のロード
func loadImageFromPath(path: String) -> UIImage? {
    let image = UIImage(contentsOfFile: path)
    if image == nil {
        print("missing image at: \(path)")
    }
    return image
}
上の判定と組み合わせて、アプリ内に該当の画像が保存してあればそれをロードし、なければ通信して取ってくる処理をします。
if exsistImageFile(url: url) {
    let myImageName = url.replacingOccurrences(of:"/", with:"=")
    let imagePath = self.fileInDocumentsDirectory(filename: myImageName) // パスを取得
    let img = loadImageFromPath(path: imagePath) // ロード
    imageView.image = img
} else {
    let urlRequest = URLRequest(url: URL(string: url)!)
    let task = URLSession.shared.dataTask(with: urlRequest) { (data,response,error) in
    ... // 省略
}
まだ完全に理解できていない箇所もありますが、以上で無事にCollectionViewの画像のチラつきをなくすことができました!