注意
私はjavascriptを趣味で勉強しているものです。これが正しいやり方というわけではなく、私が趣味で勉強しながらこうやったら面白いんじゃないかと考えながら作ったものなので注意してください。
間違いなどありましたら、ご指摘お願いいたします ![]()
タイトルの フロントエンドフレームワークっぽく という部分ですが、コンポーネント単位で再利用可能でイベント設定ができる、という感じのものを自分では思いながら作成しました。
この記事内のコードは全てchromeの最新で確認しました(version 73.0.3683.103)
参考
- Web Componentsとは何か? - Qiita
- Web Componentsに触れる - Qiita
- Web Components will replace your frontend framework
- Web Componentsを触ってみた ~後編~
- 第1回 Shadow DOMが生まれた理由
- shadow DOM の使い方 - Web Components | MDN
- Shadow DOM 201
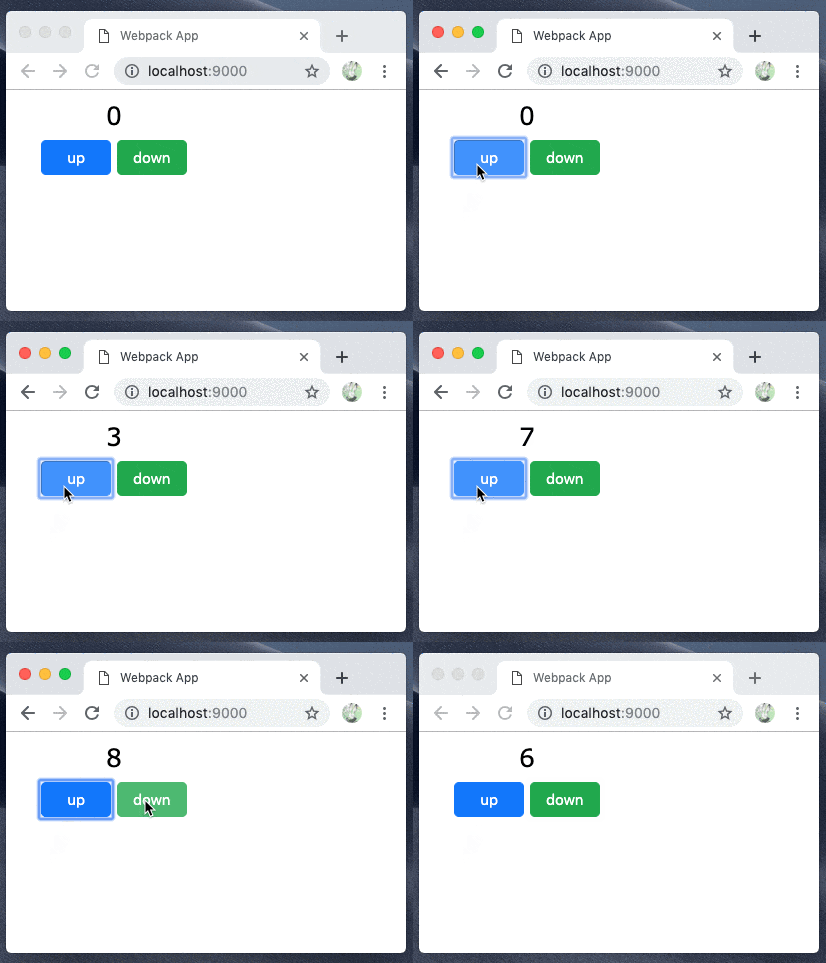
簡単なカウンターを作成してみました
import AppElement from "./AppElement";

document.body.appendChild(AppElement);
import "./CountElement";
import "./BtnElement";

window.customElements.define("app-element", class extends HTMLElement {
    constructor() {
        super();
        const shadowRoot = this.attachShadow({ mode: "open" });

        shadowRoot.innerHTML = `
            <div class="container">
                <count-element></count-element>
                <btn-element class="blue">up</btn-element>
                <btn-element class="green">down</btn-element>
            </div>

            <style>
            .container {
                width: 200px;
                text-align: center;
                font-family: Verdana, sans-serif;
            }
            </style>
        `;
    }

    connectedCallback() {
        this.addEventListener("count", e => {
            this.shadowRoot.querySelector("count-element")
              .count(e.detail.countType);
        });
    }
});

export default document.createElement("app-element");
window.customElements.define("btn-element", class extends HTMLElement {
    constructor() {
        super();
        const shadowRoot = this.attachShadow({mode: "open"});
        shadowRoot.innerHTML = `
            <button class="${this.className}" >
                <slot></slot>
            </button>

            <style>
            button {
                border-radius: 5px;
                cursor: pointer;
                font-size: 15px;
                height: 35px;
                width: 70px;
                color: #fff;
                transition: opacity .15s;
            }
            button:hover {
                opacity: .8;
            }

            button.blue {
                background-color: #007bff;
                border-color: #007bff;
            }
            button.green {
                background-color: #28a745;
                border-color: #28a745;
            }
            </style>
        `;
    }

    connectedCallback() {
        this.addEventListener("click", e => {
            this.count(e.target.textContent);
        });
    }

    count(countType) {
        this.dispatchEvent(new CustomEvent("count", {
            bubbles: true,
            composed: true,
            detail: { countType },
        }));
    }
});
window.customElements.define("count-element", class extends HTMLElement {
    constructor() {
        super();
        const shadowRoot = this.attachShadow({mode: "open"});
        shadowRoot.innerHTML = `
            <p class="count">0</p>

            <style>
            .count {
                font-size: 25px;
                margin: 10px;
            }
            </style>
        `;
    }

    count(countTyep) {
        const p = this.shadowRoot.querySelector("p");
        p.textContent = Number(p.textContent) + (countTyep === "up" ? 1 : -1);
    }
});
npm i webpack webpack-cli
npx webpack --mode development #./dist/main.jsが出力
私のやり方が悪いかもしれないですが、vueやreactを使ったほうが綺麗になりそうだと思いました。
ここからは、自分が参考サイトなどから調べたりしたことを書いていきます
Custom Elements
ユーザー定義のHTML要素
<!DOCTYPE html>
<html lang="en">
<head>
<meta charset="UTF-8">
<meta name="viewport" content="width=device-width, initial-scale=1.0">
<meta http-equiv="X-UA-Compatible" content="ie=edge">
<title>Document</title>
</head>
<body>
    <my-element></my-element>

<script>
class MyElement extends HTMLElement {
        constructor() {
            super();
            const shadowRoot = this.attachShadow({mode: "open"});
            shadowRoot.innerHTML = `
                <div>hogefuga</div>
                <style>
                div {
                    color: green;
                }
                </style>
            `;
        }
}
window.customElements.define("my-element", MyElement);
</script>
</body>
</html>
window.customElements.define("my-element", MyElement); と定義したので、htmlで<my-element></my-element>と書けば使うことができる ※タグ名の-は既存のタグ名と被らないようにつけたほうが良いようです

↑の例ではHTMLに直接<my-element></my-element>と書きましたが、javascriptからタグを生成することもできます
<body>
    <script>
    window.customElements.define("my-element", class extends HTMLElement {
        constructor() {
            super();
            const shadowRoot = this.attachShadow({mode: "open"});
            shadowRoot.innerHTML = "<div>hogefuga</div>";
        }
    });

    // customElements.get()を使う
    const el = customElements.get("my-element");
    const myElement = new el();
    document.body.appendChild(myElement);

    // または、
    document.body.appendChild(document.createElement("my-element"));
    </script>
</body>

ライフサイクルメソッド
- connectedCallback
- disconnectedCallback
- attributeChangedCallback
- adoptedCallback
connectedCallback()
<body>
    <my-element></my-element>
    <my-element></my-element>
    <my-element></my-element>

    <script>
    window.customElements.define("my-element", class extends HTMLElement {
        constructor() {
            super();
        }

        // 要素がDOMツリーに挿入されたときに呼び出される
        connectedCallback() {
            console.log(this) // ↑で3回my-elementタグを書いているので、3回実行される
        }
    });
    </script>
</body>

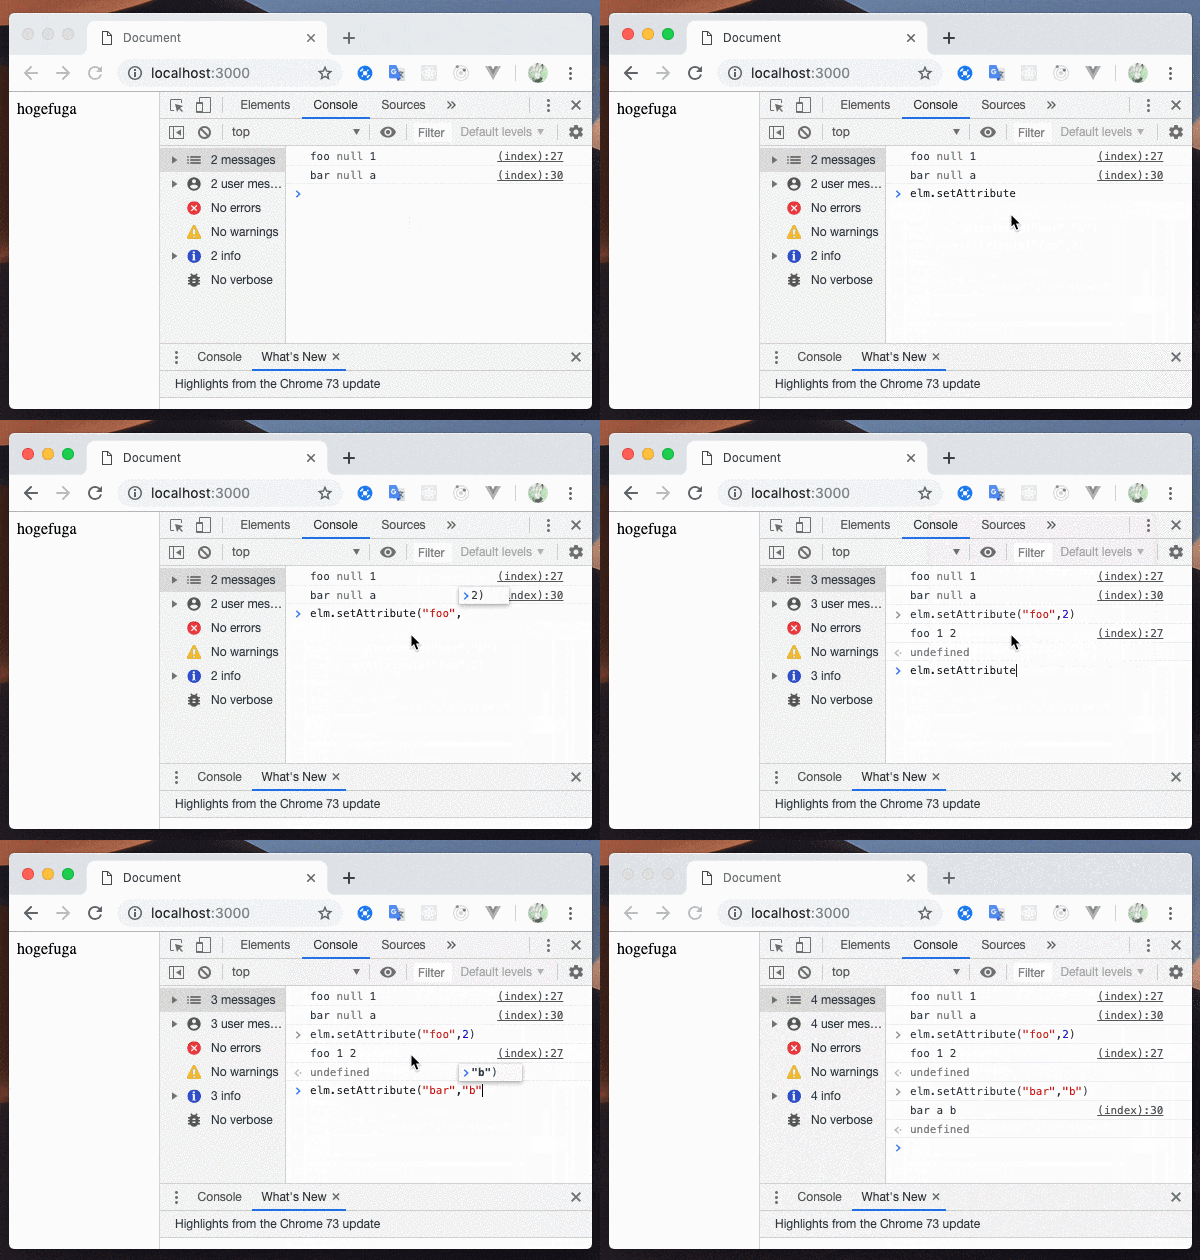
attributeChangedCallback()
observedAttributes()の配列に存在する属性が変更された時に実行される
<body>
    <my-element id="elm" foo="1" bar="a"></my-element>

    <script>
    window.customElements.define("my-element", class extends HTMLElement {
        constructor() {
            super();
            const shadowRoot = this.attachShadow({mode: "open"});
            shadowRoot.innerHTML = "<div>hogefuga</div>";
        }

        static get observedAttributes() {
            return ["foo", "bar"];
        }

        attributeChangedCallback(attr, oldVal, newVal) {
            switch(attr) {
                case "foo":
                    console.log("foo", oldVal, newVal);
                    return;
                case "bar":
                    console.log("bar", oldVal, newVal);
                    return;
            }
        }
    });
    </script>
</body>
ちなみに実行順序は以下のようです
constructor -> attributeChangedCallback -> connectedCallback
APIを設定
関数を定義
<body>
    <my-element></my-element>

    <script>
    window.customElements.define("my-element", class extends HTMLElement {
        constructor() {
            super();
            const shadowRoot = this.attachShadow({mode: "open"});
            shadowRoot.innerHTML = "<div>hogefuga</div>";
        }

        doSomething() {
            console.log("do something");
        }
    });
    const element = document.querySelector('my-element');
    element.doSomething();
    </script>
</body>

プロパティの定義
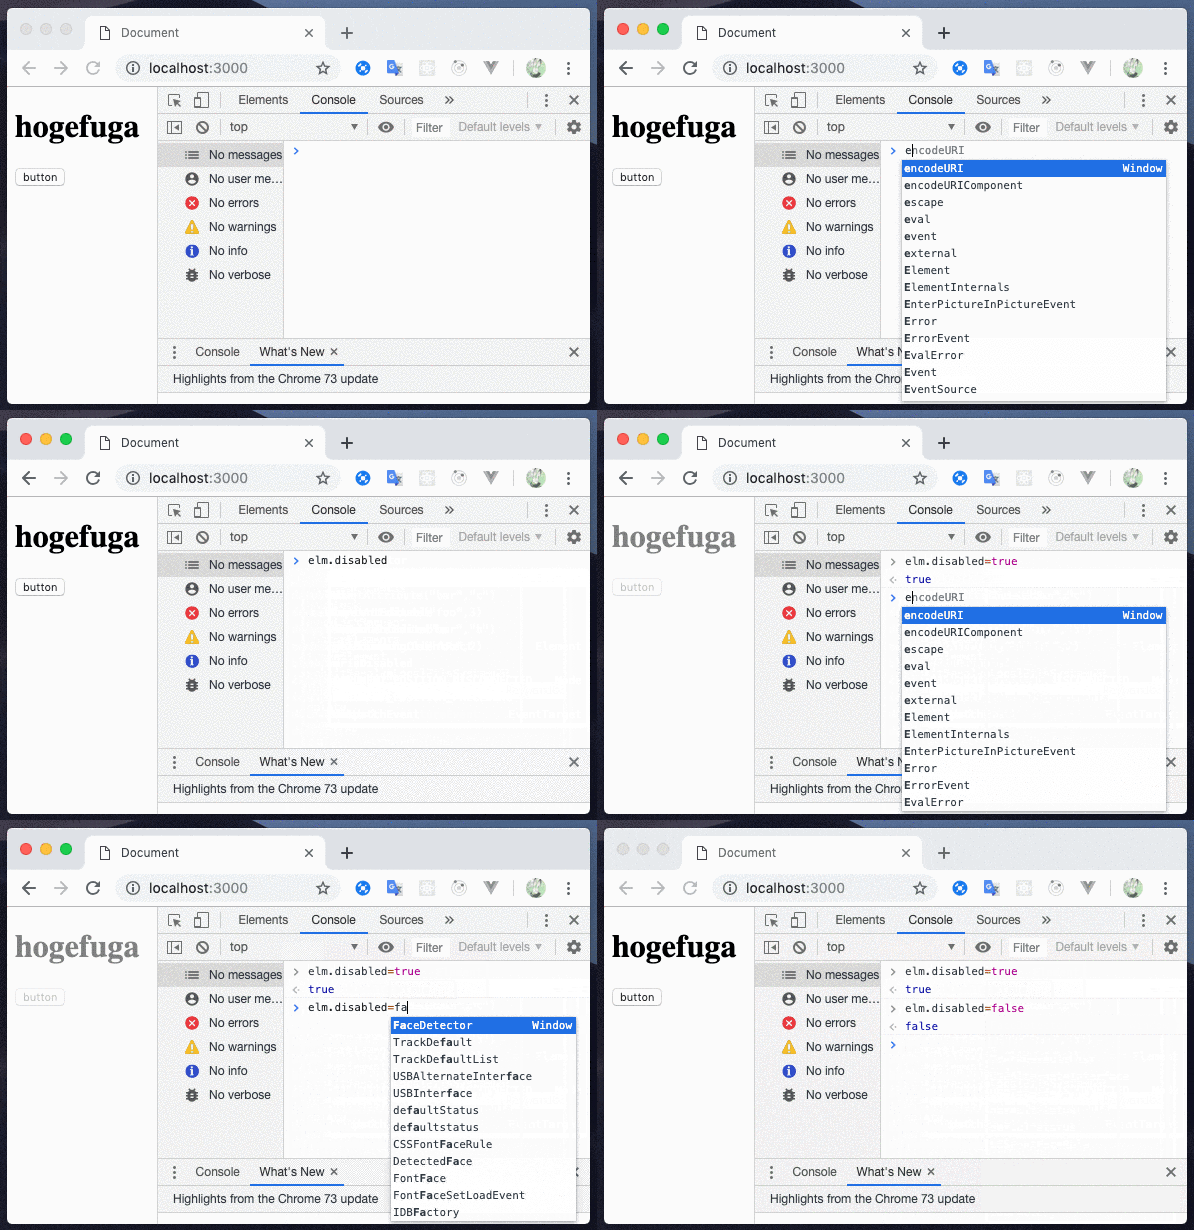
setterを使うことで簡単にできる、disabledプロパティを設定してみました
<body>
    <my-element id="elm"></my-element>

    <script>
    window.customElements.define("my-element", class extends HTMLElement {
        constructor() {
            super();
            const shadowRoot = this.attachShadow({mode: "open"});
            shadowRoot.innerHTML = `
                <h1>hogefuga</h1>
                <input type="button" value="button">
            `;
        }

        set disabled(isDisabled) {
            if(isDisabled) {
                this.setAttribute("disabled", "");
                this.shadowRoot.querySelector("h1").style.opacity = 0.5;
                this.shadowRoot.querySelector("input").setAttribute("disabled", "");
            } else {
                this.removeAttribute("disabled");
                this.shadowRoot.querySelector("h1").style.opacity = 1;
                this.shadowRoot.querySelector("input").removeAttribute("disabled");
            }
        }

        get disabled() {
            return this.hasAttribute("disabled");
        }
    });
    </script>
</body>
Shadow DOM
Shadow DOMを使うとHTMLとCSSはコンポーネント内にカプセル化され、他のスタイルシートの影響を受けず、Shadow DOM内のスタイルが外部に影響することもなくなります。
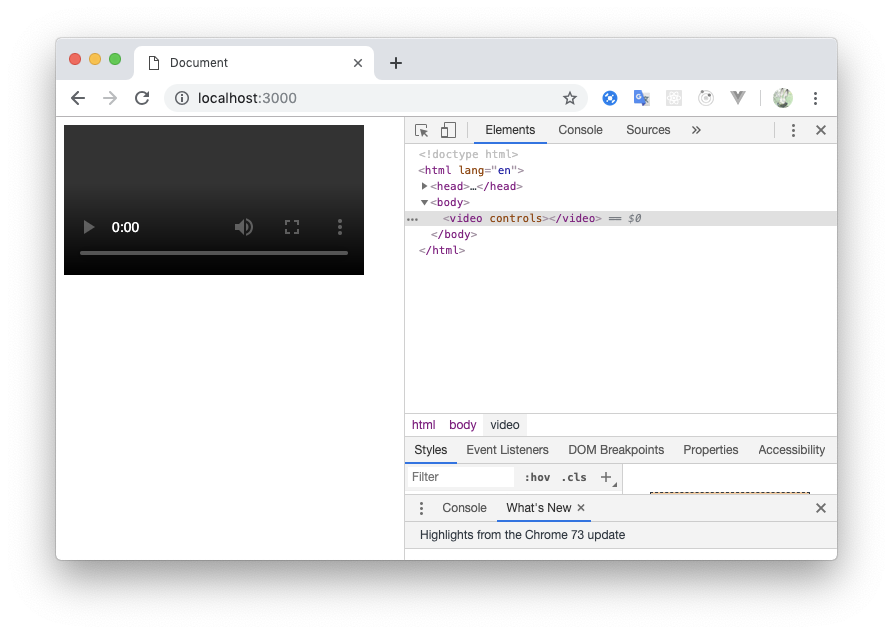
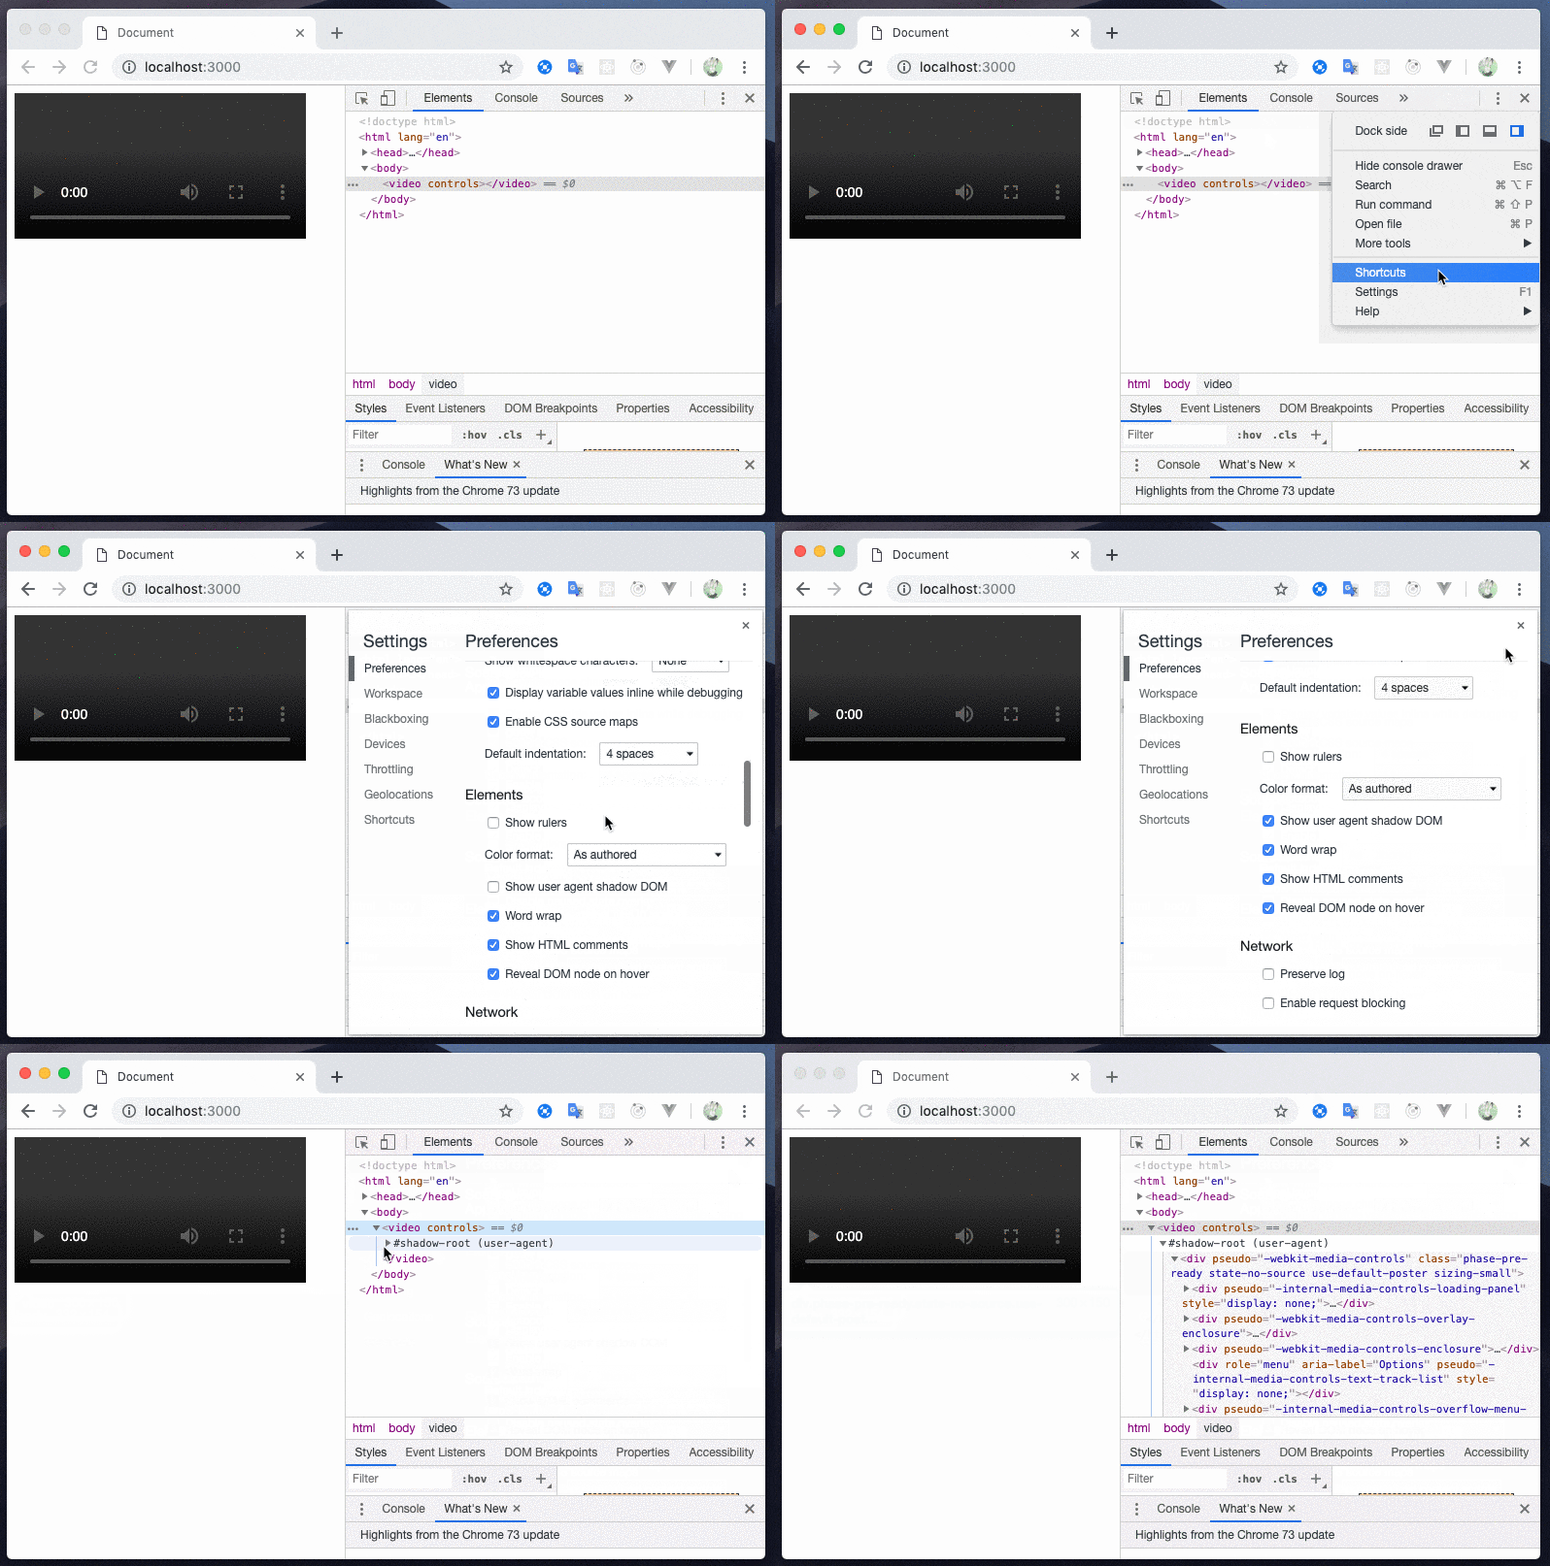
video要素とかでもShadow DOMが使われています。
<video controls></video>
chromeのデフォルトではデベロッパーツールでShadow DOMをみることはできません
なので、settingから設定を変えましょう
デベロッパーツールでもShadow DOMが確認できるようになりました
引用
以下に shadow DOM における用語を定義します。
- Shadow host: shadow DOM が追加された、通常の DOM ノード
- Shadow tree: shadow DOM の中にある DOM ツリー
- Shadow boundary: shadow DOM と通常の DOM の境界
- Shadow root: shadow ツリーの根ノード
attachShadow() でshadow root を任意の要素に追加することができます。
このメソッドではパラメータとして mode オプションを open または closed の値で取ります。
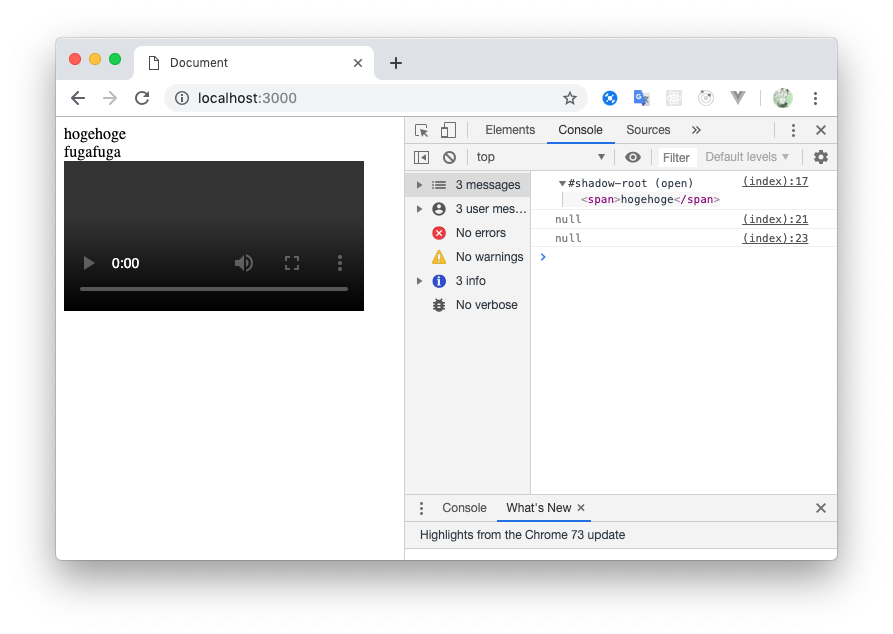
open の場合は shadow DOM の内部にメインページに書かれた javascript からアクセスできます
<div id="hoge"></div>
<div id="fuga"></div>
<video controls id="video"></video>

<script>
const hogeShadowRoot = hoge.attachShadow({mode: 'open'});
hogeShadowRoot.innerHTML = "<span>hogehoge</span>";
console.log(hoge.shadowRoot); // mode: 'open'と設定したので、shadow root を確認できる

const fugaShadowRoot = fuga.attachShadow({mode: 'closed'});
fugaShadowRoot.innerHTML = "<span>fugafuga</span>";
console.log(fuga.shadowRoot); // mode: 'closed'と設定したので、nullとなる

console.log(video.shadowRoot); // videoタグは mode:closed になっているので、null
</script>
:hostセレクタを使用してコンポーネント自体のスタイルを設定
shadow DOM が追加された、通常の DOMにスタイルを設定できる
:host {
  display: block;
}
disabled属性が付いている時だけスタイルを当てることもできました
<body>
<my-element></my-element>
<my-element disabled></my-element>

<script>
window.customElements.define("my-element", class extends HTMLElement {
    constructor() {
        super();
        const shadowRoot = this.attachShadow({mode: "open"});
        shadowRoot.innerHTML = `
            <h1>hogehoge</h1>
            <h2>fugafuga</h2>
            <h3>piyopiyo</h3>

            <style>
            /* disabled属性が付いている時だけstyleを適用 */
            :host([disabled]) {
                display: block;
                opacity: 0.5;
            }
            </style>
        `;
    }
});
</script>
</body>

Shadow DOMの外側からstyleを適用する
css変数を使うことでうまくいくようです
<my-element></my-element>
<style>
my-element {
    --background-color: tomato;
}
</style>

<script>
window.customElements.define("my-element", class extends HTMLElement {
    constructor() {
        super();
        const shadowRoot = this.attachShadow({mode: "open"});
        shadowRoot.innerHTML = `
            <h1>hogehoge</h1>
            <style>
            h1 {
                background-color: var(--background-color);
            }
            </style>
        `;
    }
});
</script>

slots
<slot>はShadow DOM内でプレースホルダーのように機能してくれます
ユーザー提供のマークアップとShadow DOMを合体させて新しいDOMツリーを作ってくれます
<body>
<image-gallery>
  <img src="http://placehold.jp/100x100.png">
  <img src="http://placehold.jp/100x100.png">
</image-gallery>

<script>
window.customElements.define("image-gallery", class extends HTMLElement {
    constructor() {
        super();
        const shadowRoot = this.attachShadow({mode: "open"});
        shadowRoot.innerHTML = `
            <h1>hoge gallery</h1>
            <slot></slot>
        `;
    }
});
</script>
</body>
↑の例ですと、<image-gallery>の子要素が、Shadow DOMの<slot></slot>の部分に適用されます

名前付きで<slot>を指定することもできます
<body>
<image-gallery>
  <img src="http://placehold.jp/100x100.png" slot="fuga">
  <img src="http://placehold.jp/100x100.png" slot="fuga">
  <img src="http://placehold.jp/150x150.png" slot="piyo">
</image-gallery>

<script>
window.customElements.define("image-gallery", class extends HTMLElement {
    constructor() {
        super();
        const shadowRoot = this.attachShadow({mode: "open"});
        shadowRoot.innerHTML = `
            <h1>hoge gallery</h1>
            <div class="skyblue">
                <slot name="fuga"></slot>
            </div>
            <div class="limegreen">
                <slot name="piyo"></slot>
            </div>

            <style>
            .skyblue { background: skyblue; }
            .limegreen { background: limegreen; }
            </style>
        `;
    }
});
</script>
</body>

slotchange イベントでslotが変更された時に、内容を取得することもできるようです
<body>
<image-gallery>
    aaa
    <img src="http://placehold.jp/100x100.png">
    bbb
    <img src="http://placehold.jp/100x100.png">
    ccc
</image-gallery>

<script>
window.customElements.define("image-gallery", class extends HTMLElement {
    constructor() {
        super();
        const shadowRoot = this.attachShadow({mode: "open"});
        shadowRoot.innerHTML = `
            <h1>hoge gallery</h1>
            <slot></slot>
        `;
    }
});

const slot = document.querySelector("image-gallery").shadowRoot.querySelector("slot");
slot.addEventListener('slotchange', e => {
  const changedSlot = e.target;
  console.log(changedSlot.assignedNodes());
});
</script>
</body>

template element
templateタグのなかのマークアップは非表示になります。
javascriptでDOMをcloneして表示したいDOMにappendChild()などすることで表示することができます。
なので画面上の表示を大幅に変更したい場合などに、複数templateタグを用意して切り替えたりすると便利です。
<body>
<my-element></my-element>

<script>
window.customElements.define("my-element", class extends HTMLElement {
    constructor() {
        super();
        const shadowRoot = this.attachShadow({mode: 'open'});

        this.shadowRoot.innerHTML = `
            <template id="view1">
                <p>This is view 1</p>
            </template>

            <template id="view1">
                <p>This is view 1</p>
            </template>

            <div id="container">
                <p>This is the container</p>
            </div>
        `;
    }

    connectedCallback() {
        const content = this.shadowRoot.querySelector('#view1').content.cloneNode(true);
        this.shadowRoot.querySelector('#container').appendChild(content);
    }
});
</script>
</body>

イベント設定
普通にイベント設定して動作してくれます
<body>
<btn-element></btn-element>

<script>
window.customElements.define("btn-element", class extends HTMLElement {
    constructor() {
        super();
        const shadowRoot = this.attachShadow({mode: "open"});
        shadowRoot.innerHTML = "<button>click</button>";
    }

    connectedCallback() {
        this.addEventListener("click", e => {
            console.log("clickされました")
        });
    }
});
</script>
</body>

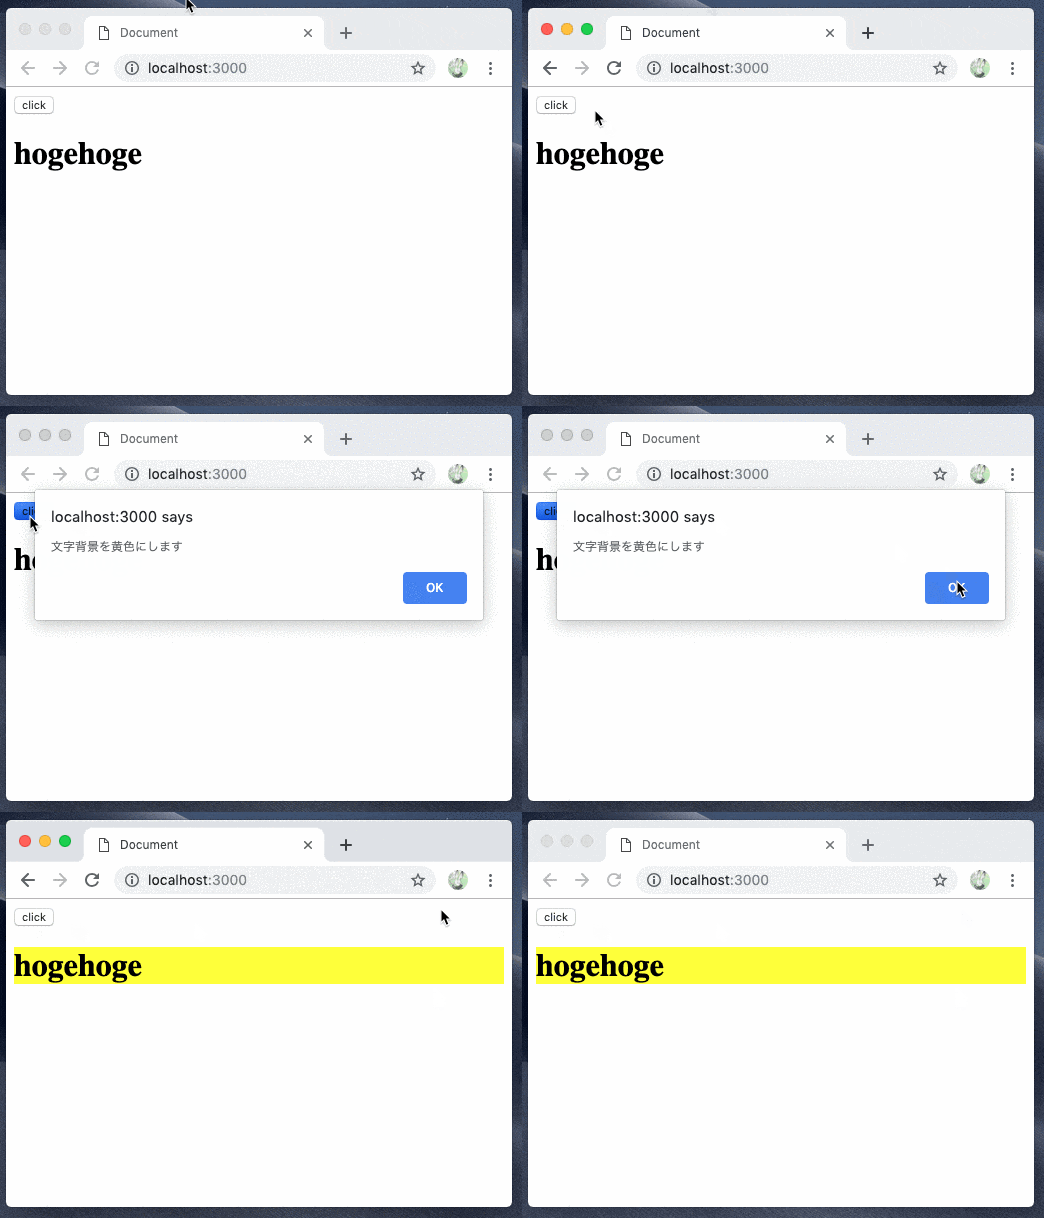
Custom Elementからイベント発火して、別のCustom Elementのメソッドを実行する
<body>
<my-app>
    <run-element></run-element>
    <alert-element></alert-element>
</my-app>

<script>
window.customElements.define("run-element", class extends HTMLElement {
    constructor() {
        super();
        const shadowRoot = this.attachShadow({mode: "open"});
        shadowRoot.innerHTML = "<button>click</button>";
    }

    connectedCallback() {
        this.addEventListener("click", e => {
            this.handleAlert();
        });
    }

    handleAlert() {
        // カスタムイベントでev-alertイベントを設定し、発火させる
        // bubbles: trueとすることでBubblingさせる
        // ※Bubblingとは、ある要素でイベントが発生すると、まずその要素でハンドラが実行され、次にその親で、次にその上の先祖ですべての処理が実行される動作
        this.dispatchEvent(new Event("ev-alert", { bubbles: true }));
    }
});

window.customElements.define("alert-element", class extends HTMLElement {
    constructor() {
        super();
        const shadowRoot = this.attachShadow({mode: "open"});
        shadowRoot.innerHTML = "<h1>hogehoge</h1>";
    }

    alert() {
        alert("文字背景を黄色にします");
        this.shadowRoot.querySelector("h1").style.background = "yellow";
    }
});

window.customElements.define("my-app", class extends HTMLElement {
    constructor() {
        super();
        const shadowRoot = this.attachShadow({mode: "open"});
        shadowRoot.innerHTML = "<slot></slot>";
    }

    connectedCallback() {
        // run-elementでev-alertイベントが発火すると、親のタグなので受け取れる
        this.addEventListener("ev-alert", e => {
            // 別のCustom Elementのメソッドを実行することができる
            this.querySelector("alert-element").alert();
        });
    }
});
</script>
</body>
イベントに値を持たせたい場合
CustomEventを使い、detailを指定するとe.detailで受け取れる
        // イベント発火
        this.dispatchEvent(new CustomEvent("hoge", {
            bubbles: true,
            detail: { msg: "hello" },
        }));

        // イベントリスナー
        this.addEventListener("hoge", e => {
            console.log(e.detail); // { msg: hello }
        });
最後まで読んでいただいてありがとうございましたm(_ _)m
