はじめに
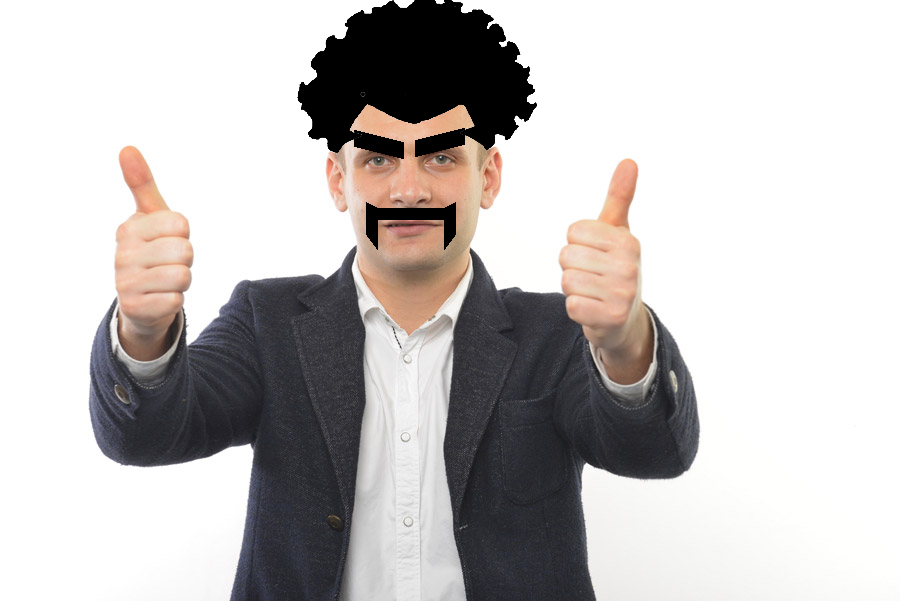
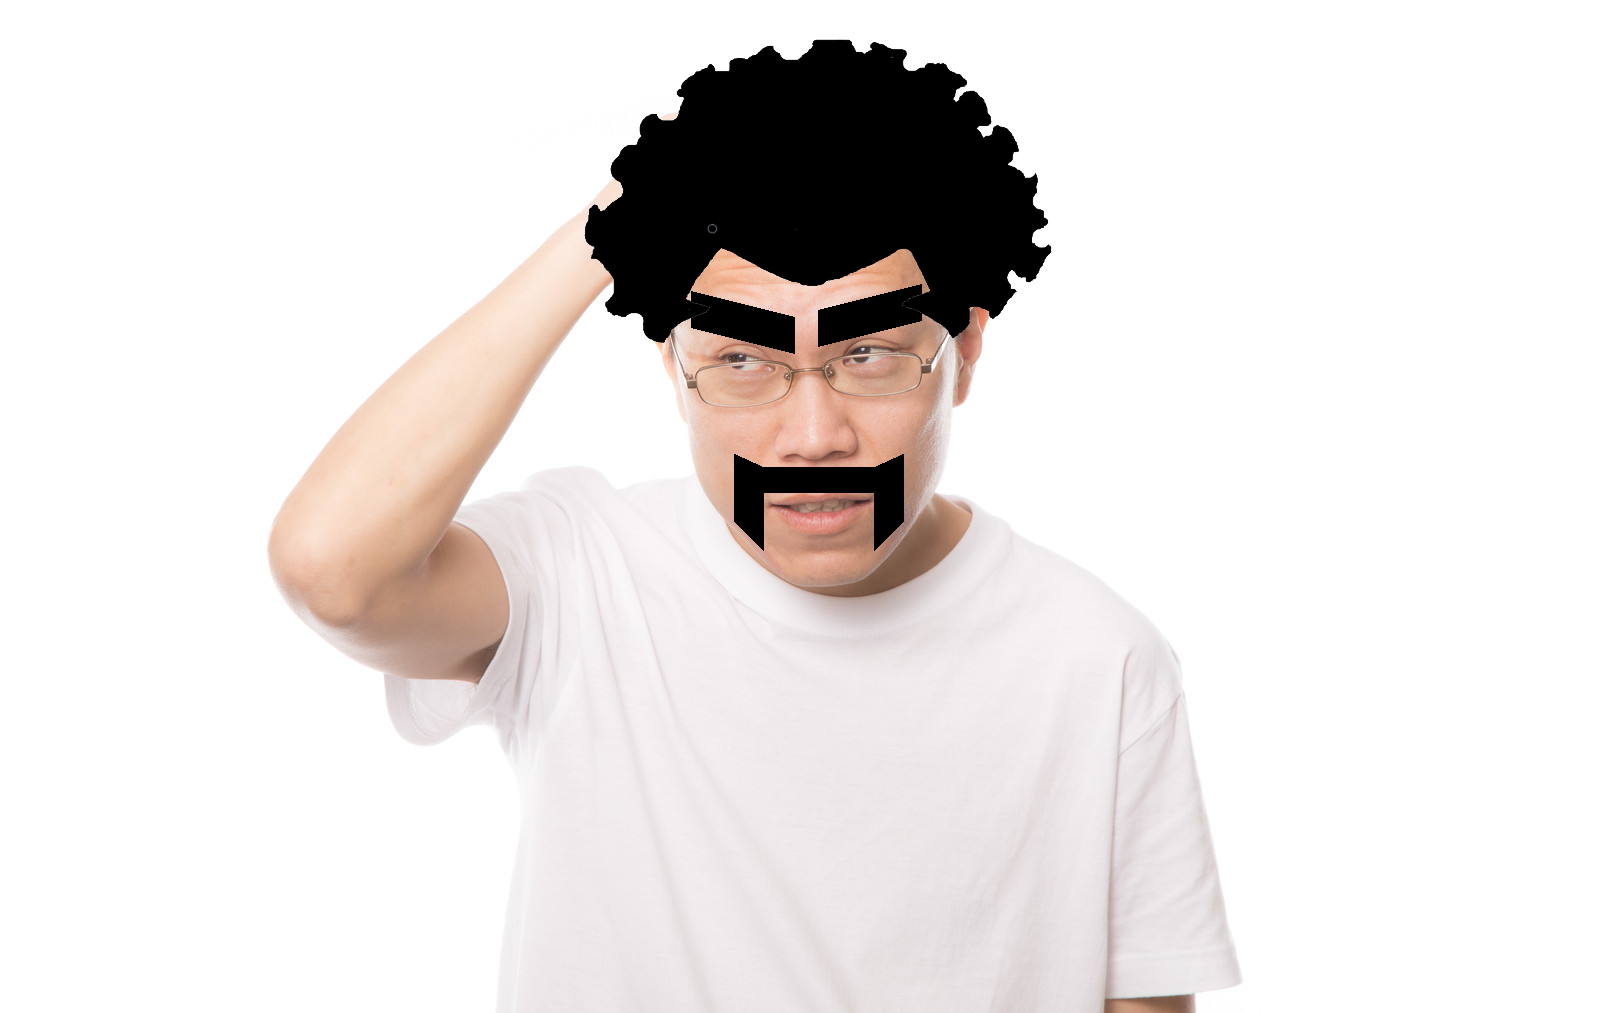
みんなのあこがれ、世界チャンピオン「ミスター・サタン」。その「ミスター・サタン」に変身できるアプリを作ってみました。特徴的な眉、髭・アフロヘアーを身にまとえば、これであなたも「ミスター・サタン」!
雑(w)!
技術的には、face_recognitionというライブラリを使って顔の各種パーツの座標を取得し、それをもとに眉・髭・アフロの位置と大きさを計算し、描画しています。
face_recognitionとは
Face Recognitionは、顔を認識・操作できる世界で最も単純な顔認識ライブラリです。
Face Recognition
Recognize and manipulate faces from Python or from the command line with the world's simplest face recognition library.
使用するには、まずpipでインストールを行います。
$ pip install opencv-python
$ pip install opencv-contrib-python
$ pip install cmake
$ pip install face_recognition
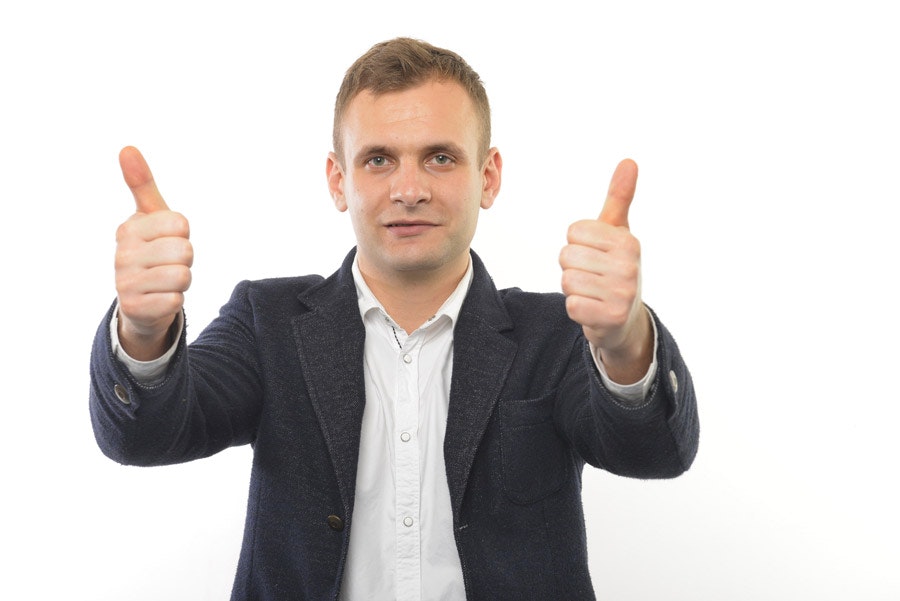
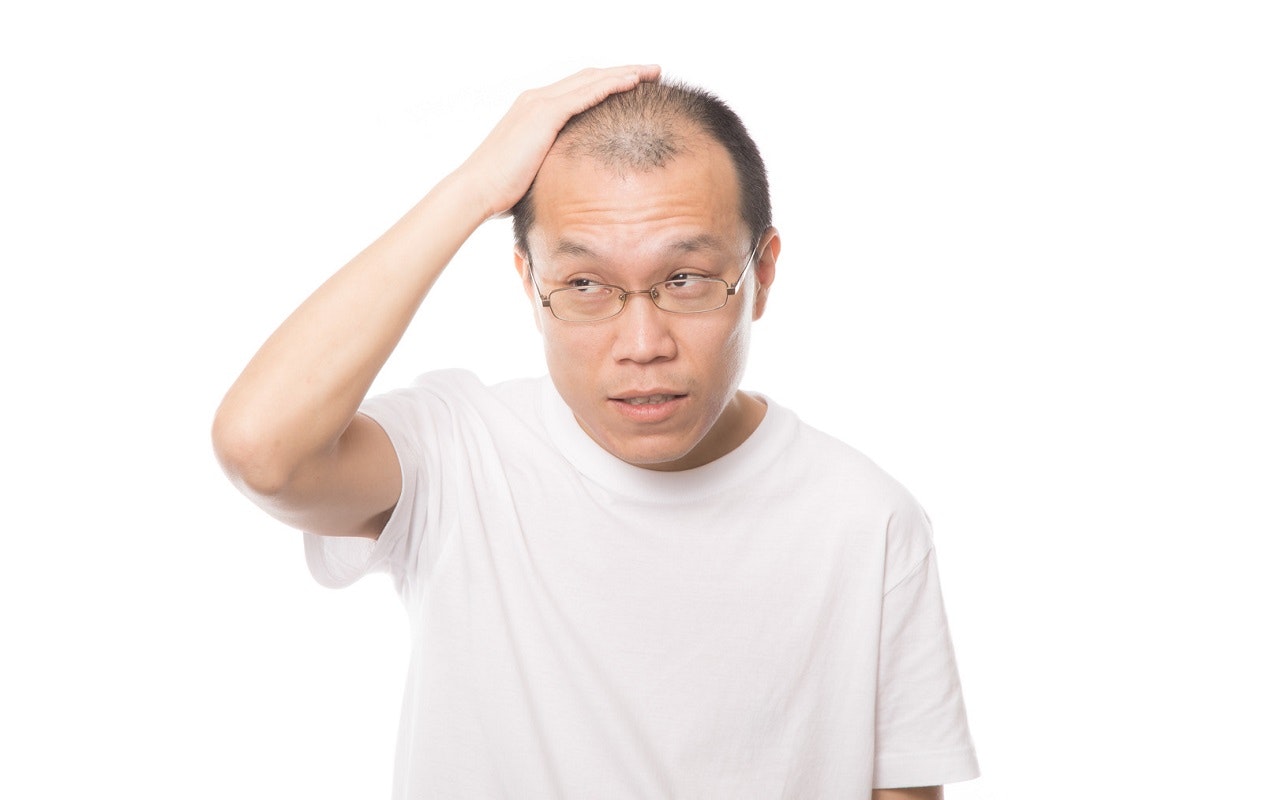
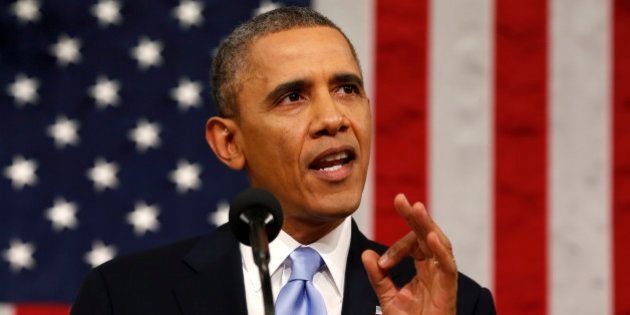
試しに、下記画像を使って、顔パーツの取得を行ってみます。
import face_recognition
import cv2

F = "image.jpg"

image = face_recognition.load_image_file(F)
face_landmarks_list = face_recognition.face_landmarks(image)

print(face_landmarks_list)

各パーツの座標が取得できました。
取得できた座標を実際の画像にプロットしてみます。
bgr = cv2.imread(F)
for face_landmarks in face_landmarks_list:

    for facial_feature in face_landmarks.keys():
        for i in range(len(face_landmarks[facial_feature])):
            cv2.drawMarker(bgr, face_landmarks[facial_feature][i],
                           color=(255, 0, 0), markerType=cv2.MARKER_CROSS, thickness=1)

cv2.imshow('', bgr)
cv2.waitKey(0)
cv2.destroyAllWindows()
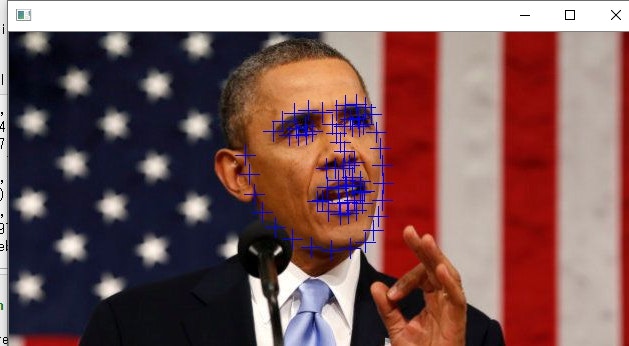
おおよそ、正しく認識できていることが分かります。
実際のコード
1.pipでインストール
$ pip install opencv-python
$ pip install opencv-contrib-python
$ pip install cmake
$ pip install face_recognition
2.ライブラリのインポート・定数宣言
import face_recognition
import cv2
from PIL import Image
import numpy as np
# 画像の縦幅・横幅の最大サイズ
MAX_IMAGE_WIDTH = 10000
MAX_IMAGE_HEIGHT = 10000
3.関数の定義(オーバーレイ描画・座標を配列に格納)
class CvOverlayImage(object):
    """
    [summary]
      OpenCV形式の画像に指定画像を重ねる
    """

    def __init__(self):
        pass

    @classmethod
    def overlay(
            cls,
            cv_background_image,
            cv_overlay_image,
            point,
    ):
        """
        [summary]
          OpenCV形式の画像に指定画像を重ねる
        Parameters
        ----------
        cv_background_image : [OpenCV Image]
        cv_overlay_image : [OpenCV Image]
        point : [(x, y)]
        Returns : [OpenCV Image]
        """
        overlay_height, overlay_width = cv_overlay_image.shape[:2]

        # OpenCV形式の画像をPIL形式に変換(α値含む)
        # 背景画像
        cv_rgb_bg_image = cv2.cvtColor(cv_background_image, cv2.COLOR_BGR2RGB)
        pil_rgb_bg_image = Image.fromarray(cv_rgb_bg_image)
        pil_rgba_bg_image = pil_rgb_bg_image.convert('RGBA')
        # オーバーレイ画像
        cv_rgb_ol_image = cv2.cvtColor(cv_overlay_image, cv2.COLOR_BGRA2RGBA)
        pil_rgb_ol_image = Image.fromarray(cv_rgb_ol_image)
        pil_rgba_ol_image = pil_rgb_ol_image.convert('RGBA')

        # composite()は同サイズ画像同士が必須のため、合成用画像を用意
        pil_rgba_bg_temp = Image.new('RGBA', pil_rgba_bg_image.size,
                                     (255, 255, 255, 0))
        # 座標を指定し重ね合わせる
        pil_rgba_bg_temp.paste(pil_rgba_ol_image, point, pil_rgba_ol_image)
        result_image = \
            Image.alpha_composite(pil_rgba_bg_image, pil_rgba_bg_temp)

        # OpenCV形式画像へ変換
        cv_bgr_result_image = cv2.cvtColor(
            np.asarray(result_image), cv2.COLOR_RGBA2BGRA)

        return cv_bgr_result_image
def GetPosi(posi_name):
    """
    [summary]
      指定した顔パーツの座標を取得する
    Parameters
    ----------
    posi_name : [str]
    Returns : [left_X、right_X, Top_Y, Bottom_Y]
    """

    for face_landmarks in face_landmarks_list:

        minX = MAX_IMAGE_WIDTH
        maxX = 0
        minY = MAX_IMAGE_HEIGHT
        maxY = 0

        for i in range(len(face_landmarks[posi_name])):

            if face_landmarks[posi_name][i][0] < minX:
                minX  = face_landmarks[posi_name][i][0]

            if face_landmarks[posi_name][i][0] > maxX:
                maxX  = face_landmarks[posi_name][i][0]

            if face_landmarks[posi_name][i][1] < minY:
                minY = face_landmarks[posi_name][i][1]

            if face_landmarks[posi_name][i][1] > maxY:
                maxY = face_landmarks[posi_name][i][1]

    return [minX, maxX, minY, maxY]
4.顔のランドマークを取得
# ファイル名の定義
F = "sample.jpg"
# 画像から顔のランドマークを取得
image_fl = face_recognition.load_image_file(F)
face_landmarks_list = face_recognition.face_landmarks(image_fl)
5.眉・髭・アフロの位置を計算
# 各パーツの座標を取得
eye_r = GetPosi('right_eye')
eye_l = GetPosi('left_eye')
mouse = GetPosi('top_lip')
nose  = GetPosi('nose_tip')
chin  = GetPosi('chin')

# 取得座標から眉幅・ひげ幅を算出
brow_h   = int((eye_r[3] - eye_r[2]) * 2)
face_w   = chin[1] - chin[0]
beard_h  = int((mouse[2] - nose[2]) * 0.7)
beard_w  = int((face_w - (mouse[1] - mouse[0])) * 0.2)
beard_h2 = int((chin[3] - mouse[2]) * 0.6)
beard_h3 = int((chin[3] - mouse[2]) * 0.3)
scale    = int(face_w / 20)
scale2   = scale * 2

# アフロ画像の場所を算出(左右対称じゃないため微調整あり)
hair_w   = int(face_w * 1.83)
hair_h   = int(hair_w * 0.64)
hair_x   = int(chin[0] - (hair_w / 2 - face_w / 2) + scale * 1.5)
hair_y   = eye_l[2] - hair_h
# 眉・髭の座標計算
eyeb_r = np.array(
    [
        [eye_r[0] - scale2, eye_r[2] - brow_h],
        [eye_r[1] + scale2, eye_r[2] - brow_h - scale2],
        [eye_r[1] + scale2, eye_r[2] - scale * 2] ,
        [eye_r[0] - scale2, eye_r[2]]
    ]
)

eyeb_l = np.array(
    [
        [eye_l[0] - scale2, eye_l[2] - brow_h - scale2],
        [eye_l[1] + scale2, eye_l[2] - brow_h],
        [eye_l[1] + scale2, eye_l[2]] ,
        [eye_l[0] - scale2, eye_l[2] - scale * 2]
    ]
)

beard_c = np.array(
    [
        [mouse[0] - scale, mouse[2] - beard_h],
        [mouse[1] + scale, mouse[2] - beard_h],
        [mouse[1] + scale, mouse[2] -  0] ,
        [mouse[0] - scale, mouse[2] -  0]
    ]
)

beard_l = np.array(
    [
        [mouse[0] - beard_w, mouse[2] - beard_h - scale],
        [mouse[0] - 5, mouse[2] - beard_h],
        [mouse[0] - 5, mouse[2] + beard_h2],
        [mouse[0] - beard_w, mouse[2] + beard_h3]
    ]
)

beard_r = np.array(
    [
        [mouse[1] + 5, mouse[2] - beard_h],
        [mouse[1] + beard_w, mouse[2] - beard_h - scale],
        [mouse[1] + beard_w, mouse[2] + beard_h3],
        [mouse[1] + 5, mouse[2] + beard_h2]
    ]
)
6.眉・髭・アフロの描画
# OpenCVでファイル読み込み
image = cv2.imread(F)

# 眉毛・ひげ・描画処理
cv2.fillConvexPoly(image, points =eyeb_r, color=(0, 0, 0))
cv2.fillConvexPoly(image, points =eyeb_l, color=(0, 0, 0))
cv2.fillConvexPoly(image, points =beard_c, color=(0, 0, 0))
cv2.fillConvexPoly(image, points =beard_l, color=(0, 0, 0))
cv2.fillConvexPoly(image, points =beard_r, color=(0, 0, 0))
# アフロ画像をオーバーレイ表示
cv_background_image = image
cv_overlay_image = cv2.imread(
    "head.png",
    cv2.IMREAD_UNCHANGED)  # IMREAD_UNCHANGEDを指定しα込みで読み込む

cv_overlay_image = cv2.resize(cv_overlay_image, (hair_w, hair_h))
point = (hair_x, hair_y)

image = CvOverlayImage.overlay(cv_background_image, cv_overlay_image, point)

# 画像描画
cv2.imshow("image", image)
cv2.waitKey(0)
cv2.destroyAllWindows()
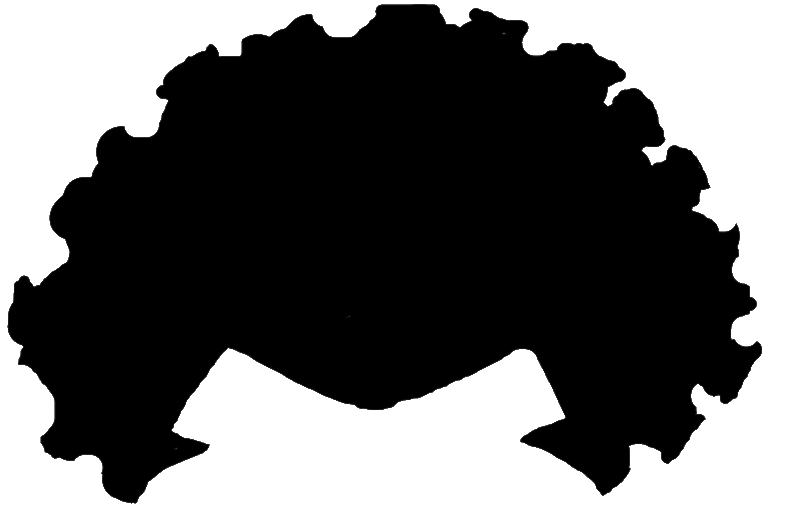
おまけ
使用したアフロ画像です。背景は透過です。head.pngとし、作業フォルダにおいてください。
終わりに
現時点では、正面画像のみ対応しています。Face Recognitionが、いい感じで座標を取得してくれるので、ちょっとの加工で作れました。出力したものの中には個人的に面白い出来のものもありましたが、肖像権の兼ね合いであきらめました。いろんな画像で遊んでもらえたら幸いです。