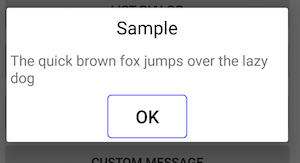
AlertDialog の使い方とカスタマイズについてまとめた。
基本的な使い方
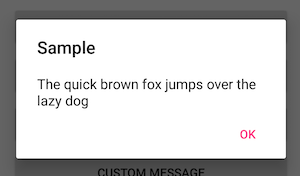
タイトル、メッセージ、OKボタンを表示する。
    new AlertDialog.Builder( getContext() )
        .setTitle( タイトル )
        .setMessage( メッセージ )
    .setPositiveButton(OK , null )
        .show();
3つボタン
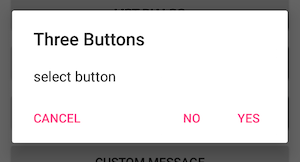
Yes, No, Cancel ボタンを表示し、クリックリスナーを設定する。
    new AlertDialog.Builder(getContext())
        .setTitle( タイトル )
        .setMessage( メッセージ )
    .setPositiveButton( はい, new  DialogInterface.OnClickListener() {
            public void onClick(DialogInterface dialog, int which) {
                // クリックしたときの処理
            }
        })
    .setNegativeButton(いいえ, new  DialogInterface.OnClickListener() {
            public void onClick(DialogInterface dialog, int which) {
                // クリックしたときの処理
            }
        })
    .setNeutralButton( キャンセル, new  DialogInterface.OnClickListener() {
            public void onClick(DialogInterface dialog, int which) {
                // クリックしたときの処理
            }
        })
        .show();
リスト表示
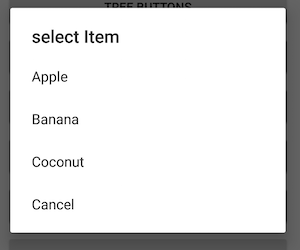
AlertDialog は ListView を内包している。
単一選択( #setItems )と、複数選択( #setMultiChoiceItems )の2つのメソッドがある。
      AlertDialog.Builder builder = new AlertDialog.Builder(getContext());

        // set title
        builder.setTitle( タイトル );

        // set dialog message
        builder.setItems(new CharSequence[]{
                        項目名1,
                         項目名2,
                         項目名3,
                        キャンセル
                }, new DialogInterface.OnClickListener() {
                    public void onClick(DialogInterface dialog, int which) {
                    //項目名をクリックしたときの処理
                }
        );

        AlertDialog dialog = builder.create();
        dialog.show();
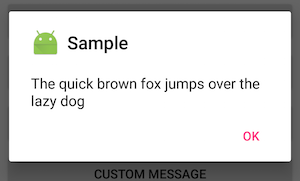
アイコン画像を追加する
new AlertDialog.Builder(getContext())
         .setTitle(タイトル )
        .setMessage( メッセージ )
        .setIcon( R.drawable.icon )
        .setPositiveButton( OK, null )
        .show();
タイトルをカスタマイズする
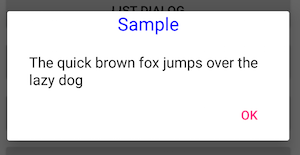
文字サイズと文字色を変更し、中央揃いにする。
    TextView tvTitle = new TextView(getContext());
    tvTitle.setText(タイトル);
// 文字サイズ
    tvTitle.setTextSize(20);
// 文字色
    tvTitle.setTextColor( Color.BLUE );
// 中央揃い
    tvTitle.setGravity( Gravity.CENTER_HORIZONTAL );

new AlertDialog.Builder(getContext())
         .setCustomTitle( tvTitle )
        .setMessage( メッセージ )
        .setPositiveButton( OK, null )
        .show();
メッセージをカスタマイズする
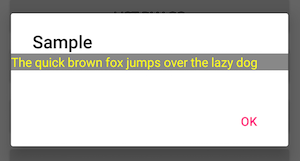
文字色と背景色を変更する。
    TextView tvMessage = new TextView(getContext());
    tvMessage.setText(メッセージ);
// 文字色
    tvMessage.setTextColor( Color.YELLOW );
// 背景色
    tvMessage.setBackgroundColor( Color.GRAY );

new AlertDialog.Builder(getContext())
         .setTitle( タイトル )
        .setView( tvMessage )
        .setPositiveButton( OK, null )
        .show();
ボタンをカスタマイズする
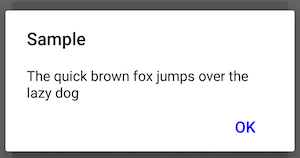
スタイルを指定する。
下記を参考にした。
AlertDialogのスタイルをカスタマイズ
テーマの構成は、ソースから調べることもできるが、難解です。
https://chromium.googlesource.com/android_tools/+/HEAD/sdk/extras/android/support/v7/appcompat/res/values/themes.xml
注意 :標準の AlertDialog でなく android.support.v7.app.AlertDialog を使用する。
スタイルで、文字サイズと文字色を変更する
<style name="Theme_CustonButtonDialog" parent="Theme.AppCompat.Light.Dialog.Alert">
<item name="buttonBarPositiveButtonStyle">@style/CustonPositiveButtonStyle</item>
</style>

<style name="CustonPositiveButtonStyle"
parent="Widget.AppCompat.Button.Borderless.Colored" >
<!-- 文字サイズ  -->
    <item name="android:textSize">@dimen/dialog_button_text_size</item>
<!-- 文字色  -->
    <item name="android:textColor">@color/colorBlue</item>
</style>
// スタイルを指定する
    new AlertDialog.Builder(getContext(), R.style.Theme_CustonButtonDialog )
        .setTitle( タイトル )
        .setMessage( メッセージ )
        .setPositiveButton(OK, null )
        .show();
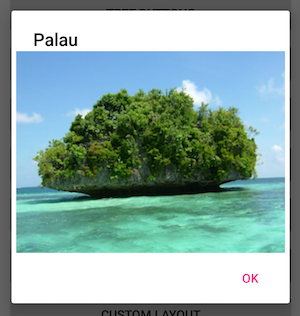
画像を表示する
    ImageView imageView = new ImageView(getContext());
    imageView.setImageResource( R.drawable.sample );

    new AlertDialog.Builder(mContext)
         .setTitle( タイトル )
        .setView(  imageView )
        .setPositiveButton( OK, null )
        .show();
タイトル、メッセージ、ボタンをカスタマイズする
レイアウトを作成する。
下記を参考にした。
Dialog をフルカスタマイズする
<LinearLayout
    android:orientation="vertical"
    android:layout_width="match_parent"
    android:layout_height="match_parent" >

      <!-- タイトル -->
        <TextView
            android:id="@+id/TextView_dialog_title"
            android:layout_width="wrap_content"
            android:layout_height="wrap_content"
            android:layout_margin="8dp"
            android:textSize="20sp"
            android:textColor="@color/colorBlack"
            android:layout_gravity="center_horizontal"
           android:gravity="center_horizontal"  />

    <!-- メッセージ -->
        <TextView
            android:id="@+id/TextView_dialog_message"
            android:layout_width="match_parent"
            android:layout_height="wrap_content"
            android:layout_margin="4dp"
            android:textSize="16sp" />

        <!-- ボタン -->
        <Button
            android:id="@+id/Button_dialog_positive"
            android:layout_width="wrap_content"
            android:layout_height="wrap_content"
            android:layout_margin="4dp"
            android:textSize="20sp"
            android:background="@drawable/bg_button"
            android:layout_gravity="center_horizontal"
           android:gravity="center" />

    </LinearLayout>
    View view = mLayoutInflater.inflate( R.layout.custom_dialog, null );

       TextView tvTitle = (TextView) view.findViewById(R.id.TextView_dialog_title);
        tvTitle.setText(タイトル);

       TextView tvMessage = (TextView) view.findViewById(R.id.TextView_dialog_message);
        tvMessage.setText(メッセージ);

        Button btnPositive = (Button) view.findViewById(R.id.Button_dialog_positive);
        btnPositive.setText( OK );
    btnPositive.setOnClickListener(new View.OnClickListener() {
// クリックしたときの処理
        });

    mDialog = new AlertDialog.Builder(getContext())
        .setView( view )
        .create();
    mDialog.show();
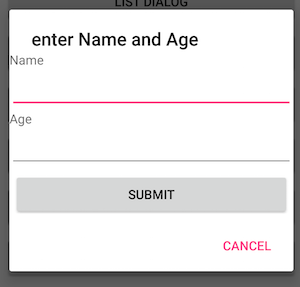
入力用のダイアルログを作成する
上記の「タイトル、メッセージ、ボタンをカスタマイズする」と同様に、入力用のレイアウトを作成する
詳細は割愛する。
github にサンプルコードを公開した
https://github.com/ohwada/Android_Samples/tree/master/
