簡単なWebページを作成しようと思い環境構築したので備忘として
訳あってちょっと古いCentOSを使用
大まかな流れ
- Python3をInstall
- Pythonの仮想環境(venv)を起動
- Flaskを使ってブラウザからHelloWorldを出力
Python3をInstall
- Ubuntu16.4では最初から入っていたので、Linux系には最初から入っていると思っていた
OSのversionを確認
$ cat /etc/redhat-release
CentOS Linux release 7.6.1810 (Core)
yumでインストール
# yumリポジトリにパッケージを追加
$ yum install -y https://centos7.iuscommunity.org/ius-release.rpm
$ yum search python36
Loaded plugins: fastestmirror, langpacks
Loading mirror speeds from cached hostfile
 * base: ty1.mirror.newmediaexpress.com
 * epel: nrt.edge.kernel.org
 * extras: ty1.mirror.newmediaexpress.com
 * updates: ty1.mirror.newmediaexpress.com
=========================================================================== N/S matched: python36 ===========================================================================
python36-cairo-devel.x86_64 : Libraries and headers for python36-cairo
python36-greenlet-devel.x86_64 : C development headers for python36-greenlet
python36-psycopg2-tests.x86_64 : Test suite for python36-psycopg2


# 必要なモジュールをインストール
$ yum install python36u python36u-libs python36u-devel python36u-pip

# インストールできたか確認
$ python3.6 -V
Python 3.6.8

# モジュールの用途は info で確認
$ yum info python36u
pipを有効化
# pipの場所を確認
$ which pip3.6
/usr/bin/pip3.6

# シンボリックリンクの作成
$ ln -s /usr/bin/pip3.6 /usr/local/bin/pip

# pipコマンドが使用可能に
$ pip --version
pip 9.0.3 from /usr/lib/python3.6/site-packages (python 3.6)
Pythonの仮想環境(venv)を起動
標準機能としてのっているのでpipによって新たにインストールする必要はない
プロジェクトの作成
# 今回はworkspace-pyというディレクトリを作成し移動
$ cd [project-dir]

# 今回はtest-flaskというプロジェクト名で作成
$ python3 -m venv [project-name]

# 以下のようなディレクトリになる
$ tree -L 3
.
└── test-flask
    ├── bin
    │   ├── activate
    │   ├── activate.csh
    │   ├── activate.fish
    │   ├── easy_install
    │   ├── easy_install-3.6
    │   ├── pip
    │   ├── pip3
    │   ├── pip3.6
    │   ├── python -> python3
    │   └── python3 -> /usr/bin/python3
    ├── include
    ├── lib
    │   └── python3.6
    ├── lib64 -> lib
    └── pyvenv.cfg
仮想環境の起動
$ source test-flask/bin/activate
 (test-flask) [root@xxxx workspace-py]#

# versionを確認
 (test-flask) [root@xxxx workspace-py]# python -V
 Python 3.6.8
Flaskを使ってブラウザからHelloWorldを出力
flaskをインストール
(test-flask) [root@xxxx workspace-py]# pip install flask
(test-flask) [root@xxxx workspace-py]# mkdir app
(test-flask) [root@xxxx workspace-py]# touch helloWorld.py
ファイル作成
from flask import Flask
app = Flask(__name__)

@app.route('/')
def hello_world():
    return 'Hello World'

if __name__ == "__main__":
    app.run(debug=True, port=8888, threaded=True)
サーバ起動
(test-flask) [root@xxxx workspace-py]# python test-flask/app/helloWorld.py
* Serving Flask app "helloWorld" (lazy loading)
* Environment: production
WARNING: This is a development server. Do not use it in a production deployment.
Use a production WSGI server instead.
* Debug mode: on
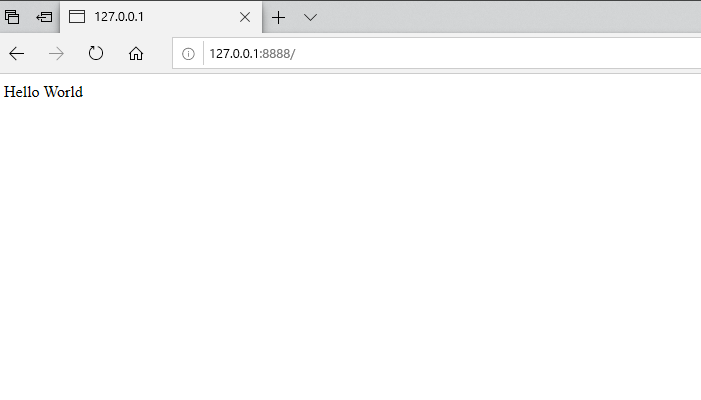
* Running on http://127.0.0.1:8888/ (Press CTRL+C to quit)
* Restarting with stat
* Debugger is active!
* Debugger PIN: 150-485-634
127.0.0.1 - - [10/Mar/2020 19:16:23] "GET / HTTP/1.1" 200 -
起動確認
最終的にディレクトリはこんな感じ
[root@xxxx workspace-py]# tree -L 3
.
└── test-flask
    ├── app   # 追加したファイル
    │   └── helloWorld.py
    ├── bin
    │   ├── activate
    │   ├── activate.csh
    │   ├── activate.fish
    │   ├── easy_install
    │   ├── easy_install-3.6
    │   ├── flask
    │   ├── pip
    │   ├── pip3
    │   ├── pip3.6
    │   ├── python -> python3
    │   └── python3 -> /usr/bin/python3
    ├── include
    ├── lib
    │   └── python3.6
    ├── lib64 -> lib
    ├── pip-selfcheck.json
    └── pyvenv.cfg
参考
CentOS7にPython3系をインストールする手順
https://qiita.com/shu1rou/items/3fac0fc0fcdafec051b7
Python+FlaskでWEBアプリケーションを構築する
https://qiita.com/t-iguchi/items/f7847729631022a5041f