BottomNavigationViewでバッジをつけるのにあれこれ調べたので記事書きます。
Material Components Androidのバージョン1.1.0-alpha06からバッジをつけれる機能が追加されたらしいです。
フッターの準備
Android Studioを使って開発します。
最初にプロジェクトを作成する時にBottom Navigation Activityを選択しましょう。
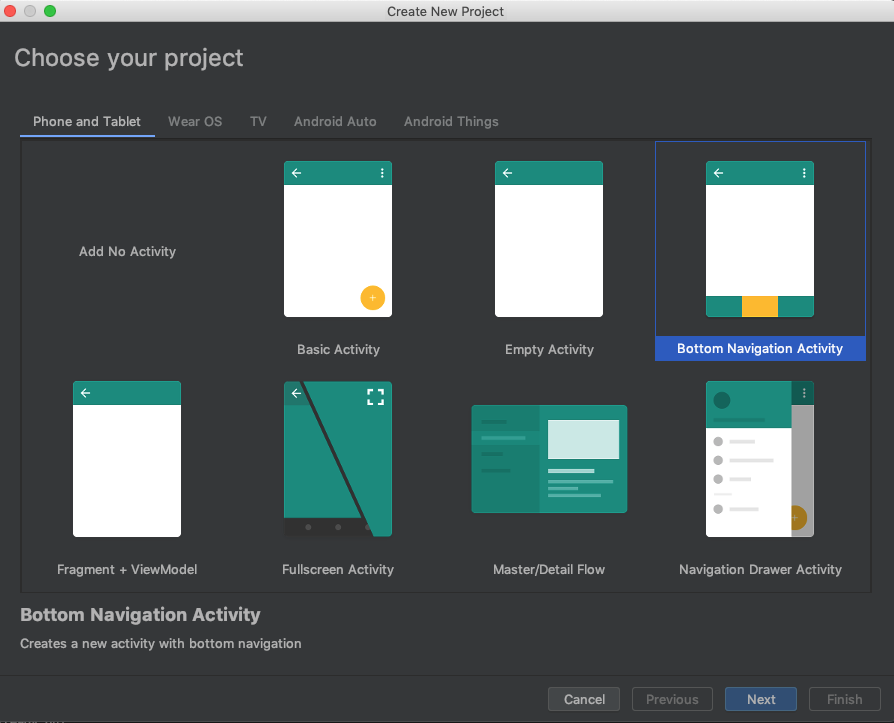
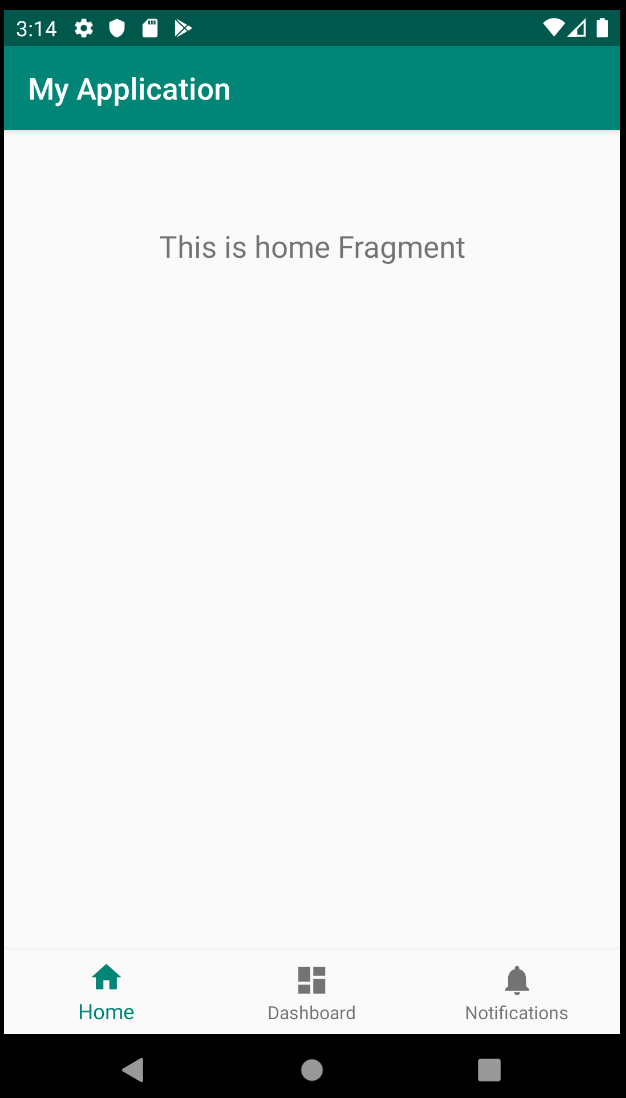
これだけでもうフッター付きのアプリが作成されているはずです。
プロジェクトが立ち上がったらアプリを起動してみましょう。
:

class MainActivity : AppCompatActivity() {

    override fun onCreate(savedInstanceState: Bundle?) {
        super.onCreate(savedInstanceState)
        setContentView(R.layout.activity_main)
        val navView: BottomNavigationView = findViewById(R.id.nav_view)

        val navController = findNavController(R.id.nav_host_fragment)

        navView.setupWithNavController(navController)
    }
}
下準備
フッターのアイコンにバッジを表示させるために少しだけ事前準備が必要です。
まずはbuild.gradle(Module: app) で最新のMaterial Components Androidを追加します。
最新のバージョンは
https://github.com/material-components/material-components-android/releases
ここで知ることができます。
今回は1.1.0-beta02を使います。
implementation 'com.google.android.material:material:1.0.0'
と書かれている部分を
implementation 'com.google.android.material:material:1.1.0-beta02'
に書き換えましょう。
これでMaterial Components Androidが最新バージョンになりました。
次にTheme.MaterialComponentsを継承するように/res/values/styles.xml を書き換えます。
(これに気付くのに少し時間かかった…)
<style name="AppTheme" parent="Theme.AppCompat.Light.DarkActionBar">
と書いてある部分を
<style name="AppTheme" parent="Theme.MaterialComponents.Light.DarkActionBar">
に書き換えます。
これでTheme.MaterialComponentsを継承するようになりました。
バッジの実装
それではフッターにバッジを表示させてみましょう。
getOrCreateBadge(itemId) を使うことでアイコンにバッジを表示させることができます。
たとえば、上で作成したフッターのNotificationsのアイコンに10を表示させたい時は、
navView.menu.getItem(2).itemId.let {
  navView.getOrCreateBadge(it).apply {
    number = 10
  }
}
という風に書けば表示されます。
全体的なコードはこんなかんじ。
:

class MainActivity : AppCompatActivity() {

    override fun onCreate(savedInstanceState: Bundle?) {
        super.onCreate(savedInstanceState)
        setContentView(R.layout.activity_main)
        val navView: BottomNavigationView = findViewById(R.id.nav_view)

        navView.menu.getItem(2).itemId.let {
            navView.getOrCreateBadge(it).apply {
                number = 10
            }
        }

        val navController = findNavController(R.id.nav_host_fragment)

        navView.setupWithNavController(navController)
    }
}
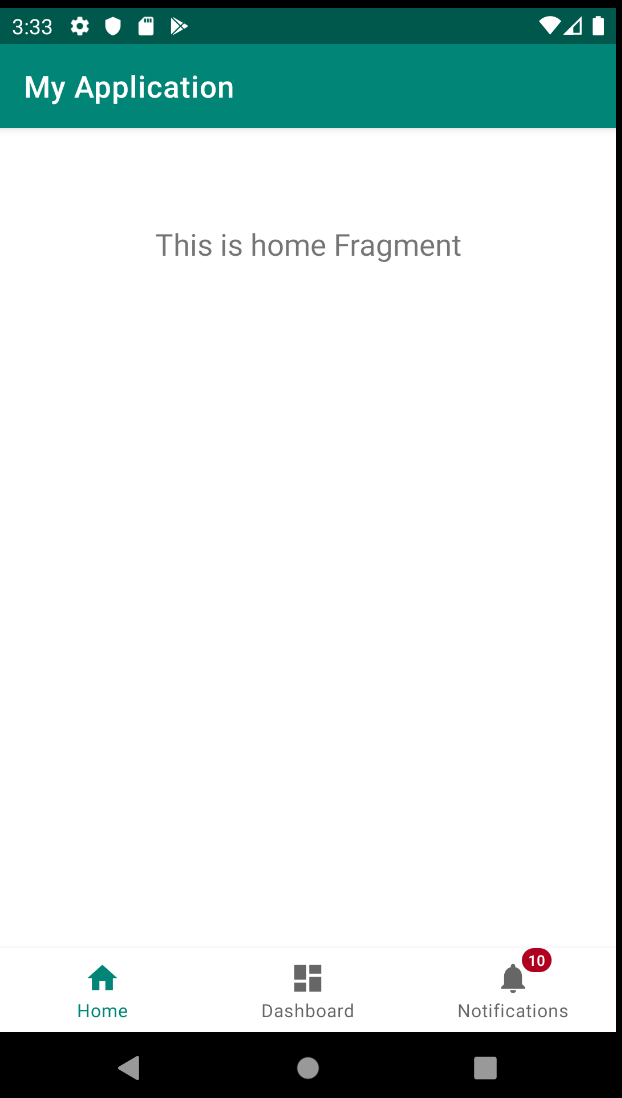
これでバッジが実装できました。
しかしこのままだとnumberが0のときもバッジが表示されてしまいます。
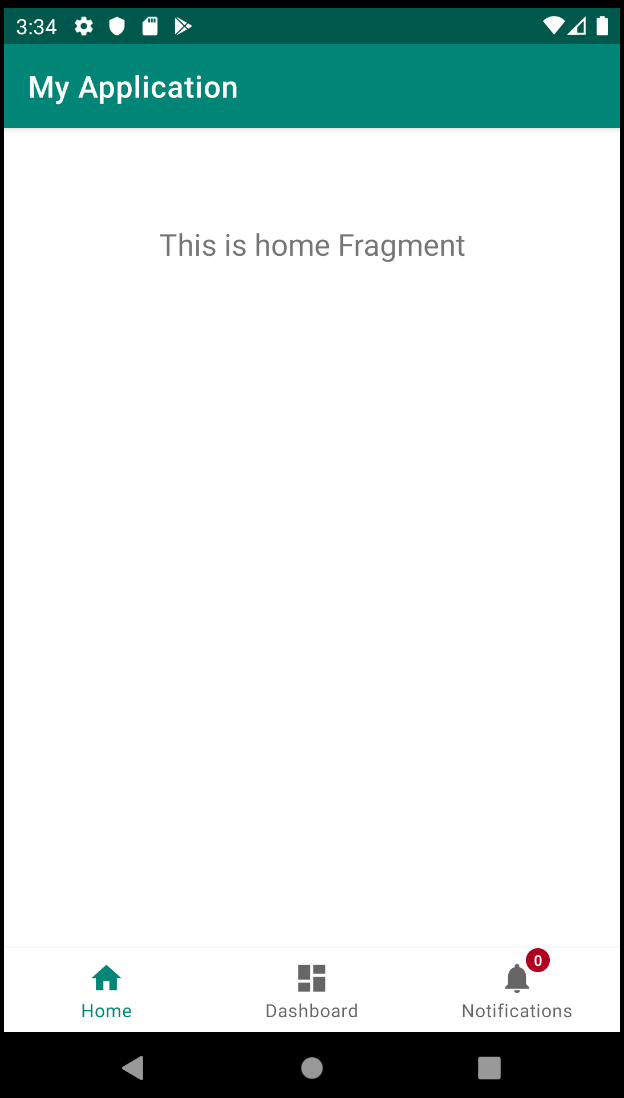
inVisible = false
を付け加えることでバッジの表示非表示を変更できます。
navView.menu.getItem(2).itemId.let {
    navView.getOrCreateBadge(it).apply {
        number = 0

        if (number == 0) {
            isVisible = false
        }
    }
}
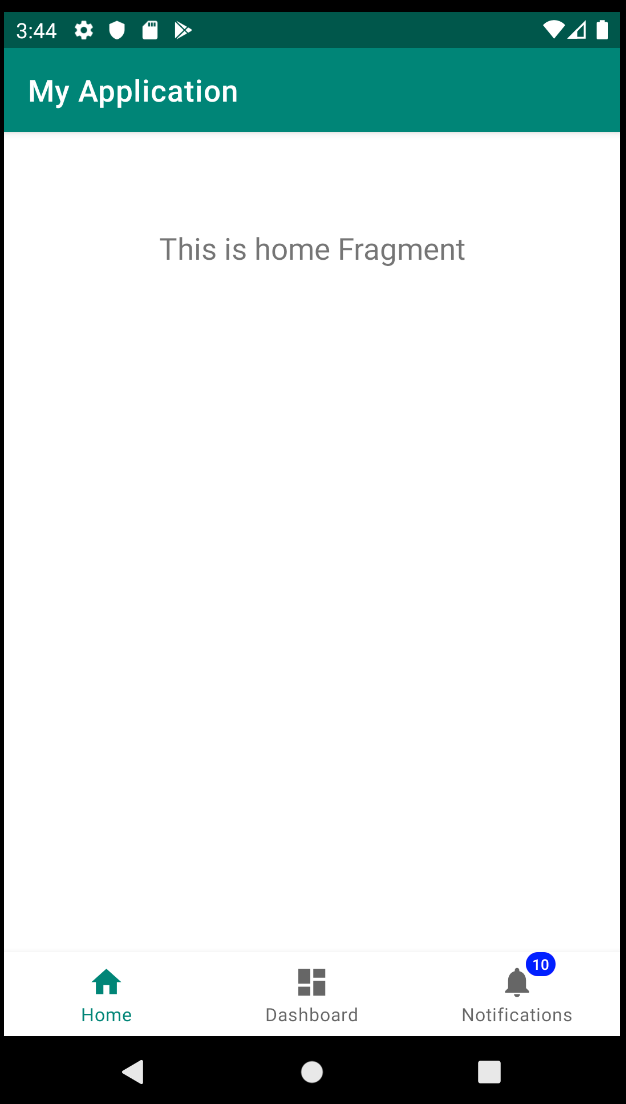
また、バッジの背景色はbackgroundColorで変更が可能です。
navView.menu.getItem(2).itemId.let {
    navView.getOrCreateBadge(it).apply {
        backgroundColor = Color.BLUE
        number = 10
    }
}
参考
BottomNavigationViewにバッジを表示する
【Android】MaterialComponentsのComponent別Badge付け方まとめ
Material Components for Android