まえがき
先週末、仕事で東京から岡山まで行く機会があり、新幹線の中で一人でハッカソンしてみたら、意外と0から作ってサービスを公開するところぐらいまではできました。当日の経過のログが誰かの助けになればと思い、投稿。TsuyoshiNumano/emojishare にコードは公開してます&要所要所で Pull Request を分けました。 サービスづくりの雰囲気だけでも感じ取ってもらえれば幸いです。
サービス自体は流行らないと思うので、そのうち消すと思います(ドメイン代とかもかかるし汗)
当日の twitter 実況。
対象読者
- さくっと web サービスを作って公開してみたい方
- 割とフロントエンドよりの技術スタックなので、そのへんに興味ある方
*細かい技術的なところはお話しません。
使った技術スタック
-
create-react-app
React でサクッとアプリ作るならオススメ -
Google Apps Script & Google Spread Sheet
貧者のためのデータベースとスクリプト。これなしでは生きていけない。 -
Firebase Hosting
create-react-app との相性も良い。Google Domain でドメインを取って SPA をホスティングするのにちょうどよい。 -
material-ui
かんたんにそれっぽい ui 作るならこれ。 -
Google Domains beta
firebase とかで設定するのが楽
作ったもの
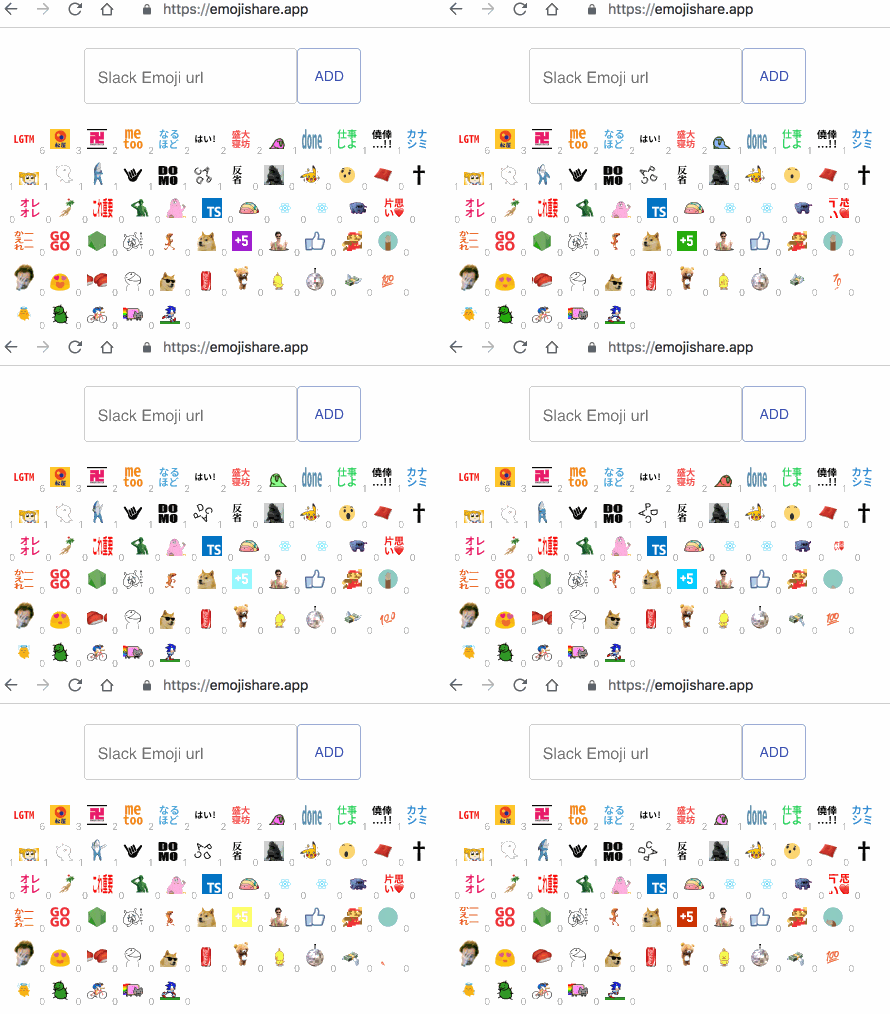
| Slack 絵文字の共有サービス |
|---|
 |
モチベーション
週末フリーランスでいろんな会社の slack に入ってるんだけど、会社独自の絵文字とか面白いのがあるよね!
— numa🏅さすらいのライターエンジニア@Lancers, inc. (@numanomanu) 2018年11月18日
そういうのをシェアする場がほしいなと思って、サービス作ってみました。https://t.co/wRL02bk5QB
ぜひ、御社の絵文字登録して slack 絵文字界隈を盛り上げましょう!
#新幹線ハッカソン
さっそく制作過程
1. 製作開始
品川駅からスタート
新幹線で品川出発した。
— numa🏅さすらいのライターエンジニア@Lancers, inc. (@numanomanu) 2018年11月18日
最近新幹線内プログラミングが自分の中でブームなので、なんかwebサービス開発しよかな。
アイデアは何個かあるのでどれかやる。#社員さすらいワーク #新幹線ハッカソン
2. リポジトリを作成
Slack の絵文字を共有するサービスをつくることにした。
— numa🏅さすらいのライターエンジニア@Lancers, inc. (@numanomanu) 2018年11月18日
とりあえず、このオープンなリポジトリにコミットしていく。https://t.co/8TmeT8tCiv
岡山駅までいくのであと2時間ちょいぐらいあるかな〜。できるかなー。
#新幹線ハッカソン
3. おもむろに create-react-app
yarn create react-app fron-react
4. List を表示するベースを作る
fron-react/src/App.js を編集
import React, { Component } from 'react';

class App extends Component {
  constructor() {
    super();
    this.state = {
      emojiList: [
        {
          url:
            'https://emoji.slack-edge.com/T02HHLFPR/lgtm/393f650bcf7d2b0a.png',
          likeCount: 0
        }
      ]
    };
  }

  render() {
    return (
      <div>
        <div>emojishare</div>
        <div>
          {this.state.emojiList.map((emoji, i) => (
            <img alt={emoji.url} key={'emoji' + i} src={emoji.url} width="20px" />
          ))}
        </div>
      </div>
    );
  }
}

export default App;
| 結果 |
|---|
 |
このへんで富士山が見えた。
5. データを入力して List に追加する
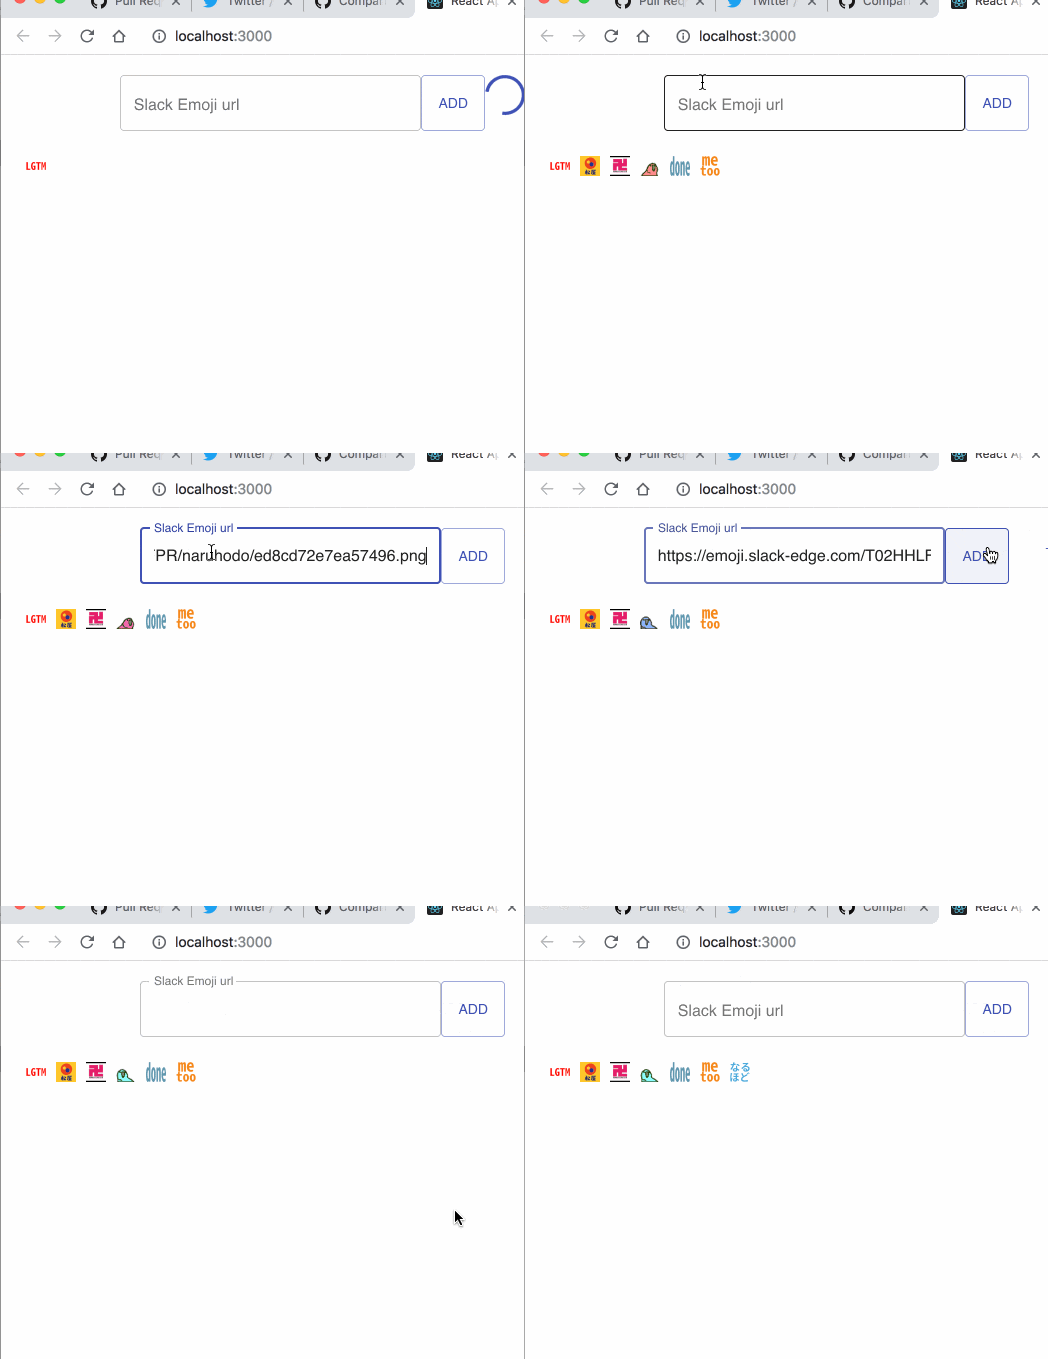
とりあえず入力して、リストに追加するまで作った。https://t.co/LStF9kj4Ts
— numa🏅さすらいのライターエンジニア@Lancers, inc. (@numanomanu) 2018年11月18日
#新幹線ハッカソン pic.twitter.com/ehtvFU9JR8
...
    this.state = {
      inputValue: ''
    };
  }

  hadleChange = e => {
    this.setState({ inputValue: e.target.value });
  };

  handleSubmit = e => {
    this.setState({
      emojiList: [
        ...this.state.emojiList,
        { url: this.state.inputValue, likeCount: 0 }
      ]
    });
    this.setState({ inputValue: '' });
  };

  render() {
    return (
      <div>
        <div>emojishare</div>
        <input
          type="text"
          placeholder="Please add your Emoji's url"
          value={this.state.inputValue}
          onChange={this.hadleChange}
        />
        <button onClick={this.handleSubmit}>add</button>
        <div>
          {this.state.emojiList.map((emoji, i) => (
            <img alt={emoji.url} key={'emoji' + i} src={emoji.url} width="20px" />
          ))}
        </div>
      </div>
    );
...
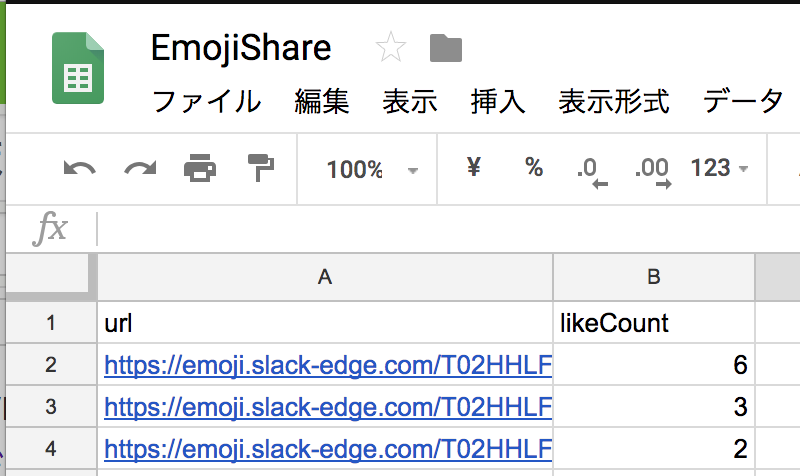
6. GASで簡易 API サーバーを作る
DB は時間もないので Google Spreadsheet & GAS の構成で。https://t.co/wrtQmueY4P
— numa🏅さすらいのライターエンジニア@Lancers, inc. (@numanomanu) 2018年11月18日
#新幹線ハッカソン
WEB API としての公開などはこちらを参考に: 3分で API を作って世の中にデプロイするライブコーディング〜今日から君もスピードスターエンジニア〜
function doGet(e) {
  var response = {
    data: [],
    meta: { status: 'success' }
  };

  var sheet = SpreadsheetApp.getActiveSheet();
  var sheetData = sheet.getRange('A2:B' + sheet.getLastRow()).getValues();

  var responseList = [];

  sheetData.map(function(d) {
    responseList.push({ url: d[0], likeCount: d[1] });
  });

  response.data = responseList;

  return ContentService.createTextOutput(JSON.stringify(response)).setMimeType(
    ContentService.MimeType.JSON
  );
}
| DB |
|---|
 |
7. 簡易 API サーバーからのデータの取得
axios をつかって GAS の API にフロント側からリクエストを行う
yarn add axios
import axios from 'axios';

...

  componentDidMount() {
    axios
      .get(
        'https://script.google.com/macros/s/AKfycbyw9qQBpO7rm89iFWFjaslKcEqm4C72Z2smPh0rtcC68hMVGXI/exec'
      )
      .then(response => {
        console.log(response);
        this.setState({
          emojiList: response.data.data
        });
      });
  }

...
8. API にデータを送り、フロントと連動するようにする
- 入力したデータを API サーバーに送りつけて
- スプレッドシートで作った DB に追加
入力を GAS のデータベースと連携することまではきた。
— numa🏅さすらいのライターエンジニア@Lancers, inc. (@numanomanu) 2018年11月18日
もうすぐ名古屋。https://t.co/n9PNemZAdk
#新幹線ハッカソン pic.twitter.com/2QfYblmv9B
-  var sheetData = sheet.getRange('A2:B' + sheet.getLastRow()).getValues();
-
-  var responseList = [];

-  sheetData.map(function(d) {
-    responseList.push({ url: d[0], likeCount: d[1] });
-  });
+  if (e.parameter.url) {
+    sheet.appendRow([e.parameter.url, 0]);
+  }

+  var responseList = getData(sheet);
   response.data = responseList;

   return ContentService.createTextOutput(JSON.stringify(response)).setMimeType(
     ContentService.MimeType.JSON
   );
 }
+
+function getData(sheet) {
+  var sheetData = sheet.getRange('A2:B' + sheet.getLastRow()).getValues();
+
+  var responseList = [];
+
+  sheetData.map(function(d) {
+    responseList.push({ url: d[0], likeCount: d[1] });
+  });
+  return responseList;
+}
   handleSubmit = e => {
-    this.setState({
-      emojiList: [
-        ...this.state.emojiList,
-        { url: this.state.inputValue, likeCount: 0 }
-      ]
-    });
+    if (!this.state.inputValue) {
+      return;
+    }
+
+    axios
+      .get(
+        'https://script.google.com/macros/s/AKfycbyw9qQBpO7rm89iFWFjaslKcEqm4C72Z2smPh0rtcC68hMVGXI/exec?url
+          encodeURI(this.state.inputValue)
+      )
+      .then(response => {
+        this.setState({
+          emojiList: response.data.data
+        });
+      });
     this.setState({ inputValue: '' });
   };
ここで、 axios.post を使っていないのは CORS 問題でブラウザから GAS へは GET しかできないからです。
GETのクエリパラメータに無理やり送りたいデータをつけて送ってます。
名古屋あたり。
9. material-ui を入れて ui をリッチにする
yarn add @material-ui/core
import TextField from '@material-ui/core/TextField';
import Button from '@material-ui/core/Button';
import CircularProgress from '@material-ui/core/CircularProgress';

...

        <div className="button-and-text">
          <TextField
            className="text-field"
            type="text"
            label="Slack Emoji url"
            placeholder="Please add your Emoji's url"
            value={this.state.inputValue}
            onChange={this.hadleChange}
            variant="outlined"
          />
          <Button
            onClick={this.handleSubmit}
            variant="outlined"
            color="primary"
          >
            add
          </Button>
          <div>{this.state.loadingFlag && <CircularProgress />}</div>
        </div>

...
10. 簡単なバリデーションを入れる。
なんだかんだサービス作るのって、単純なアプリケーションのコーディングよりも、バリデーションとかセキュリティとかでめっちゃ時間使う気がする。
— numa🏅さすらいのライターエンジニア@Lancers, inc. (@numanomanu) 2018年11月18日
京都についた。もうすぐ新大阪。岡山までに公開できるのか!?https://t.co/a86MHudhR8
#新幹線ハッカソン pic.twitter.com/7YvzevnyDr
京都に着。
11. Firebase にデプロイ
この辺を参考に Firebase Hosting でWebサイトを公開する方法
npm install -g firebase-tools
firebase init
ホスティングを選択して、deploy するフォルダを build にする。←地味に大事。
~/work/emojishare/front-react firebase init                 (git)-[feat/emojilist]

     ######## #### ########  ######## ########     ###     ######  ########
     ##        ##  ##     ## ##       ##     ##  ##   ##  ##       ##
     ######    ##  ########  ######   ########  #########  ######  ######
     ##        ##  ##    ##  ##       ##     ## ##     ##       ## ##
     ##       #### ##     ## ######## ########  ##     ##  ######  ########

You're about to initialize a Firebase project in this directory:

  /work/emojishare/front-react

? Which Firebase CLI features do you want to setup for this folder? Press Space to select features, then Enter to conf
irm your choices. Hosting: Configure and deploy Firebase Hosting sites

=== Project Setup

First, let's associate this project directory with a Firebase project.
You can create multiple project aliases by running firebase use --add,
but for now we'll just set up a default project.

? Select a default Firebase project for this directory: [create a new project]

=== Hosting Setup

Your public directory is the folder (relative to your project directory) that
will contain Hosting assets to be uploaded with firebase deploy. If you
have a build process for your assets, use your build's output directory.

? What do you want to use as your public directory? build
? Configure as a single-page app (rewrite all urls to /index.html)? Yes
? File build/index.html already exists. Overwrite? No
i  Skipping write of build/index.html

i  Writing configuration info to firebase.json...
i  Writing project information to .firebaserc...

✔  Firebase initialization complete!

Project
ここまで来たらビルドしてデプロイする
yarn build
firebase deploy
firebase で deploy するとこまで来た。。。
— numa🏅さすらいのライターエンジニア@Lancers, inc. (@numanomanu) 2018年11月18日
もう結構疲れた。
新神戸。
なんとか品川から岡山までには WEB サービスを作ってデプロイできた。https://t.co/cUJCvoEgT2
#新幹線ハッカソン
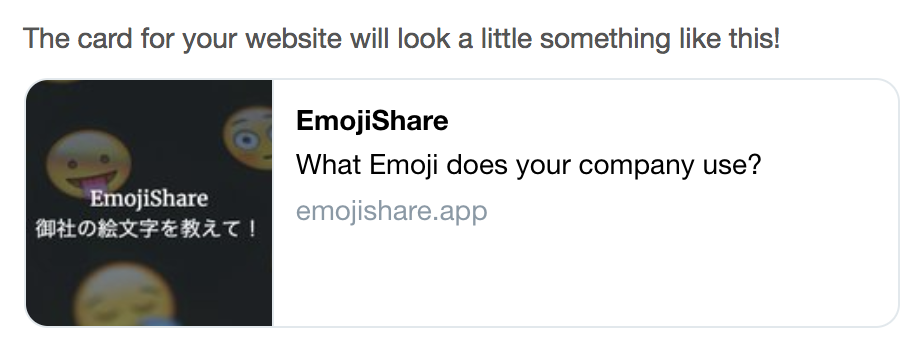
12. OGP を設定する
ogp 作るならこのサイトがオススメ
https://pablo.buffer.com
13. Google Domain でドメインを取得する
こちらの記事がとてもわかり易いので割愛!
.appドメインはFirebase hostingとの相性が抜群
14. アイデアをもらったランキングシステムを実装
簡単にインポートできて、ランキングあれば使うサービス!
— たばてぃしゃちょー (@gahara_p) 2018年11月18日
細かいので詳細は以下
https://github.com/TsuyoshiNumano/emojishare/pull/9
15. 完成
ゴール!
最後ちょっと延長戦しましたが、なんとか品川から岡山までで、 API 通信するようなサービスを作って OGP を設定しドメインを取って公開するところまで行きました。
岡山ついたけど、延長戦で駅構内で開発。
— numa🏅さすらいのライターエンジニア@Lancers, inc. (@numanomanu) 2018年11月18日
駅構内では新幹線到着の音が心臓にめちゃくちゃ悪い笑
#新幹線ハッカソン
まとめ
- 割とフロントエンド技術だけでウェブサービスを作ってさっさと公開できる。
- 新幹線の移動時間でも簡単な WEB アプリは思ったより簡単に作れる!
- ぱっと作るのは簡単だけど、このあとセキュリティとか、バリデーションとか、パフォーマンスを考え出すと、運用は色々工夫が必要。
今回のは react でつくりましたが、別に vue.js でも jQuery でもできると思います。(単に自分が最近この構成に慣れてるだけ)
みなさんも、是非オススメのプロトタイピングな開発スタックを教えてください。
Tips
- 新幹線は窓側に電源ある。
- できれば進行方向最前列だとちょっとスペースが広い。
- この記事はだいたい帰りの新幹線で。
- 東京から関西方面だと、神戸ぐらいにいくなら実は西明石までの往復きっぷの方が安い

