検索したら意外とヒット少なかったので記事化
初学者ゆえ適切でないコードや表現があるかと思います。その際は優しくご指導いただけますと幸いです。
開発環境
- macOS Catalina 10.15.7
- Docker 20.10.2
作業ディレクトリ作成
mkdir hoge/app
cd app
npm init
適当な場所に作業ディレクトリを作成&npm init
package nameとかは適当なものを選択。
server.js作成
touch server.js
npm i --save express
const express = require("express");
const app = express();

app.get("/", (req, res) => {
  res.send("Hello World!");
});

app.listen(9000, () => {
  console.log("The app listening on port 5000");
});
nodemon設定
node server.jsだとserver.jsを書き換えるたびに再起動しなければならないため、nodemonを設定しておく。
npm i --save nodemon
  "scripts": {
    "start": "nodemon server.js"
  }
node.jsのイメージを作成
node.jsの公式ドキュメントを参考にコンテナを作成する。
Dockerfile編集
cd ..(appからhogeへ移動)
touch Dockerfile
# ベースイメージ
FROM node:14.15.4

# 作業ディレクトリ
WORKDIR /usr/src

# packages.jsonを個別にコピーする理由は後述
COPY/packages*.json ./
RUN npm install

# その他のファイル群もコンテナへコピー
COPY / ./

EXPOSE 5000

# サーバースタート
CMD ["npm", "start"]
npm_modulesをignoreする
npm_modules
npm-debug.log
npm_modulesをコピーするのは時間がかかるのでignoreして、先述のnpm installで作成する。
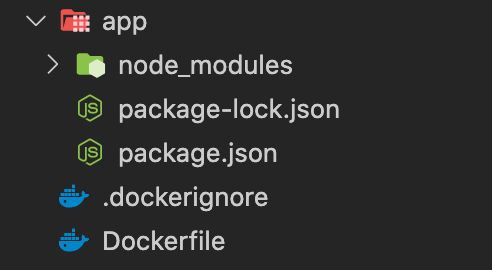
現在のhogeディレクトリ構成はこんな感じ
buildする
docker build -t hoge/node .
-t: タグをつけるオプション(イメージの名前になる)
Successfully built 英数字
Successfully tagged hoge/node:latest
↑こうなったらOK
コンテナ作成
Express、Postgresを組み合わせたコンテナを作成していく。
みんな大好きdocker-compose
touch docker-compose.yml
touch .env
version: "3"
services:
  app:
    # docker-compose up実行時に開始する関連サービス(上から順に実行)
    depends_on:
      - postgres
    # コンテナを実行するときの元となるimage(さっき作ったやつ)
    image: hoge/node
    # コンテナの名前
    container_name: "hoge_express-pg"
    # マウントするパス(ホストの相対パス:DockerfileのWORKDIRからの絶対パス)
    volumes:
      - ./app:/usr/src/app
    # ホストマシンにつなげるポート(ホスト:コンテナ)
    ports:
      - 5000:9000
    # 環境変数
    env_file: .env
    # コンテナの永続化
    tty: true

  postgres:
    image: postgres:13-alpine
    container_name: postgres
    ports:
      - 5432:5432
    volumes:
      - ./postgres/init:/docker-entrypoint-initdb.d
    env_file: .env
    hostname: postgres
    # rootにしないとあとで「権限ないで」って言われる
    user: root

  # ブラウザでdbを確認できるすごいヤツ(任意)
  pgadmin4:
    image: dpage/pgadmin4:4.20
    container_name: pgadmin4
    depends_on:
      - postgres
    ports:
      - 80:80
    volumes:
      - ./pgadmin:/var/lib/pgadmin/storage
    env_file: .env
    hostname: pgadmin4
volumesに指定したパスはホストマシンとコンテナとでファイルが共有されて便利。
POSTGRES_USER=hoge
POSTGRES_PASSWORD=hoge
POSTGRES_INITDB_ARGS=--encoding=UTF-8

TZ=Asia/Tokyo

PGADMIN_DEFAULT_EMAIL=root
PGADMIN_DEFAULT_PASSWORD=root
POSTGRES_~: dbのログイン情報と設定
TZ: TimeZone
PGADMIN_DEFAULT_~: pgAdmin4のログイン情報
動作確認
docker-compose up
postgres  | 2021-01-23 01:24:24.380 JST [1] LOG:  database system is ready to accept connections
~
hoge_express-pg | [nodemon] starting `node server.js`
hoge_express-pg | The app listening on port 5000
~
pgadmin4  | [2021-01-22 16:24:29 +0000] [1] [INFO] Listening at: http://[::]:80
こんな感じに3つのコンテナの起動が確認できたらOK。
ブラウザ
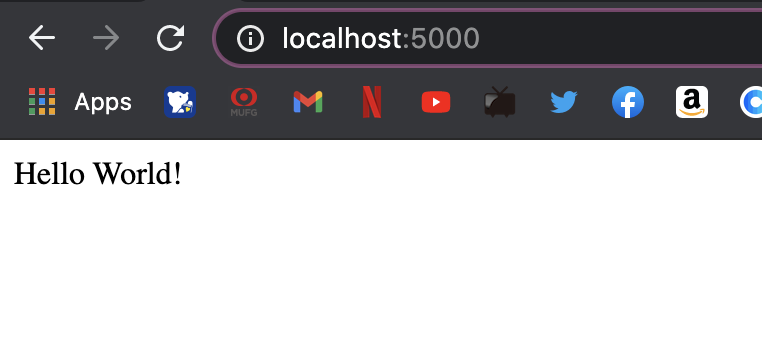
ブラウザでlocalhost:5000にアクセスするとHello World!できる。

db作成
Ctrl+Cで一度コンテナを終了し、自動生成されたpostgres/initフォルダにSQLファイルを追加する。
ここに配置されたSQLはコンテナ開始時に実行されるので、db作成の他、初期データの設定にも便利。
touch postgres/init/template.sql
CREATE DATABASE development
作成したらもう一度docker-compose upしておく。
pgAdmin4初期設定(任意)
ブラウザでlocalhost:80にアクセス
こんな感じの画面が出るので、.envで設定したユーザー名とパスワードでログイン。
ちなみに、dpage/pgAdmin4:4は何故かこの段階でログインできない不具合があるようです(これに気づくのに一晩費やした)。
サーバー追加
ログインしたらAdd New ServerのConnectionタブで
- Host: postgres
- Port: 5432
- Mentenance database: postgres
- Username: hoge
- Password: hoge
左のサーバー一覧にpostgresとその中にdevelopmentdbが表示されればOK。
もしコンテナ作成後に.envでパスワードなどを変更した場合は一度コンテナを削除してから再度接続を行う必要があるので注意。
Sequelize設定
ここからはコンテナ内で作業する(けどvolumesで共有されているのでほとんどの作業はホスト側でやっても平気←Docker使う意味は??)
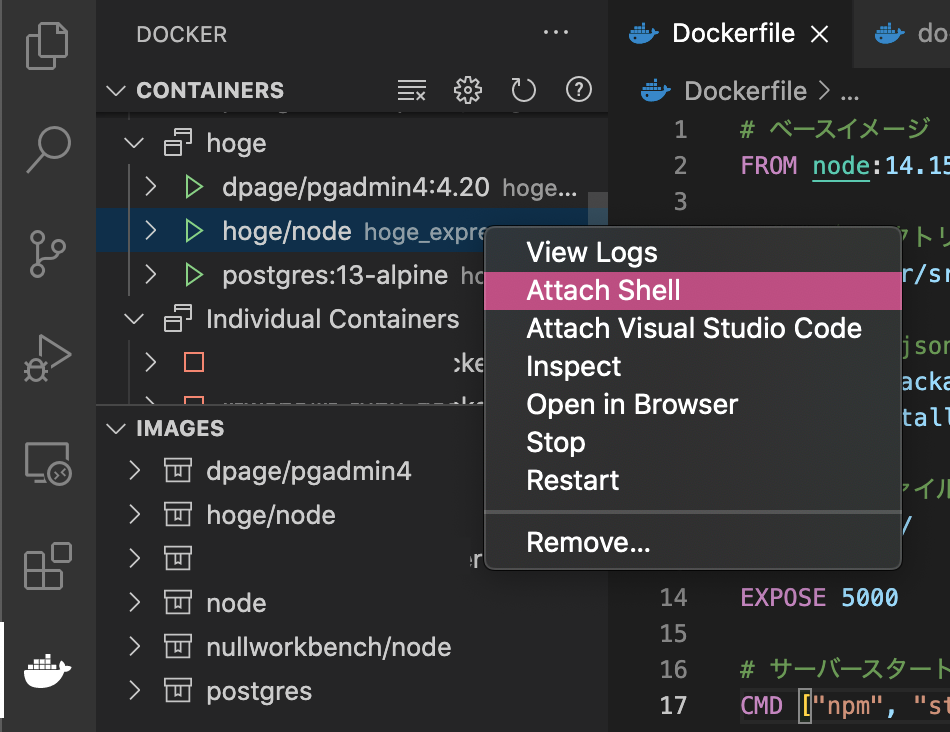
VSCodeでDockerの拡張機能を入れてると、ここから簡単にコンテナのbashを起動できる
各種パッケージインストール&Sequelize初期設定
npm i --save sequelize sequelize-cli pg
npx sequelize-cli init
npx sequelize-cli initをすると、config, models, migrations, seedersフォルダが作成される
このディレクトリ名を見てわかるように、SequelizeはRubyのActiveRecordのようにdbのマイグレーションがJSでできるようになるスグレもの
config.json変更
{
  "development": {
    "username": "hoge", ←.envで設定したdbのログイン情報
    "password": "hoge",
    "database": "development", ←dbの名前
    "host": "postgres",
    "dialect": "postgres"
  },
  "test": {
    省略
  },
  "production": {
    省略
  }
}
これでSequelizeの設定は完了。
Sequelizeでdbへアクセス
modelを作成
npx sequelize-cli model:generate --name Post --attributes title:string,body:string
--name: model名
--attributes: modelが保有する属性(カラム)
migrations/日付-create-post、models/post.jsの2つが自動生成されているのを確認する。
"use strict";
module.exports = {
  up: async (queryInterface, Sequelize) => {
    await queryInterface.createTable("Posts", {
      id: {
        allowNull: false,
        autoIncrement: true,
        primaryKey: true,
        type: Sequelize.INTEGER,
      },
      title: {
        type: Sequelize.STRING,
      },
      body: {
        type: Sequelize.STRING,
      },
      createdAt: {
        allowNull: false,
        type: Sequelize.DATE,
      },
      updatedAt: {
        allowNull: false,
        type: Sequelize.DATE,
      },
    });
  },
  down: async (queryInterface, Sequelize) => {
    await queryInterface.dropTable("Posts");
  },
};
"use strict";
const { Model } = require("sequelize");
module.exports = (sequelize, DataTypes) => {
  class Post extends Model {
    /**
     * Helper method for defining associations.
     * This method is not a part of Sequelize lifecycle.
     * The `models/index` file will call this method automatically.
     */
    static associate(models) {
      // define association here
    }
  }
  Post.init(
    {
      title: DataTypes.STRING,
      body: DataTypes.STRING,
    },
    {
      sequelize,
      modelName: "Post",
    }
  );
  return Post;
};
マイグレーション
npx sequelize-cli db:migrate
> Sequelize CLI [Node: 14.15.4, CLI: 6.2.0, ORM: 6.4.0]

> Loaded configuration file "config/config.json".
> Using environment "development".
> == 20210123053140-create-post: migrating =======
> == 20210123053140-create-post: migrated (0.022s)
migratedとなればOK。
Expressからdbをさわってみる
Create
const express = require("express");
const app = express();

+ const models = require("./models/index");

app.get("/", (req, res) => {
  res.send("Hello World!");
});

+ // createして/へリダイレクトする
+ app.get("/create", (req, res) => {
+   await models.Post.create({
+     title: "sample title",
+     body: "sample body",
+   });
+   res.redirect("/");
+ });

app.listen(9000, () => {
  console.log("The app listening on port 5000");
});
modelsをrequireするとき、./models/だと失敗するので注意。
アクセス
localhost:5000/create
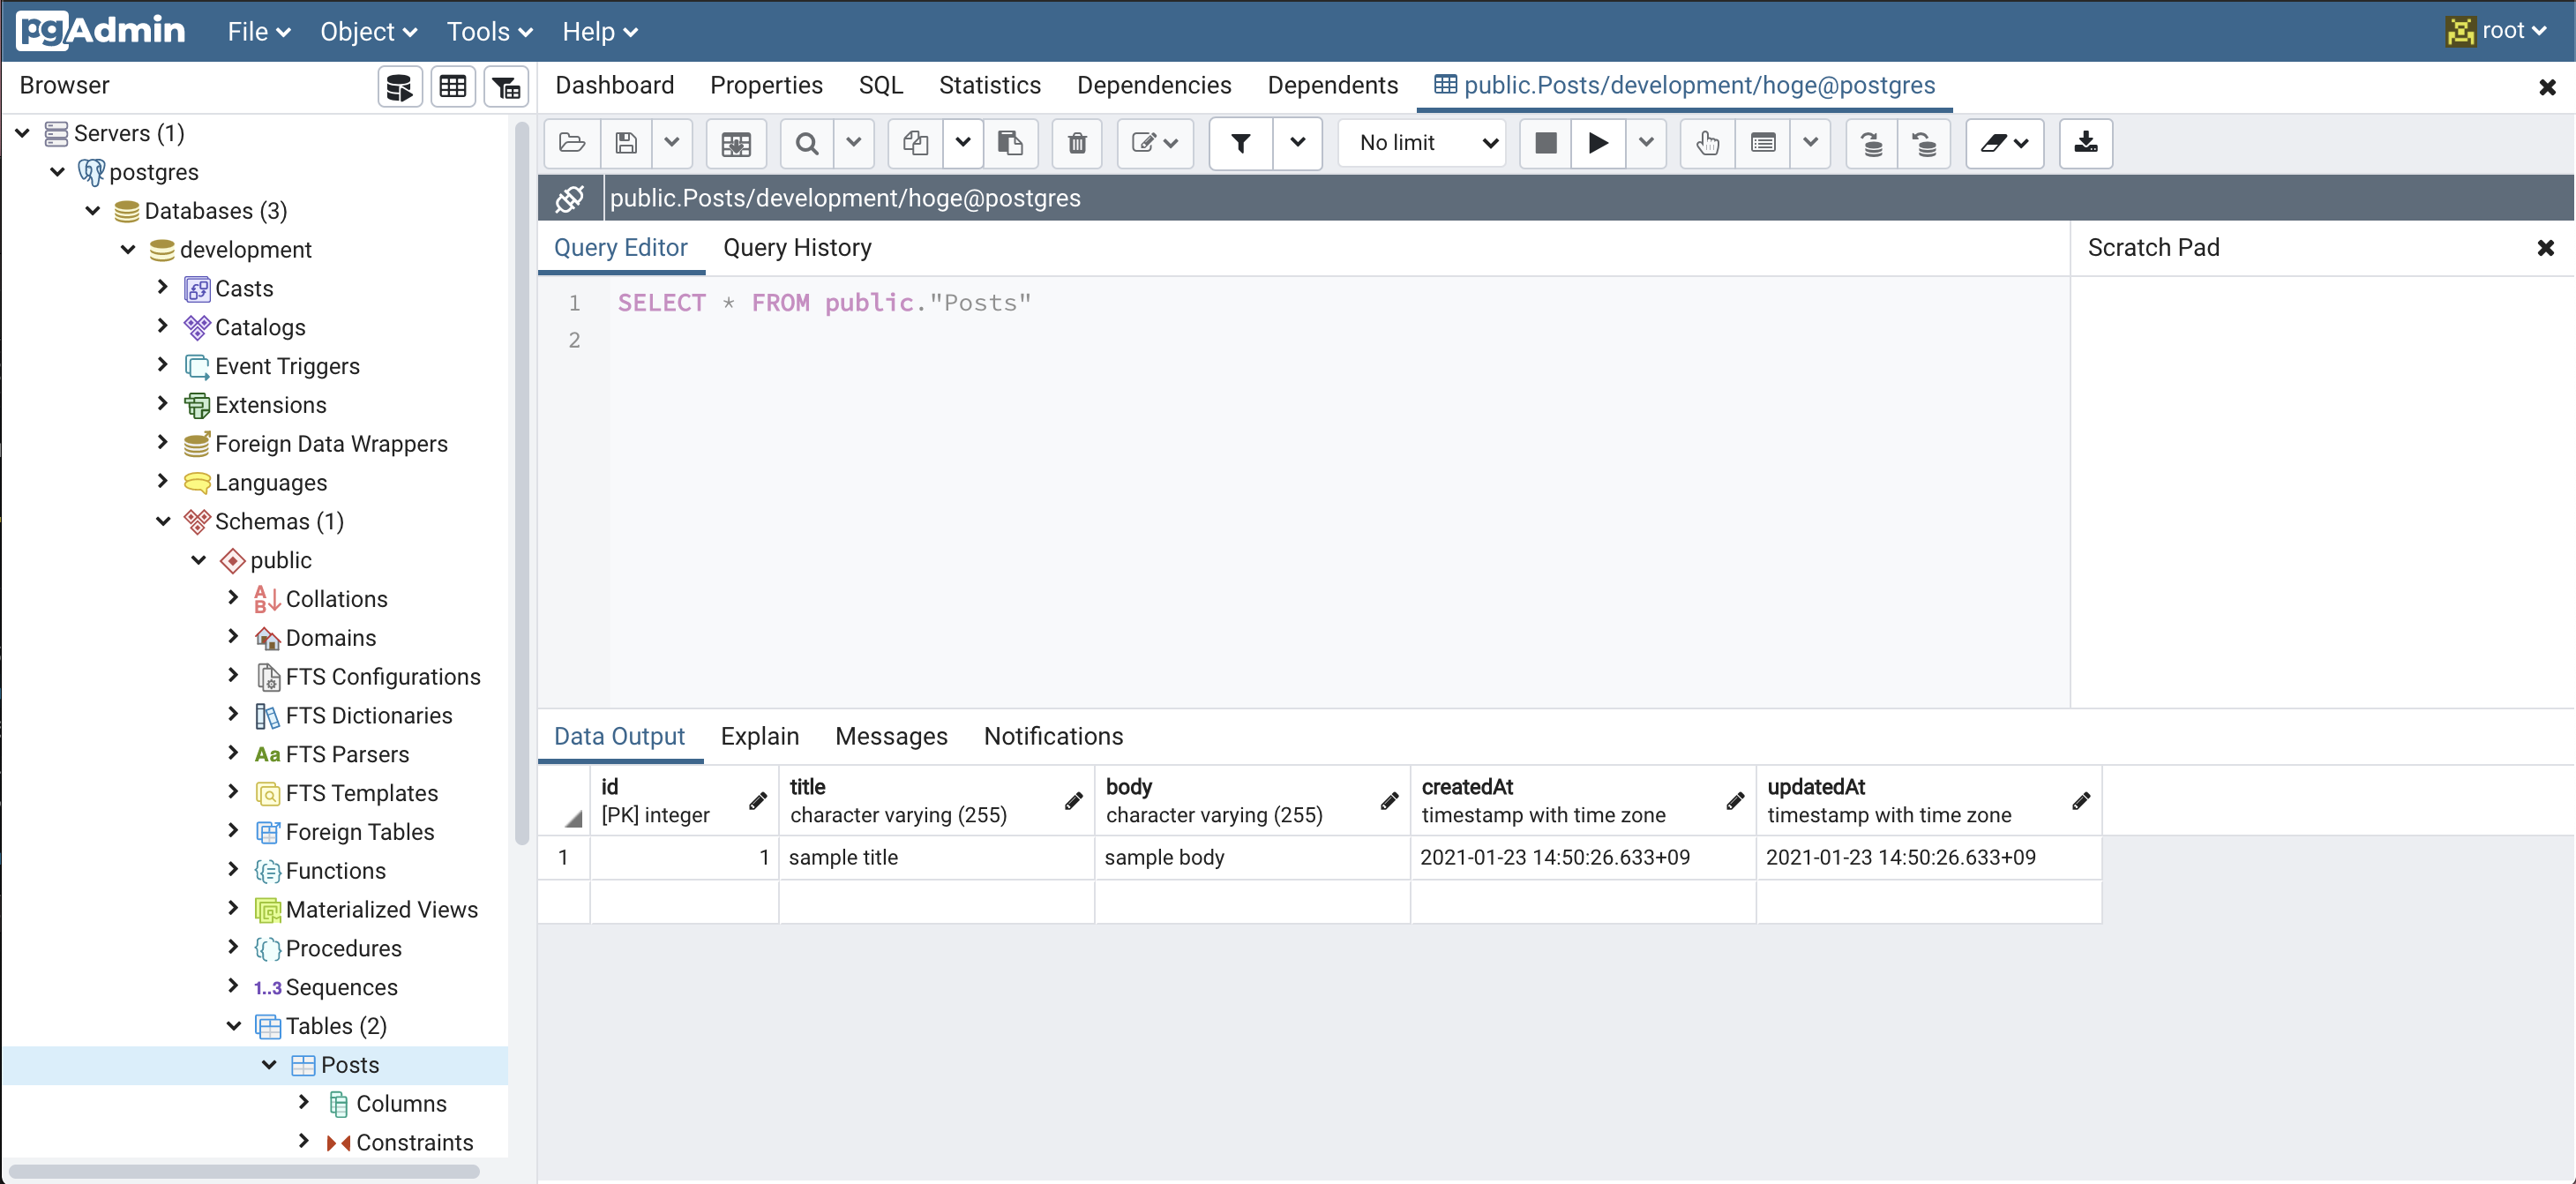
pgAdminで確認
Servers/postgres/Databases/development/Schemas/public/Tables/の中の先ほど生成したモデル名のテーブルを右クリックし、View/Edit Data->All Rows
Data OutputタブでデータがCreateされているのが確認できる。
Read
const express = require("express");
const app = express();

const models = require("./models/index");

// 全て取得して返す
app.get("/", (req, res) => {
+   models.Post.findAll().then((posts) => {
+     res.send(posts);
+   });
-   //   res.send("Hello World!");
});

// createして/へリダイレクトする
app.get("/create", (req, res) => {
  models.Post.create({
    title: "sample title",
    body: "sample body",
  });
  res.redirect("/");
});

app.listen(9000, () => {
  console.log("The app listening on port 5000");
});
アクセス
localhost:5000
無事に取得できているのが確認できた!
おしまい
あとはejsを入れたりしてviewを整形したり、bodyParserでFormデータを受け取ったりすればサービスとして本格的な開発が進められる。
今回のコード


