はじめに
Ubuntuの起動時にGUIユーザーとして自動ログインする方法を紹介する。
本記事は以下のような用途を想定している。
- VNCやRDPでGUIセッションを常時起動したい
- ヘッドレス環境でデスクトップを起動したい
自動ログインを有効にすると、PC起動時に認証なしでログインされるため、セキュリティリスクがある。共有環境や持ち運び可能な端末では利用に注意すること。
動作確認環境
- Ubuntu 22.04 x86_64/aarch64
- GDM3
方法
GUIとCUI、それぞれについて方法を紹介する。
- ディスプレイがない環境ではダミーディスプレイ設定(HDMIダミープラグやxrandrによる仮想ディスプレイ設定)が必要になる場合がある
- Wayland環境では一部のリモートデスクトップや自動起動が制限される場合がある
- VNCやxrdpを利用する場合は無効化を推奨
- 必要に応じて以下を設定する
- WaylandEnable=false
GUI
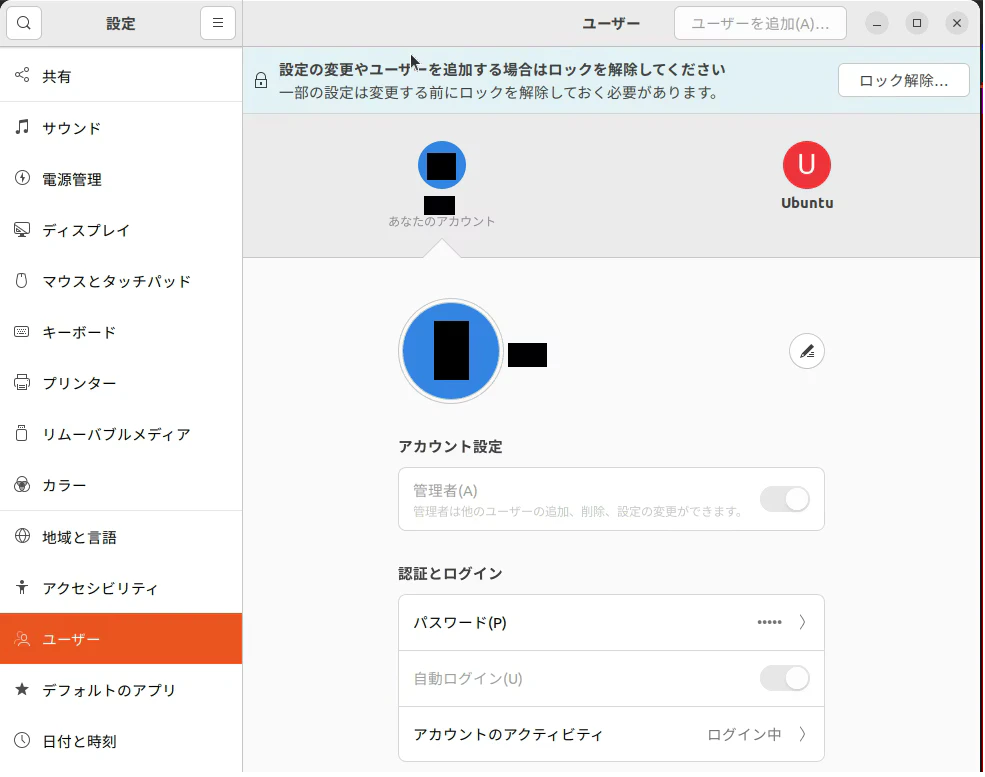
デスクトップ環境(設定画面)から自動ログインを設定する方法を紹介する。
「設定」-「ユーザー」で、「ロックの解除」ボタンを押し、自動ログインしたいユーザーの「自動ログイン(U)」を有効にする。次回以降、PC起動時に自動でログインされる。
CUI(CLIからGDM3設定を変更する方法)
ディスプレイマネージャーとして、GDM3を利用している場合のCUIでの設定方法を紹介する。
ディスプレイマネージャーの確認は以下のコマンドを実行する。
cat /etc/X11/default-display-manager
以下のようになればGDM3が利用されている。
/usr/sbin/gdm3
設定を変更する前に、現状のファイルのバックアップを以下のコマンドで取っておく。
sudo cp -a /etc/gdm3/custom.conf /etc/gdm3/custom.conf.bak 2>/dev/null || true
GDM3の設定ファイルを以下のコマンドで編集する。
sudoedit /etc/gdm3/custom.conf
[daemon]セクションの以下のコメントアウトを外して設定する。
AutomaticLoginEnable = true
AutomaticLogin = your-username
- your-username: 自身のユーザー名に置き換える
# GDM configuration storage
#
# See /usr/share/gdm/gdm.schemas for a list of available options.

[daemon]
# Uncomment the line below to force the login screen to use Xorg
#WaylandEnable=false

# Enabling automatic login
#  AutomaticLoginEnable = true
#  AutomaticLogin = user1

# Enabling timed login
#  TimedLoginEnable = true
#  TimedLogin = user1
#  TimedLoginDelay = 10

[security]

[xdmcp]

[chooser]

[debug]
# Uncomment the line below to turn on debugging
# More verbose logs
# Additionally lets the X server dump core if it crashes
# GDM configuration storage
#
# See /usr/share/gdm/gdm.schemas for a list of available options.

[daemon]
# Uncomment the line below to force the login screen to use Xorg
#WaylandEnable=false

# Enabling automatic login
AutomaticLoginEnable = true
AutomaticLogin = your-username

# Enabling timed login
#  TimedLoginEnable = true
#  TimedLogin = user1
#  TimedLoginDelay = 10

[security]

[xdmcp]

[chooser]

[debug]
# Uncomment the line below to turn on debugging
# More verbose logs
# Additionally lets the X server dump core if it crashes
#Enable=true
- your-username: 自動ログインさせたいユーザー名
ファイルを保存したら、以下のコマンドで設定を反映する。
sudo systemctl restart gdm3
実行すると現在のGUIセッションが切断されるため、リモート接続時は注意すること。
もしくは再起動してもよい。
sudo reboot now
設定反映後に、ログインユーザーのセッションが存在していることを確認する。
まずセッション一覧を確認する。
loginctl list-sessions
SESSION  UID USER    SEAT  TTY
  23169 1001 username seat0 tty2
表示されたセッション番号を指定して詳細を確認する。
loginctl show-session <SESSION>
- : セッション番号
Type=wayland または x11 が確認できれば、GUIセッションとしてログインできている。
Id=<SESSION>
User=1001
Name=user-name
...
Type=x11
(オプション)セキュリティ対策:自動で画面ロック
セキュリティ対策として、画面ロックのスクリプトを作成し、ログイン時に自動起動させる。これにより物理端末で閲覧されるリスクを低減する。
-
gnome-screensaverをインストール
下記でインストールしておく。sudo apt update sudo apt install gnome-screensaver -
スクリプトを作成
mkdir -p ~/bin
vi ~/bin/screensaver.sh
以下を記載する。
#!/bin/bash sleep 10 gnome-screensaver-command -l exit 0- 自動起動直後はセッションが安定していないため、sleepを入れないとエラーになる場合がある
以下のコマンドで実行権限付与する。
chmod +x ~/bin/screensaver.sh -
ログイン時にスクリプトを自動実行させる。
ログイン時にスクリプトを自動実行される方法は、著者の別記事を参照すること。- GUIの場合
- 「自動起動するアプリケーション」に、上記作成した、
screensaver.shを追加する。
- 「自動起動するアプリケーション」に、上記作成した、
- CUIの場合
-
~/.config/autostart/に、screensaver.desktopファイルを作成して保存する。screensaver.desktop[Desktop Entry] Type=Application Exec=/home/username/bin/screensaver.sh Hidden=false NoDisplay=false X-GNOME-Autostart-enabled=true Name[ja]=X Server Access Name=X Server Access Comment[ja]= Comment=- username: 自身のユーザー名に置き換える
-
- GUIの場合
環境によっては gnome-screensaver が利用されていない場合があるため、その場合は loginctl lock-session などを利用する。
まとめ
Ubuntuの起動時にGUIユーザーとして自動ログインする方法を紹介した。VNCなどのリモートデスクトップ接続などGUIセッションを起動しておきたいときに有用である。
参考