1 はじめに
LINEのボット機能を使ってwikipediaのような情報共有をする仕組みを作ります。
1.1 用意するもの
- PaizaCloudのアカウント
- LINEのアカウント
1.2 参考URL
#2 事前準備
ボットを作成するにはLINEアカウントで専用のチャネルを設定し、そこから呼び出されるサーバーサイドのエントリポイントを登録する必要があります。
2.1 webhookエントリポイントの設定
まず、今回のバックエンドサーバにはPaiza Cloudを利用します。LINEの開発ドキュメントではHerokuが利用されています。Paiza cloudは無料での利用は時間制限があるので、実際に仲間内でりようするのであればHerokuで構築するのも手だと思います。
(1) PaizaCloudの起動
いつものようにPaizaCloudを使って環境構築を行います。

(2) サーバーの作成
nodejs,postgresを選択して新規サーバー作成ボタンを押します。
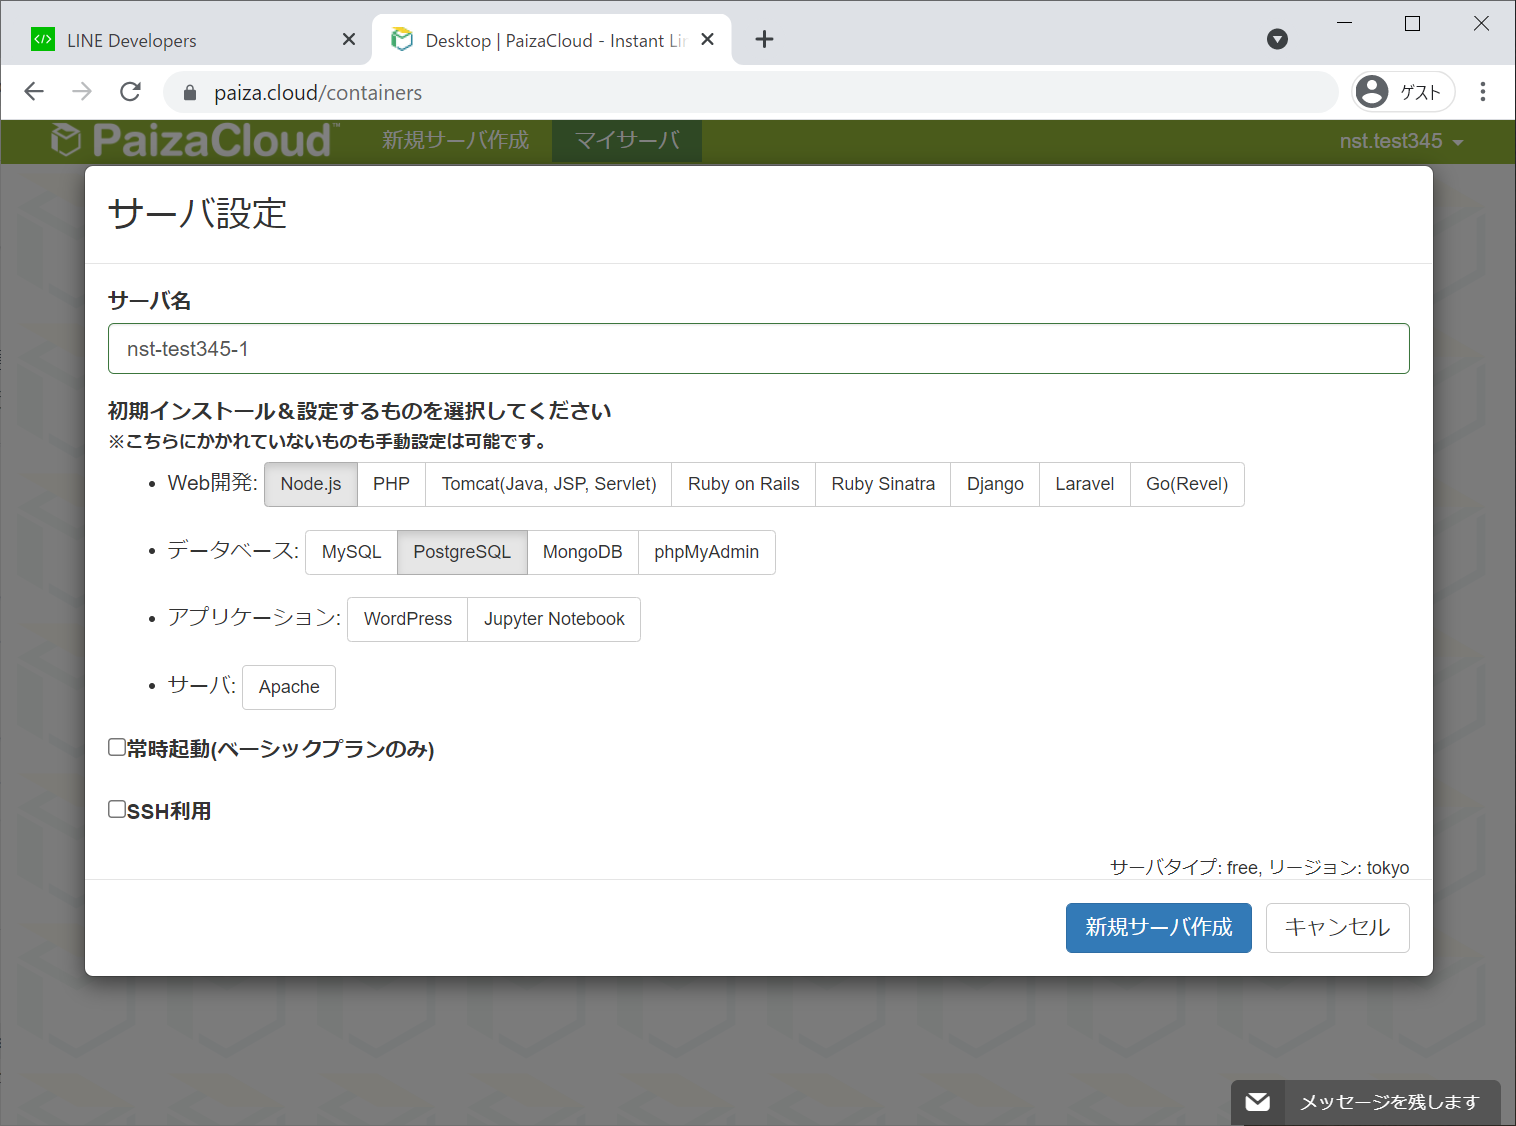
この時、上記の画面にあるサーバー名を控えておいてください。(この例ではnst-test345-1)
2.2 チャネル作成
手順はMessaging APIを始めように記載されていますが、簡単に解説します。
(1) LINE Developersコンソールにログインする
LINE Developersコンソールへアクセスする
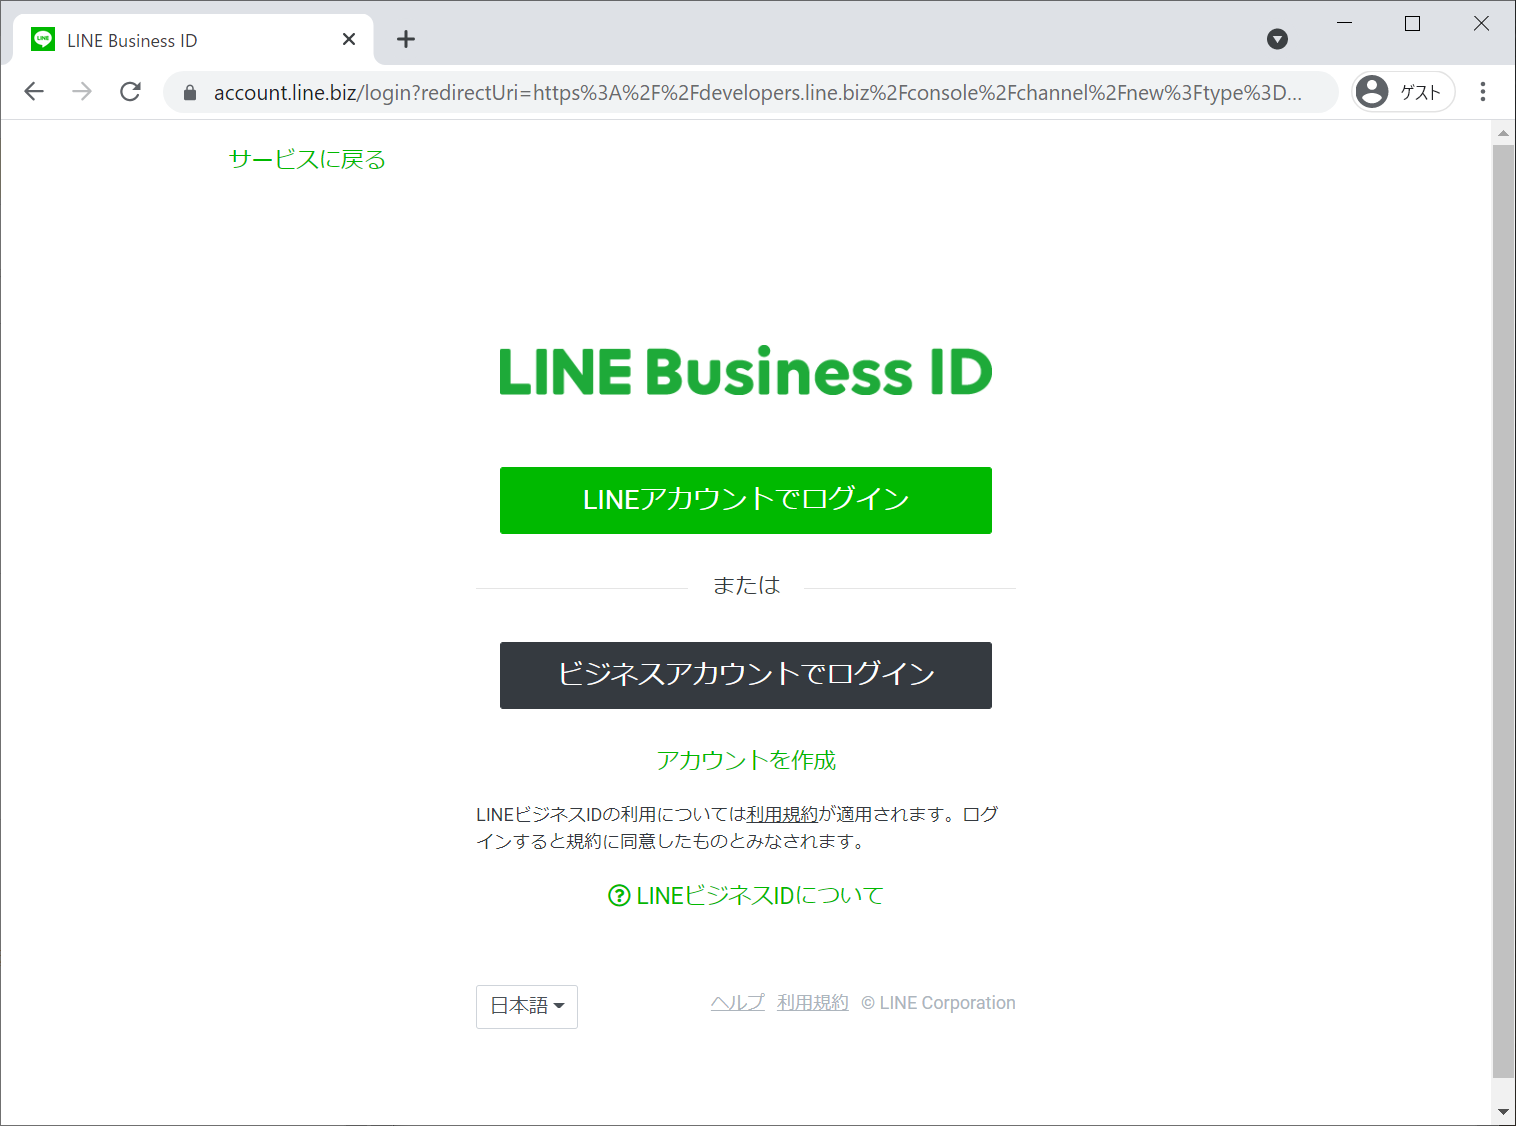
緑色のLINEアカウントでログインをクリックする
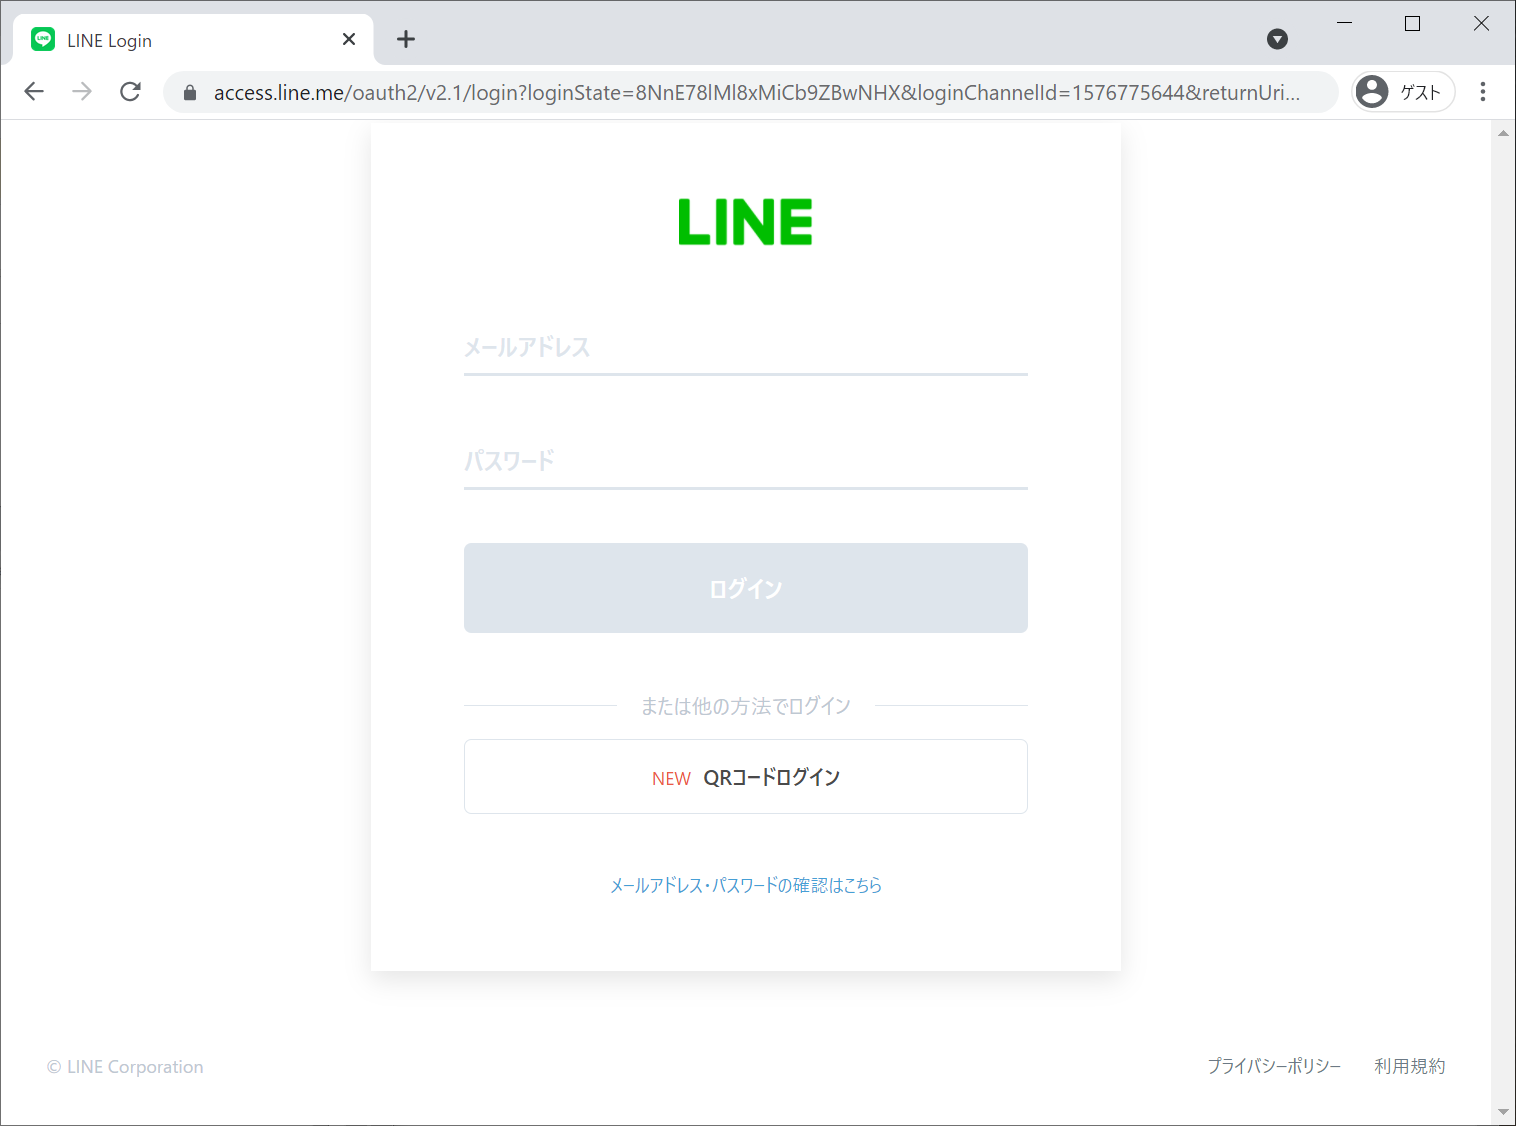
QRコードログインを選択し、表示されたQRコードをLINEで読み取ると、本人確認コードが表示されるので、これを確認する。
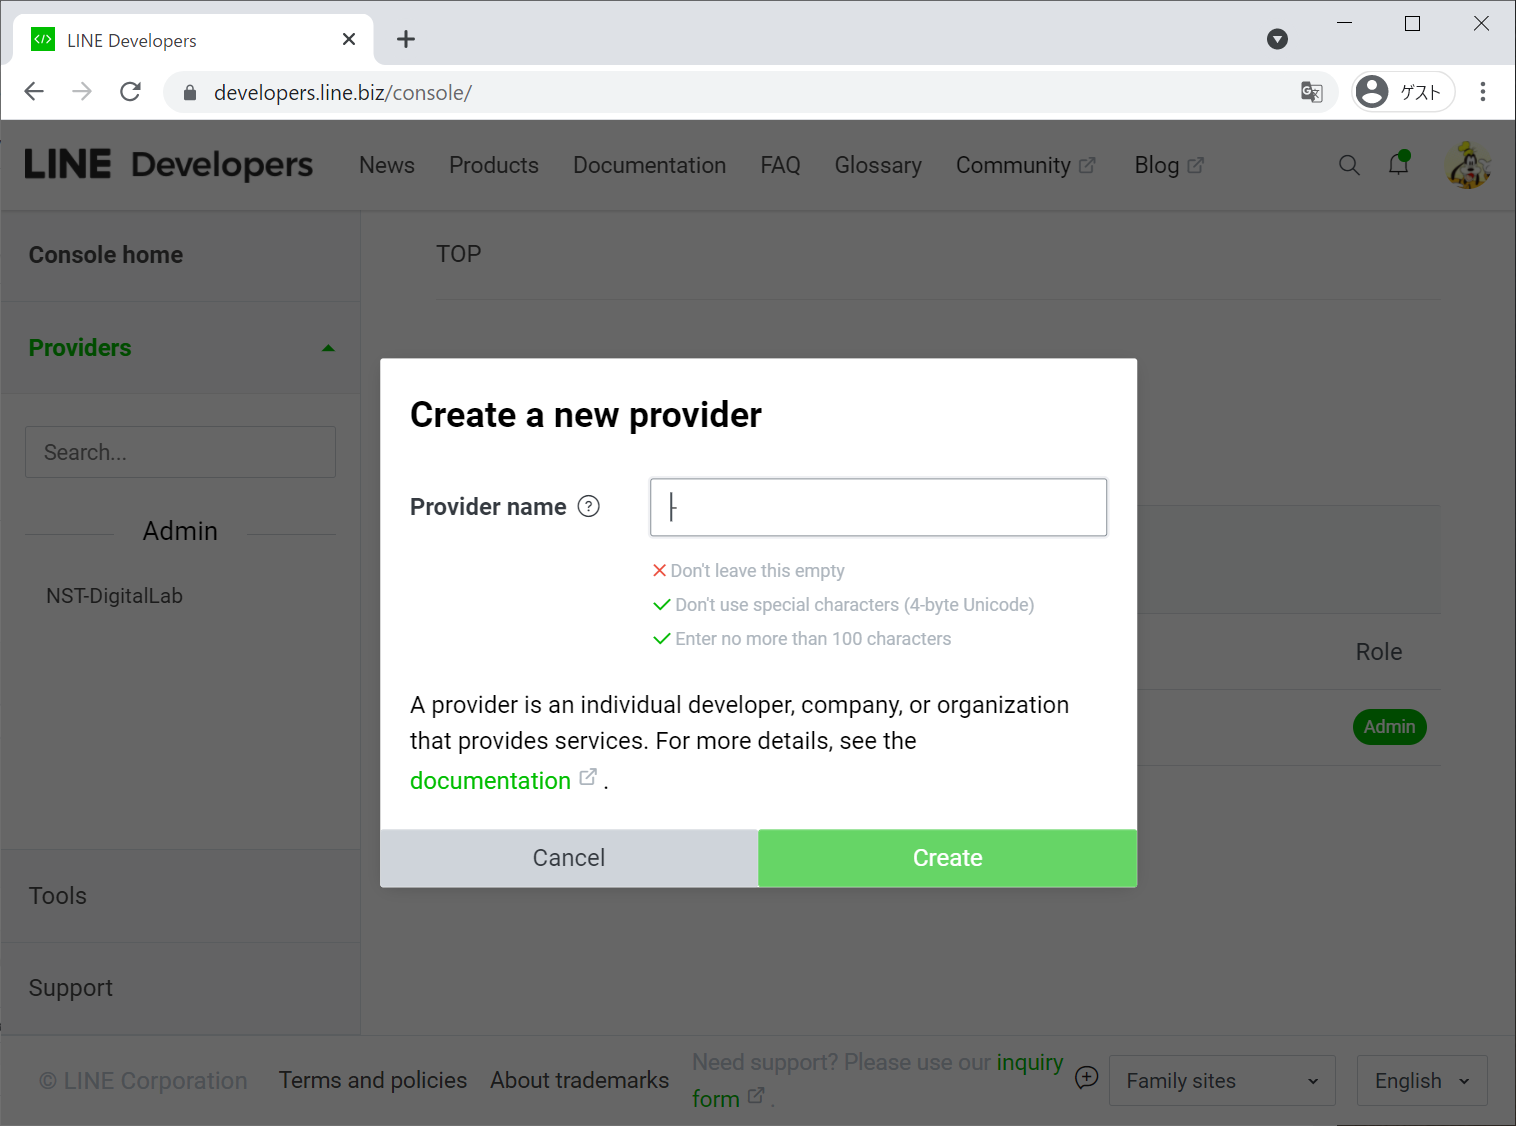
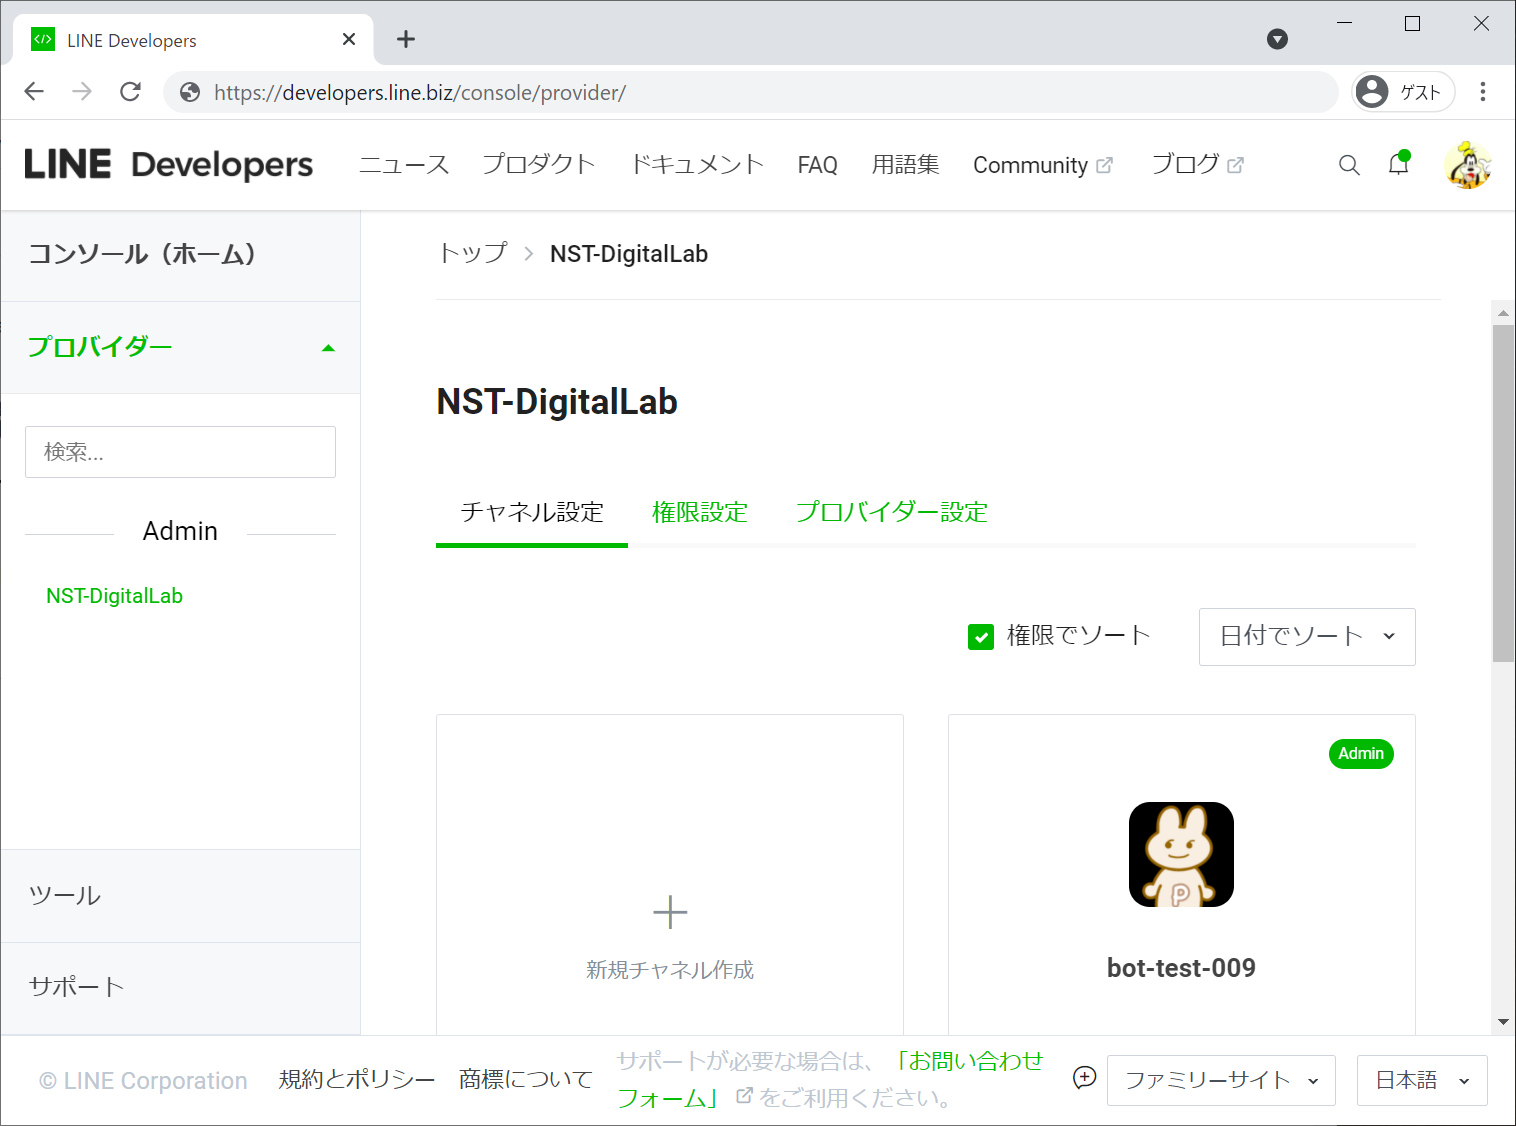
(2) プロバイダの作成
次にプロバイダを作成します。
(3) チャネルの作成
作成したプロバイダに紐づくチャネルを作成します。このチャネルの内容がLINEのボットアカウントで表示される内容です。

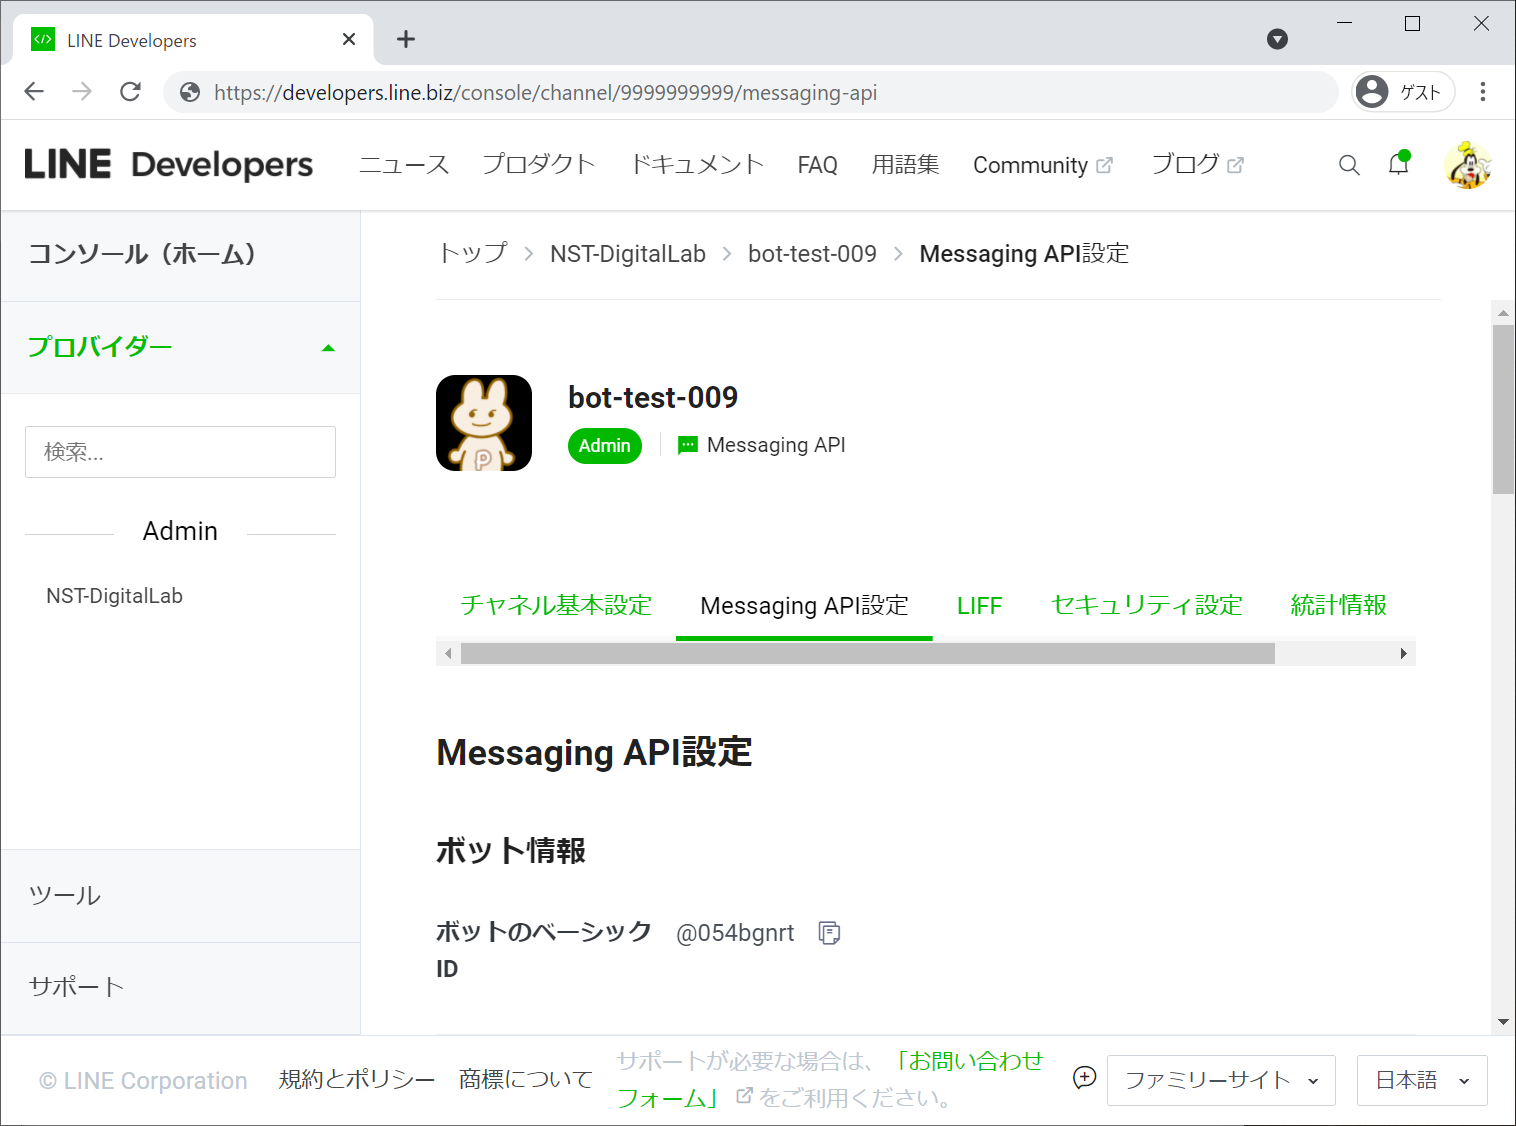
(4) チャネルシークレットの取得
再度プロバイダー画面を表示し、先ほど作成したチャンネルボタン(下記の画面右下)をクリックします
クリックして画面をスクロールさせるとチャネルシークレットという欄がありますので、そこに表示されているコピーしておきます。
(5) Webhookの利用を設定
先ほどの画面のトップにあるタブから「Messaging APIの設定」を選択します
下のほうにスクロールさせると、Webhook設定という欄がありますので、ここでWebhookの利用をONにします。
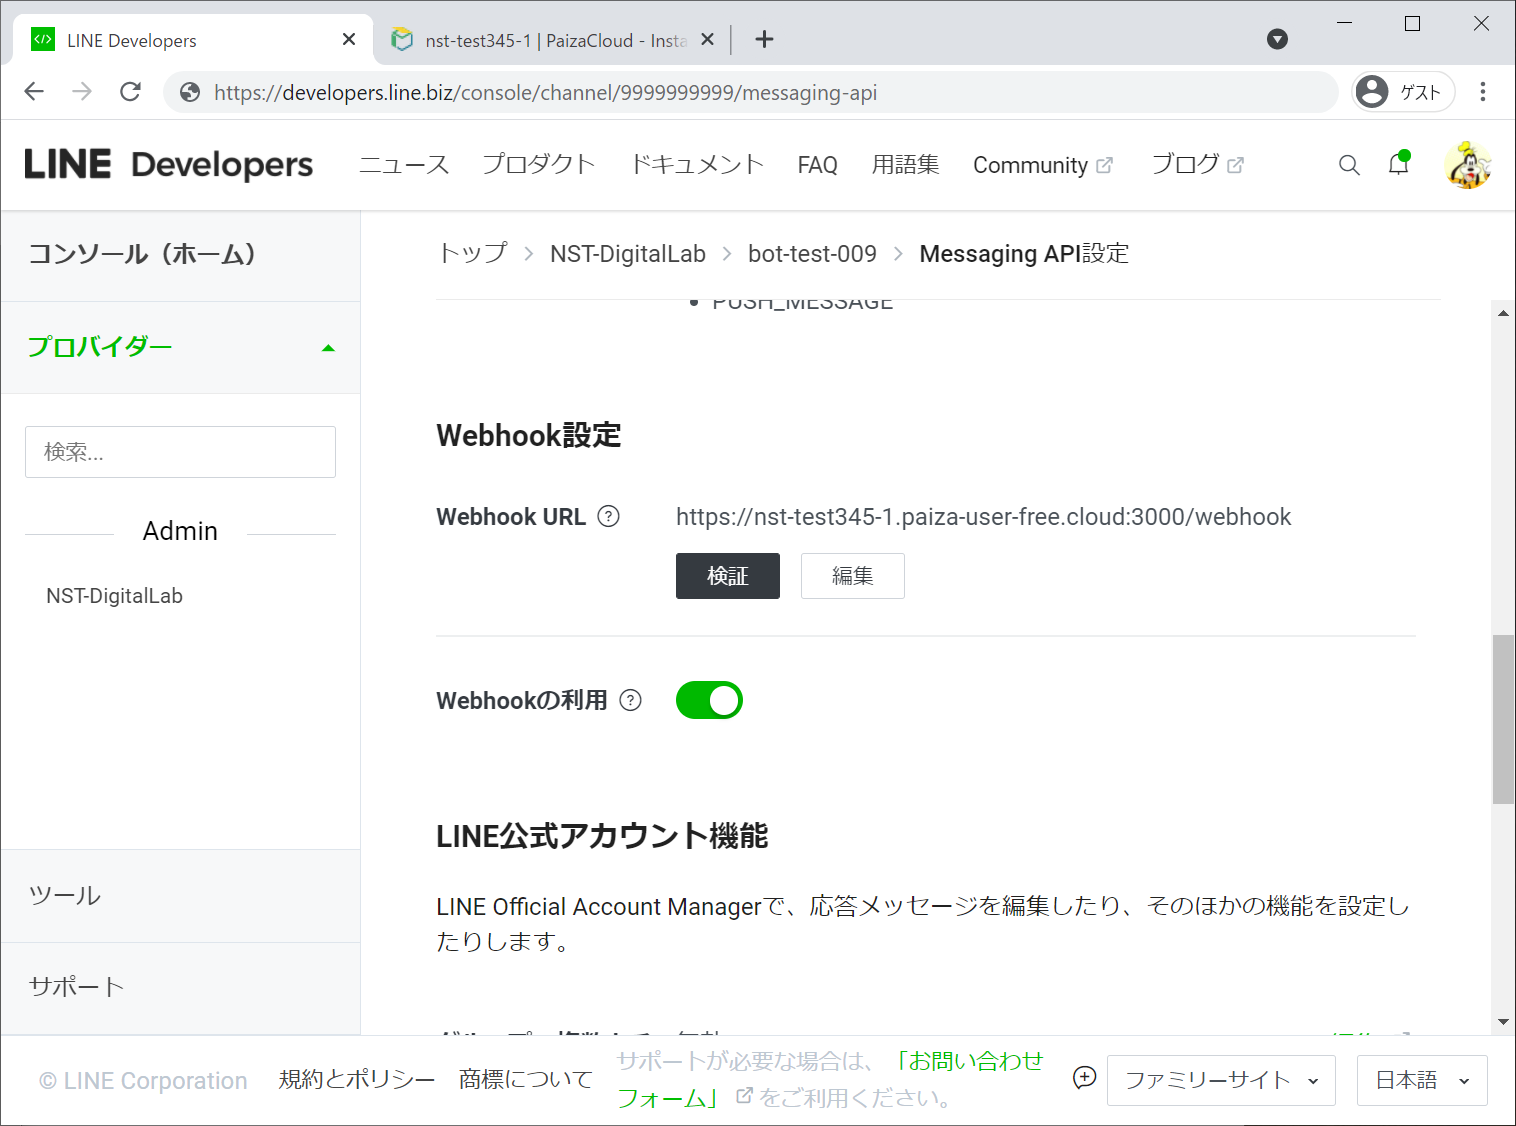
その際にWebhook URLを手順2.1で設定したサーバー名をもとに入力します。Paiza Cloudの場合は
https://サーバー名.paiza-user-free.cloud:3000/webhook
という感じです。後ろのwebhookというのが今回作成するエンドポイントになります。
※ また、この画面に表示されているQRコードを読み込むことで、作成したボットにアクセスすることができます。
(6) チャンネルアクセストークンの取得
先ほどの画面をさらに下にスクロールすると、チャンネルアクセストークンという長い文字列が表示されていますので、これもコピーしておきましょう。
3 エコーボットの作成
まず手始めに単純なエコーボットを作成します。node.jsを使ったサンプルのドキュメントを参考にします。
3.1 サーバーサイドの作成
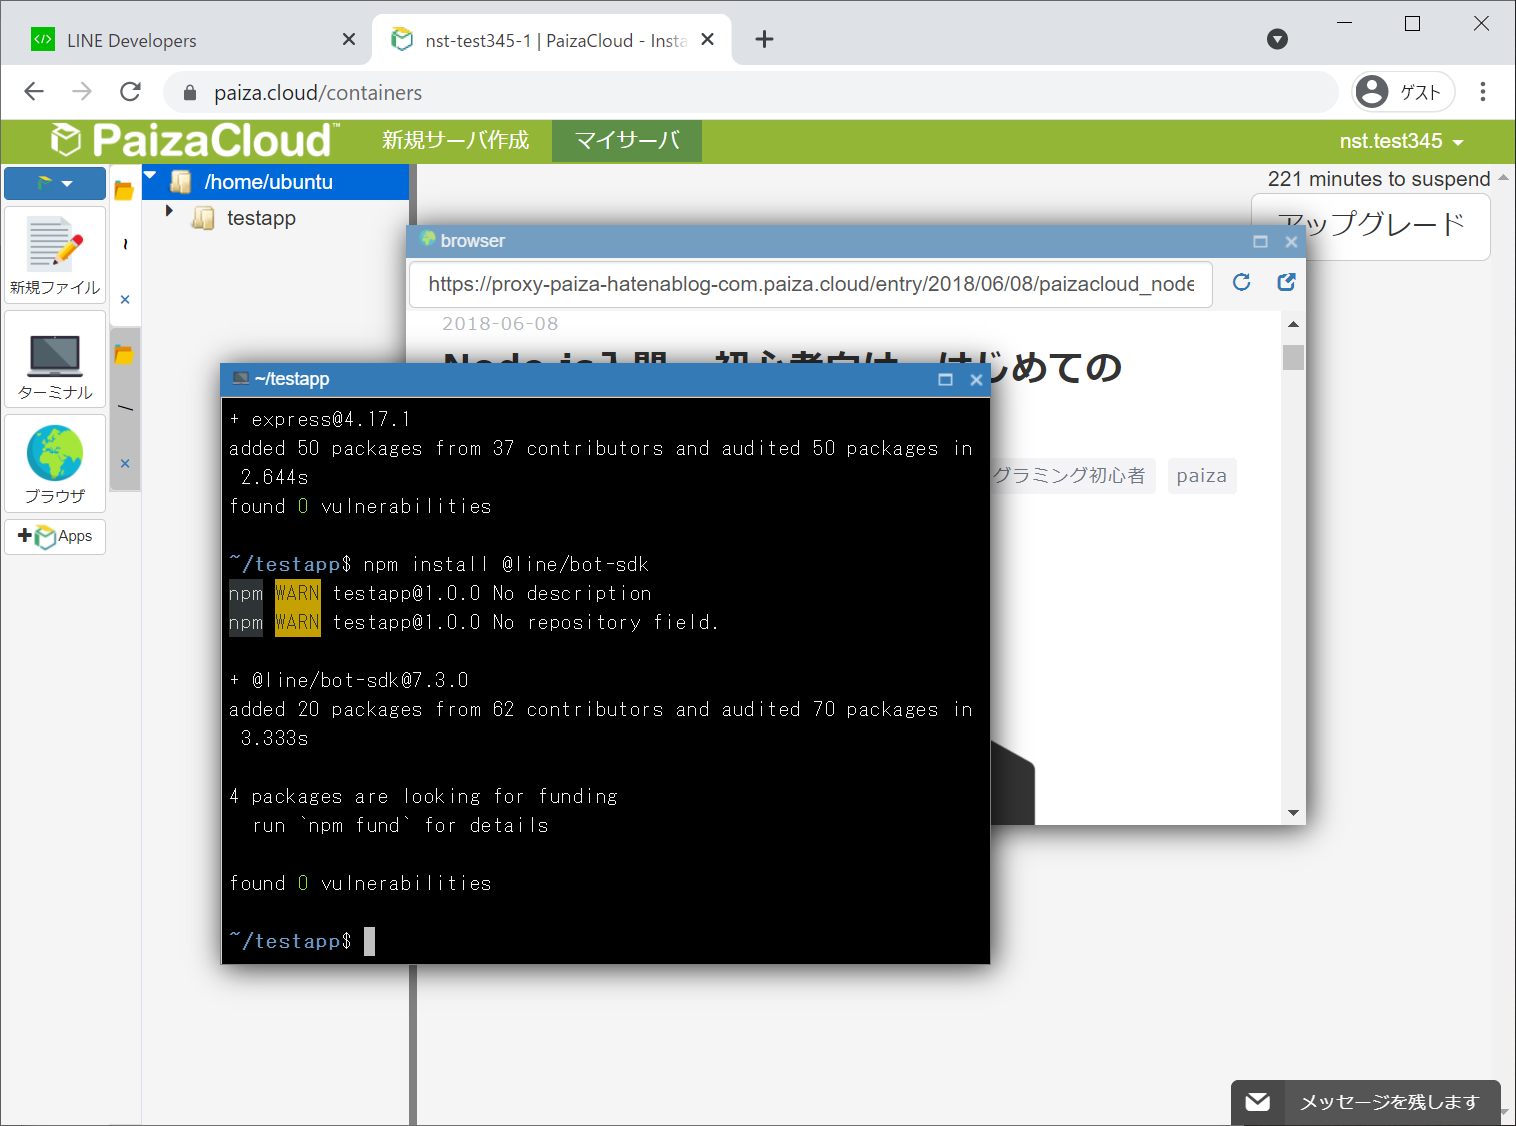
(1) node.jsサイトを作成
Paiza.cloudのコンソールを開き下記のコマンドを投入します。
mkdir testapp
cd testapp
npm init -y

npm install express

npm install @line/bot-sdk
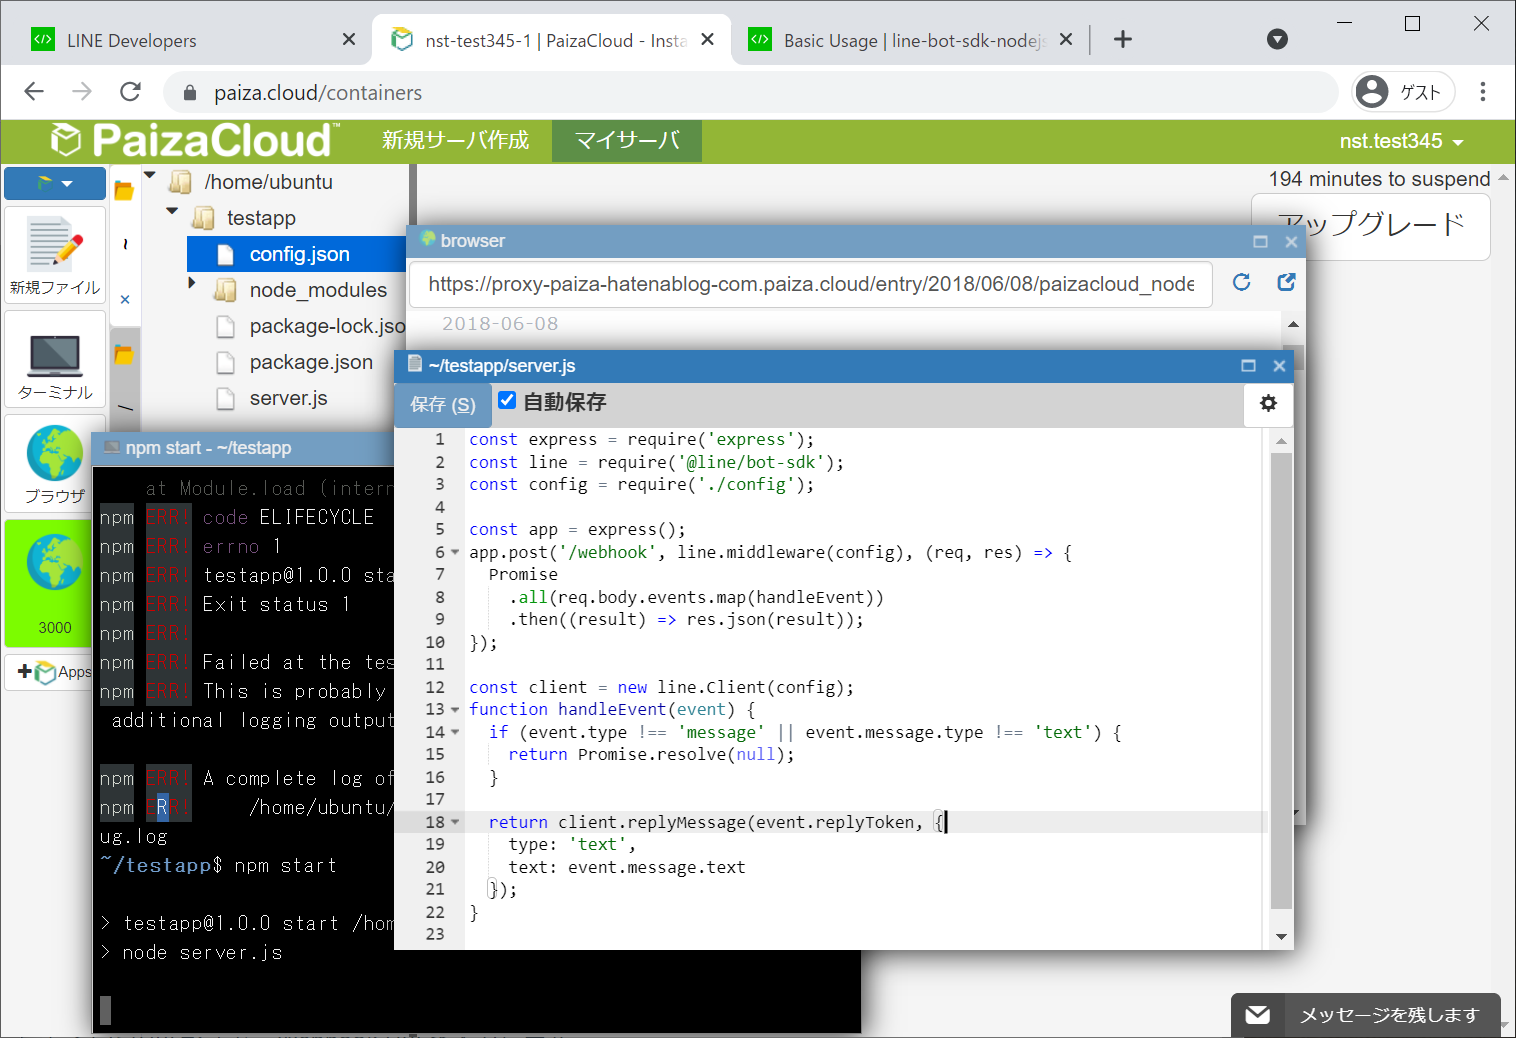
先ほどのドキュメントにあるSynopsisにあるソースをそのままコピーします。
const express = require('express');
const line = require('@line/bot-sdk');

const config = {
  channelAccessToken: 'YOUR_CHANNEL_ACCESS_TOKEN',
  channelSecret: 'YOUR_CHANNEL_SECRET'
};

const app = express();
app.post('/webhook', line.middleware(config), (req, res) => {
  Promise
    .all(req.body.events.map(handleEvent))
    .then((result) => res.json(result));
});

const client = new line.Client(config);
function handleEvent(event) {
  if (event.type !== 'message' || event.message.type !== 'text') {
    return Promise.resolve(null);
  }

  return client.replyMessage(event.replyToken, {
    type: 'text',
    text: event.message.text
  });
}

app.listen(3000);
ソース中のコンフィグ部分を、外部ファイルから読み込む形式にします
const config = {
  channelAccessToken: 'YOUR_CHANNEL_ACCESS_TOKEN',
  channelSecret: 'YOUR_CHANNEL_SECRET'
};
const config = require('./config');
そして、手順2.2(4),(6)で取得したチャンネルアクセストークンとチャンネルシークレットをもとに、server.jsと同位置にconfig.jsonというファイルを作成してください
{
  "channelAccessToken" : "xxxxxxxxxxxxxxxxxxxxxxxxxxxxxxx",
  "channelSecret" : "xxxxxxxxxxxxxxxxxxx"
}
上記の内容でtestapp配下にserver.jsとconfig.jsonを作成します
(2) 動作確認
先ほどのserver.jsを起動します
~/testapp$ npm start
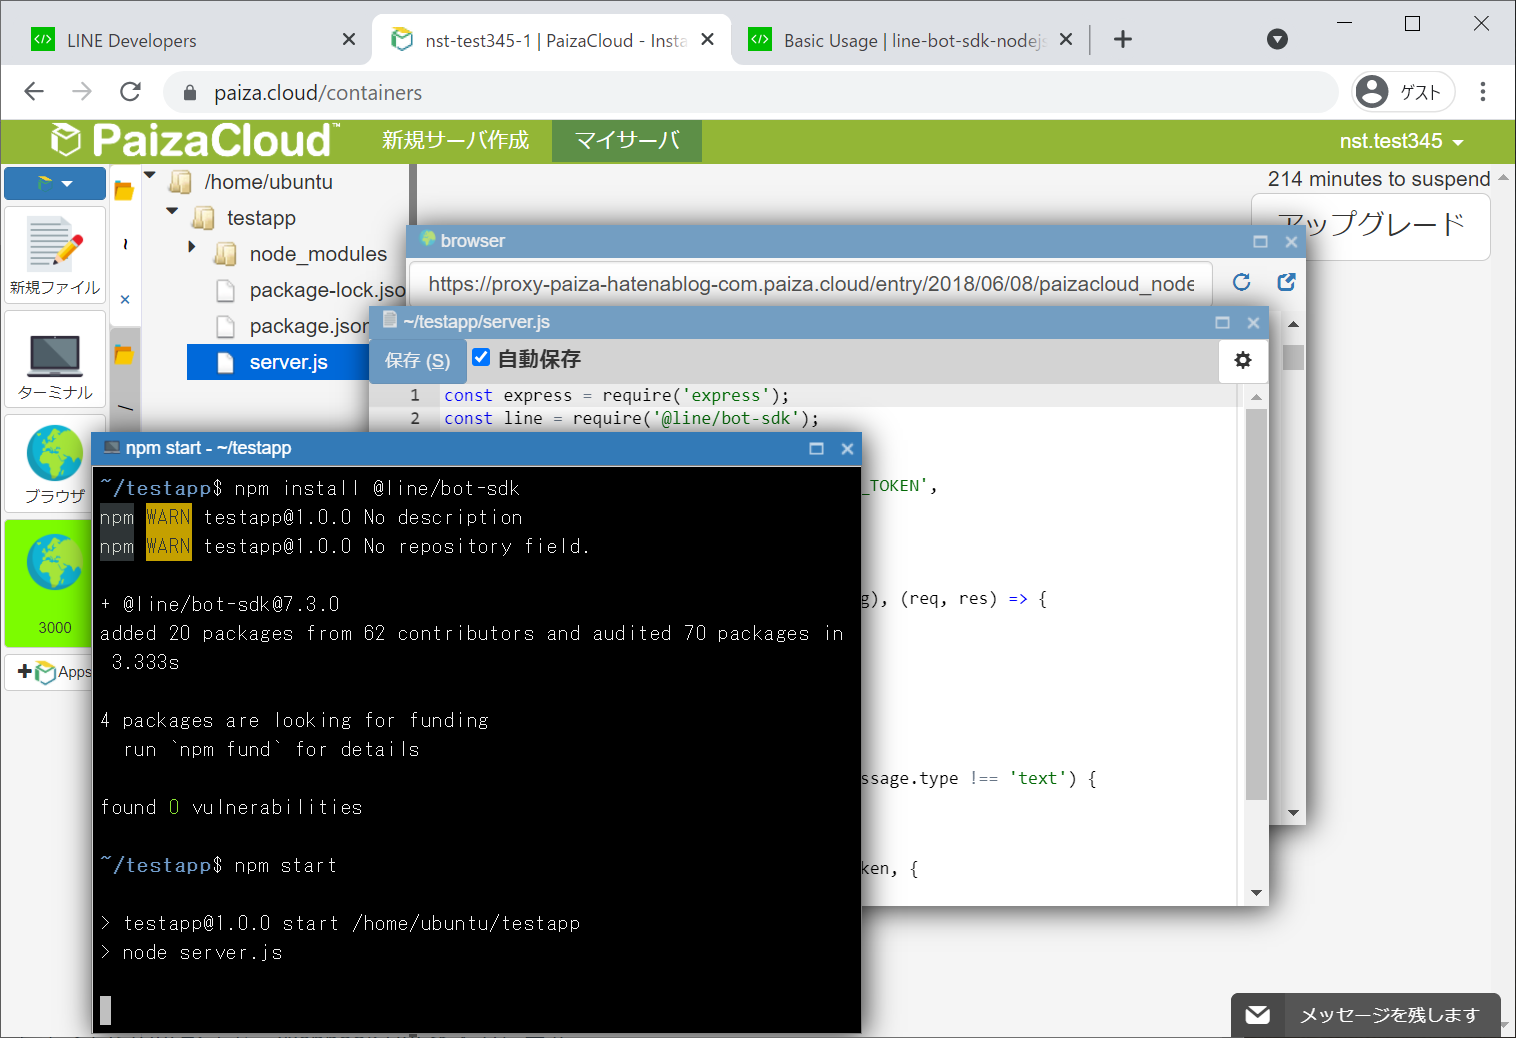
これで、LINEからのアクセスを受け取れますので、さっそくQRコードから追加してメッセージを送ってみてください。入力した内容がそのまま返されます。
#4 情報共有ボットの作成
いよいよここからがwikipedia風ボットの作成になります。
4.1 DBアクセスの実装
やり取りされるメッセージからキーワードや解説などを保存するためにデータベースを接続します。
PaizaCloudでサーバーを構築した際にpostgresを指定していますので、すでにその環境ができています。
まずは、データベースを作成します。PaizaCLoudのコンソールで作業を行ってください。
psql
create database testdb;
\c testdb
alter role session_user with password 'ubuntu';
create table memo ( key text, value text);
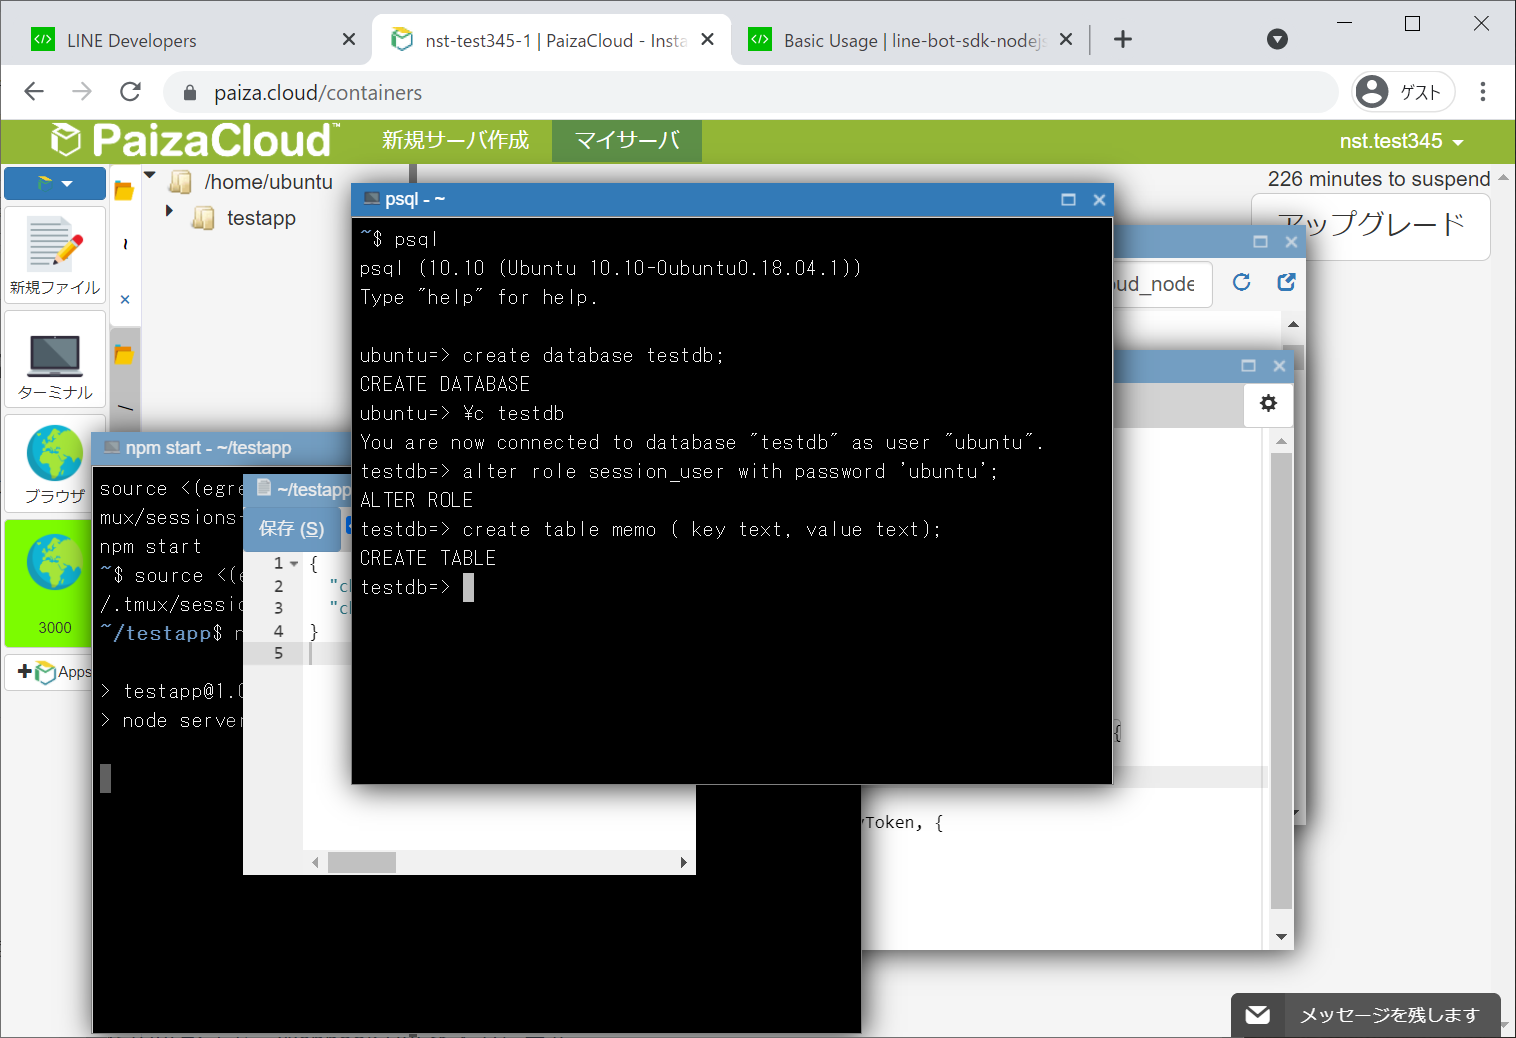
psqlでpostgresにログインしたのちに、データベースを作成します。そして\c(円サインc)と打ってtestdbに切り替えたのちに、パスワードの設定とテーブルのクリエイトを行っています。
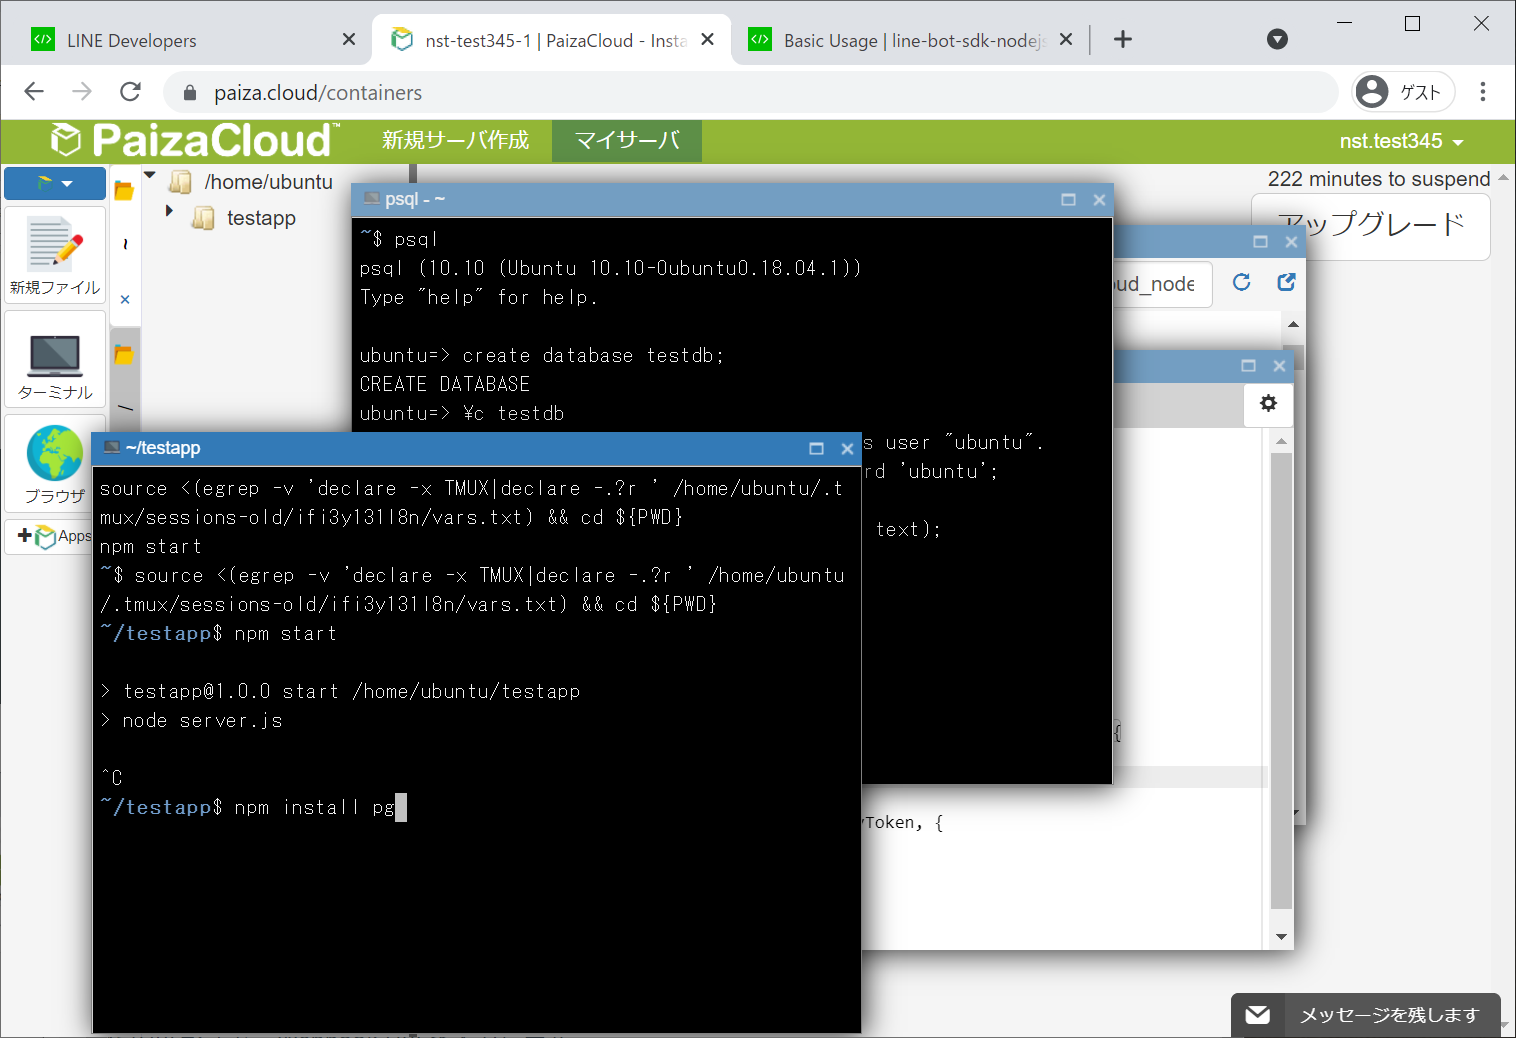
これで、単語と解説を格納するデータベースが出来上がりました。次にnodejsからデータベースへアクセスするためのライブラリを導入します。
npm install pg
なお、nodeサーバーが起動中の場合はctrl-cでいったん終了させましょう。
ちなみに簡単なアクセスサンプルは下記のとおりです。
const { Pool, Client } = require('pg')

const pool = new Pool({
  user: 'ubuntu',
  host: 'localhost',
  database: 'testdb',
  password: 'ubuntu',
  port: 5432,
})

pool.query('SELECT NOW()', (err, res) => {
  console.log(err, res)
  pool.end()
})
4.2 単語の検索と登録
まず最初に実装する操作イメージは下記の通りです。
- 教えてほしい単語を書き込む
- 登録されている単語であれば、解説を返す
- 登録されていなければ「教えて」と返して、次に入力されたメッセージを解説として登録する
という感じで、気軽に質問して気軽に登録するイメージです。
const express = require('express');
const line = require('@line/bot-sdk');
const config = require('./config');

const { Pool, Client } = require('pg')

const pool = new Pool({
  user: 'ubuntu',
  host: 'localhost',
  database: 'testdb',
  password: 'ubuntu',
  port: 5432,
})

const app = express();

var users=[]
var beforeText=[]
var actionFlag=[]

app.post('/webhook', line.middleware(config), (req, res) => {
  Promise
    .all(req.body.events.map(handleEvent))
    .then((result) => res.json(result));
});

const client = new line.Client(config);
function handleEvent(event) {
  if (event.type !== 'message' || event.message.type !== 'text') {
    return Promise.resolve(null);
  }
  const userid = event.source.userId
  const message = event.message.text

  if (users.indexOf(userid)) {
    users.push(userid)
  }

  const indexNo = users.indexOf(userid)
  console.log("actionFlag[indexNo] = ",actionFlag[indexNo])
  console.log("beforeText[indexNo] = ",beforeText[indexNo])

  if (actionFlag[indexNo]==='insert') {
    const insertValue = {
      name: 'insert-value',
      text: 'insert into memo(key,value) values ($1,$2)',
      values: [beforeText[indexNo], event.message.text],
    }
    pool
      .query(insertValue)
      .then(res => {
        client.broadcast({
          type: 'text',
          text: beforeText[indexNo]+'\n--------------\n'+event.message.text
        })
        .then(() => {
          actionFlag[indexNo] = ''
          beforeText[indexNo] = ''
        })
        .catch((err) => {
          console.log(err)
        });
      })
      .catch(e => console.error(e.stack))

  } else {
    const fetchValue = {
      name: 'fetch-value',
      text: 'SELECT * FROM memo WHERE key = $1',
      values: [event.message.text],
    }
    pool
      .query(fetchValue)
      .then(res => {
        console.log(res.rows[0])
        if(res.rows.length === 0) {
          actionFlag[indexNo] = "insert"
          beforeText[indexNo] = message

          return client.replyMessage(event.replyToken, {
            type: 'text',
            text:  '教えて!'
          });

        } else {
          return client.replyMessage(event.replyToken, {
            type: 'text',
            text:  res.rows[0].value
          });
        }
      })
      .catch(e => console.error(e.stack))
  }

}

app.listen(3000);
入力された単語を検索して、データベースになければその単語を保存しておき、同じユーザーから来た次のメッセージをその解答としてデータベースへ登録しています。
4.3 不明な単語をみんなに通知する
ここで、もう一工夫ということで、不明な単語があった場合に、その単語をみんなに知らせる機能を付けます。この機能により、自分がしらない単語でも誰かが解説を登録してくれるかもしれません。
先ほどのソースに 「教えて」 -> 「わからない」で単語をブロードキャストしてみます。
const express = require('express');
const line = require('@line/bot-sdk');
const config = require('./config');

const { Pool, Client } = require('pg')

const pool = new Pool({
  user: 'ubuntu',
  host: 'localhost',
  database: 'testdb',
  password: 'ubuntu',
  port: 5432,
})

const app = express();

var users=[]
var beforeText=[]
var actionFlag=[]

app.post('/webhook', line.middleware(config), (req, res) => {
  Promise
    .all(req.body.events.map(handleEvent))
    .then((result) => res.json(result));
});

const client = new line.Client(config);
function handleEvent(event) {
  if (event.type !== 'message' || event.message.type !== 'text') {
    return Promise.resolve(null);
  }
  const userid = event.source.userId
  const message = event.message.text

  if (users.indexOf(userid)) {
    users.push(userid)
  }

  const indexNo = users.indexOf(userid)
  console.log("actionFlag[indexNo] = ",actionFlag[indexNo])
  console.log("beforeText[indexNo] = ",beforeText[indexNo])

  if (actionFlag[indexNo]==='insert') {
    if ( message ==='わからない' ||  message ==='知らない' ||  message ==='?') {
      client.broadcast({
        type: 'text',
        text: '誰か―\n'+beforeText[indexNo]+'\nってなにー? 教えてー'
      })
      .then(() => {
        actionFlag[indexNo]=''
        beforeText[indexNo] = ''
        console.log("broadcast")
      })
      .catch((err) => {
        console.log(err)
      });
    } else {
      const insertValue = {
        name: 'insert-value',
        text: 'insert into memo(key,value) values ($1,$2)',
        values: [beforeText[indexNo], event.message.text],
      }
      pool
        .query(insertValue)
        .then(res => {
          client.broadcast({
            type: 'text',
            text: beforeText[indexNo]+'\n--------------\n'+event.message.text
          })
          .then(() => {
            actionFlag[indexNo] = ''
            beforeText[indexNo] = ''
          })
          .catch((err) => {
            console.log(err)
          });
        })
        .catch(e => console.error(e.stack))
    }
  } else {
    const fetchValue = {
      name: 'fetch-value',
      text: 'SELECT * FROM memo WHERE key = $1',
      values: [event.message.text],
    }
    pool
      .query(fetchValue)
      .then(res => {
        console.log(res.rows[0])
        if(res.rows.length === 0) {
          actionFlag[indexNo] = "insert"
          beforeText[indexNo] = message

          return client.replyMessage(event.replyToken, {
            type: 'text',
            text:  '教えて!'
          });

        } else {
          return client.replyMessage(event.replyToken, {
            type: 'text',
            text:  res.rows[0].value
          });
        }
      })
      .catch(e => console.error(e.stack))
  }

}

app.listen(3000);
最後に
いかがだったでしょうか。キーワードを使った仲間内だけの情報共有ツールですが、キーワードを増やして解説の修正や追記、単語の削除なども機能追加できると思います。
次回は...
いよいよブロックチェーンでしょうかね。頑張ります。
記事一覧