3
0

Delete article

Deleted articles cannot be recovered.

Draft of this article would be also deleted.

Are you sure you want to delete this article?

More than 3 years have passed since last update.

[無料] AWS EC2 + RDS + Flask でWebアプリを作り HTTPS 化する [その2: セキュリティグループ]

Last updated at Posted at 2020-12-12

セキュリティグループ設定

その1 からの続きです。EC2インスタンスを作成して仮想サーバーを構築する前に、セキュリティグループの設定をしておきます。

Services から EC2 を選択するとこんな画面になります。当然まだ何も無いかと思いきや、Security groups が既に一つあります。これは簡単に言えばファイアウォールみたいなもので、ポートを開けたりアドレスの指定を行います。まずはこれを弄ります。
Screen Shot 2563-12-13 at 01.01.59.png

Name が無いのは寂しいので、とりあえず securitygroup1 とでも命名します。
Screen Shot 2563-12-13 at 01.07.56.png
下の方の Inbound rules から Edit inbound rules をクリックし、Type は HTTP を選択して80番ポートを開け、Source は 0.0.0.0/0 にします。こうしないとどこからでもアクセスできるようになりません。逆に言えば、不特定多数からのアクセスを前提としない、自分や身内だけのアプリケーションなどを作る場合には、IPアドレスを指定しておくと安全になります。
Screen Shot 2563-12-13 at 01.12.05.png
Screen Shot 2563-12-13 at 01.15.30.png
Add ruleから、 SSH(22), HTTPS(443) とデータベース用のポートも開けておきます。この例ではMySQLを使っているので 3306 番が開いてますが、PostgreSQL を選べば自動的に 5432 番が開きます。
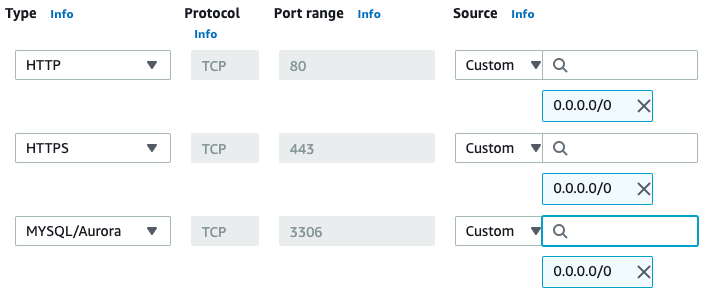
Screen Shot 2563-12-13 at 01.18.55.png
右下の Save rules で保存し、Outbound rules の方も同様に設定します。
Screen Shot 2563-12-13 at 01.51.08.png

その3 EC2インスタンスの作成に続きます

3
0
0

Register as a new user and use Qiita more conveniently

  1. You get articles that match your needs
  2. You can efficiently read back useful information
  3. You can use dark theme
What you can do with signing up
3
0

Delete article

Deleted articles cannot be recovered.

Draft of this article would be also deleted.

Are you sure you want to delete this article?