はじめに
Flutterを触っているとTVアプリも作れるのかな?と少し気になり、FireTVがあったのでFireTVアプリを作れるか試してみようと思いやってみました。
タイトル通りスゴイ初歩なのでTV機能を使って...とかはやってないのでご了承ください。
先に結論!
リモコンキーに応答できればTVアプリとして動くものはつくれそう。
作ってみたものの説明
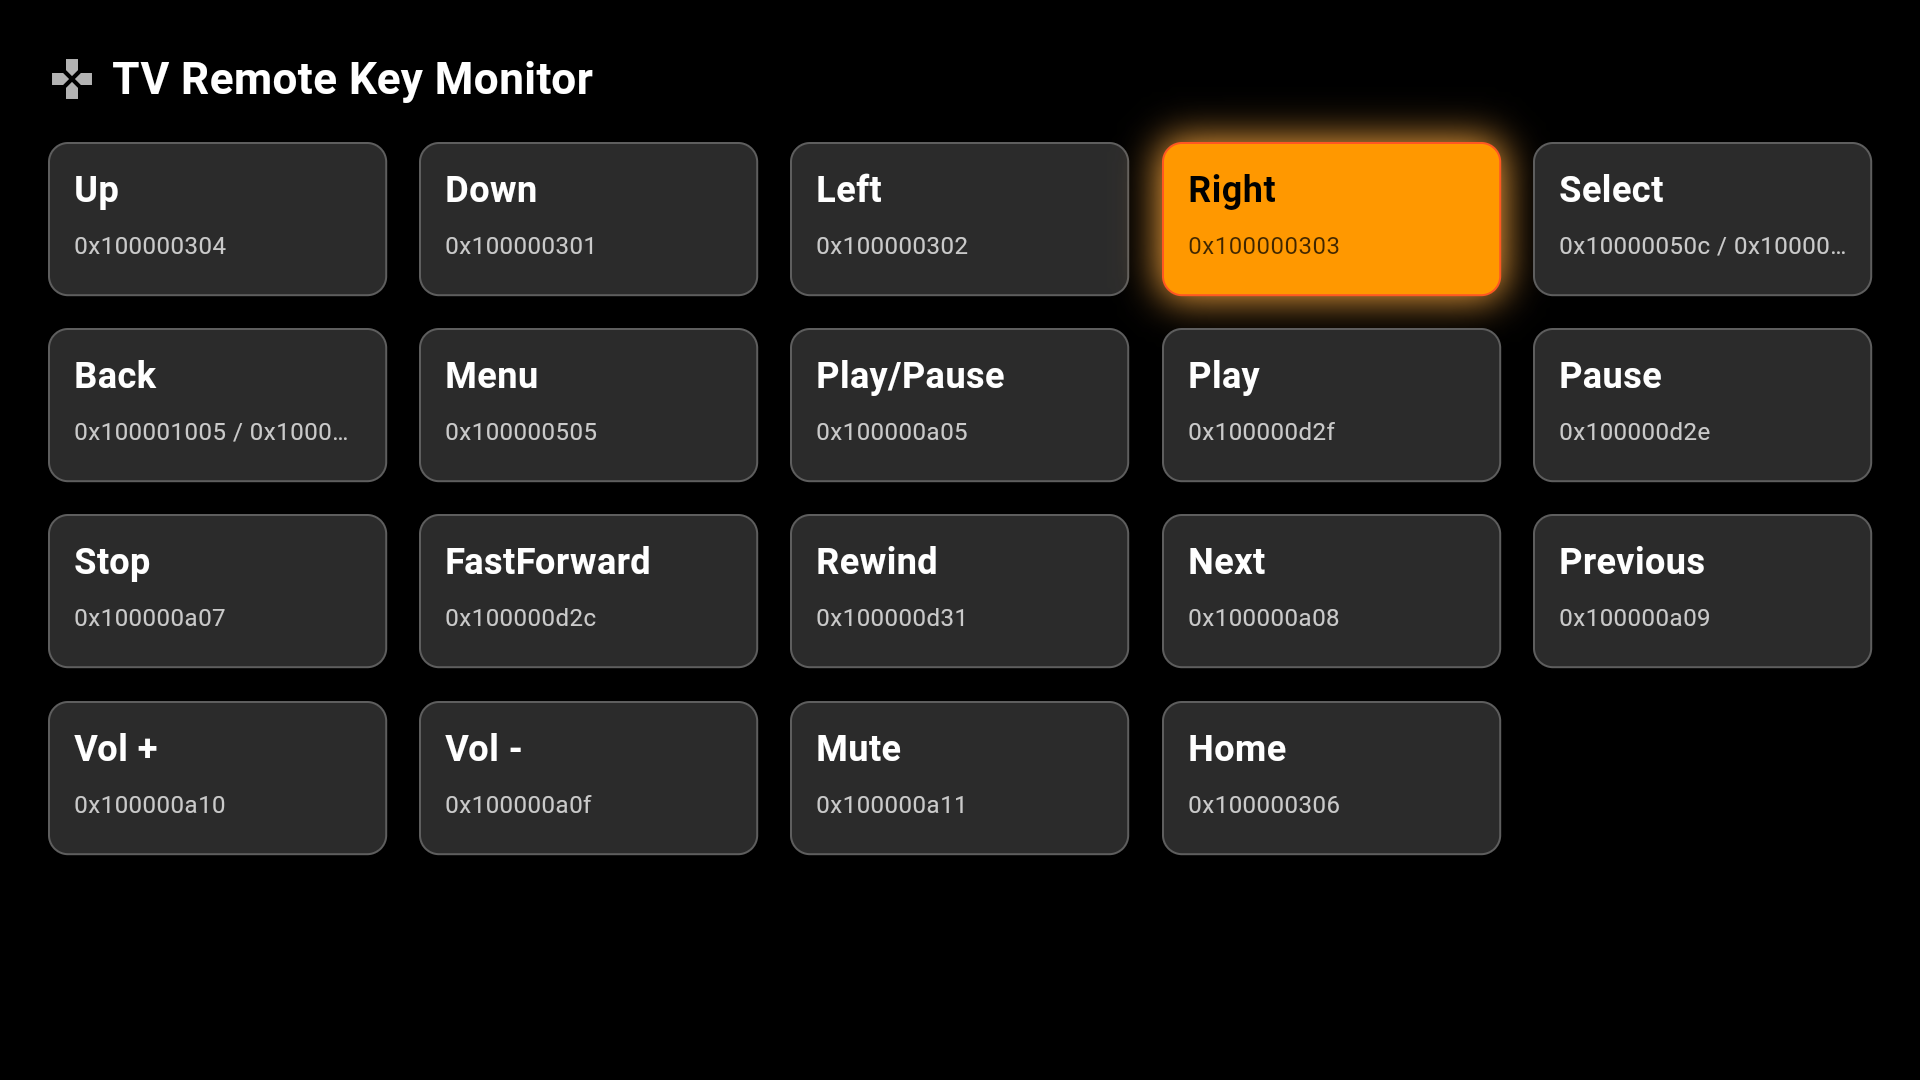
どんなキーに反応するのか見たかったので押したキーに応じたタイルが光るアプリを作ってみました。
(Copilotさんに手伝ってもらいました)
環境
使用するFireTV Stickは「Fire Stick TV 4K(第1世代)」。
Fire OS 6.7.1.1になります。
FireTVはandroidベースなのでandroid側の設定を合わせる必要があります。
anrdoid/app/build.gradle
minSdkVersion 25
targetSdkVersion 34
コード紹介
main.dart
import 'package:flutter/material.dart';
import 'package:flutter/services.dart';

void main() => runApp(
    const MaterialApp(debugShowCheckedModeBanner: false, home: TvKeyGrid()));

class KeySpec {
  final String label;
  final List<LogicalKeyboardKey> candidates; // 同じボタンでも環境差に備えて複数候補
  const KeySpec(this.label, this.candidates);
}

// Fire TV / Android TV の代表的なキーをカタログ化
const List<KeySpec> tvKeyCatalog = [
  KeySpec('Up', [LogicalKeyboardKey.arrowUp]),
  KeySpec('Down', [LogicalKeyboardKey.arrowDown]),
  KeySpec('Left', [LogicalKeyboardKey.arrowLeft]),
  KeySpec('Right', [LogicalKeyboardKey.arrowRight]),
  KeySpec('Select', [
    LogicalKeyboardKey.select,
    LogicalKeyboardKey.enter,
    LogicalKeyboardKey.numpadEnter
  ]),
  KeySpec('Back', [LogicalKeyboardKey.goBack, LogicalKeyboardKey.escape]),
  KeySpec('Menu', [LogicalKeyboardKey.contextMenu]),
  KeySpec('Play/Pause', [LogicalKeyboardKey.mediaPlayPause]),
  KeySpec('Play', [LogicalKeyboardKey.mediaPlay]),
  KeySpec('Pause', [LogicalKeyboardKey.mediaPause]),
  KeySpec('Stop', [LogicalKeyboardKey.mediaStop]),
  KeySpec('FastForward', [LogicalKeyboardKey.mediaFastForward]),
  KeySpec('Rewind', [LogicalKeyboardKey.mediaRewind]),
  KeySpec('Next', [LogicalKeyboardKey.mediaTrackNext]),
  KeySpec('Previous', [LogicalKeyboardKey.mediaTrackPrevious]),
  KeySpec('Vol +', [LogicalKeyboardKey.audioVolumeUp]),
  KeySpec('Vol -', [LogicalKeyboardKey.audioVolumeDown]),
  KeySpec('Mute', [LogicalKeyboardKey.audioVolumeMute]),
  KeySpec('Home', [LogicalKeyboardKey.home]),
];

class TvKeyGrid extends StatefulWidget {
  const TvKeyGrid({super.key});
  @override
  State<TvKeyGrid> createState() => _TvKeyGridState();
}

class _TvKeyGridState extends State<TvKeyGrid> {
  final FocusNode _focusNode = FocusNode();
  Set<LogicalKeyboardKey> _pressed = <LogicalKeyboardKey>{};

  // カタログに含まれる全候補キー集合(Unknown対策で差分検出に使う)
  late final Set<LogicalKeyboardKey> _catalogKeys =
      tvKeyCatalog.expand((k) => k.candidates).toSet();

  @override
  void initState() {
    super.initState();
    WidgetsBinding.instance
        .addPostFrameCallback((_) => _focusNode.requestFocus());
  }

  @override
  void dispose() {
    _focusNode.dispose();
    super.dispose();
  }

  bool _isSpecPressed(KeySpec spec) {
    // そのKeySpecの候補のどれかが押されていれば「押下中」とみなす
    return spec.candidates.any(_pressed.contains);
  }

  String _candidateIds(KeySpec spec) {
    // 候補キーのIDを16進で併記(デバッグ用)
    return spec.candidates
        .map((k) => '0x${k.keyId.toRadixString(16)}')
        .join(' / ');
  }

  @override
  Widget build(BuildContext context) {
    // キーイベントを拾って、現在押下中の集合を毎回更新
    return Scaffold(
      backgroundColor: Colors.black,
      body: KeyboardListener(
        focusNode: _focusNode,
        autofocus: true,
        onKeyEvent: (KeyEvent event) {
          // リモコンキー入力を受け取り
          final nowPressed = HardwareKeyboard.instance.logicalKeysPressed;
          setState(() => _pressed = nowPressed);
        },
        child: Padding(
          padding: const EdgeInsets.all(24),
          child: Column(
            crossAxisAlignment: CrossAxisAlignment.stretch,
            children: [
              const _TitleBar(),
              const SizedBox(height: 16),
              Expanded(
                child: GridView.builder(
                  gridDelegate: const SliverGridDelegateWithFixedCrossAxisCount(
                    crossAxisCount: 5, // 画面サイズに合わせて調整
                    crossAxisSpacing: 16,
                    mainAxisSpacing: 16,
                    childAspectRatio: 2.2,
                  ),
                  itemCount: tvKeyCatalog.length,
                  itemBuilder: (context, i) {
                    final spec = tvKeyCatalog[i];
                    final pressed = _isSpecPressed(spec);
                    return _KeyTile(
                      label: spec.label,
                      ids: _candidateIds(spec),
                      pressed: pressed,
                    );
                  },
                ),
              ),
              const SizedBox(height: 8),
              _UnknownPressedStrip(
                  pressed: _pressed, catalogKeys: _catalogKeys),
            ],
          ),
        ),
      ),
    );
  }
}

class _TitleBar extends StatelessWidget {
  const _TitleBar();

  @override
  Widget build(BuildContext context) {
    return Row(
      children: [
        const Icon(Icons.gamepad, color: Colors.white70),
        const SizedBox(width: 8),
        const Text(
          'TV Remote Key Monitor',
          style: TextStyle(
              color: Colors.white, fontSize: 22, fontWeight: FontWeight.w600),
        ),
      ],
    );
  }
}

// 押下キータイル
class _KeyTile extends StatelessWidget {
  final String label;
  final String ids;
  final bool pressed;

  const _KeyTile({
    required this.label,
    required this.ids,
    required this.pressed,
  });

  @override
  Widget build(BuildContext context) {
    final bg = pressed ? Colors.orange : const Color(0xFF2B2B2B);
    final border = pressed ? Colors.deepOrange : Colors.white24;
    final txt = pressed ? Colors.black : Colors.white;

    return AnimatedContainer(
      duration: const Duration(milliseconds: 120),
      curve: Curves.easeOut,
      decoration: BoxDecoration(
        color: bg,
        borderRadius: BorderRadius.circular(10),
        border: Border.all(color: border),
        boxShadow: pressed
            ? [
                const BoxShadow(
                    color: Colors.orangeAccent, blurRadius: 16, spreadRadius: 1)
              ]
            : const [],
      ),
      padding: const EdgeInsets.symmetric(horizontal: 12, vertical: 10),
      child: Column(
        crossAxisAlignment: CrossAxisAlignment.start,
        children: [
          Text(label,
              style: TextStyle(
                  color: txt, fontSize: 18, fontWeight: FontWeight.bold)),
          const SizedBox(height: 6),
          Text(
            ids,
            style: TextStyle(color: txt.withOpacity(0.75), fontSize: 12),
            maxLines: 1,
            overflow: TextOverflow.ellipsis,
          ),
        ],
      ),
    );
  }
}

// カタログ外(Unknown含む)で現在押されているキーを帯で表示
class _UnknownPressedStrip extends StatelessWidget {
  final Set<LogicalKeyboardKey> pressed;
  final Set<LogicalKeyboardKey> catalogKeys;
  const _UnknownPressedStrip(
      {required this.pressed, required this.catalogKeys});

  @override
  Widget build(BuildContext context) {
    final extras = pressed.difference(catalogKeys).toList()
      ..sort((a, b) => (a.debugName ?? '').compareTo(b.debugName ?? ''));
    if (extras.isEmpty) {
      return const SizedBox.shrink();
    }
    return Container(
      padding: const EdgeInsets.all(10),
      decoration: BoxDecoration(
        color: const Color(0xFF1B1B1B),
        borderRadius: BorderRadius.circular(8),
        border: Border.all(color: Colors.white24),
      ),
      child: Wrap(
        spacing: 10,
        runSpacing: 8,
        children: extras.map((k) {
          final name = k.debugName ?? k.keyLabel;
          final idHex = '0x${k.keyId.toRadixString(16)}';
          return Container(
            padding: const EdgeInsets.symmetric(horizontal: 8, vertical: 6),
            decoration: BoxDecoration(
              color: Colors.teal.shade700,
              borderRadius: BorderRadius.circular(6),
            ),
            child: Text('$name ($idHex)',
                style: const TextStyle(color: Colors.white)),
          );
        }).toList(),
      ),
    );
  }
}
本アプリの動きの流れとしては以下になります。
- リモコンキー入力をイベント受信してキー情報を取得
- キー情報で状態更新して、集合に適するタイルを光らせる(長押しなら光りっぱなし)
- 見つからなかったら下にボックスが表示される ※キー情報をとれた場合
リモコンのキーはキーイベントとして受け取れ、'LogicalKeyboardKey'で取得できます。
なので本コードで一番大事な部分はここですね。
onKeyEvent: (KeyEvent event) {
  // リモコンキー入力を受け取り
  final nowPressed = HardwareKeyboard.instance.logicalKeysPressed;
  setState(() => _pressed = nowPressed);
},
あとはここからkeyIdやdebugNameでアプリ制御できます。
余談
HDMIのCEC機能を使えばテレビのリモコンでもFireTVは操作できます。
試しにテレビのリモコンで触ってみましたが、カラーボタン(赤/青/緑/黄)にも反応できるんだなぁとちょっと新発見でした。
あとは長押しにはテレビリモコンだと十字キーくらいしか反応しませんでした。(リモコンの種類にもよるのかも?)
おわりに
テレビ用にUIは作る必要がありますが、FlutterでもTVアプリを作れる可能性があるのはいいことなのかなと思います。