
こちらはQiita夏祭り2020の「〇〇(言語)のみを使って、今△△(アプリ)を作るとしたら」というテーマに沿って投稿した記事です。
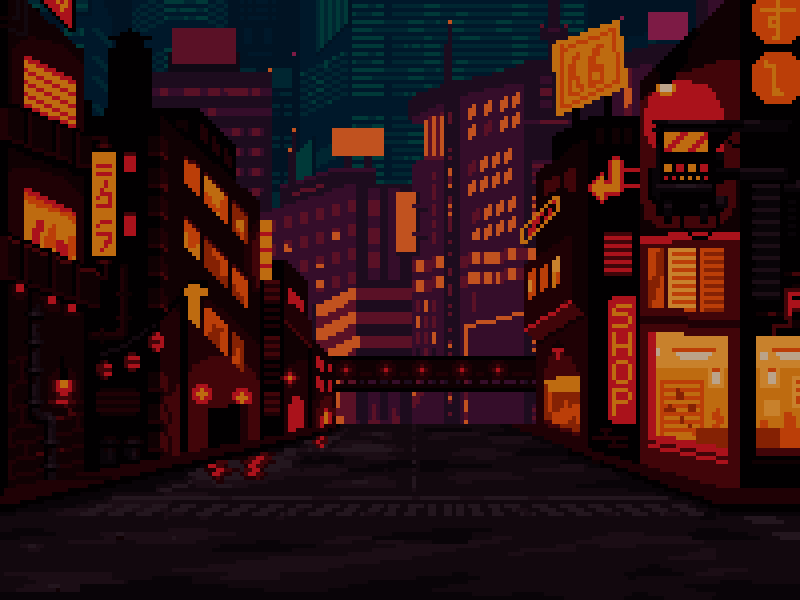
完成イメージ
0. はじめに
この章は読み飛ばして「1. 環境構築」に進んでも問題ありません。
要約:Phaser3を使うならTypeScriptで書くのがおすすめです。
やってみたいとは思いつつも中々難易度が高いゲーム制作。
Unityなんかにも挑戦してみたいけどハードルが高く、webに慣れ親しんだ身としてはTypeScriptでゲームを書きたい…。
そこでこの記事ではHTML5/JavaScriptでゲームが作れるフレームワーク「Phaser3」と「TypeScript」でシンプルなノベルゲームを作っていきます。
Phaser3もリリースからしばらく経って成熟してきたので、今ならTypeScriptで快適にゲームが作れると感じこの記事を書き始めました。
日本語記事の少ないPhaserの知名度が上がってほしいという願いを込めて…。
目標
この記事内でゲームを完成させます。(Part2などには続けずに)
そのため出来上がるのは最小限のノベルゲームです。
対象
TypeScriptの知識は持っているが、Phaser3の知識は無い/少ないという読者を想定して書いています。
ただしTypeScriptもトリッキーな使い方はしていないので、基本的な知識がある方なら読めると思います。
なぜPhaser3?
Phaser3の他にもJavaScriptでゲームを書けるライブラリはあります。(Pixi.jsなど)
ただその中でも、ゲームに特化している、TypeScriptの定義ファイルがある、githubのスターが多い、更新が活発、みんながいいって言ってるなどの理由からPhaser3を選びました。
Phaser2(開発終了)のコミュニティメンテ版であるPhaserCEと今回使うPhaser3は別物なので注意が必要です。
(TypeScriptで書かれた「Phaser4」が発表されましたがリリースはまだまだ先のようです)
なぜTypeScript?
Phaser3を扱う場合はTypeScriptの使用を強くおすすめします。
最強の仲間にして最大の敵「Phaser3」
Phaser3には大量のクラスがあり、それぞれに数多くのメンバとメソッドが備わっています。
Phaser3のAPI Docsはとても読んで覚えられる量ではないので、API Docsとエディタを行ったり来たりする回数が非常に多くなります。
そうするとPhaser3のAPI Docsと格闘している時間がどんどん長引いてしまい、コードを書くのに割ける時間が短くなってしまいます。
そんな問題を解決してくれるのがTypeScriptです。
TypeScriptを使うことで関数名の入力補完やヒントの表示を強力に実行してくれます。
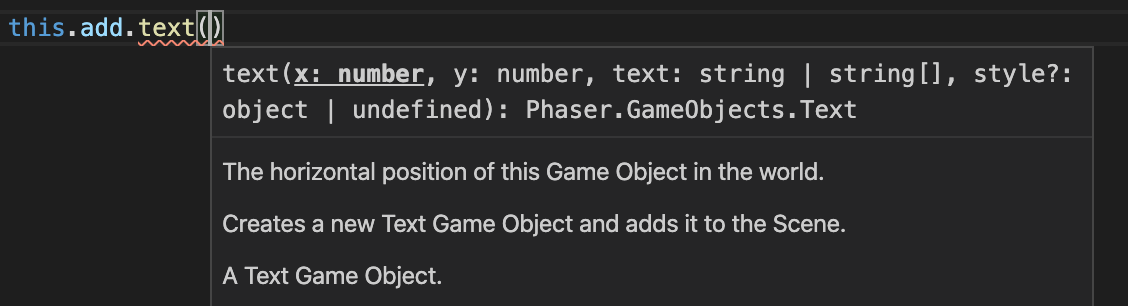
エディタ上で関数の説明や引数がすぐ確認できるのでコードを書くスピードが格段に上がります。
もちろん型チェックによる強力な検証などもTypeScriptを採用することで得られる大きなメリットです。
1. 環境構築
node.jsのインストールやnpm initは終わっているものとします。
パッケージのインストール
phaser、typescript、webpack系のパッケージをインストール
npm i phaser
npm i -D typescript webpack webpack-cli webpack-dev-server ts-loader html-webpack-plugin copy-webpack-plugin
設定ファイルの作成
typescriptの設定ファイルtsconfig.jsonの作成(package.jsonと同じ階層に保存)
{
  "compilerOptions": {
    "strict": true,
    "target": "es5",            // ES5準拠のコードを出力
    "moduleResolution": "node"  // node方式のモジュール解決方法(node_modulesを探索)
  }
}
webpackの設定ファイルwebpack.config.jsの作成(package.jsonと同じ階層に保存)
const webpack = require('webpack');
const path = require('path');
const HtmlWebpackPlugin = require('html-webpack-plugin');
const CopyWebpackPlugin = require('copy-webpack-plugin');

const config = {
  mode: 'development',
  entry: './src/index.ts',
  output: {
    path: path.resolve(__dirname, 'dist'),
    filename: 'bundle.js'
  },
  module: {
    rules: [
      {
        test: /\.ts$/,
        loader: 'ts-loader',
        exclude: /node_modules/
      }
    ]
  },
  plugins: [
    new HtmlWebpackPlugin({
      template: 'src/index.html'
    }),
    new CopyWebpackPlugin({
      patterns: [
        { from: 'src/assets/', to: 'assets/' }
      ]
    })
  ],
  resolve: {
    extensions: ['.ts', '.js']
  },
  devServer: {
    static: {
      directory: path.resolve(__dirname, 'dist'),
    },
    port: 3000,
    open: true
  }
};

module.exports = config;
上記のwebpackの設定をまとめると
-
src/index.tsを起点としてtsファイルを変換しつつjsファイルとバンドルしてdist/bundle.jsとして保存する。 -
src/index.htmlをdist/index.htmlにコピーする。 -
src/assets/の中身をdist/assets/にコピーする。 - webpack-dev-serverをlocalhost:3000で起動する。
となっています。
動作確認(Hello World)
srcディレクトリを作成し、その中にindex.htmlとindex.tsファイルを作成します。
<!DOCTYPE html>
<html>
<head>
  <meta charset="utf-8">
  <meta name="viewport" content="width=device-width,initial-scale=1">
  <title>PHASER GAME</title>
  <style>
    html, body {
      height: 100%;
      margin: 0;
    }
    #game-app {
      height: 100%;
      display: flex;
      align-items: center;
      justify-content: center;
    }
    #game-app > canvas {
      max-width: 100%;
      max-height: 100%;
    }
  </style>
</head>
<body>
  <div id="game-app"></div>
</body>
</html>
CSSはcanvasを画面中央に表示するためのものです。
scriptタグはビルド時にhtml-webpack-pluginが埋め込んでくれるので書きません。
import * as Phaser from 'phaser';

class MyScene extends Phaser.Scene {
  constructor() {
    // Phaser.Sceneのコンストラクタにはstringかオブジェクト(Phaser.Types.Scenes.SettingsConfig)を渡す
    // 以下は { key: 'myscene' } を渡したのと同義になる
    super('myscene');
  }

  preload() {
    // アセット読み込み
    this.load.image('street', 'assets/street.png');
    this.load.image('robot', 'assets/robot.png');
  }

  create() {
    // 画面中央に画像とテキストを配置
    this.add.image(400, 300, 'street');
    this.add.image(400, 300, 'robot');
    this.add.text(400, 300, 'Hello World', {fontFamily:'arial', fontSize: '60px'}).setOrigin(0.5);
  }
}

const config: Phaser.Types.Core.GameConfig = {
  type: Phaser.AUTO,  // webGLを使うかcanvasを使うかをphaserが自動で判断してくれる
  width: 800,
  height: 600,
  parent: 'game-app',  // #game-app内にcanvasを生成
  scene: MyScene
};

new Phaser.Game(config);
アセットのダウンロード
srcディレクトリの中にassetsディレクトリを作成して、以下の画像2点を右クリックで保存してください。
src
├── assets
│   ├── robot.png  # 保存
│   └── street.png  # 保存
├── index.html
└── index.ts
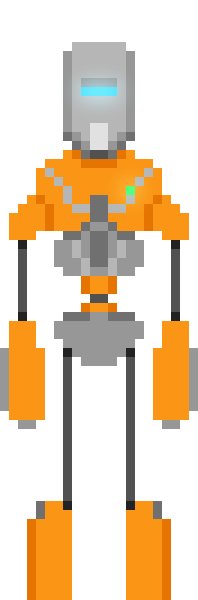
画像を右クリックして
名前を付けてリンク先を保存を選択
robot.pngで保存してください
自作 (CC0)
画像を右クリックして
名前を付けてリンク先を保存を選択
street.pngで保存してください
Cyberpunk Street Environment by Luis Zuno @ansimuz (CC-BY-3.0)
この時点でのファイル構成はこんな感じになっているはず
.
├── node_modules/
├── package-lock.json
├── package.json
├── src
│   ├── assets
│   │   ├── robot.png
│   │   └── street.png
│   ├── index.html
│   └── index.ts
├── tsconfig.json
└── webpack.config.js
もう動くはずなのでwebpack-dev-serverを起動して確認してみましょう。webpack-dev-serverを起動すると自動的にブラウザでhttp://localhost:3000が開かれます。
npx webpack-dev-server
ブラウザで表示されるHello World

webpack-dev-serverはCtrl+Cで終了できます。
2. ゲームの仕様
簡単に今回作るゲームの仕様を考えておきます。
シーン構成
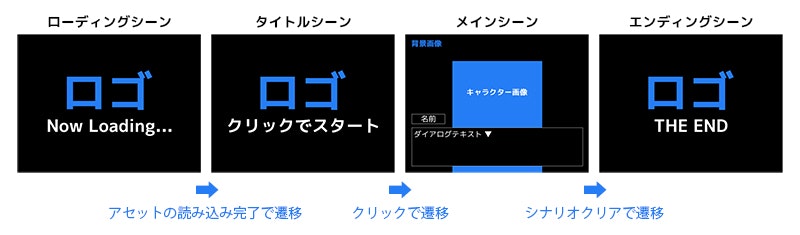
画面構成(メインシーン)
メインシーンには背景画像、前景(キャラクター)画像、テキストを表示するダイアログボックスおよび選択肢ボタンを配置します。
画面全体をクリックすることで次のテキストを表示し、選択肢ボタン表示中は選択肢ボタンのみクリックできるようにします。
画面構成(その他のシーン)
メインシーン以外のシーンはロゴとテキストを表示するだけにします。
シナリオの進行
会話テキストの更新や背景画像の変更などのシナリオは全て配列に書いておくことにして、これをタイムラインと呼ぶことにします。
会話テキストの更新時のみクリックするまでタイムラインの進行を止めておくことにします。
[
  { type: 'setBackground', key: 'sky' },  // 背景画像の設定(すぐに次へ)
  { type: 'addForeground', key: 'actor01' },  // 前景画像の設定(すぐに次へ)
  { type: 'dialog', text: 'おはよう' },  // 会話テキストを表示(クリックして次へ)
  { type: 'dialog', text: 'よく眠れたかい?' },  // 会話テキストを表示(クリックして次へ)
  ...
]
分岐システム
ただシナリオが進んでいくだけでは面白くないので、ある時点で選択肢を表示し、ユーザーに選んでもらいシナリオが分岐するようにします。
それを考慮して複数のタイムラインを設定できるようにして、それぞれにID(キー)をつける形にします。
最終的にタイムライン(シナリオ)の書き方はこんな感じに決定しました。
{
  'start': [
    { type: 'setBackground', key: 'sky' },
    { type: 'addForeground', key: 'actor01' },
    { type: 'dialog', text: 'おはよう' },
    { type: 'dialog', text: 'よく眠れたかい?' },
    { type: 'choice', choices: [
      { text: 'はい', timelineID: 'choice01_a01' },
      { text: 'いいえ', timelineID: 'choice01_a02' }
    ] }
  ],
  'choice01_a01': [/* はいを選んだ時のタイムライン */],
  'choice01_a02': [/* いいえを選んだ時のタイムライン */]
}
3. Phaser基礎
今回のゲーム制作にあたって必要になるPhaserの各クラスについての解説です。
この章は飛ばして後から読んでも大丈夫です。
Phaser.Game
Phaserにおいて全ての基礎となるのがPhaser.Gameです。このインスタンスを生成することでゲームが開始されます。
シーンからはthis.gameで呼び出せます。
SceneManager(Phaser.Scene.SceneManager)
SceneManagerはシーンを管理するクラスです。Phaser.Gameが1つのSceneManagerインスタンスを持っています。
ゲームで使用する全てのシーンをこれに登録しておきます。シーンの遷移などをやってくれます。
シーンからはthis.sceneという形で ScenePlugin というSceneManagerのプロキシを呼び出せます。
シーン(Phaser.Scene)
Phaser.Sceneはその名の通りシーンを表現するクラスです。
シーンを作るときはPhaser.Sceneを継承したクラスを作成し、その中にゲーム中に実行されるコードを書いていきます。
init()、preload()、create()、update()というメソッドがゲーム実行中に呼び出されるので、そのメソッドにコードを書きます。
-
init()
init()はシーンが呼び出されて最初に実行されます。 -
preload()
preload()はinit()の後に呼び出され、この中でアセットのロードを行います。 -
create()
create()はpreload()でのアセットのロードが完了すると呼び出されます。 -
update()
update()はcreate()後、フレーム描画毎に呼び出されます。(今回は使用しません)
ゲームオブジェクト(Phaser.GameObjects.GameObject)
Phaserにはテキスト(Phaser.GameObjects.Text)や画像(Phaser.GameObjects.Image)、四角形(Phaser.GameObjects.Rectangle)など様々なタイプのゲームオブジェクトが存在します。
ゲームオブジェクトを画面に表示するにはthis.add.text()やthis.add.image()と書いてシーンに配置します。
自分で作成(拡張)したゲームオブジェクトをシーンに配置する場合はthis.add.existing(gameObject)と書きます。
LoaderPlugin(Phaser.Loader.LoaderPlugin)
LoaderPluginはアセット(画像などの素材となるファイル)のロードを担当するクラスです。
各シーンはそれぞれ1つのLoaderPluginインスタンスを持っていますが、一度読み込んだアセットはグローバルにキャッシュされるので、どのシーンからでも読み出せます。
シーンからはthis.loadで呼び出せます。
4. シーンの作成
まず全てのシーンを作成しておきます。
ローディングシーンの作成
srcディレクトリの中にsceneディレクトリを作成して、その中にLoadingScene.tsを作成します。
src
├── assets/
├── scene
│   └── LoadingScene.ts  # 作成
├── index.html
└── index.ts
export class LoadingScene extends Phaser.Scene {
  constructor() {
    // シーンのkeyを指定
    super('loading');
  }

  // preload()はシーンが呼び出されたら実行される
  preload() {
    // ロゴ画像だけは最初から表示したいので予めロード
    // Phaser3のロゴをlabs.phaser.ioから取得しているので、もし公開する際はこの部分は消してください
    this.load.image('logo', '//labs.phaser.io/assets/sprites/phaser3-logo.png');
  }

  // create()はpreload内のアセットのロードが完了したら実行される
  create() {
    // 描画領域のサイズを取得
    const { width, height } = this.game.canvas;

    // ロゴ画像を中央に表示
    this.add.image(width/2, height/2, 'logo');

    // テキストをロゴの下に表示
    this.add.text(width/2, height/2 + 60, 'Loading...').setOrigin(0.5);

    // アセットをロード(一度ロードしたアセットは他のシーンでも使用可)
    this.load.image('street', 'assets/street.png');
    this.load.image('robot', 'assets/robot.png');

    // アセットのロードが完了したらTitleSceneに遷移
    this.load.on('complete', () => {
      this.scene.start('title');
    });

    // アセットのロードを開始(preload外でロードを行う場合はこのメソッドを呼ぶ必要がある)
    this.load.start();
  }
}
タイトルシーンの作成
次にTitleScene.tsを作成します。
src
├── assets/
├── scene
│   ├── LoadingScene.ts
│   └── TitleScene.ts  # 作成
├── index.html
└── index.ts
export class TitleScene extends Phaser.Scene {
  constructor() {
    super('title');
  }

  create() {
    const { width, height } = this.game.canvas;

    this.add.image(width/2, height/2, 'logo');
    this.add.text(width/2, height/2+60, 'クリックでスタート').setOrigin(0.5);

    // 画面を埋めるようなZoneを作成
    const zone = this.add.zone(width/2, height/2, width, height);

    // Zoneをクリックできるように設定
    zone.setInteractive({
      useHandCursor: true  // マウスオーバーでカーソルが指マークになる
    });

    // ZoneをクリックしたらMainSceneに遷移
    zone.on('pointerdown', () => {
      this.scene.start('main', { timelineID: 'start' });
    });
  }
}
メインシーンの作成
次にMainScene.tsを作成します。
src
├── assets/
├── scene
│   ├── LoadingScene.ts
│   ├── MainScene.ts  # 作成
│   └── TitleScene.ts
├── index.html
└── index.ts
export class MainScene extends Phaser.Scene {
  constructor() {
    super('main');
  }

  create() {
    const { width, height } = this.game.canvas;

    this.add.image(width/2, height/2, 'street');
    this.add.text(width/2, height/2, 'クリックでエンディング').setOrigin(0.5);

    const zone = this.add.zone(width/2, height/2, width, height);
    zone.setInteractive({
      useHandCursor: true
    });
    zone.on('pointerdown', () => {
      this.scene.start('ending');  // EndingSceneに遷移
    });
  }
}
MainSceneの中身は後で書き換えます。
エンディングシーンの作成
最後にEndingScene.tsを作成します。
src
├── assets/
├── scene
│   ├── EndingScene.ts  # 作成
│   ├── LoadingScene.ts
│   ├── MainScene.ts
│   └── TitleScene.ts
├── index.html
└── index.ts
export class EndingScene extends Phaser.Scene {
  constructor() {
    super('ending');
  }

  create() {
    const { width, height } = this.game.canvas;

    this.add.image(width/2, height/2, 'logo');
    this.add.text(width/2, height/2+60, 'おわり').setOrigin(0.5);
    this.add.text(width/2, height/2+80, '背景:[Cyberpunk Street Environment] by Luis Zuno @ansimuz').setOrigin(0.5);

    const zone = this.add.zone(width/2, height/2, width, height);
    zone.setInteractive({
      useHandCursor: true
    });
    zone.on('pointerdown', () => {
      this.scene.start('title');  // TitleSceneに遷移
    });
  }
}
シーンをまとめて登録
複数のシーンをまとめてsrc/index.tsに渡すために、src/scene/index.tsを作成します。
src
├── assets/
├── scene
│   ├── EndingScene.ts
│   ├── index.ts  # 作成
│   ├── LoadingScene.ts
│   ├── MainScene.ts
│   └── TitleScene.ts
├── index.html
└── index.ts
import { LoadingScene } from './LoadingScene';
import { TitleScene } from './TitleScene';
import { MainScene } from './MainScene';
import { EndingScene } from './EndingScene';

export const Scenes = [LoadingScene, TitleScene, MainScene, EndingScene];
src/index.tsを書き換えます。
import * as Phaser from 'phaser';
import { Scenes } from './scene';  // 追加

// MySceneはもう使わないので削除

const config: Phaser.Types.Core.GameConfig = {
  type: Phaser.AUTO,
  width: 800,
  height: 600,
  resolution: window.devicePixelRatio,
  parent: 'game-app',
  scene: Scenes  // 変更
};

new Phaser.Game(config);
webpack-dev-serverを起動して試してみましょう(これ以降この手順は省略します)
npx webpack-dev-server
ゲームが始まってローディングが終わるとタイトルに遷移し、その後はクリックするごとにメイン、エンディング、タイトルと遷移していきます。

5. ダイアログボックスの作成

会話を表示するためのダイアログボックスクラスを作成します。
ダイアログボックスには会話テキストおよび名前テキスト用のRectangleとTextオブジェクトを2セット用意します。
こうした複数のゲームオブジェクトを内包するようなクラスを作成する時は、Phaser.GameObjects.Container(ゲームオブジェクトをまとめられるコンテナ。レイヤーとしても使える)を継承すると便利です。
また、外部から会話テキストと名前テキストを変更できるようにpublicメソッドも登録しておきます。
srcディレクトリの中にclassディレクトリを作成して、その中にDialogBox.tsを作成します。
src
├── assets/
├── class
│   └── DialogBox.ts  # 作成
├── scene/
├── index.html
└── index.ts
export type DialogBoxConfig = {
  x: number,
  y: number,
  width: number,
  height: number,
  padding?: number,
  margin?: number,
  textStyle?: Phaser.Types.GameObjects.Text.TextStyle
};

// Phaser.GameObjects.Containerを継承してDialogBoxを作成
export class DialogBox extends Phaser.GameObjects.Container {
  private box: Phaser.GameObjects.Rectangle;
  private text: Phaser.GameObjects.Text;

  private actorNameBox: Phaser.GameObjects.Rectangle;
  private actorNameText: Phaser.GameObjects.Text;

  private padding: number;

  constructor(public scene: Phaser.Scene, { x, y, width, height, padding=10, margin=10, textStyle={} }: DialogBoxConfig) {
    // Phaser.GameObjects.Containerのコンストラクタ
    super(scene, 0, 0);

    // 白枠付きの黒いRectangleを作成
    this.box = new Phaser.GameObjects.Rectangle(this.scene, x, y, width, height, 0x000000).setStrokeStyle(1, 0xffffff);
    this.add(this.box);  // Containerへの追加

    // wordWrap(折り返し設定)を追加した会話テキスト用のTextStyleを作成
    const dialogBoxTextStyle = {
      ...textStyle,
      wordWrap: { width: width - padding*2, useAdvancedWrap: true }  // useAdvancedWrapをtrueにすることで日本語の折り返しが有効になる
    };

    // 会話テキスト用のTextを作成
    this.text = new Phaser.GameObjects.Text(this.scene, x - width/2 + padding, y - height/2 + padding, '', dialogBoxTextStyle);
    this.add(this.text);  // Containerへの追加

    // 高さ40の白枠付きの黒いRectangleを作成
    this.actorNameBox = new Phaser.GameObjects.Rectangle(this.scene, x - width/2, y - height/2 - margin, 0, 40, 0x000000).setStrokeStyle(1, 0xffffff);
    this.actorNameBox.setOrigin(0, 1);  // 原点を左下に設定
    this.actorNameBox.setVisible(false);  // 初期状態では非表示
    this.add(this.actorNameBox);  // Containerへの追加

    // 名前テキスト用のTextを作成
    this.actorNameText = new Phaser.GameObjects.Text(this.scene, x - width/2 + padding, y - height/2 - margin - 20, '', textStyle);
    this.actorNameText.setOrigin(0, 0.5);  // 原点を左中に設定
    this.actorNameText.setVisible(false);  // 初期状態では非表示
    this.add(this.actorNameText);  // Containerへの追加

    this.padding = padding;
  }

  // 会話テキストのセット
  public setText(text: string) {
    this.text.setText(text);
  }

  // 名前テキストのセット
  public setActorNameText(name: string) {
    this.actorNameText.setText(name);

    // Textの幅に合わせてBoxの幅を調整
    const bounds = this.actorNameText.getBounds();
    this.actorNameBox.width = bounds.width + this.padding*2;

    // Rectangleのサイズを変更した際にstrokeがおいてかれる問題の解消
    // https://github.com/photonstorm/phaser/issues/4811
    // @ts-ignore
    this.actorNameBox.geom.width = this.actorNameBox.width;
    // @ts-ignore
    this.actorNameBox.updateData();

    // BoxとTextを表示
    this.actorNameBox.setVisible(true);
    this.actorNameText.setVisible(true);
  }

  // 名前のクリア(非表示)
  public clearActorNameText() {
    // BoxとTextを非表示
    this.actorNameBox.setVisible(false);
    this.actorNameText.setVisible(false);
  }
}
試しに呼んでみましょう。メインシーンを書き換えます。
import { DialogBox, DialogBoxConfig } from '../class/DialogBox';  // 追加

export class MainScene extends Phaser.Scene {
  constructor() {
    super('main');
  }

  create() {
    const { width, height } = this.game.canvas;

    this.add.image(width/2, height/2, 'street');

    // フォントの設定
    const textStyle: Phaser.Types.GameObjects.Text.TextStyle = {
      fontFamily: '"Helvetica Neue", Arial, "Hiragino Kaku Gothic ProN", "Hiragino Sans", Meiryo, sans-serif',
      fontSize: '24px'
    };

    // DialogBoxのコンフィグ
    const dialogBoxHeight = 150;
    const dialogBoxMargin = 10;
    const dialogBoxConfig: DialogBoxConfig = {
      x: width/2,
      y: height - dialogBoxMargin - dialogBoxHeight/2,
      width: width - dialogBoxMargin*2,
      height: dialogBoxHeight,
      padding: 10,
      margin: dialogBoxMargin,
      textStyle: textStyle
    };

    // DialogBoxの作成
    const dialogBox = new DialogBox(this, dialogBoxConfig);

    // テキストの設定
    dialogBox.setText('クリックでエンディングへ ▼');
    dialogBox.setActorNameText('NAME');

    // DialogBoxの表示
    this.add.existing(dialogBox);

    const zone = this.add.zone(width/2, height/2, width, height);
    zone.setInteractive({
      useHandCursor: true
    });
    zone.on('pointerdown', () => {
      this.scene.start('ending');  // EndingSceneに遷移
    });
  }
}
DialogBoxはGameObjects.Containerを継承しているのでゲームオブジェクトです。
インスタンス化されたゲームオブジェクトを表示する際はthis.add.existing()を使用します。
実行結果
6. タイムラインプレイヤーの作成
タイムラインを受け取って順次実行していくタイムラインプレイヤークラスを作成します。
型の定義
まずクラスに必要な型を定義するファイルから作成します。
typeディレクトリを作って、その中にChoice.tsとTimeline.tsを作成します。
src
├── assets/
├── class/
├── scene/
├── type
│   ├── Choice.ts  # 作成
│   └── Timeline.ts  # 作成
├── index.html
└── index.ts
// 選択肢
export type Choice = {
  text: string,
  timelineID: string
};
import { Choice } from './Choice';

// ダイアログ表示イベント
type DialogEvent = {
  type: 'dialog',
  text: string,
  actorName?: string
};

// 背景設定イベント
type SetBackgroundEvent = {
  type: 'setBackground',
  x: number,
  y: number,
  key: string
};

// 前景追加イベント
type AddForegroundEvent = {
  type: 'addForeground',
  x: number,
  y: number,
  key: string
};

// 前景クリアイベント
type ClearForegroundEvent = {
  type: 'clearForeground'
};

// タイムライン遷移イベント
type TimelineTransitionEvent = {
  type: 'timelineTransition',
  timelineID: string
};

// シーン遷移イベント
type SceneTransitionEvent = {
  type: 'sceneTransition',
  key: string,
  data?: object
};

// 選択肢イベント
type ChoiceEvent = {
  type: 'choice',
  choices: Choice[]
};

// Timelineはイベントの配列
export type Timeline = (DialogEvent|SetBackgroundEvent|AddForegroundEvent|ClearForegroundEvent|TimelineTransitionEvent|SceneTransitionEvent|ChoiceEvent)[];
クラスの作成
classディレクトリの中にTimelinePlayer.tsを作成します。
src
├── assets/
├── class
│   ├── DialogBox.ts
│   └── TimelinePlayer.ts  # 作成
├── scene/
├── type/
├── index.html
└── index.ts
import { Timeline } from '../type/Timeline';
import { Choice } from '../type/Choice';
import { DialogBox } from './DialogBox';

export class TimelinePlayer {
  private backgroundLayer: Phaser.GameObjects.Container;
  private foregroundLayer: Phaser.GameObjects.Container;
  private uiLayer: Phaser.GameObjects.Container;
  private hitArea: Phaser.GameObjects.Zone;

  private timeline?: Timeline;
  private timelineIndex = 0;

  constructor(private scene: Phaser.Scene, private dialogBox: DialogBox, private textStyle: Phaser.Types.GameObjects.Text.TextStyle={}) {
    // 背景レイヤー・前景レイヤー・UIレイヤーをコンテナを使って表現
    this.backgroundLayer = this.scene.add.container(0, 0);
    this.foregroundLayer = this.scene.add.container(0, 0);
    this.scene.add.existing(this.dialogBox);  // ダイアログボックスは前景レイヤーとUIレイヤーの間に配置
    this.uiLayer = this.scene.add.container(0, 0);

    // クリック領域(hitArea)を画面全体に設定
    const { width, height } = this.scene.game.canvas;
    this.hitArea = new Phaser.GameObjects.Zone(this.scene, width/2, height/2, width, height);
    this.hitArea.setInteractive({
      useHandCursor: true
    });

    // hitAreaをクリックしたらnext()を実行
    this.hitArea.on('pointerdown', () => {
      this.next();
    });

    // hitAreaをUIレイヤーに追加
    this.uiLayer.add(this.hitArea);
  }

  // タイムラインの再生を開始
  public start(timeline: Timeline) {
    this.timeline = timeline;
    this.next();
  }

  // 背景画像をセット
  private setBackground(x:number, y:number, texture:string) {
    // 背景レイヤーの子を全て削除
    this.backgroundLayer.removeAll();
    // 背景画像のオブジェクトを作成
    const backgroundImage = new Phaser.GameObjects.Image(this.scene, x, y, texture);
    // 背景レイヤーに画像オブジェクトを配置
    this.backgroundLayer.add(backgroundImage);
  }

  // 前景画像を追加
  private addForeground(x:number, y:number, texture:string) {
    // 前景画像のオブジェクトを作成
    const foregroundImage = new Phaser.GameObjects.Image(this.scene, x, y, texture);
    // 前景レイヤーに画像オブジェクトを配置
    this.foregroundLayer.add(foregroundImage);
  }

  // 前景をクリア
  private clearForeground() {
    // 前景レイヤーの子を全て削除
    this.foregroundLayer.removeAll();
  }

  // 選択肢ボタンをセット
  private setChoiceButtons(choices: Choice[]) {
    if (choices.length === 0) {
      return;
    }
    this.hitArea.disableInteractive();  // hitAreaのクリックを無効化

    // ボタンを中央に配置するようにボタングループのY原点を計算
    const buttonHeight = 40,
          buttonMargin = 40;
    const { width, height } = this.scene.game.canvas;
    const buttonGroupHeight = buttonHeight * choices.length + buttonMargin * (choices.length - 1);
    const buttonGroupOriginY = height/2 - buttonGroupHeight/2;

    choices.forEach((choice, index) => {
      const y = buttonGroupOriginY + buttonHeight * (index + 0.5) + buttonMargin * (index);

      // Rectangleでボタンを作成
      const button = new Phaser.GameObjects.Rectangle(this.scene, width/2, y, width - buttonMargin*2, buttonHeight, 0x000000).setStrokeStyle(1, 0xffffff);
      button.setInteractive({
        useHandCursor: true
      });

      // マウスオーバーで色が変わるように設定
      button.on('pointerover', () => {
        button.setFillStyle(0x333333);
      });
      button.on('pointerout', () => {
        button.setFillStyle(0x000000);
      });

      // ボタンクリックでシーンをリスタートし、指定のタイムラインを実行する
      button.on('pointerdown', () => {
        // restart()の引数がシーンのinit()の引数に渡される
        this.scene.scene.restart({ timelineID: choice.timelineID });
      });

      // ボタンをUIレイヤーに追加
      this.uiLayer.add(button);

      // ボタンテキストを作成
      const buttonText = new Phaser.GameObjects.Text(this.scene, width/2, y, choice.text, this.textStyle).setOrigin(0.5);

      // ボタンテキストをUIレイヤーに追加
      this.uiLayer.add(buttonText);
    });
  }

  // 次のタイムラインを実行
  private next() {
    if (!this.timeline) {
      return;
    }
    if (this.timelineIndex >= this.timeline.length) {
      return;
    }

    // タイムラインのイベントを取得してから、timelineIndexをインクリメント
    const timelineEvent = this.timeline[this.timelineIndex++];

    switch (timelineEvent.type) {
      case 'dialog':  // ダイアログイベント
        if (timelineEvent.actorName) {
          // actorNameが設定されていたら名前を表示
          this.dialogBox.setActorNameText(timelineEvent.actorName);
        } else {
          // actorNameが設定されていなかったら名前を非表示
          this.dialogBox.clearActorNameText();
        }
        this.dialogBox.setText(timelineEvent.text);
        break;

      case 'setBackground':  // 背景設定イベント
        this.setBackground(timelineEvent.x, timelineEvent.y, timelineEvent.key);
        this.next();  // すぐに次のタイムラインを実行する
        break;

      case 'addForeground':  // 前景追加イベント
        this.addForeground(timelineEvent.x, timelineEvent.y, timelineEvent.key);
        this.next();  // すぐに次のタイムラインを実行する
        break;

      case 'clearForeground':  // 前景クリアイベント
        this.clearForeground();
        this.next();  // すぐに次のタイムラインを実行する
        break;

      case 'timelineTransition':  // タイムライン遷移イベント
        // シーンをリスタートし、指定のタイムラインを実行する
        // restart()の引数がシーンのinit()の引数に渡される
        this.scene.scene.restart({ timelineID: timelineEvent.timelineID });
        break;

      case 'sceneTransition':  // シーン遷移イベント
        // 指定のシーンに遷移する
        // start()の第2引数がシーンのinit()の引数に渡される
        this.scene.scene.start(timelineEvent.key, timelineEvent.data);
        break;

      case 'choice':  // 選択肢イベント
        this.setChoiceButtons(timelineEvent.choices);
        break;

      default:
        break;
    }
  }
}
7. タイムライン(シナリオ)の作成
タイムラインを再生できるようになったので、今度はタイムラインを使ってシナリオを作成します。
型の定義
その前に型を定義。
typeディレクトリの中にTimelines.tsを作成します。
src
├── assets/
├── class/
├── scene/
├── type
│   ├── Choice.ts
│   ├── Timeline.ts
│   └── Timelines.ts  # 作成
├── index.html
└── index.ts
import { Timeline } from './Timeline';

export type Timelines = {
  [timelineID: string] : Timeline
};
[TIPS] TypeScriptのインデックスシグネチャ
この{ [timelineID: string]: Timeline }という書き方はTypeScriptのインデックスシグネチャという表現方法で、オブジェクトのキー(インデックス)の型を指定するための手法です。
今回のように「キーにはどんな文字列が来てもいいけどプロパティの型は指定したいオブジェクト」といった型を宣言する際にも使えます。
(今回はキーは文字列・プロパティはTimelineと決められたオブジェクト型を作りたいのでこのような宣言になっています。)
通常は{ [key: string]: number }や{ [index: string]: number }のように書きますが、この中のkey・indexの部分は何を指定してもよい(可読性のためだけのものです)ので、今回はtimelineIDと指定しています(キーがtimelineIDになるよというささやかなメッセージです)。
Index Signatures - TypeScript Deep Dive 英語版
Index signature(インデックス型) - TypeScript Deep Dive 日本語版
シナリオの作成
srcディレクトリの中にdataディレクトリを作成して、その中にtimeline.tsを作成します。
src
├── assets/
├── class/
├── data
│   └── timeline.ts  # 作成
├── scene/
├── type/
├── index.html
└── index.ts
timeline.tsの中にシナリオのタイムラインを書いていきます。
import { Timelines } from '../type/Timelines';

export const timelineData: Timelines = {
  start: [
    {type: 'dialog', text: '・・・・・・ ▼'},
    {type: 'dialog', text: 'う、うーん・・・ ▼'},
    {type: 'setBackground', x: 400, y: 300, key: 'street'},
    {type: 'dialog', text: 'ここは・・・? ▼'},
    {type: 'addForeground', x: 400, y: 300, key: 'robot'},
    {type: 'dialog', text: '目が覚めましたか ▼', actorName: '???'},
    {type: 'dialog', text: 'アンドロイド・・・? ▼'},
    {type: 'dialog', text: '私は「ACT-42」 ▼', actorName: '???'},
    {type: 'dialog', text: '早速ですが—— ▼', actorName: 'ACT-42'},
    {type: 'dialog', text: 'あなたは追われています ▼', actorName: 'ACT-42'},
    {type: 'dialog', text: '一刻も早くここから逃げた方がいい ▼', actorName: 'ACT-42'},
    {type: 'timelineTransition', timelineID: 'choice01'}
  ],
  choice01: [
    {type: 'setBackground', x: 400, y: 300, key: 'street'},
    {type: 'addForeground', x: 400, y: 300, key: 'robot'},
    {type: 'dialog', text: '一緒に逃げましょう ▼', actorName: 'ACT-42'},
    {type: 'choice', choices: [
      {text: 'はい', timelineID: 'choice01_a01'},
      {text: 'いいえ', timelineID: 'choice01_a02'},
      {text: 'アンドロイド風情が話しかけるな', timelineID: 'choice01_a03'}
    ]}
  ],
  choice01_a01: [
    {type: 'setBackground', x: 400, y: 300, key: 'street'},
    {type: 'addForeground', x: 400, y: 300, key: 'robot'},
    {type: 'dialog', text: '事情はつかめないけどとりあえず従っておこう ▼'},
    {type: 'dialog', text: 'よろしい。ではこちらへ来てください ▼', actorName: 'ACT-42'},
    {type: 'clearForeground'},
    {type: 'dialog', text: 'こうして銀河を股にかけた物語が始まるのであった・・・ ▼'},
    {type: 'sceneTransition', key: 'ending'}
  ],
  choice01_a02: [
    {type: 'setBackground', x: 400, y: 300, key: 'street'},
    {type: 'addForeground', x: 400, y: 300, key: 'robot'},
    {type: 'dialog', text: '・・・困りましたね ▼', actorName: 'ACT-42'},
    {type: 'dialog', text: '今は事情を話している暇がないんです ▼', actorName: 'ACT-42'},
    {type: 'dialog', text: 'あなたは捕まるべきではない ▼', actorName: 'ACT-42'},
    {type: 'dialog', text: 'もう一度聞きますね? ▼', actorName: 'ACT-42'},
    {type: 'timelineTransition', timelineID: 'choice01'}
  ],
  choice01_a03: [
    {type: 'setBackground', x: 400, y: 300, key: 'street'},
    {type: 'addForeground', x: 400, y: 300, key: 'robot'},
    {type: 'dialog', text: '・・・・・・ ▼', actorName: 'ACT-42'},
    {type: 'dialog', text: 'わかりました。それでは私はこれで ▼', actorName: 'ACT-42'},
    {type: 'clearForeground'},
    {type: 'dialog', text: '・・・・・・ ▼'},
    {type: 'dialog', text: 'この後俺は謎の組織に捕まり色々されてしまうのだった・・・ ▼'},
    {type: 'sceneTransition', key: 'ending'}
  ]
}
startというタイムラインを作るのと、各タイムラインの最後は必ずchoiceかtimelineTransitionかsceneTransitionで終わるようにすればあとは自由です。
8. タイムラインの読み込み・再生
タイムラインの再生を行えるようMainScene.tsを書き換えます。
import { DialogBox, DialogBoxConfig } from '../class/DialogBox';
import { TimelinePlayer } from '../class/TimelinePlayer';
import { Timeline } from '../type/Timeline';
import { timelineData } from '../data/timeline';

export class MainScene extends Phaser.Scene {
  private timeline?: Timeline;

  constructor() {
    super('main');
  }

  init(data: any) {
    // this.scene.restart()の第1引数もしくは
    // this.scene.start()の第2引数に指定されたオブジェクトがdataに渡される
    const timelineID = data.timelineID || 'start';

    if (!(timelineID in timelineData)) {
      console.error(`[ERROR] タイムラインID[${timelineID}]は登録されていません`);
      // 登録されていないタイムラインIDが指定されていたらタイトルシーンに遷移する
      this.scene.start('title');
      return;
    }

    this.timeline = timelineData[timelineID];
  }

  create() {
    if (!this.timeline) {
      return;
    }

    const { width, height } = this.game.canvas;

    const textStyle: Phaser.Types.GameObjects.Text.TextStyle = {
      fontFamily: '"Helvetica Neue", Arial, "Hiragino Kaku Gothic ProN", "Hiragino Sans", Meiryo, sans-serif',
      fontSize: '24px'
    };

    const dialogBoxHeight = 150;
    const dialogBoxMargin = 10;
    const dialogBoxConfig: DialogBoxConfig = {
      x: width/2,
      y: height - dialogBoxMargin - dialogBoxHeight/2,
      width: width - dialogBoxMargin*2,
      height: dialogBoxHeight,
      padding: 10,
      margin: dialogBoxMargin,
      textStyle: textStyle
    };

    const dialoxBox = new DialogBox(this, dialogBoxConfig);

    // タイムラインプレイヤーの作成
    const timelinePlayer = new TimelinePlayer(this, dialoxBox, textStyle);

    // タイムラインの再生開始
    timelinePlayer.start(this.timeline);
  }
}
これでゲームは完成です。
9. ビルド
npx webpack --mode=production
を実行するとdistディレクトリにビルド結果が生成されますので、それらをサーバーに置いてindex.htmlにアクセスするとゲームが遊べるようになります。
(もし公開する際はPhaser3のロゴをlabs.phaser.ioから引っ張ってきている部分を必ず消してください)
サーバーを立てずにローカルのindex.htmlファイルをブラウザで開いてもアセットが読み込めないので注意です。
10. 終わりに
思いのほか長くなってしまいました。
本当は音を鳴らしたり、テキストを1文字ずつ表示するアニメーションなども実装したかったのですが、もっと長くなってしまうので泣く泣く割愛…。
コードを改造したりして色々遊んでみてください。
テキストを1文字ずつ表示するアニメーションは
Create a Dialog Modal Plugin in Phaser 3 – Part 2
を参考にすると作りやすいと思います。
この記事を書いている途中で同じ企画(Qiita夏祭り2020)の同じテーマでPhaser3を取り扱っている記事を見つけて被ったと絶望嬉しくなりました。
Web屋がJavaScriptでゲームを作ってSteamで配信するまでの道のり
こちらの記事では完成したゲームをSteamで公開する手順などを説明されています。
ゲームの完成度も物凄く高く、ソースもgithubで公開されていて非常に参考になりますので是非ご覧ください。