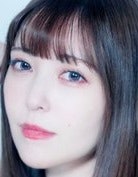
きっかけ
- VS嵐のコーナーで、人の顔や物が別の人の顔へ変化していくというものがあった。
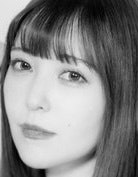
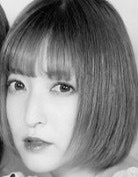
これをそのままゲームにしたいと思った。 - また、私の好きな黒崎真音 さんが神田沙也加 さんに似ているという話から、似ている人がモーフィングされたらどうなるのか興味を持った。
モーフィングの参考
というかコピペで利用させていただいた。
顔モーフィング
ありがとうございます。
準備
- anacondaを利用して環境構築する
- モーフィングしたい画像を収集する
実装
コードの概要
- morphing.py
- 画像ファイルパスを二つ、出力先フォルダパスを引数で与える
- 1%~99%まで係数を与えて徐々に変化していく画像を100枚作る
- creategif.py
- 画像があるフォルダを引数で与える(上記morphing.pyで出力されたフォルダ)
- 作成された画像のフォルダで実行し、画像を繋ぎ合わせてアニメーション化する
作ったコード(ほぼコピペ)
morphing.py
import argparse
import cv2
import numpy as np
import random
import dlib
from imutils import face_utils
import sys
import os
import shutil

def Face_landmarks(image_path):
  print("[INFO] loading facial landmark predictor...")
  detector = dlib.get_frontal_face_detector()
  predictor = dlib.shape_predictor("shape_predictor_68_face_landmarks.dat")
  image = cv2.imread(image_path)
  size = image.shape
  gray = cv2.cvtColor(image, cv2.COLOR_BGR2GRAY)
  rects = detector(gray, 0)
  if len(rects) > 2:
    print("[ERR] too many faces fount...")
    # print("[Error] {} faces found...".format(len(rect)))
    sys.exit(1)
  if len(rects) < 1:
    print("[ERR] face not found...")
    # print("[Error] face not found...".format(len(rect))
    sys.exit(1)
  for rect in rects:
    (bX, bY, bW, bH) = face_utils.rect_to_bb(rect)
    print("[INFO] face frame {}".format(bX, bY, bW, bH))
    shape = predictor(gray, rect)
    shape = face_utils.shape_to_np(shape)
    points = shape.tolist()
    # (0,0),(x,0),(0,y),(x,y)
    points.append([0, 0])
    points.append([int(size[1]-1), 0])
    points.append([0, int(size[0]-1)])
    points.append([int(size[1]-1), int(size[0]-1)])
    # (x/2,0),(0,y/2),(x/2,y),(x,y/2)
    points.append([int(size[1]/2), 0])
    points.append([0, int(size[0]/2)])
    points.append([int(size[1]/2), int(size[0]-1)])
    points.append([int(size[1]-1), int(size[0]/2)])
  cv2.destroyAllWindows()
  return points

def Face_delaunay(rect,points1 ,points2 ,alpha ):
    points = []
    for i in range(0, len(points1)):
        x = ( 1 - alpha ) * points1[i][0] + alpha * points2[i][0]
        y = ( 1 - alpha ) * points1[i][1] + alpha * points2[i][1]
        if rect[2] < x:
            print(rect[2], x)
            x = rect[2]-0.01
        elif rect[3] < y:
            print(rect[3], y)
            y = rect[3]-0.01
        points.append((x,y))
    triangles, delaunay = calculateDelaunayTriangles(rect, points)
    cv2.destroyAllWindows()
    return triangles, delaunay

def calculateDelaunayTriangles(rect, points):

    subdiv = cv2.Subdiv2D(rect)
    for p in points:
        subdiv.insert(p)

    triangleList = subdiv.getTriangleList()

    delaunayTri = []

    pt = []

    for t in triangleList:
        pt.append((t[0], t[1]))
        pt.append((t[2], t[3]))
        pt.append((t[4], t[5]))

        pt1 = (t[0], t[1])
        pt2 = (t[2], t[3])
        pt3 = (t[4], t[5])

        if rectContains(rect, pt1) and rectContains(rect, pt2) and rectContains(rect, pt3):
            ind = []
            for j in range(0, 3):
                for k in range(0, len(points)):
                    if(abs(pt[j][0] - points[k][0]) < 1.0 and abs(pt[j][1] - points[k][1]) < 1.0):
                        ind.append(k)
            if len(ind) == 3:
                delaunayTri.append((ind[0], ind[1], ind[2]))

        pt = []

    return triangleList,delaunayTri

def rectContains(rect, point) :
    if point[0] < rect[0] :
        return False
    elif point[1] < rect[1] :
        return False
    elif point[0] > rect[0] + rect[2] :
        return False
    elif point[1] > rect[1] + rect[3] :
        return False
    return True

def betweenPoints(point1, point2, alpha) :
    points = []
    for i in range(0, len(points1)):
        x = ( 1 - alpha ) * points1[i][0] + alpha * points2[i][0]
        y = ( 1 - alpha ) * points1[i][1] + alpha * points2[i][1]
        points.append((x,y))
    return points

def Face_morph(img1, img2, img, tri1, tri2, tri, alpha) :
    """モーフィング画像作成
    Args:
        img1 : 画像1
        img2 : 画像2
        img  : 画像1,2のモーフィング画像(Output用画像)
        tri1 : 画像1の三角形
        tri2 : 画像2の三角形
        tri  : 画像1,2の間の三角形
        alpha: 重み
    """

    # 各三角形の座標を含む最小の矩形領域 (バウンディングボックス)を取得
    # (左上のx座標, 左上のy座標, 幅, 高さ)
    r1 = cv2.boundingRect(np.float32([tri1]))
    r2 = cv2.boundingRect(np.float32([tri2]))
    r = cv2.boundingRect(np.float32([tri]))
    # バウンディングボックスを左上を原点(0, 0)とした座標に変換
    t1Rect = []
    t2Rect = []
    tRect = []
    for i in range(0, 3):
        tRect.append(((tri[i][0] - r[0]),(tri[i][1] - r[1])))
        t1Rect.append(((tri1[i][0] - r1[0]),(tri1[i][1] - r1[1])))
        t2Rect.append(((tri2[i][0] - r2[0]),(tri2[i][1] - r2[1])))
    # 三角形のマスクを生成
    # 三角形の領域のピクセル値は1で、残りの領域のピクセル値は0になる
    mask = np.zeros((r[3], r[2], 3), dtype = np.float32)
    cv2.fillConvexPoly(mask, np.int32(tRect), (1.0, 1.0, 1.0), 16, 0)
    # アフィン変換の入力画像を用意
    img1Rect = img1[r1[1]:r1[1] + r1[3], r1[0]:r1[0] + r1[2]]
    img2Rect = img2[r2[1]:r2[1] + r2[3], r2[0]:r2[0] + r2[2]]
    # アフィン変換の変換行列を生成
    warpMat1 = cv2.getAffineTransform( np.float32(t1Rect), np.float32(tRect) )
    warpMat2 = cv2.getAffineTransform( np.float32(t2Rect), np.float32(tRect) )
    size = (r[2], r[3])
    # アフィン変換の実行
    # 1.src:入力画像、2.M:変換行列、3.dsize:出力画像のサイズ、4.flags:変換方法、5.borderMode:境界の対処方法
    warpImage1 = cv2.warpAffine( img1Rect, warpMat1, (size[0], size[1]), flags=cv2.INTER_LINEAR, borderMode=cv2.BORDER_REFLECT_101 )
    warpImage2 = cv2.warpAffine( img2Rect, warpMat2, (size[0], size[1]), flags=cv2.INTER_LINEAR, borderMode=cv2.BORDER_REFLECT_101 )
    # 2つの画像に重みを付けて、三角形の最終的なピクセル値を見つける
    #print(warpImage1.shape, warpImage2.shape)
    imgRect = (1.0 - alpha) * warpImage1 + alpha * warpImage2
    # マスクと投影結果を使用して論理AND演算を実行し、
    # 三角形領域の投影されたピクセル値を取得しOutput用画像にコピー
    #print("mask:",mask)
    #print("imgRect:",imgRect)
    #print("r:",r)
    img[r[1]:r[1]+r[3], r[0]:r[0]+r[2]] = img[r[1]:r[1]+r[3], r[0]:r[0]+r[2]] * ( 1 - mask ) + imgRect * mask

if __name__ == '__main__' :
    # モーフィングする画像取得
    filename1 = sys.argv[1]
    filename2 = sys.argv[2]
    print(sys.argv)
    img1 = cv2.imread(filename1)
    img2 = cv2.imread(filename2)

    # 画像をfloat型に変換
    img1 = np.float32(img1)
    img2 = np.float32(img2)
    print("img1:",img1.shape)
    print("img2:",img2.shape)
    # 長方形を取得
    size = img1.shape
    rect = (0, 0, size[1], size[0])
    #print(rect)
    # 顔の特徴点を取得
    points1 = Face_landmarks(filename1)
    points2 = Face_landmarks(filename2)
    # 1~99%割合を変えてモーフィング
    for cnt in range(1, 100):
        alpha = cnt * 0.01

        # 画像1,2の特徴点の間を取得
        points = betweenPoints(points1,points2,alpha)
        # ドロネーの三角形(座標配列とpoints要素番号)を取得
        triangles, delaunay = Face_delaunay(rect,points,points2,alpha)
        # モーフィング画像初期化
        imgMorph = np.zeros(img1.shape, dtype = img1.dtype)
        # ドロネー三角形の配列要素番号を読込
        for (i, (x, y, z)) in enumerate(delaunay):
            # ドロネー三角形のピクセル位置を取得
            tri1 = [points1[x], points1[y], points1[z]]
            tri2 = [points2[x], points2[y], points2[z]]
            tri = [points[x], points[y], points[z]]
            # モーフィング画像を作成
            Face_morph(img1, img2, imgMorph, tri1, tri2, tri, alpha)
        # モーフィング画像をint型に変換し出力
        imgMorph = np.uint8(imgMorph)

        os.makedirs(sys.argv[3], exist_ok=True)
        stroutfile = sys.argv[3] + '/picture-%s.png'
        cv2.imwrite(stroutfile % str(cnt).zfill(3),imgMorph)
        strcopyfilezero =  sys.argv[3] + '/picture-000.png'
        strcopyfilehund =  sys.argv[3] + '/picture-100.png'
        shutil.copyfile(filename1, strcopyfilezero)
        shutil.copyfile(filename2, strcopyfilehund)
creategif.py
from PIL import Image
import glob
import sys

images = []
for i in range(100):
    file_name = sys.argv[1] + '/picture-' + str(i).zfill(3) + '.png'
    im = Image.open(file_name)
    images.append(im)
images[0].save(sys.argv[1] + '/image.gif' , save_all = True , append_images = images[1:] , duration = 100 , loop = 0)
実装がうまくいかなかった点
-
顔モーフィング の筆者は関数の役割毎にファイルを分けており、
face_landmarks.Face_landmarks(filename1)
のように記載していた
* pythonを使ったことが無いので、別ファイルの関数呼び出しが分からず、全部一つのファイルにまとめ、
    ```
        Face_landmarks(filename1)
    ```
とした。
調べればよいが、とりあえず実行してみたかったので飛ばした。
-
"import dlib"が記載されていなかったりしてエラーが出る
- ライブラリの宣言は重要
-
範囲外を触っているというエラーが出た
calculateDelaunayTriangles()subdiv = cv2.Subdiv2D(rect) for p in points: subdiv.insert(p)- subdiv.insert(p)でエラー発生
- 渡した二つの画像サイズが違うため起こっていた
- 最初は安直にrectの値を+1して範囲に収まるようにしていたが、
ほかの箇所でエラーが出てしまった - ペイントでピクセルサイズを合わせる
- 最初は安直にrectの値を+1して範囲に収まるようにしていたが、
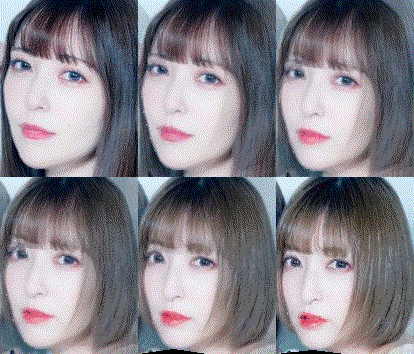
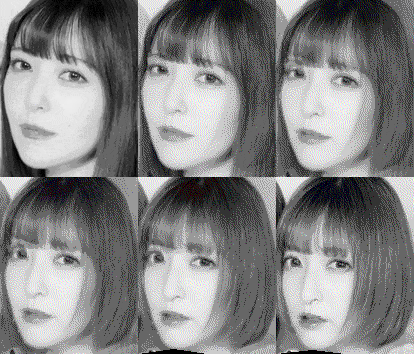
結果
ということで、失敗した。
口が認識できていない?色、角度の問題か?
参考にさせていただいた著者の方、真音さん、沙也加さんごめんなさい。
グレーにして再挑戦
こっちはほぼ成功!
なぜ失敗したのか
-
カラーに対応していないコードだった?
gray = cv2.cvtColor(image, cv2.COLOR_BGR2GRAY)- ここでグレーに変換している
- 特徴点の検出がうまくできていない?
- ここでグレーに変換している
このアルゴリズムの欠点
- 顔の特徴点が全て取れないと進めない
- 眉毛が前髪で全く見えなかったり、顔の輪郭が手で隠れているとダメみたい。
