はじめに
VMを立てるのは面倒くさい。でも複数人向けにPythonの開発環境を安く作りたい。そんな悩める人のためのQiita。自分用のメモ書きである。
うまく行けば所要時間1時間程度。
Material
- Raspberry Pi3+ (Raspberry Pi4 Memory:4GB を本当は欲しかった)
- Raspbian GNU/Linux 10 (buster)
- LAN環境(有線/Wifiどちらでも)
Method
環境構築
-
まずはaptを用いてjupyterhubに必要な一式をインストールします。
$ sudo apt update $ sudo apt upgrade $ sudo apt install python3 python3-pip npm nodejs libnode64 -
次にpip3とnpmを用いてjupyterhub一式とproxy機能をを入れます。#1
$ sudo pip3 install jupyterhub notebook wheel ipywidgets jupyterlab $ sudo npm install -g configurable-http-proxy -
JupyterHubをローカルで起動し動作チェックする。まずは一般ユーザーで確認。
$ /usr/local/bin/jupyterhubそしてRaspberry PiのDesktopにあるChromiumで、http://localhost:8000/ にアクセスし、次の画面が出ることを確認する。JupyterHubサーバは、
ctrl-cで終了できる。
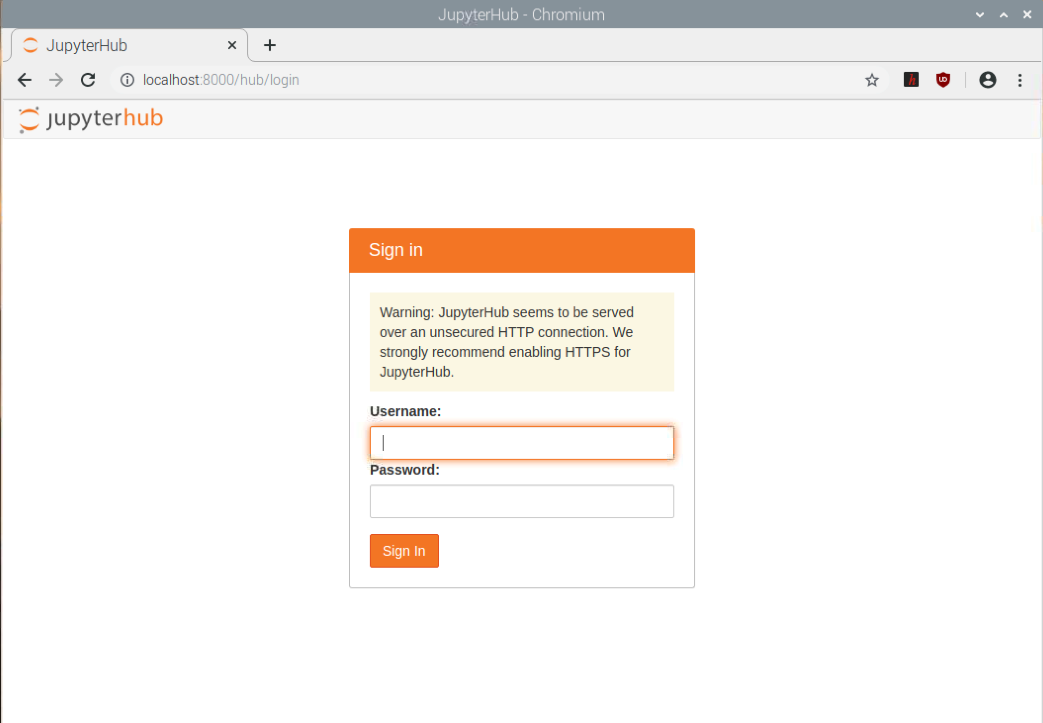
Multiple userで使うには、rootユーザでの起動が必要。なので、一応 root (sudo) で起動し、上記ログイン画面が表示されることを再度確認。
$ sudo jupyterhub -
JupyterHub の設定をするために、設定ファイルの元を"/etc/jupyterhub"に作り出す。
$ sudo mkdir /etc/jupyterhub
$ cd /etc/jupyterhub
$ sudo jupyterhub --generate-config    # このコマンドでデフォルトの設定ファイルを作成させる
すると"jupyterhub_config.py"が吐き出される。rootユーザーでそれを開き、以下を修正。
$ sudo vi /etc/jupyterhub/jupyterhub_config.py # viでも何でもお好きなテキストエディタでOK/etc/jupyterhub/jupyterhub_config.py# デフォルトでjupyter labを用いたいため以下を修正 c.Spawner.default_url = '/lab' # アクセス可能なユーザーをホワイトリストへ追加 c.Authenticator.whitelist = {'User1, User2'} # adminユーザを追加 (一般ユーザーの接続を切断する権限有) c.Authenticator.admin_users = {'User0'} # アクセスしたら各ユーザーディレクトリのnotebookフォルダを参照するように設定 # 必須設定項目ではなく、好みが分かれるところ。 c.Spawner.notebook_dir = '~/notebook''c.Spawner.notebook_dir'を設定した場合、'各ユーザのnotebookディレクトリ(~/notebook)は事前に作成が必要。
(参考サイト: https://qiita.com/atsushi_wagatsuma/items/89b714328663992b54f4)また、詳しいユーザの管理については本記事「ユーザの追加と削除」を参考。
-
最後にjupyterhubを起動し、動作をチェックする。
$ sudo jupyterhub -f /etc/jupyterhub/jupyterhub_config.py ... [I 2020-02-23 11:10:12.687 JupyterHub app:2631] JupyterHub is now running at http://:8000 # この表示が出れば起動完了! -
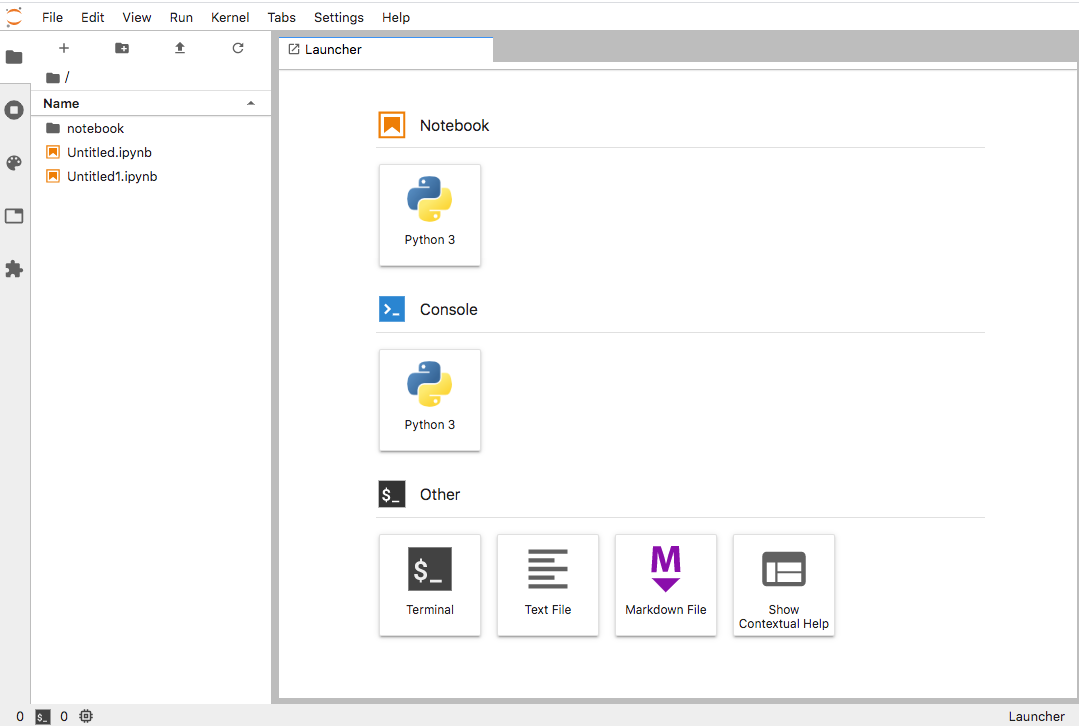
Adminユーザ and 一般ユーザでlocalhostもしくはネットワーク上の他コンピュータからログインできるかどうかチェック。簡単なPythonプログラムを書いてちゃんと動いていればOK !
Localhost:http://localhost:8000/
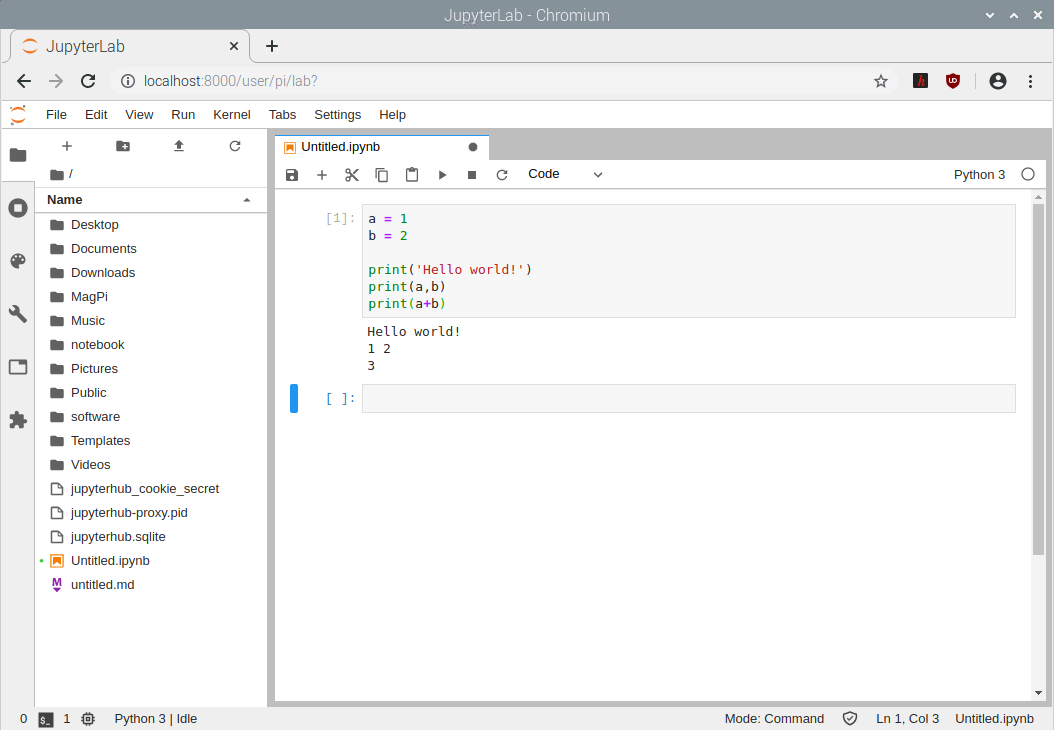
Network:http://<IP address>:8000/
-
とりあえずは動いたが、このままだと毎回起動時に
$ sudo jupyterhub -f /etc/jupyterhub/jupyterhub_config.pyを打たなければいけない。非常に面倒くさい。よって、Systemd serviceで一元的に管理し、Raspberry pi起動時に自動起動するよう設定する。$ sudo mkdir -p /opt/jupyterhub/etc/systemd # 慣習に従って、opt以下にこのようなフォルダを作り、そこに設定ファイルを置く。 $ sudo vi /opt/jupyterhub/etc/systemd/jupyterhub.service # viなどのText Editorで新ファイルを作り、以下の書き込みをコピペする。/opt/jupyterhub/etc/systemd/jupyterhub.service[Unit] Description=JupyterHub After=syslog.target network.target [Service] User=root
Environment="PATH=/bin:/usr/local/sbin:/usr/local/bin:/usr/sbin:/usr/bin"
ExecStart=/usr/local/bin/jupyterhub -f /etc/jupyterhub/jupyterhub_config.py
[Install]
WantedBy=multi-user.target
```
-
systemdの読み込みフォルダへシンボリックリンクを作る。
$ sudo ln -s /opt/jupyterhub/etc/systemd/jupyterhub.service /etc/systemd/system/jupyterhub.service -
systmctlでconfigurationファイルをリロード。そしてRaspberry Pi起動時にjupyterhubを自動起動する設定をする。さらにマニュアルでとりあえず起動してみる。
$ sudo systemctl daemon-reload    # config.ファイルを再読み込み
$ sudo systemctl enable jupyterhub.service    # 起動時にjupyterhub.serviceを自動起動
$ sudo systemctl start jupyterhub.service    # jupyterhub.serviceをマニュアル起動
$ sudo systemctl status jupyterhub.service    #jupyterhub.serviceの状態を確認。

# "Active: active (runnning)"が表示されればOK

● jupyterhub.service - JupyterHub
Loaded: loaded
(/opt/jupyterhub/etc/systemd/jupyterhub.service; enabled; vendor preset: enabled)
Active: active (running) since Sun 2020-02-23 13:11:01 JST; 10s ago
...
ユーザーの追加・削除
-
デフォルト設定ではJupyterHubがインストールされているサーバのUnixユーザの中から、JupyterHubにアクセスできるユーザを選べる。
-
UnixユーザのどのユーザがJupyterHubのサーバー起動時にアクセスできるかどうかは、上記
/etc/jupyterhub/jupyterhub_config.pyのc.Authenticator.whitelistに追加。 -
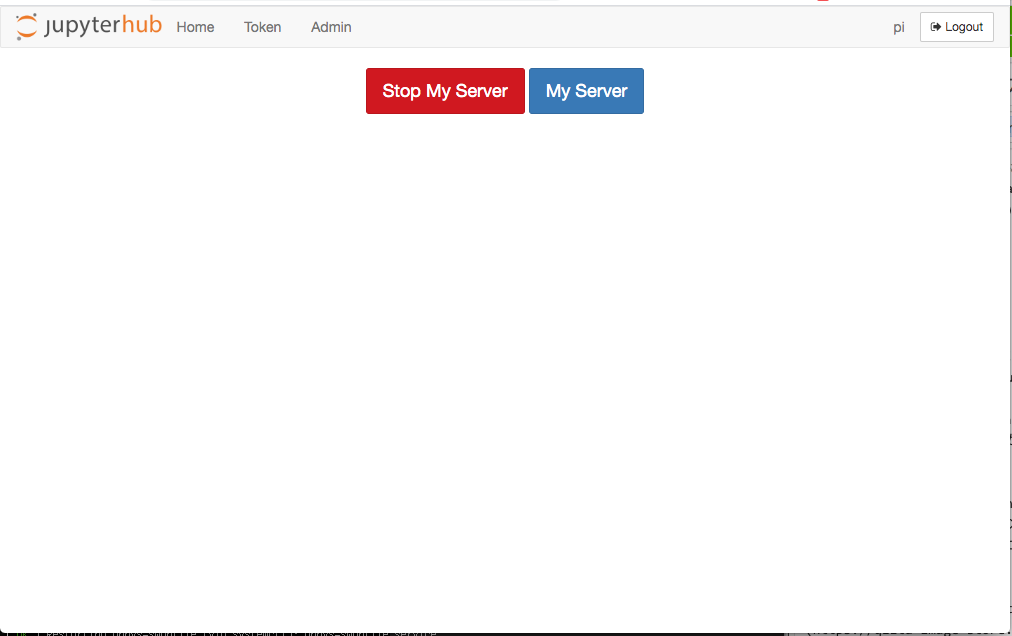
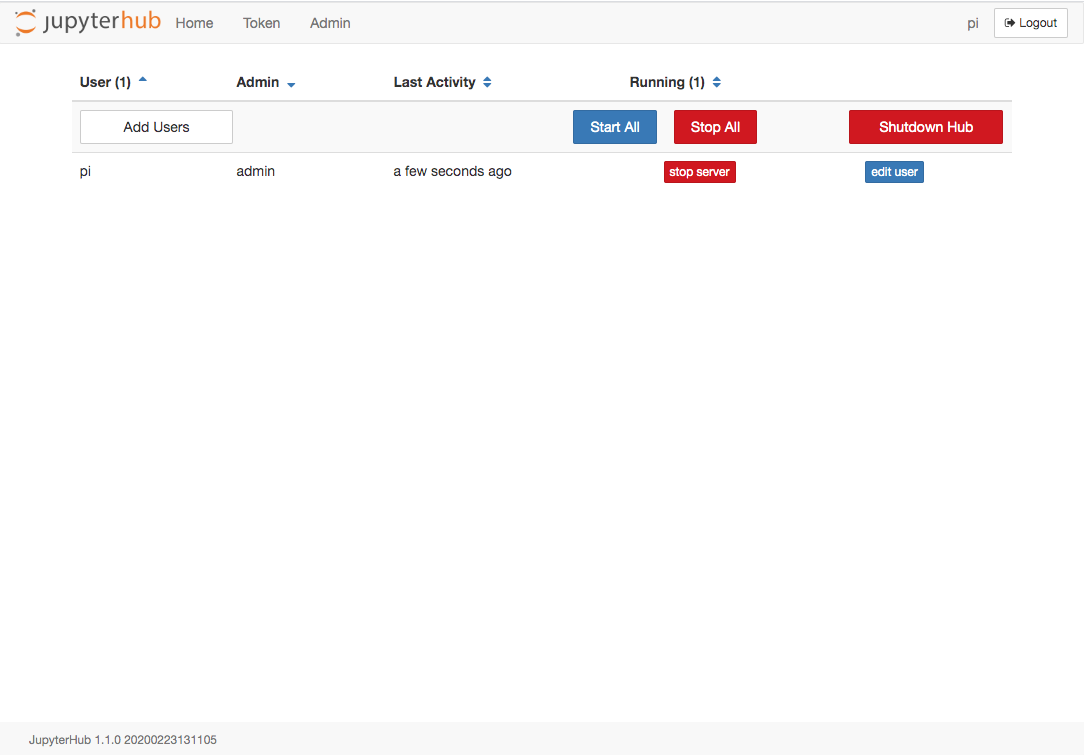
jupyterHubサーバー起動中は、adminユーザが
JupyterhubのWebApp上でユーザーの追加・削除の管理をできるが、jupyterHubサーバをリスタートするとこの設定はリセットされるので注意。
-
公式WebのDocumentにはさらに多くの情報がある。本格的に管理する方は必読。
Jupyterlab/hub-extension
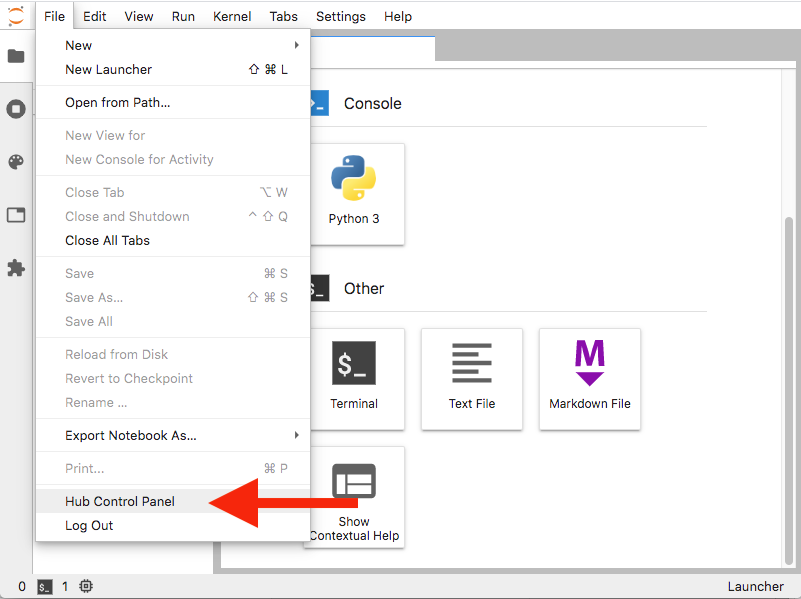
2020.02.23現在、JupyterlabのFile --> Hub Control Panelより、Hubの設定画面に移動可能。Jupyterlab/hub-extensionは必要ではない?
追記(2020.02.23)
公式にこのExtensionはJupyterlabに統合されたようです。よってインストールの必要なし。
GitHub: jupyterlab/jupyterlab
This adds a "Hub" menu to JupyterLab that allows a user to log out of JupyterHub or access their JupyterHub control panel.
Python Library
注:筆者がpip派なのでそれのみ記述。Conda派の皆様はググっていただければ... m(_ _)m
-
全ユーザに適用したいLibraryは、sudoでインストール&管理。
$ sudo pip3 install <library name> -
各ユーザーで導入・管理したいPython Libraryは、各ユーザーで、
JupyterLab --> Launcher --> Other --> Terminalなどを用いて個別にコマンドを打ち、入れる。
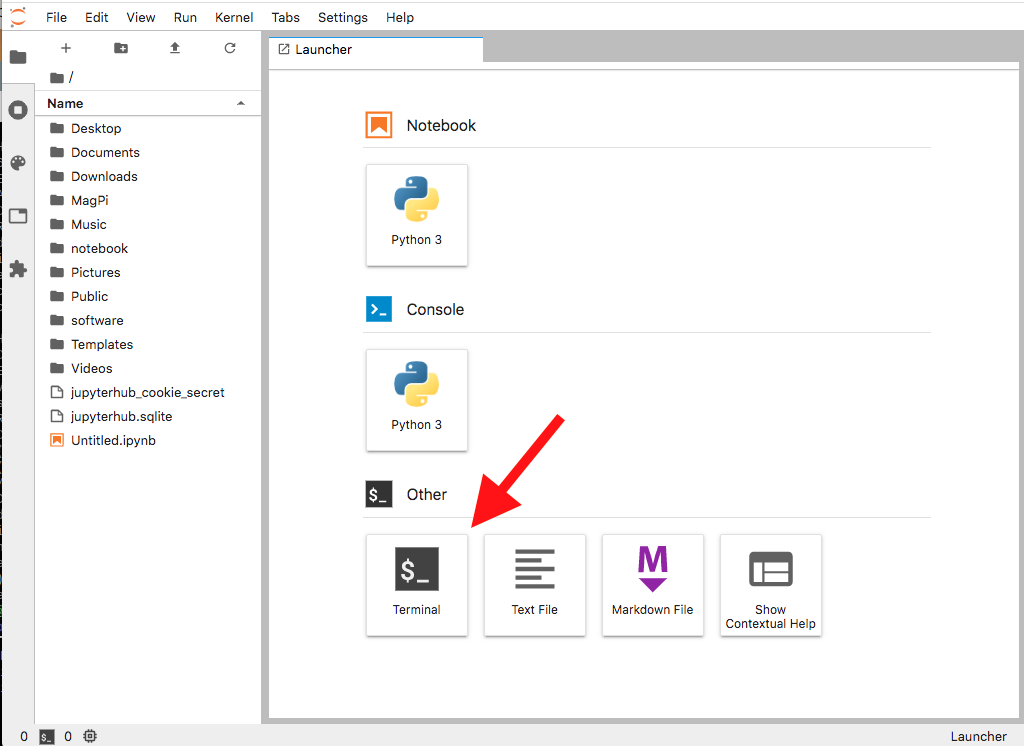
$ pip3 install <library name>
Trouble-Shooting
Proxy関連のエラーで起動しない
-
Jupyterhubを起動しようとしたら、proxy関連のエラーコードが返ってきて起動できなかった。npmに原因があると考え、npmコマンドを打ったが梨の礫。
$ sudo npm $ #何も表示されない -
仕方がないので、npn/node/nodejs関連を一旦削除し再インストール。
$ sudo apt remove node npm nodejs $ sudo apt update #一応リストを更新 $ sudo apt upgrade #一応他も最新版に $ sudo apt install node libnode64 npm -
npmコマンドを打ってみる。正常にversionが表示されるので良し。
$ sudo npm -v 5.8.0 -
なお、npmだけを打つと、"npmとNode.jsのバージョンが合っていない"と警告が出る。これが将来的に不具合を起こす可能性もあるが、とりあえずjupyterhubは動く。
$ sudo npm npm WARN npm npm does not support Node.js v10.15.2 npm WARN npm You should probably upgrade to a newer version of node as we npm WARN npm can't make any promises that npm will work with this version. npm WARN npm Supported releases of Node.js are the latest release of 4, 6, 7, 8, 9. npm WARN npm You can find the latest version at https://nodejs.org/ -
jupyterhubを起動し、正常に起動するか確認する。
$ sudo jupyterhub -f /etc/jupyterhub/jupyterhub_config.py
...
[I 2020-02-23 11:10:12.687 JupyterHub app:2631] JupyterHub is now running at http://:8000
jupyterlabのExtension、jupyterlab-drawioがインストールできない
おそらく上のNode.jsとnpmのバージョンが合っていない問題に関連し、rebuildできないのが原因?現在打つ手なし(2020/02/23現在)。
Great Web references for JupyterLab/Python
初めてJupyterLab/Pythonを使う人向けに紹介したい素晴らしいサイト!
