Pay.jpを使用した決済システムの実装方法です。
Goals
以下のようなアプリを作成します。
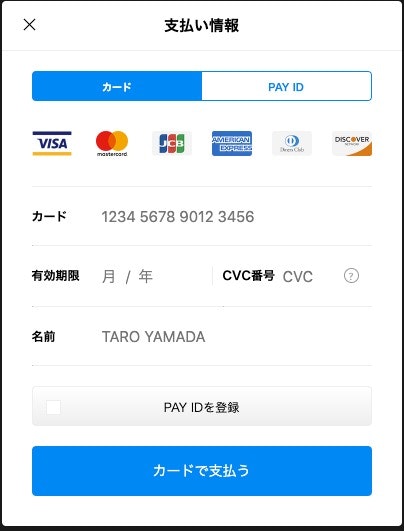
金額を入力して「カードを支払う」をクリックすると、支払いのウィンドウが表示されます。
クレジットカード情報を入力し「カードを支払う」をクリックすると支払いが完了します。
PAY.JPの会員登録
PAY.JP公式ページより会員登録をします。
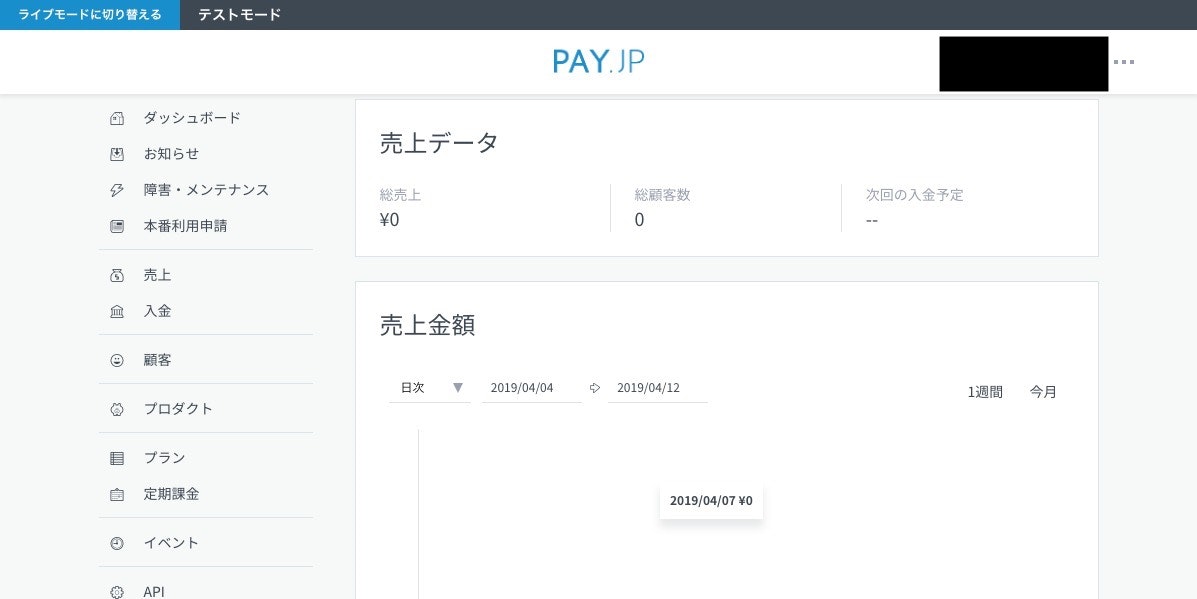
ログインすると以下の画面が表示されます。
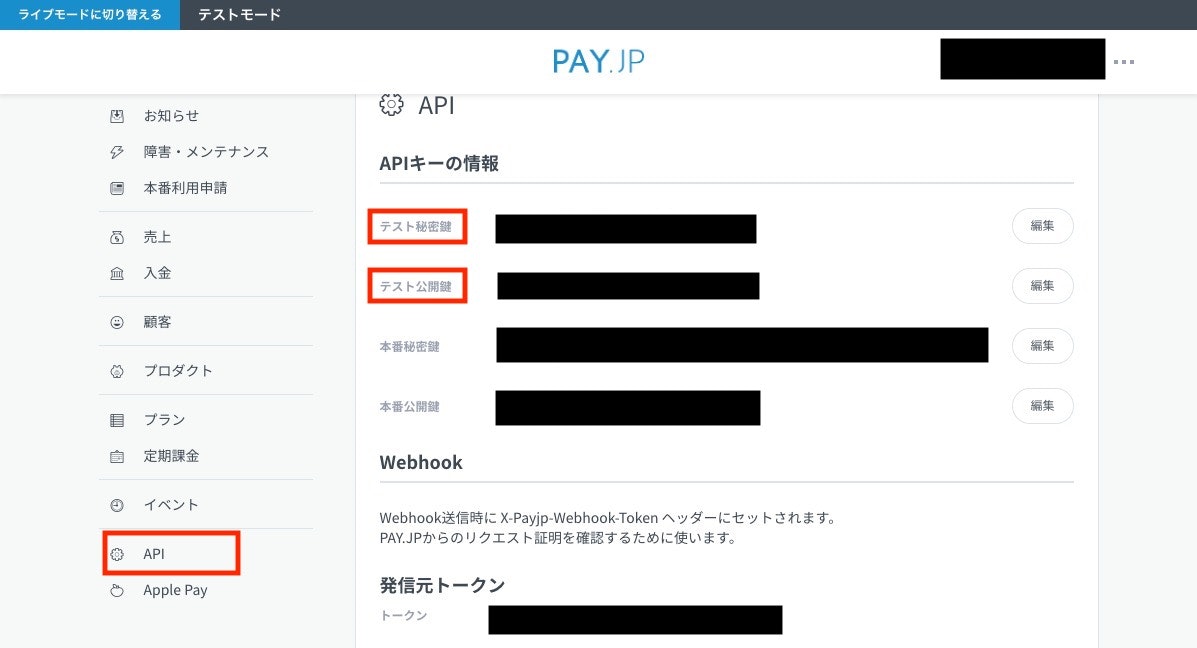
左の「API」を選択するとAPIキーの情報が表示されます。
今回はテストアプリなのでテスト秘密鍵とテスト公開鍵を使用します。
サンプルアプリの作成
Railsのプロジェクトを作成したら、Gemfileを開き以下をグローバルに追記します。
gem 'payjp'
インストールします。
bundle install
環境変数の設定
ローカル環境
環境変数の設定にはdotenv-railsというを使用します。
dotenv-railsのインストールは、Gemfileのグローバルへgem 'dot-env'を記載してbundle installを実行してください。
使用方法は、プロジェクト直下に.envファイルを作成し、以下のように編集しましょう。
注:.envがリモートリポジトリへアップされないようにgit.ignorへ追加しましょう
PAYJP_PUBLIC_KEY='テスト公開鍵'
PAYJP_SECRET_KEY='テスト秘密鍵'
これでローカル環境での環境変数の設定は完了です。
ViewとControllerの作成
以下を実行してControllerとViewを作成します。
rails g controller products index pay
View
app/views/products/index.html.erb
「カードで支払う」ボタンを設置します。
このボタンをクリックするだけで、支払い用のモーダルウィンドウが表示されます。
<%= form_with local: true, url: products_pay_path do |form| %>
  金額:<%= form.text_field :amount %>
  <script
    type="text/javascript"
    src="https://checkout.pay.jp"
    class="payjp-button"
    data-key="<%= ENV["PAYJP_PUBLIC_KEY"] %>">
  </script>
<% end %>
app/views/products/pay.html.erb
支払い完了の旨を表示します。
支払いが完了しました

<br>
<%= link_to 'Topへ', root_path %>
Controller
payメソッドを編集します。
def pay
  Payjp.api_key = ENV["PAYJP_SECRET_KEY"]
  Payjp::Charge.create(
    :amount => params[:amount],
    :card => params['payjp-token'],
    :currency => 'jpy'
  )
end
動作確認
金額(50〜)を入力し、「カードで支払う」をクリックします。
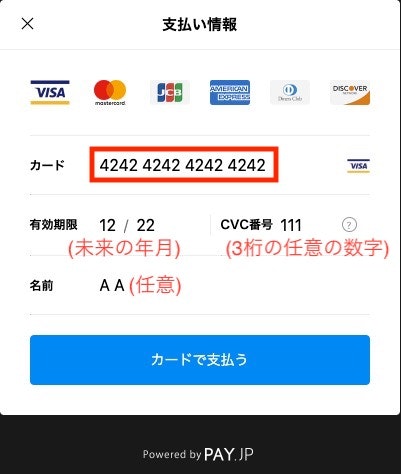
支払い情報ウィンドウにクレジットカード情報を入力し「カードで支払う」をクリックします。
- カード:テストカードに記載の番号
- 有効期限:未来の年月
- CVC番号:3桁の適当な数字
- 名前:任意の名前
「支払いが完了しました」の画面が表示されれば成功です。
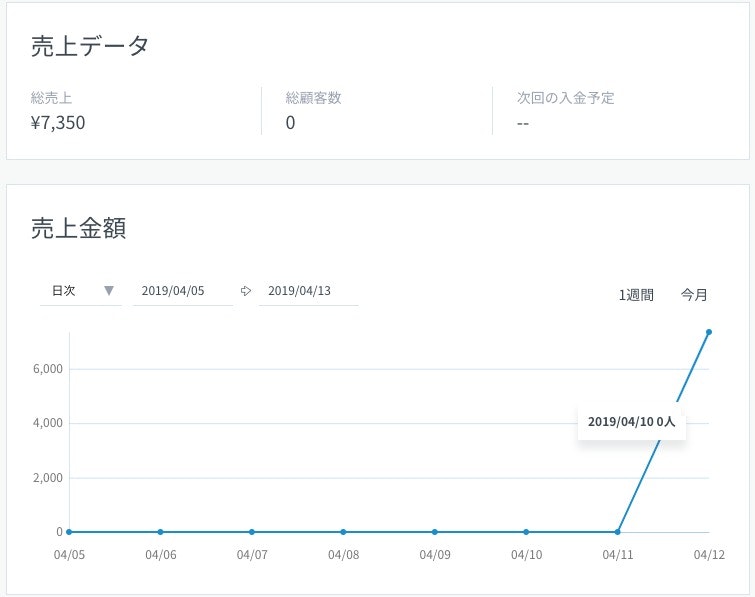
Webのダッシュボードで売り上げデータが更新されていることが確認できます。
最後に
返金は「売上一覧」->「課金ID」->「売上返金」から。
本番運用する際は、ほかにもいろいろ考慮する点がありますが、最低限の実装であれば、ものすごく簡単ですね。
参考

