この記事は Angular Advent Calendar 2022 の16日目の記事です。
Astroとは?
Astroは、コンテンツにフォーカスした高速なWebサイトを構築するためのオールインワンWebフレームワークです。SSG (Static Site Generator)の1つです。
公式ドキュメントがわかりやすいので、ぜひご一読ください。日本語版もあります。
Astroは、コアコンセプトにもあるように、自分好みのUIフレームワークを持ち込むことができる(BYOD: Bring Your Own UI Framework) 設計になっています。
本記事は、AstroにAngularを持ち込む方法を紹介したいと思います。
AstroでAngularを使う方法
残念ながらAstroが公式でサポートしているUIフレームワークにAngularは含まれていません ![]()
AnalogというAngularのメタフレームワークを導入することで、AstroでもAngularを使うことができます。ありがとうBrandon!
Analogついては、@komura_cさんがAngularのメタフレームワークAnalogを試すで紹介しているので、気になった方はご参照ください。
実際に試してみる
Astroのセットアップ
まずは、Astroのプロジェクトを生成します。
$ npm create astro@latest
✔ How would you like to setup your new project?は、a few best practices(recommended)を選択します。
プロジェクトルートへ移動して、起動してみます。
npm run dev
http://localhost:3000/にアクセスして、Welcome to Astro.のページが表示されたらOKです。
@analogjs/astro-angularをインストールする
次に、AnalogのAstro用プラグインをインストールして、Angularが使えるようにします。
npx astro add @analogjs/astro-angular
コマンドを実行すると、astroの設定ファイルにanalogの設定が追加されます。
import { defineConfig } from 'astro/config';

// https://astro.build/config
- export default defineConfig({});
+ import analogjsangular from "@analogjs/astro-angular";
+
+ // https://astro.build/config
+ export default defineConfig({
+   integrations: [analogjsangular()]
+ });
Angularは2022年12月12日現在、v15.0.3がインストールされます。
"dependencies": {
+     "@analogjs/astro-angular": "^0.1.0-beta.5",
+     "@angular-devkit/build-angular": "^15.0.3",
+     "@angular/animations": "^15.0.3",
+     "@angular/common": "^15.0.3",
+     "@angular/compiler": "^15.0.3",
+     "@angular/compiler-cli": "^15.0.3",
+     "@angular/core": "^15.0.3",
+     "@angular/language-service": "^15.0.3",
+     "@angular/platform-browser": "^15.0.3",
+     "@angular/platform-browser-dynamic": "^15.0.3",
+     "@angular/platform-server": "^15.0.3",
+     "rxjs": "^7.6.0",
+     "tslib": "^2.4.1",
+     "zone.js": "^0.11.8"
  }
@analogjs/astro-angularはまだβ版で@Outputが使えない、などの制限事項があります。
tsconfig.app.jsonを追加する
コンパイルするために、プロジェクトルートにtsconfig.app.jsonを追加する必要があります。
{
  "extends": "./tsconfig.json",
  "compileOnSave": false,
  "compilerOptions": {
    "baseUrl": "./",
    "outDir": "./dist/out-tsc",
    "forceConsistentCasingInFileNames": true,
    "strict": true,
    "noImplicitOverride": true,
    "noPropertyAccessFromIndexSignature": true,
    "noImplicitReturns": true,
    "noFallthroughCasesInSwitch": true,
    "sourceMap": true,
    "declaration": false,
    "downlevelIteration": true,
    "experimentalDecorators": true,
    "moduleResolution": "node",
    "importHelpers": true,
    "noEmit": false,
    "target": "es2020",
    "module": "es2020",
    "lib": ["es2020", "dom"]
  },
  "angularCompilerOptions": {
    "enableI18nLegacyMessageIdFormat": false,
    "strictInjectionParameters": true,
    "strictInputAccessModifiers": true,
    "strictTemplates": true
  },
  "files": [],
  "include": ["src/**/*.ts"]
}
Angularコンポーネントを追加する
componentsフォルダにファイルを追加して、コンポーネントを定義します。
今回は、counter.component.tsを追加します。
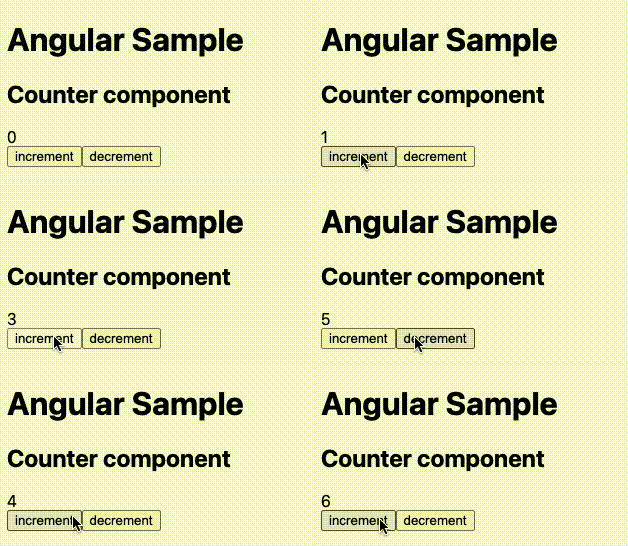
ボタンを押すたびに、表示されている数字が増減します。
import { Component, Input } from "@angular/core";

@Component({
  selector: "app-counter",
  standalone: true,
  template: `
    <h2>{{ title }}</h2>
    <div>
      <div>{{ count }}</div>
      <button (click)="onIncrement()">increment</button>
      <button (click)="onDecrement()">decrement</button>
    </div>
  `,
})
export class CounterComponent {
  @Input() title: string;

  count = 0;

  onIncrement() {
    this.count++;
  }

  onDecrement() {
    this.count--;
  }
}
Angular v14から追加された機能である、Standalone Componentsを使用する必要があります。
Angularコンポーネントを使用する
まず、追加したAngularコンポーネントを表示するためのページを追加します。
Astroはファイルベースルーティングなので、pagesフォルダにファイルを追加するだけで、ルーティングが自動的に設定されます。
今回は、angular.astroを追加します。
初期構築時に自動生成されたLayout.astroと、先ほど追加したcounter.component.tsをimportして使用します。
---
import Layout from "../layouts/Layout.astro";
import { CounterComponent } from "../components/counter.component";
---

<Layout title="Angular">
  <h1>Angular Sample</h1>
  <CounterComponent title="Counter component" client:load />
</Layout>
JavaScriptの動作が必要なAngularコンポーネントにはclient:loadディレクティブを設定します。
Astroはビルド時に全てのJavaScriptを排除します。インタラクティブなUIを実現するためにJavaScriptが必要になる場合は、開発者が明示的に許可する必要があります。
これはPartial Hydrationと呼ばれる、Astroのコアコンセプトの1つです。
client:loadが指定されたコンポーネントのJavaScriptは、ページ読み込み時にインポートされます。これをclient:visibleに変えて、表示されるまで遅延ロードさせることもできます。
動作確認
http://localhost:3000/angularにアクセスして、動作確認します。
![]()
ユースケースを考える
長らく、AngularでSSGをやりたい場合はScullyぐらいしかありませんでしたが、Astro + Angular(Analog)という選択肢が増えました。それぞれコンセプトが違うので難しいですが、既存のAngularアプリケーションをSSG化したい場合はScully、新規で構築する場合はAstro + Angular(Analog)がいいような気がします。
Astroと他のSSGの比較は公式でも言及されているため、よければそちらもご参照ください。
おわりに
個人的にAstroの設計思想はかなり良いと思っていて、今からSSGを構築するならぜひ検討したいフレームワークの1つです。Analogと合わせて引き続きキャッチアップしていきたいです。
明日は、@ic_lifewoodさんです!
参考記事
