0. samegame
今日はさめがめをつくります。
だいたい200行程度のシンプルなやつです。

- リポジトリ: https://github.com/nikueater/elm-samegame-example/
- デモ: https://nikueater.github.io/elm-samegame-example/
1. プロジェクトを作成
% elm init
% elm install elm/random
% elm install mdgriffith/elm-ui
ランダムにステージを生成するので elm/random を使います。
あとmdgriffith/elm-uiを使いますが,このあたりは好みで。
以下,src/Main.elm を編集していきます。
module Main exposing (..)

import Browser
import Element exposing (..)
import Element.Background as Bg
import Element.Events as Events
import Html exposing (Html)
import Random
2. データ構造
-- さめがめステージ
type Cell = Red | Green | Blue | Orange

type alias Row = List (Maybe Cell)

type alias Stage = List Row

-- モデル
type alias Model = Stage
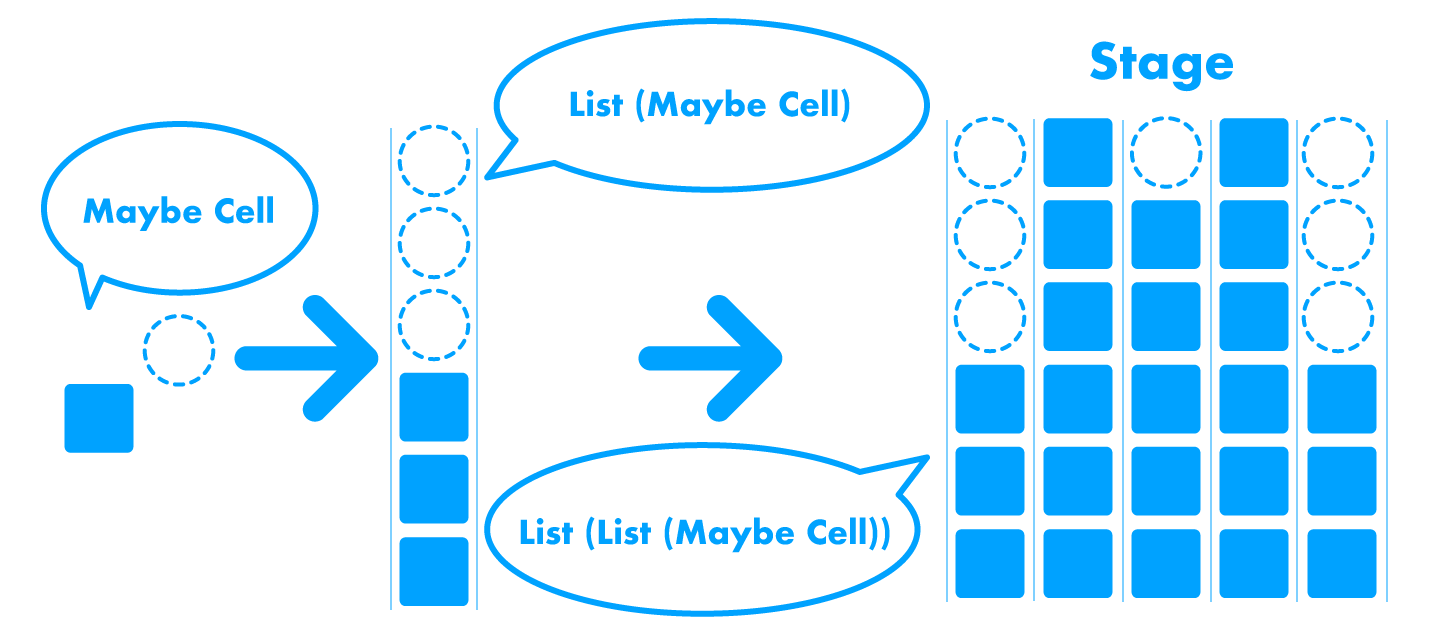
まずは四色のセルを_Cell_型として定義します。
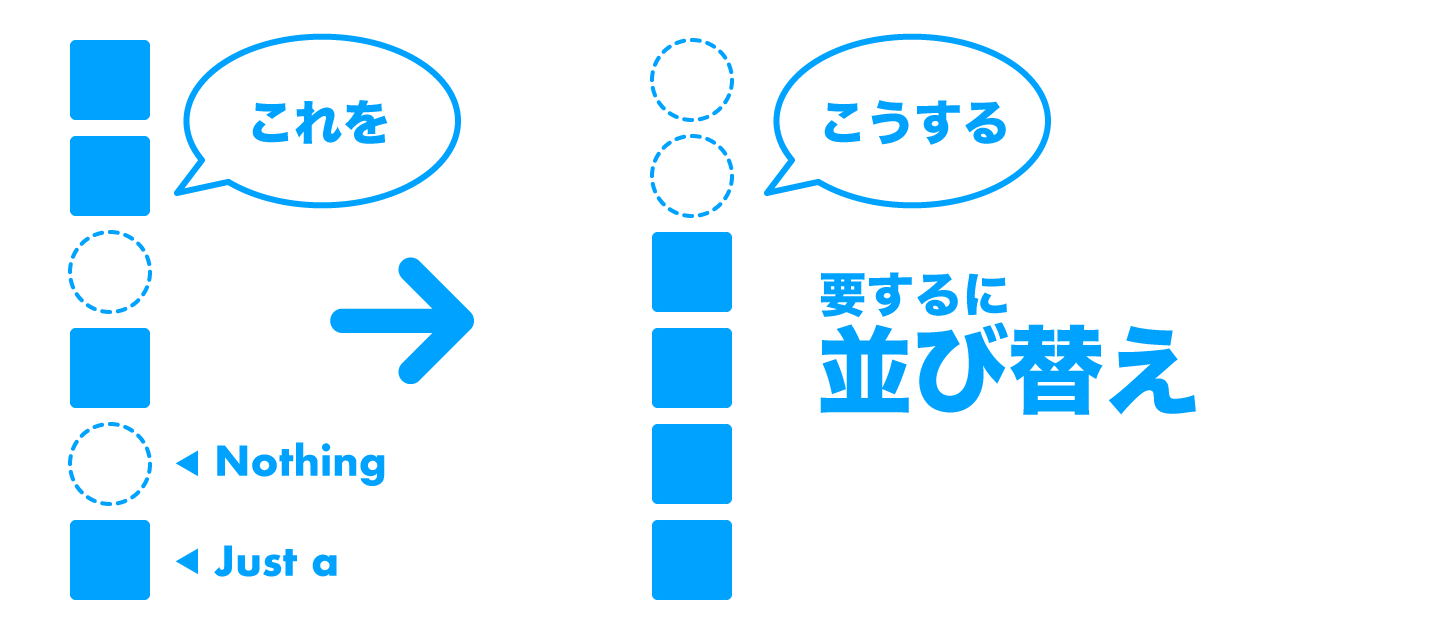
ステージはセルで埋め尽くされますが,クリックされると消えてしまいますので消えたセルを表現するために,今回は_Maybe_を使い_Maybe Cell_型とします。
そうすれば,消えてしまったセルは_Nothing_として表現できますよね。

さて,このセルを使ってどうステージを表現するかです。
一番単純なのは一次元のリストにしてしまうことですが,最初に載せたgifアニメーションの動きを実現するのは一手間かかりそうですね。
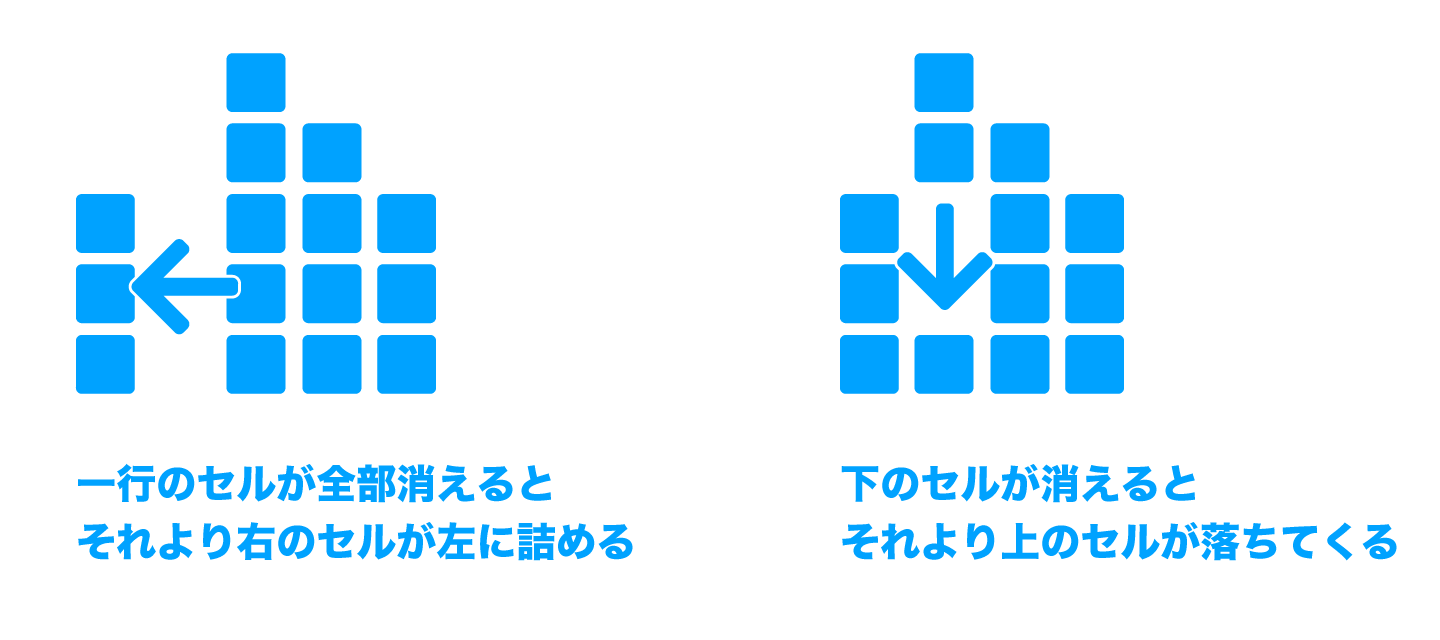
"さめがめ"のセルの水平方向と垂直方向の動きを考えると,セルの行(垂直方向に並んだセル)を水平に並べると処理しやすそうなので,こうしてみます。
3. 乱数でステージを初期化する
Elmでの乱数の扱いについてはElmのガイド読むと良いです。
ざっくり言うとJavaScriptみたいにその場で変数に乱数を代入するのではなく,乱数が生成されたら_update_関数で受け取ります。
今回はカスタムタイプ(Cell)をランダムで取得したいので,Random.uniformを,また_Cell_は_List_になるので,Random.listを使いましょう。
type Msg
    = Initialized Stage

init : Model
init =
    let
        initStage =
            Random.uniform Red  [Blue, Green, Orange]
                |> Random.list 6
                |> Random.map (List.map Just)
                |> Random.list 25
                |> Random.generate Initialized
    in
        ([], initStage)

main : Program () Model Msg
main =
    Browser.element
        { init = always init
        , update = update
        , view = view
        , subscriptions = always Sub.none
        }
ここで動作確認をしておきましょう。
まだ_update_ と view を定義していなかったので,一時的に書いておきます。
update : Msg -> Model -> ( Model, Cmd Msg )
update msg model =
    case msg of
        Initialized stage ->
            (stage, Cmd.none)
                |> Debug.log "initialized"

view : Model -> Html Msg
view model =
    layout [] none
そうしたら,実行です。
% elm reactor
で localhost:8000 とかにアクセスして,_Main.elm_を開き,_F12キー_などでブラウザの開発者ツールを起動すると,_init_で初期化し_update_で受け取った**stage**の内容がコンソールに表示されているはずです。
(参考までに,ここまでのソースコードはこちら)
initialized: ([[Just Green,Just Green,Just Orange,Just Red,Just Red,Just Orange],[Just Red,Just Green,Just Green,Just Orange,Just Blue,Just Red],[Just Orange,Just Orange,Just Orange,Just Blue,Just Green,Just Red],...(以下略)],<internals>)
4. ステージを描画する
先述の通り今回_view_はelm-uiで実装します。
この記事でもさらっと説明を入れながら実装していきますが,詳しくはelm-uiハンズオンを参考にすると良いかもしれません。
-- Element.layoutはelm-uiの"Element msg"を"Html msg"に変換する
view : Model -> Html Msg
view model =
    layout [padding 8] (viewStage model)

-- Element.rowで水平方向に子要素を配置する
-- (flex-direction:row)
viewStage : Model -> Element Msg
viewStage model =
    row [spacing 2] (List.map viewRow model)

-- Element.columnで垂直方向に子要素を配置する
-- (flex-direction:column)
viewRow : List (Maybe Cell) -> Element Msg
viewRow cs =
    column [spacing 2] (List.map viewCell cs)

-- Element.elは子要素を一つ持つdiv的なもの, noneは空div
viewCell : Maybe Cell -> Element Msg
viewCell cell =
    let
        filler =
            el [width (px 20), height (px 20)] none
    in
        case cell of
            Just Red ->
                el [Bg.color (rgb 1 0.2 0.3)] filler

            Just Green ->
                el [Bg.color (rgb 0.2 1 0.3)] filler

            Just Blue ->
                el [Bg.color (rgb 0.2 0.3 1)] filler

            Just Orange ->
                el [Bg.color (rgb 1 0.75 0.25)] filler

            Nothing ->
                filler
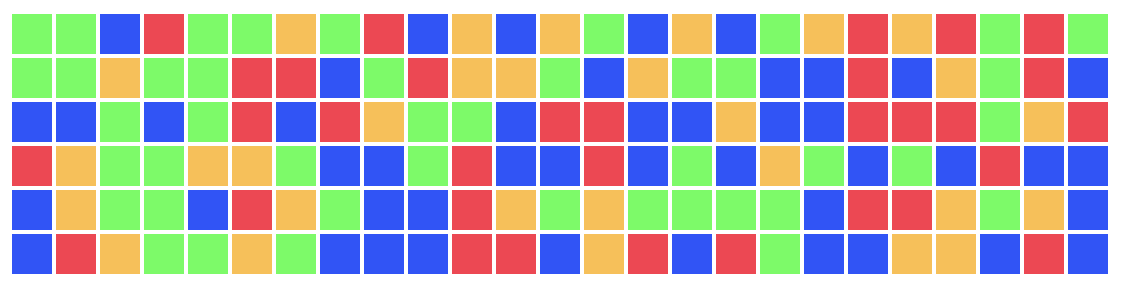
実行するとこんな感じになったでしょうか?
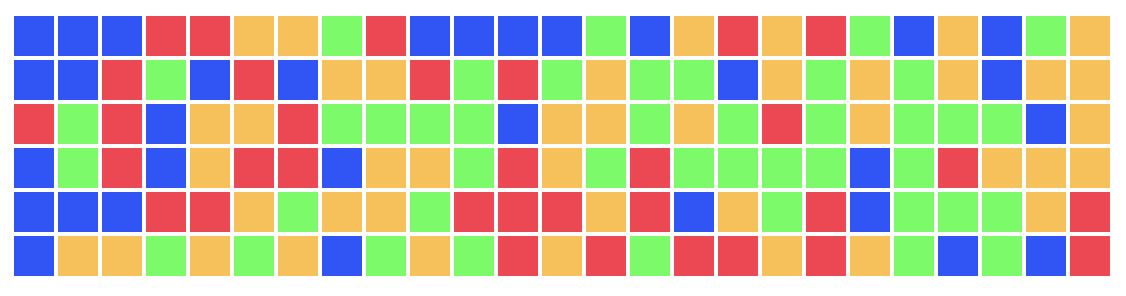
リロードする度にセルがランダムに表示されるはずです。
5. クリック位置を検出する
セルがクリックされたら,クリックされたのがどのセルなのか分かるようにしましょう。
この節ではこれまで書いてきた関数たちにちょっと手を加えていきます。
5.1. Msgの拡張
まずは,クリックされたイベントを_update_で受け取る必要があるので,_Msg_の拡張です。
こんな感じにセルが何色か,そしてx座標とy座標の情報を持つ_Clicked_を定義しましょう。
type Msg
    = Initialized Stage
    | Clicked (Maybe Cell) {x: Int, y: Int}
5.2. セルに自身の座標を持たせる
List.indexedMapは,リストの要素が何番目を受け取ることができるList.mapです。
これを使えば,セルが水平方向に何番目,垂直方向に何番目かを受け取ることができるので,クリック時にその情報を渡すようにしましょう。
viewStage : Model -> Element Msg
viewStage model =
    row [spacing 2] (List.indexedMap viewRow model)


viewRow : Int -> List (Maybe Cell) -> Element Msg
viewRow i cs =
    column [spacing 2] (List.indexedMap (viewCell i) cs)


viewCell : Int -> Int -> Maybe Cell -> Element Msg
viewCell x y cell =
    let
        -- クリックされたときのイベント
        onClick =
            Events.onClick (Clicked cell {x = x, y = y})

        filler =
            el [width (px 20), height (px 20)] none
    in
        -- Nothing以外の各セルにクリックされたときのイベントを追加
        case cell of
            Just Red ->
                el [Bg.color (rgb 1 0.2 0.3), onClick] filler

            Just Green ->
                el [Bg.color (rgb 0.2 1 0.3), onClick] filler

            Just Blue ->
                el [Bg.color (rgb 0.2 0.3 1), onClick] filler

            Just Orange ->
                el [Bg.color (rgb 1 0.75 0.25), onClick] filler

            Nothing ->
                filler
5.3. クリックイベントをupdateで受け取る
update : Msg -> Model -> ( Model, Cmd Msg )
update msg model =
    case msg of
        Initialized stage ->
            (stage, Cmd.none)

        Clicked cell pos ->
            let
                _ = Debug.log "click" pos
            in
                (model, Cmd.none)
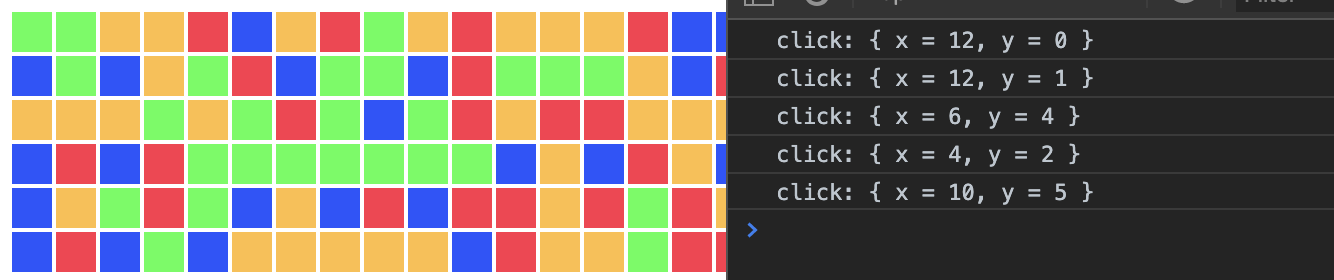
(ここまでのソース)
6. クリックしたセルの周囲の同色のマスを削除していく
6.1. 指定したセルの周囲の座標を取得する
このあとクリックされたセルの周囲の同色セルを調べていく上で必要な二つのヘルパ関数を作っておきましょう。
まず,指定したセルの上下左右のセルの座標を取得する関数を定義します。
surroundings : {x: Int, y: Int} -> List {x: Int, y: Int}
surroundings pos =
     [ { pos | x = pos.x - 1 }
     , { pos | x = pos.x + 1}
     , { pos | y = pos.y - 1 }
     , { pos | y = pos.y + 1}
     ]
     |> List.filter (\{x} -> 0 <= x && x < 25)  -- 左端右端を超えるものは除去
     |> List.filter (\{y} -> 0 <= y && y < 6)   -- 上端下端を超えるものは除去
これで,例えば{x = 2, y = 2}を渡されれば
- {x = 1, y = 2}
- {x = 3, y = 2}
- {x = 2, y = 1}
- {x = 2, y = 3}
が返ってきます。
6.2. 指定した座標のセルを取得する
次は_Stage_の中から指定した座標のセルを取得する関数です。
getAt : {x: Int, y: Int} -> Stage -> Maybe Cell
getAt {x, y} stage =
    let
        get i=
            List.drop i >> List.head
    in
        stage
            |> get x
            |> Maybe.andThen (get y)
            |> Maybe.andThen identity
6.3. 指定した座標のセルをステージから消す
指定したセルを消す(=Nothingに書き換える)関数を作りましょう。
eraseAt : Stage -> {x: Int, y: Int} -> Stage
eraseAt stage {x, y} =
    let
        -- 行内i番目の要素をNothingにする補助関数
        eraseNth i xs =
            case (i, xs) of
                (_, []) -> []
                (0, _::cs) -> Nothing :: cs
                (_, c::cs) -> c :: eraseNth (i - 1) cs

        -- Stage中x行目ならeraseAtInLineを適用し,それ以外はそのまま返す補助関数
        eraseAtInRow i xs =
            case (i, xs) of
                (_, []) -> []
                (0, l::ls) -> (eraseNth y l) :: ls
                (_, l::ls) -> l :: eraseAtInRow (i - 1) ls
    in
        eraseAtInRow x stage
なんかまとめられそうな気配がしますね。
eraseAt : Stage -> {x: Int, y: Int} -> Stage
eraseAt stage {x, y} =
    let
        -- i番目の要素にfnを適用する補助関数
        doAt i fn xs =
            case (i, xs) of
                (_, []) -> []
                (0, e::es) -> (fn e) :: es
                (_, e::es) -> e :: doAt (i - 1) fn es

        -- 行内i番目の要素をNothingにする補助関数
        eraseNth i xs =
            doAt i (always Nothing) xs

    in
        doAt x (eraseNth y) stage
6.4. 指定したセルおよび周囲の同色セルを辿りながら削除する
ではクリックしたセルから辿っていける同色のセルを削除していく処理を実装しましょう。
考え方は,
- 自身(self)が指定したセル(target)と同じであるかチェックする
2. 同じ場合
3. 自身(selfを削除)
3. 自身(self)の周囲のセルの座標を取得する(s[0], s[1], s[3], s[4])
4. 周囲のセル(s[0], s[1], s[3], s[4])にも同じ処理を適用する
4. 異なる場合
5. 探索を終了
です。
eraseAround : (Maybe Cell) -> {x: Int, y: Int} -> Stage -> Stage
eraseAround target self stage =
    if getAt self stage == target
        then
            eraseAt self stage
            |> \cs -> List.foldl (eraseAround target) cs (surroundings self)
        else
            stage
update msg model =
    {-...略...-}
        Clicked cell pos ->
            (eraseAround cell pos model, Cmd.none)
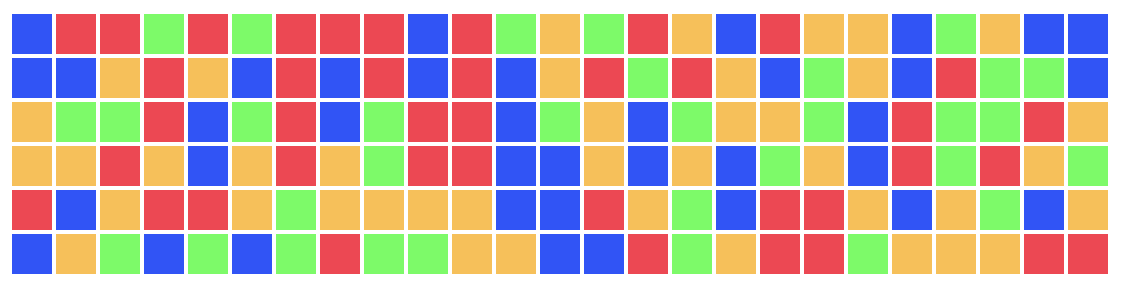
では試してみましょう。
中央左下あたりに青色のセルが固まっている場所があるので,それをクリックしてみると...
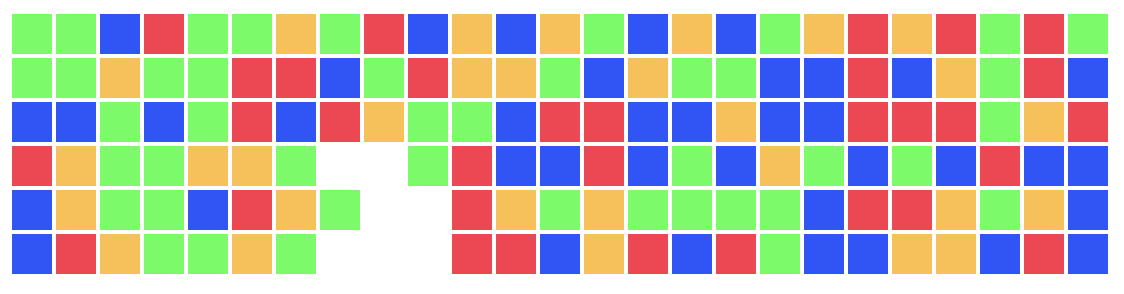 こんな感じになれば成功です。
( ここまでのソースコード )
8. 消したセルを詰める(垂直方向)
sweepV : Stage -> Stage
sweepV =
    let
        comp a _ =
            if a == Nothing
                then LT
                else EQ
    in
        List.map (List.sortWith comp)
List.filterで_Nothing_を取り除いてから,末尾に_Nothing_を追加していくのが一番簡単ですが,今回はList.sortWithという関数があるので,これを使ってみましょう。
名前の通りソートするための関数で,第一引数にリスト中の二要素を受け取りどちらが大きいかを比較する関数を渡します。
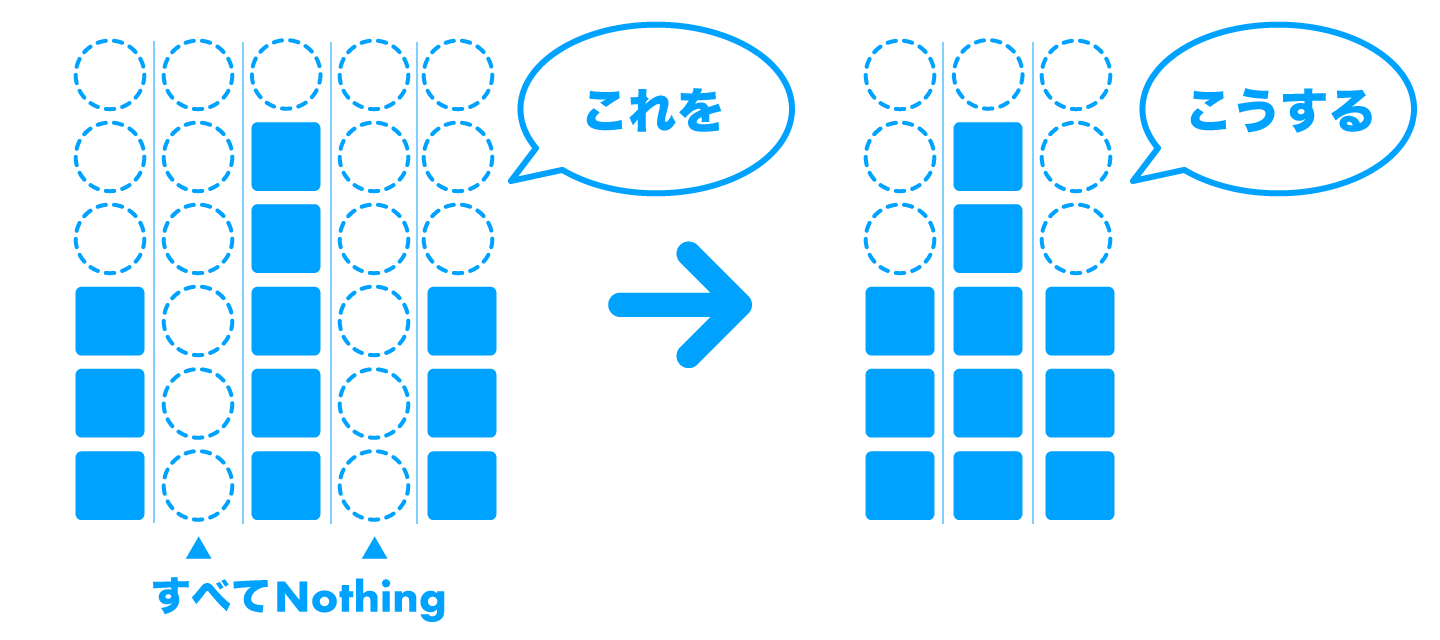
9. 消したセルを詰める(水平方向)
sweepH : Stage -> Stage
sweepH =
    List.filter (List.any ((/=) Nothing))
stage_に含まれる行のうち,全てのセルが_Nothing_のものを取り除いてやれば良いので,List.filterとList.anyを使います。
List.any ((/=) Nothing)は**一つでも_Nothing_以外の値が含まれていれば_True**を返します。
10. 消したセルを詰める(垂直&水平方向)
8, 9 の_sweepV, sweepH_を組み合わせると,
sweep : Stage -> Stage
sweep =
    sweepV >> sweepH
11. 周囲の同色セルを調べてそれらを消す
ここまで作ってきたものをまとめます。
update : Msg -> Model -> ( Model, Cmd Msg )
update msg model =
    case msg of
        Initialized stage ->
            (stage, Cmd.none)

        Clicked cell pos ->
            let
                stage =
                    model
                        |> eraseAround cell pos
                        |> sweep
            in
            (stage, Cmd.none)
完成版のソースです
改行を入れまくることで評判のフォーマッタを入れても190行に収まったので,割とシンプルにできたのでは無いでしょうか。この辺り難しいことを考えなくても書いていけばそれなりにまとまるのはElmの強みですね。
今回の内容に手を加えればマインスイーパーなんかも作れるので興味ある人はどうぞ。
以上。