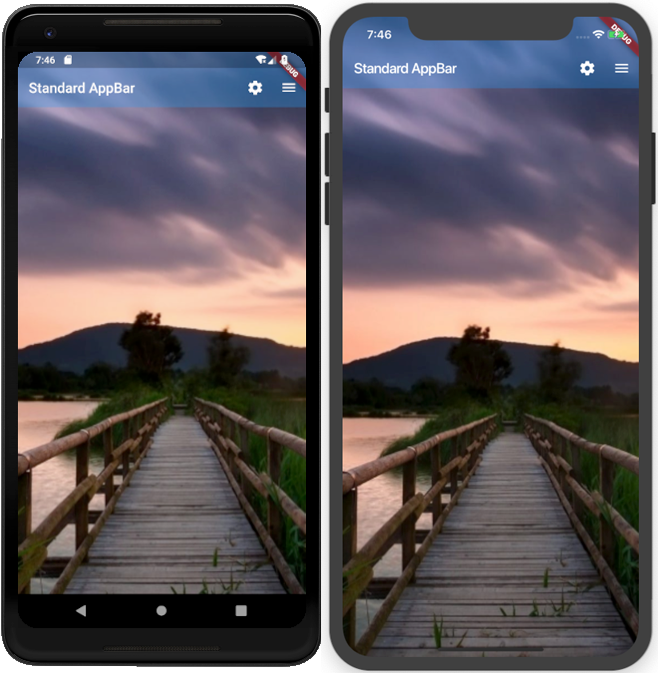
レイアウトを作る上で、良く透過ヘッダーが欲しくなるので作成。
Flutterなるものを最近知って遅まきながら色々触っているのでメモ書きをかねて記事作成。
とりあえず、それっぽいUIと言うことで透過背景の画面がこんな感じにできました。
ソース
ソースはこんな感じ。
class MyApp extends StatelessWidget {
  @override
  Widget build(BuildContext context)
  {
    return new MaterialApp(
      title: 'Flutter Demo',
      home: Stack(
        children: <Widget>[
          new Container(
            height: double.infinity,
            width: double.infinity,
            decoration:new BoxDecoration(
              image: new DecorationImage(
                image: new AssetImage("assets/background.png"),
                fit: BoxFit.cover,
              ),
            ),
          ),
            Scaffold(
              backgroundColor: Colors.transparent,
              appBar: new AppBar(
                title: const Text("Standard AppBar"),
                backgroundColor: Colors.blue.withOpacity(0.3),
                elevation: 0.0,
              actions: <Widget>[
                IconButton(
                  icon: Icon(Icons.settings),
                  onPressed: () {
                    // Pressed Action
                  },
                ),
                IconButton(
                  icon: Icon(Icons.menu),
                  onPressed: () {
                    // Pressed Action
                  },
                ),
              ],
            ),
            body: new Container(
              color: Colors.transparent,
            ),
          ),
        ],
      )
    );
  }
}
詳細
まずはStackを使い各要素を重ねるように作成します。
return new MaterialApp(
  title: 'Flutter Demo',
  home: Stack(
   children: ...
  )
);
Stack要素の中に、まずは背景を設定してその上にScaffoldでヘッダーやメニューを配置することで、背景画像の上に透過のヘッダーやボディ要素を設定しています。
new Container(
  decoration:new BoxDecoration(
    image: new DecorationImage(
      image: new AssetImage("assets/background.png"),
      fit: BoxFit.cover,
    ),
  ),
),
Scaffold(
  ...
)
背景画像が見えるようにするにはColors.transparentを使ってウィジェットを透過させることで、実現しています。
最後
たったこれだけで簡単にそれっぽい画面がAndroidもiOSも作れるのでなかなか便利なFlutter。
今後も色々試してみようと思います。
いろんなレイアウトとか、使い方とかまだまだ日本語記事もすくないので、自分で試した事に関しては、
参考にまとめておくと後で便利そうなので、こんなの作りました。
https://flutter.ctrnost.com
今後も、レイアウトイメージが浮かんだら、随時更新していきます。
