はじめに
JavaScript 地図ライブラリ Leaflet 基本処理サンプルのReact版です。
Reactになると、結構考え方が違うので、忘れないようにメモ。
パッケージ追加
yarn add leaflet react-leaflet
フォルダ構成
src
 ├ index.js
 ├ App.js
 ├ util
 │  └ leafletCommon.js
 └ mapIcon
     ├ icon1.png
     └ icon2.png
フォルダ&ファイル構成のざっくり説明
- util/leafletCommon.js は共通設定とか共通処理(現在地取得しかありませんが)とか
- mapIcon はアイコン画像を格納しているフォルダ(この辺り良いパッケージがなかった、、、)
- App.js 実際ページ(コンポーネント上で)上でどう使うか
※indexはデフォルトのやつです
コード
util/leafletCommon.js
// 地図の設定
export const mapOption = {
  startZoom: "13", // 開始時のズーム値
  maxZoom: "18", // 最大のズーム値
  minZoom: "5", // 最小のズーム値
};

// 現在地(緯度経度取得)関数
export const getCurrentPosition = () =>
  new Promise((resolve, reject) =>
    navigator.geolocation.getCurrentPosition(resolve, reject)
  );
App.js
import React, { useState, useEffect } from "react";
import "leaflet/dist/leaflet.css";
import Leaflet from "leaflet";
import { MapContainer, TileLayer, Marker, Popup } from "react-leaflet";
import { mapOption, getCurrentPosition } from "./util/leafletCommon";
// 切り替え前データ
const tempPlaceData1 = [
{ id: "1", lat: 33.59513931435894, lng: 130.42419433593753, name: "地点A" },
{ id: "2", lat: 33.59260123175435, lng: 130.41131973266604, name: "地点B" },
{ id: "3", lat: 33.59517506146791, lng: 130.42694091796878, name: "地点C" },
{ id: "4", lat: 33.59653344063089, lng: 130.420138835907, name: "地点D" },
{ id: "5", lat: 33.592813804823924, lng: 130.42249917984012, name: "地点E" },
{ id: "6", lat: 33.590849553725455, lng: 130.4186797142029, name: "地点F" },
];
// 切り替え後データ
const tempPlaceData2 = [
{ id: "7", lat: 33.55513931435894, lng: 130.40419433593753, name: "地点G" },
{ id: "8", lat: 33.59260123175435, lng: 130.42131973266604, name: "地点H" },
{ id: "9", lat: 33.57517506146791, lng: 130.43694091796878, name: "地点I" },
{ id: "10", lat: 33.58653344063089, lng: 130.390138835907, name: "地点J" },
];
// 現在地アイコン
const currentIcon = Leaflet.icon({
iconUrl: require("./mapIcon/icon1.png"),
iconSize: [40, 40],
});
// 場所アイコン
const placeIcon = Leaflet.icon({
iconUrl: require("./mapIcon/icon2.png"),
iconSize: [40, 40],
});
const App = () => {
// キー設定
const [mapKey, setMapKey] = useState(0);
// 現在地情報
const [currentPosition, setCurrentPosition] = useState({
lat: 0,
lng: 0,
});
// 場所情報
const [placeData, setPlaceData] = useState([]);
// 初期処理
useEffect(() => {
moveCurrentPosition();
setPlaceData([...tempPlaceData1]);
// eslint-disable-next-line react-hooks/exhaustive-deps
}, []);
// 現在地に移動
const moveCurrentPosition = async () => {
const location = await getCurrentPosition();
setCurrentPosition({
...currentPosition,
lat: location.coords.latitude,
lng: location.coords.longitude,
});
// キーを設定して、再表示
setMapKey(new Date().getTime());
};
// 検索処理
const getLocationList = () => {
// データ設定
setPlaceData([...tempPlaceData2]);
// 本当はfetchとかしてデータ取ってくる
// const responce = await axios.get("http://localshot:8000/api/getLocation/...");
// setPlaceData([...responce]);
};
return (
<>
{/* ボタン(機能操作) */}
<div>
<button onClick={() => moveCurrentPosition()}>現在地</button>
<button onClick={() => getLocationList()}>検索</button>
</div>
{/* 地図表示 */}
<MapContainer
key={mapKey}
center={currentPosition}
zoom={mapOption.startZoom}
style={{ height: "90vh", width: "100vw" }}
>
{/* 地図のタイル情報 */}
<TileLayer
attribution='&copy <a href="http://osm.org/copyright";>OpenStreetMap</a> contributors'
url="https://{s}.tile.openstreetmap.org/{z}/{x}/{y}.png"
maxZoom={mapOption.maxZoom}
minZoom={mapOption.minZoom}
/>
{/* 現在地情報を出力 */}
<Marker position={currentPosition} icon={currentIcon}>
<Popup>現在地</Popup>
</Marker>
{/* 場所情報を出力 */}
{placeData.length > 0
? placeData.map((item) => (
<Marker key={item.id} position={item} icon={placeIcon}>
<Popup>{item.name}</Popup>
</Marker>
))
: null}
</MapContainer>
</>
);
};
export default App;
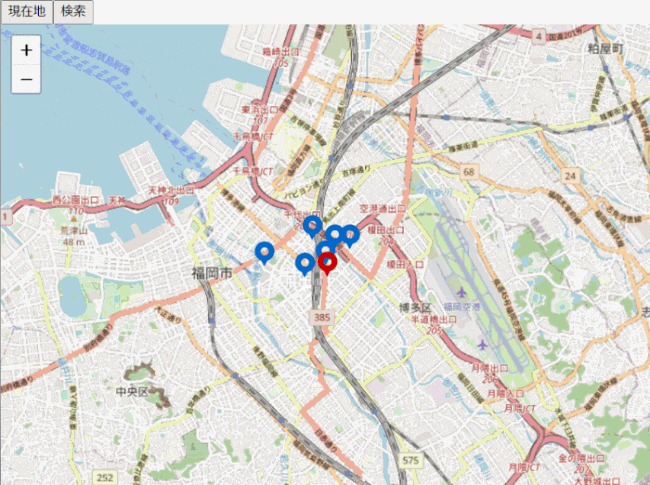
こんな感じ
最後に
自宅でアップすると、家の場所をさらした記事が出来上がってしまうので、危なかった、、
あと、画像のアップロード2M制限とかあったのか、、知らんかった