はじめに
Next.js app routerのチュートリアルの第13章のアウトプットをします。
前の記事
【01】Next.js app routerのチュートリアルやってみる
https://qiita.com/naoyuki2/items/af58da3d20cbc790e767
【02】Next.js app routerのチュートリアルやってみる
https://qiita.com/naoyuki2/items/edf450b3ee135e83d1e8
【03】Next.js app routerのチュートリアルやってみる
https://qiita.com/naoyuki2/items/612221eac233aa9cbb74
【04】Next.js app routerのチュートリアルやってみる
https://qiita.com/naoyuki2/items/62f9beccbfe36eaf7f90
【05】Next.js app routerのチュートリアルやってみる
https://qiita.com/naoyuki2/items/8b71b1d1df7c9435a9c9
【06】Next.js app routerのチュートリアルやってみる
https://qiita.com/naoyuki2/items/58130c3cfbaf8a573de2
【07】Next.js app routerのチュートリアルやってみる
https://qiita.com/naoyuki2/items/2c2da0f8071e60454679
【08】Next.js app routerのチュートリアルやってみる
https://qiita.com/naoyuki2/items/45f45fcb9cc14506f79f
【09】Next.js app routerのチュートリアルやってみる(loading.tsxとSuspenseでストリーミング)
https://qiita.com/naoyuki2/items/717694288ec6017a3af2
【10】Next.js app routerのチュートリアルやってみる(部分的な事前レンダリング)
https://qiita.com/naoyuki2/items/8062f755b0679fe925b1
【11-1】Next.js app routerのチュートリアルやってみる(URLパラメーターを利用した検索機能)
https://qiita.com/naoyuki2/items/2be9503ac80fc4a1fa6a
【11-2】Next.js app routerのチュートリアルやってみる(URL パラメータを利用したページネーション)
https://qiita.com/naoyuki2/items/fd00dc2b376e7d87fb44
【12-1】Next.js app routerのチュートリアルやってみる(React Server Actionsを使ったデータ作成処理)
https://qiita.com/naoyuki2/items/04ffef203ae798f8c7bc
【12-2】Next.js app routerのチュートリアルやってみる(React Server Actionsを使ったデータ更新処理)
https://qiita.com/naoyuki2/items/41f16ef69a50171d9d86
【12-3】Next.js app routerのチュートリアルやってみる(React Server Actionsを使ったデータ削除処理)
第13章 エラーハンドリング
この章では以下を学びました。
- error.tsx
- not-fountd.tsx
サーバーアクションに try/catch の追加
SQLの処理をtry/catchで囲みましょう。
export async function createInvoice(formData: FormData) {
  const { customerId, amount, status } = CreateInvoice.parse({
    customerId: formData.get('customerId'),
    amount: formData.get('amount'),
    status: formData.get('status'),
  });

  const amountInCents = amount * 100;
  const date = new Date().toISOString().split('T')[0];

  try {
    await sql`
      INSERT INTO invoices (customer_id, amount, status, date)
      VALUES (${customerId}, ${amountInCents}, ${status}, ${date})
    `;
  } catch (error) {
    return {
      message: 'Database Error: Failed to Create Invoice.',
    };
  }

  revalidatePath('/dashboard/invoices');
  redirect('/dashboard/invoices');
}
export async function updateInvoice(id: string, formData: FormData) {
  const { customerId, amount, status } = UpdateInvoice.parse({
    customerId: formData.get('customerId'),
    amount: formData.get('amount'),
    status: formData.get('status'),
  });

  const amountInCents = amount * 100;

  try {
    await sql`
        UPDATE invoices
        SET customer_id = ${customerId}, amount = ${amountInCents}, status = ${status}
        WHERE id = ${id}
      `;
  } catch (error) {
    return { message: 'Database Error: Failed to Update Invoice.' };
  }

  revalidatePath('/dashboard/invoices');
  redirect('/dashboard/invoices');
}
export async function deleteInvoice(id: string) {
  try {
    await sql`DELETE FROM invoices WHERE id = ${id}`;
    revalidatePath('/dashboard/invoices');
    return { message: 'Deleted Invoice.' };
  } catch (error) {
    return { message: 'Database Error: Failed to Delete Invoice.' };
  }
}
これで、処理が成功した場合はリダイレクトして、
失敗した場合は、エラーをはくようになりました。
実験的にdeleteInvoiceでエラーをはくようにしてみましょう。
export async function deleteInvoice(id: string) {
+ throw new Error('Failed to Delete Invoice');

  // Unreachable code block
  try {
    await sql`DELETE FROM invoices WHERE id = ${id}`;
    revalidatePath('/dashboard/invoices');
    return { message: 'Deleted Invoice' };
  } catch (error) {
    return { message: 'Database Error: Failed to Delete Invoice' };
  }
}
この状態で削除ボタンを押すと、エラーがブラウザに表示されます。
そこでerror.tsxを使いましょう。
error.tsx
error.tsxというファイルはエラーをキャッチし、フォールバックUIを表示してくれます。
/dashboard/invoicesにerror.tsxを作成します。
.
└── invoices/
    ├── [id]/
    │   └── edit/
    │       └── page.tsx
    ├── create/
    │   └── page.tsx
    ├── error.tsx // new!
    └── page.tsx
次のコードを貼り付けます。
'use client';

import { useEffect } from 'react';

export default function Error({
  error,
  reset,
}: {
  error: Error & { digest?: string };
  reset: () => void;
}) {
  useEffect(() => {
    // Optionally log the error to an error reporting service
    console.error(error);
  }, [error]);

  return (
    <main className="flex h-full flex-col items-center justify-center">
      <h2 className="text-center">Something went wrong!</h2>
      <button
        className="mt-4 rounded-md bg-blue-500 px-4 py-2 text-sm text-white transition-colors hover:bg-blue-400"
        onClick={
          // Attempt to recover by trying to re-render the invoices route
          () => reset()
        }
      >
        Try again
      </button>
    </main>
  );
}
error.tsxはクライアント コンポーネントである必要があるそうです
そして、2 つのPropsを受け入れます。
error: このオブジェクトは JavaScript のネイティブのインスタンスです
reset: エラーをリセットする機能です。実行されると、関数はルート セグメントの再レンダリングを試みます。
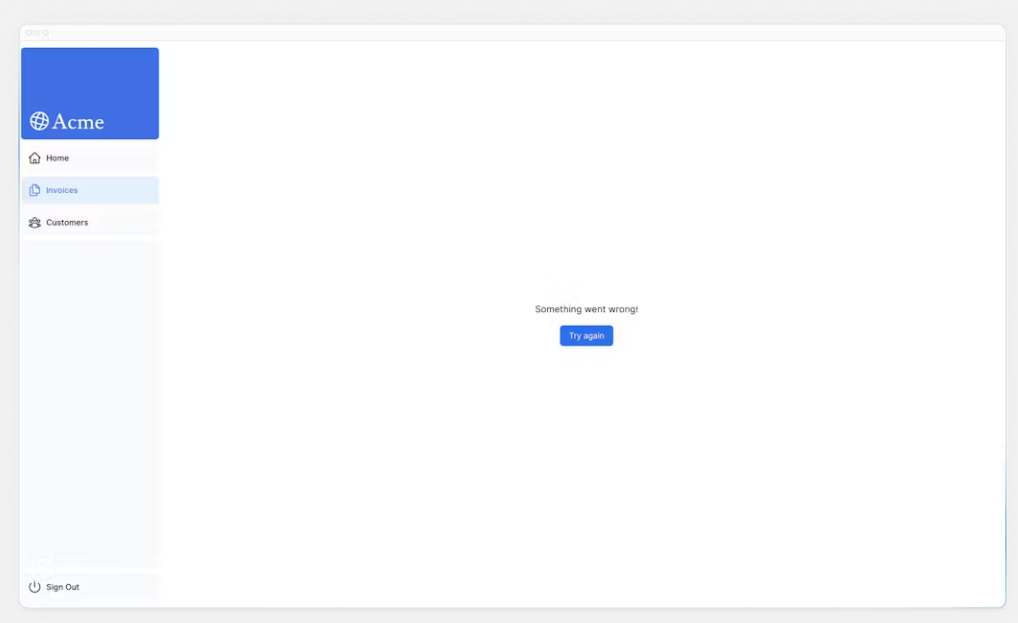
これで再度削除ボタンを押すと、次のようなUIが表示されるようになりました。
not-found.tsx
エラーを適切に処理するもう 1 つの方法は、notFound関数を使用することです。
error.tsxではすべてのエラーをキャッチすることができますが、
存在しないリソースを取得しようとするときにはnot-found.tsxというファイルを使用できます。
/dashboard/invoices/[id]/edit/page.tsxに移動しましょう。
next/navigationからnotFoundをimportし、
もし、invoiceが空だったら、notFound()関数を実行します。
import { fetchInvoiceById, fetchCustomers } from '@/app/lib/data';
import { updateInvoice } from '@/app/lib/actions';
+import { notFound } from 'next/navigation';

export default async function Page({ params }: { params: { id: string } }) {
  const id = params.id;
  const [invoice, customers] = await Promise.all([
    fetchInvoiceById(id),
    fetchCustomers(),
  ]);

+ if (!invoice) {
+   notFound();
+ }

  // ...
}
これで、リソースが見つからない場合にエラーがはかれるようになりました。
その場合のフォールバックUIを記述するために、/edit内にnot-found.tsxを作成します。
.
└── invoices/
    ├── [id]/
    │   └── edit/
    │       ├── page.tsx
    │       └── not-found.tsx // new!
    ├── create/
    │   └── page.tsx
    ├── error.tsx
    └── page.tsx
次に、not-found.tsxファイル内に次のコードを貼り付けます。
import Link from 'next/link';
import { FaceFrownIcon } from '@heroicons/react/24/outline';

export default function NotFound() {
  return (
    <main className="flex h-full flex-col items-center justify-center gap-2">
      <FaceFrownIcon className="w-10 text-gray-400" />
      <h2 className="text-xl font-semibold">404 Not Found</h2>
      <p>Could not find the requested invoice.</p>
      <Link
        href="/dashboard/invoices"
        className="mt-4 rounded-md bg-blue-500 px-4 py-2 text-sm text-white transition-colors hover:bg-blue-400"
      >
        Go Back
      </Link>
    </main>
  );
}
これで、存在しないリソースhttp://localhost:3000/dashboard/invoices/2e94d1ed-d220-449f-9f11-f0bbceed9645/editにアクセスしてみましょう。

404ページが表示されましたね。
not-found.tsxはerror.tsxより優先されるため、より具体的なエラーを処理したい場合にこれを利用できます。
おわりに
便利ですね。
次の記事