DMM.com Advent Calendar 2018 18日目の記事です。
今年はふと目についたMicrosoft産のネットワークパフォーマンスツールである、
Ethrついて簡単に紹介できたらと思います。
Ethrとは
ethrはgolangで書かれたクロスプラットフォームのネットワークパフォーマンス測定ツールです。
Windows、Linux、その他のUnixシステムをサポートしています。
Ethrの目的はTCP、UDP、HTTP、HTTPSなどの複数のプロトコル間、
および複数のプラットフォーム間(たとえば、TCP / UDP、TCP / IPなど)の
ネットワークパフォーマンス測定用のネイティブツールを提供することです。
Goの準備 (MacにGoが入っていない場合)
※ 必要があれば展開
go getでethrをインストール
$ go get github.com/Microsoft/ethr
Serverを立てる
下記のコマンドでServerを立ち上げることができる。
$ ethr -s
Listening on 8888 for control plane
Listening on 9999 for TCP bandwidth tests
Listening on 9998 for TCP conn/s tests
Listening on 9996 for TCP latency tests
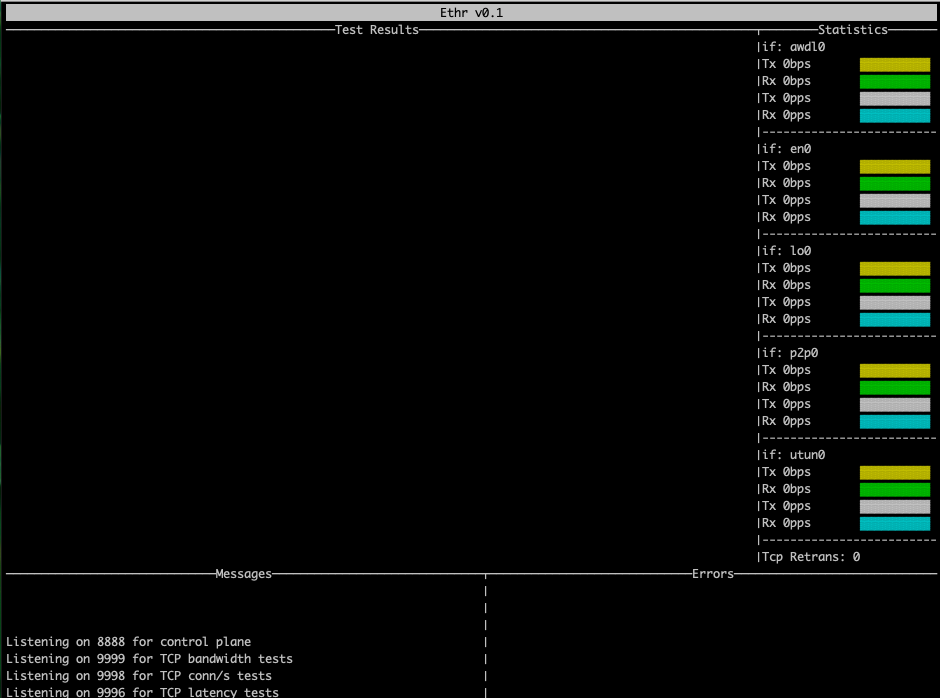
-uiをつけると Text UIをつけてServerを起動することができる。
$ ethr -s -ui

ただしターミナルが小さい(40hx80w 以内)と下記のエラーが発生し、
Text UIモードで表示されない
$ ethr -s -ui
Error: Failed to initialize UI. Terminal too small (101wx25h), must be at least 40hx80w
Using command line view instead of UI
Listening on 8888 for control plane
Listening on 9999 for TCP bandwidth tests
Listening on 9998 for TCP conn/s tests
Listening on 9996 for TCP latency tests
また、 -no オプションを指定しない場合はデフォルトでログをファイルに吐き出しており、
ファイル名はethrs.logとして吐き出される
$ ls -la ethrs.log
-rw-r--r--  1 user  wheel  2032 Dec 17 02:36 ethrs.log
ファイルの中には下記のような起動時のログと、テストの結果が記録される。
$ cat ethrs.log
{"Type":"INFO","Message":"Listening on 8888 for control plane"}
{"Type":"INFO","Message":"Listening on 9999 for TCP bandwidth tests"}
{"Type":"INFO","Message":"Listening on 9998 for TCP conn/s tests"}
{"Type":"INFO","Message":"Listening on 9996 for TCP latency tests"}
{"Type":"INFO","Message":"New control connection from ::1, port 54945"}
{"Type":"INFO","Message":"Starting HTTP Bandwidth test from ::1"}
{"Type":"TestResult","RemoteAddr":"::1","Protocol":"HTTP","BitsPerSecond":"0","ConnectionsPerSecond":"","PacketsPerSecond":"","AverageLatency":""}
{"Type":"TestResult","RemoteAddr":"::1","Protocol":"HTTP","BitsPerSecond":"399.23M","ConnectionsPerSecond":"","PacketsPerSecond":"","AverageLatency":""}
{"Type":"TestResult","RemoteAddr":"::1","Protocol":"HTTP","BitsPerSecond":"416.64M","ConnectionsPerSecond":"","PacketsPerSecond":"","AverageLatency":""}
{"Type":"TestResult","RemoteAddr":"::1","Protocol":"HTTP","BitsPerSecond":"391.30M","ConnectionsPerSecond":"","PacketsPerSecond":"","AverageLatency":""}
{"Type":"TestResult","RemoteAddr":"::1","Protocol":"HTTP","BitsPerSecond":"400.64M","ConnectionsPerSecond":"","PacketsPerSecond":"","AverageLatency":""}
{"Type":"TestResult","RemoteAddr":"::1","Protocol":"HTTP","BitsPerSecond":"417.66M","ConnectionsPerSecond":"","PacketsPerSecond":"","AverageLatency":""}
{"Type":"TestResult","RemoteAddr":"::1","Protocol":"HTTP","BitsPerSecond":"402.69M","ConnectionsPerSecond":"","PacketsPerSecond":"","AverageLatency":""}
{"Type":"TestResult","RemoteAddr":"::1","Protocol":"HTTP","BitsPerSecond":"403.07M","ConnectionsPerSecond":"","PacketsPerSecond":"","AverageLatency":""}
{"Type":"TestResult","RemoteAddr":"::1","Protocol":"HTTP","BitsPerSecond":"404.22M","ConnectionsPerSecond":"","PacketsPerSecond":"","AverageLatency":""}
{"Type":"TestResult","RemoteAddr":"::1","Protocol":"HTTP","BitsPerSecond":"400.90M","ConnectionsPerSecond":"","PacketsPerSecond":"","AverageLatency":""}
{"Type":"INFO","Message":"Ending Bandwidth test from ::1"}
http: multiple response.WriteHeader calls
また、 -o filenameというオプションをつけることで、ログのファイル名が指定できる
e.g., $ ethr -s -ui -o output.log
Clientを動かす
下記の条件で動かしてみる
- Server側は
$ ethr -s -ui - Client側は
$ ethr -c localhost
$ ethr -c localhost
Connecting to host localhost, port 9999
[  8] local ::1 port 55487 connected to ::1 port 9999
- - - - - - - - - - - - - - - - - - - - - - -
[ ID]   Protocol    Interval      Bits/s
[  8]     TCP      000-001 sec     2.78G
[  8]     TCP      001-002 sec     3.52G
[  8]     TCP      002-003 sec     3.96G
[  8]     TCP      003-004 sec     3.86G
[  8]     TCP      004-005 sec     3.30G
[  8]     TCP      005-006 sec     3.69G
[  8]     TCP      006-007 sec     4.27G
[  8]     TCP      007-008 sec     4.51G
[  8]     TCP      008-009 sec     3.98G
[  8]     TCP      009-010 sec     2.82G
Ethr done, duration: 10s.
また、Client側はオプションを指定しない場合は TCPの帯域のテスト行う。
ログとしてはデフォルトではethrc.logという名前で残ります。
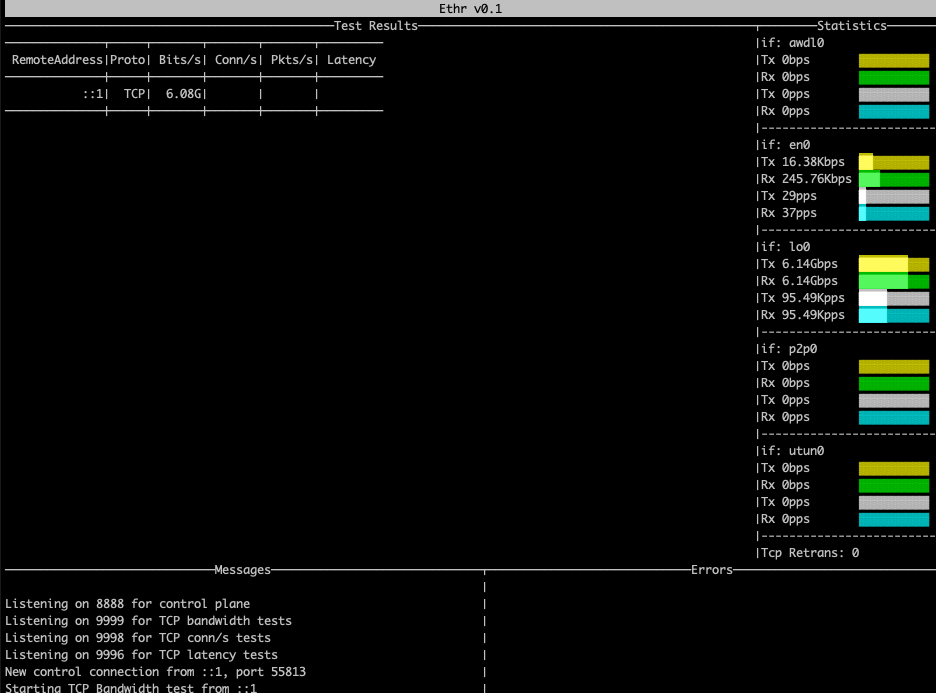
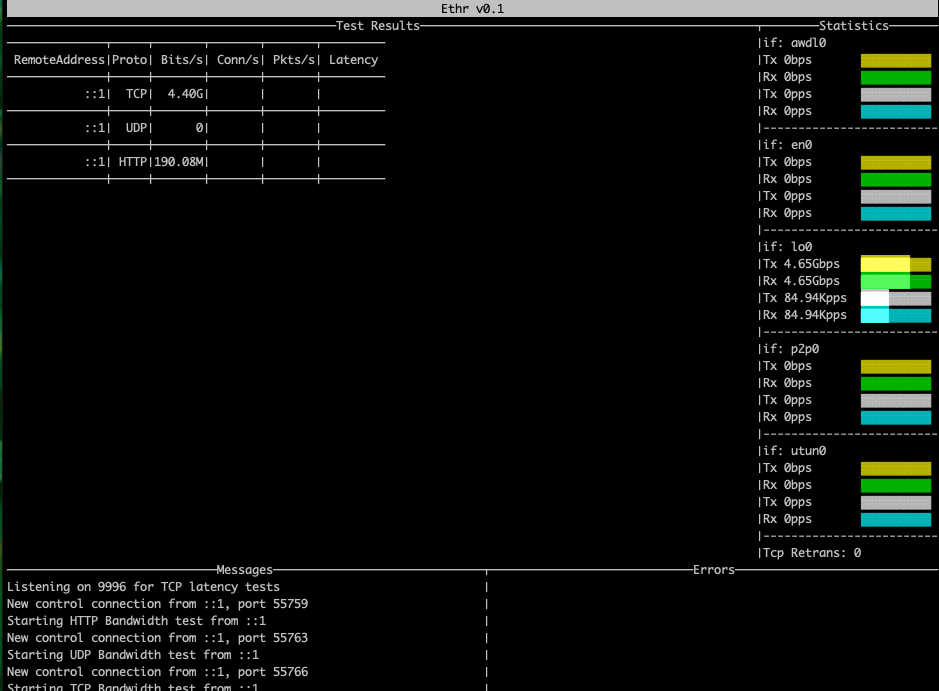
Client側から実行している時は下記のようにText UI側に表示されます。

下記で試すと、TextUIには3つとも表示されるのがわかる。
ethr -c localhostethr -c localhost -p udpethr -c localhost -p http
現在の各プロトコルの対応状況
| Protocol | Bandwidth | Connections/s | Packets/s | Latency |
|---|---|---|---|---|
| TCP | 対応 | 対応 | 非対応 | 対応 |
| UDP | 対応 | - | 対応 | 非対応 |
| HTTP | 対応 | 非対応 | 非対応 | 対応 |
| HTTPS | 対応 | 非対応 | 非対応 | 非対応 |
| ICMP | 非対応 | - | 非対応 | 非対応 |
オプションまとめ
ServerとClient共通
| オプション | 説明 |
|---|---|
| -h | ヘルプの表示 |
| -no | ファイルへのロギングの無効。 デフォルトでは有効。 |
-o <filename>
|
filenameで指定されたファイルに記録。 デフォルトではEthrがサーバーモードなら./ethrs.log。Ethrがクライアントモードの場合は./ethrc.log
|
| -debug | デバッグログの出力 |
Serverのオプション
| オプション | 説明 |
|---|---|
| -s | Serverモード |
| -ui | テキストによるUIの表示 |
Clientのオプション
| オプション | 説明 |
|---|---|
-c <server>
|
Clientモード。指定されたIP or ドメイン名 |
-t <b|c|p|l>
|
実行するテスト。 デフォルトではbandwidth b: bandwidth c: connections/s p: packets/s l: latency |
-p <tcp|udp|http|https|icmp>
|
使用するプロトコル。 デフォルトはTCP tcp udp http https icmp |
-n <number>
|
使用するセッション/スレッドの数 |
-l <number>
|
各リクエストに使用するバッファサイズ |
-i <number>
|
latencyテストの繰り返し回数 |
使ってみたざっくりとした感想
- -uiを使う時は ターミナルが40hx80w以上の大きさがないと、UIが表示されない。
- 実際に使ってみて思うのはUIモードの時に、表示されている情報をコピーできない事が少し残念。
- ログについて特別何も指定していない場合、自動で実行している場所にログが吐かれるので、その点は注意。
- 各プロトコルの対応状況はまだ未対応の物が多く、もう少し見守っていきたい。
実はちょっと前までリポジトリ名がMicrosoft/Ethrという用に頭が大文字だった。
