動機
『PC でも GPIO を使えたら便利だな』という場面が時々あります。そんな時は、例えば、次のような製品を使います。
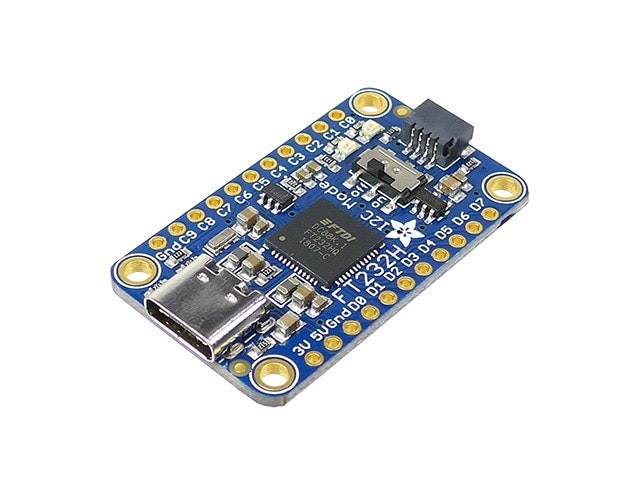
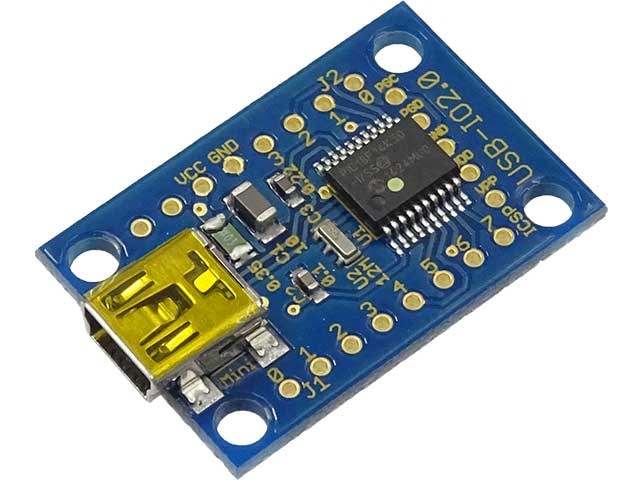
ところが、ほぼ同じことが、もっと安く入手できるRaspberry Pi Picoを使う方法で実現できます。しかも、Python 言語で制御するため、PC側の OS に依存しません。Windows や Mac、Ubuntu等の PC で GPIO を使うことができるのです。
i2C, SPI, デジタル入出力, アナログ入出力 など、Raspberry Pi Picoのすべてがお手軽に使えます。
執筆時現在、秋月電子通商 での Raspberry Pi Pico の税込価格は 770円です。発売当初は 550円だったような・・・
Raspberry Pi Pico側の準備
Raspberry Pi Picoに MicroPythonをインストールして、USBケーブルで PC の USBポートに接続するだけ。
MicroPython をインストール
Raspberry Pi Picoには、MicroPython をインストールしておきます。
Pythonコード
次のコードをRaspberry Pi Picoで実行します。ファイル名をmain.pyとして保存することで、常に自動起動させます。
オンボードの LED を点滅させるblinkメソッドを定義して、起動時に3回点滅させています。
import machine, utime

led = machine.Pin("LED", machine.Pin.OUT)

def blink(sec=0.1):
    led.value(1)
    utime.sleep(sec)
    led.value(0)
    utime.sleep(sec)

for _ in range(3): blink()

try:
    while True:
        s = input() #⭐️
        exec(s)
        print('ok!')

except Exception as e:
    print(e)

finally:
    print('exit!')
    print('restart!')


machine.reset() #restart
⭐️16行目のinput()で pythonコードを読み込み、その次のexec()で、読み込んだコードを実行します。
ここでの標準入出力は シリアルポートにバインドされ、PC から入出力(送受信)する シンプルな構造です。シリアルREPLそのもの。
PC側
PC側も Python を使います。
変数 PORT には、USB接続したRaspberry Pi Picoのポートを指定します。
Windows なら'COM3'など、Ubuntu なら'/dev/ttyACM0'などと OSや環境によって変わリます。
import serial, time

PORT = '/dev/cu.usbmodem1201' # for macOS
ser = serial.Serial(port=PORT, baudrate=115200, timeout=1)
cnt = 0

def read(wait=False):
    global cnt
    if wait:
        while ser.in_waiting == 0: time.sleep(0.1)
    while ser.in_waiting > 0:
        buf = ser.readline().decode().strip()
        cnt += 1
        print(cnt, buf)

def write(cmd):
    if len(cmd) == 0: return
    _ = ser.write((cmd + '\r\n').encode('utf-8'))
    read()
次の 2つの関数を定義します。
-
write(cmd)
コマンド(pythonコード)を送信し、read() を呼び出して 結果を受信する
( コマンドはワンライナーで書く必要があります ) -
read()
応答を受信する
これら関数の使い方を、対話形式で説明します。
Python 3.10.11 (/Applications/Thonny.app/Contents/Frameworks/Python.framework/Versions/3.10/bin/python3.10)

>>> import serial, time

PORT = '/dev/cu.usbmodem12101' # for macOS
ser = serial.Serial(port=PORT, baudrate=115200, timeout=1)
cnt = 0

def read(wait=False):
    global cnt
    if wait:
        while ser.in_waiting == 0: time.sleep(0.1)
    while ser.in_waiting > 0:
        buf = ser.readline().decode().strip()
        cnt += 1
        print(cnt, buf)

def write(cmd):
    if len(cmd) == 0: return
    _ = ser.write((cmd + '\r\n').encode('utf-8'))
    read()

>>>
・ 変数a を設定して aを出力
>>> write('a = 10')

1 a = 10
2 ok!

>>> write('print(a)')

3 print(a)
4 10
5 ok!

>>>
・ 上と同じことをワンライナーで書く
行を分けて書く場合でも、;が必須!!。
#を書くとそれ以降の行もコメント扱い。要注意!!!
>>> cmd = 'a = 10; print(a)'
 OR
>>> cmd = '''
a = 10;
print(a)
'''

>>> write(cmd)

6 a = 10; print(a)
7 10
8 ok!

>>>
・ 関数も呼べます
定義済みのblinkを呼んでLEDを点滅させます。
writeは非同期実行のため、処理時間がかかると readが間に合いません。その場合は、明示的にread(wait=True)を書きます。
何秒もかかるなら、readの前にsleepを入れます。
>>> write('blink()')

9 blink()

>>> read()

10 ok!

>>>
>>> write('blink()'); read(wait=True)

11 blink()
12 ok!

>>>
・ for や while も、ワンライナーで書く
>>> write('for _ in range(3): blink()'); time.sleep(1); read()
13 for _ in range(3): blink()
14 ok!

>>>
for や whileを複数行に書くときは、;が必要な場合があるので 要注意 !!。
(あくまでワンライナーで書くイメージ)
>>> cmd = '''
for n in range(3):
    print(n);
    blink()
'''

>>> write(cmd)

15 for n in range(3):    print(n);    blink()
16 0

>>> read()

17 1
18 2
19 ok!

>>>
・ 関数も定義できるが、ワンライナーで書く
>>> write('def sum(a, b): c = a + b; return c')

20 def sum(a, b): c = a + b; return c
21 ok!

>>> write('print(sum(1, 2))')

22 print(sum(1, 2))
23 3
24 ok!

>>>
defを複数行に書いて;を忘れると、エラーになります。
(Raspberry Pi Pico側で 例外が発生)
>>> cmd = '''
def sum(a, b):
    c = a + b
    return c
'''

>>> write(cmd)

Traceback (most recent call last):
  File "/Applications/Thonny.app/Contents/Frameworks/Python.framework/Versions/3.10/lib/python3.10/site-packages/serial/serialposix.py", line 575, in read
    buf = os.read(self.fd, size - len(read))
OSError: [Errno 6] Device not configured

During handling of the above exception, another exception occurred:

Traceback (most recent call last):
  File "<stdin>", line 1, in <module>
  File "<stdin>", line 19, in write
  File "<stdin>", line 12, in read
  File "/Applications/Thonny.app/Contents/Frameworks/Python.framework/Versions/3.10/lib/python3.10/site-packages/serial/serialposix.py", line 581, in read
    raise SerialException('read failed: {}'.format(e))
serial.serialutil.SerialException: read failed: [Errno 6] Device not configured

>>>
・ Raspberry Pi Pico側で 例外が発生した場合
Raspberry Pi Picoが再起動するので、シリアルポートの再オープンが必要です。
>>> ser.close()
>>> ser = serial.Serial(port=PORT, baudrate=115200, timeout=1)
対話形式でない場合は、try-except を使うとよい。
PORT = '/dev/cu.usbmodem1201' # for macOS
ser = serial.Serial(port=PORT, baudrate=115200, timeout=1)

try:
    write(・・・)
    write(・・・)
    write(・・・)

except:
    ser.close()
    ser = serial.Serial(port=PORT, baudrate=115200, timeout=1)
使用例
Raspberry Pi Picoのアナログポート4を読み出します。
RP2040内の温度センサを読み出し摂氏に変換する関数を定義して、それを呼び出す。
import serial, time

PORT = '/dev/cu.usbmodem1201' # for macOS
ser = serial.Serial(port=PORT, baudrate=115200, timeout=1)
cnt = 0

def read(wait=False):
    global cnt
    if wait:
        while ser.in_waiting == 0: time.sleep(0.1)
    while ser.in_waiting > 0:
        buf = ser.readline().decode().strip()
        cnt += 1
        print(cnt, buf)

def write(cmd):
    if len(cmd) == 0: return
    _ = ser.write((cmd + '\r\n').encode('utf-8'))
    read()

cmd_def='''
def internal_temp():
    voltage = machine.ADC(4);
    sensor_vol = voltage.read_u16()*3.3/65535;
    temp = 27-(sensor_vol-0.706)/0.001721;
    return temp
'''

try:
    write(cmd_def)
    for n in range(10):
        write('print(internal_temp())'); read(wait=True)
        time.sleep(1)

except:
    ser.close()
    ser = serial.Serial(port=PORT, baudrate=115200, timeout=1)

finally:
    ser.close()
>>> %Run -c $EDITOR_CONTENT

1 def internal_temp():    voltage = machine.ADC(4);    sensor_vol = voltage.read_u16()*3.3/65535;    temp = 27-(sensor_vol-0.706)/0.001721;    return temp
2 ok!
3 print(internal_temp())
4 36.40732
5 ok!
6 print(internal_temp())
7 34.0666
8 ok!
9 print(internal_temp())
10 34.0666
11 ok!
12 print(internal_temp())
13 33.59845
14 ok!
15 print(internal_temp())
16 33.59845
17 ok!
18 print(internal_temp())
19 34.0666
20 ok!
21 print(internal_temp())
22 34.0666
23 ok!
24 print(internal_temp())
25 34.0666
26 ok!
27 print(internal_temp())
28 34.0666
29 ok!
30 print(internal_temp())
31 34.0666
32 ok!
^C
よく使う関数であれば、既出のblinkのように事前にRaspberry Pi Pico側のコードに書いておけば、呼び出すだけで済みます。
応用例
Raspberry Pi Picoに i2C接続 128×32 OLEDディスプレイ を接続して、PC の CPU利用率 とメモリ使用率 を 1秒ごとに表示します。
Raspberry Pi Pico側のコード
次のコードを実行します。
入力した文字列を'/'で分割し、displayに最大 4行出力する。
表示する内容や書式化は、PC側で行う。
from machine import Pin, I2C
import ssd1306

i2c = I2C(0, sda=Pin(12), scl=Pin(13))
display = ssd1306.SSD1306_I2C(128, 32, i2c)

def disp(S):
    display.fill(0)
    offset, height = [(12, 20), (8, 16), (4, 10), (0, 8)][len(S)-1]
    for s in S:
        display.text(s, 0, offset)
        offset += height
    display.show()

disp(["Ready!"])

try:
    while True:
        s = input()
        disp(s.split('/'))
        print('ok!')

except Exception as e:
    import sys
    print(e)
    print(sys.print_exception(e))

finally:
    print('exit!')
    print('restart!')

#utime.sleep(1)
machine.reset() #restart
PC側のコード
import psutil
import serial, time, datetime

PORT = '/dev/cu.usbmodem1201' # for macOS
ser = serial.Serial(port=PORT, baudrate=115200, timeout=1)
cnt = 0

def read(wait=False):
    global cnt
    if wait:
        while ser.in_waiting == 0: time.sleep(0.1)
    while ser.in_waiting > 0:
        buf = ser.readline().decode().strip()
        cnt += 1
        print(cnt, buf)

def write(cmd):
    if len(cmd) == 0: return
    _ = ser.write((cmd + '\r\n').encode('utf-8'))
    read()

try:
    while True:
        cpu_percent = psutil.cpu_percent(interval=1)
        mem = psutil.virtual_memory()
        now = datetime.datetime.now().strftime('    %H:%M:%S')
        s = f'{now}/cpu   : {cpu_percent}%/memory: {mem.percent}%'
        write(s)

except Exception as e:
    print(e)
    ser.close()
    ser = serial.Serial(port=PORT, baudrate=115200, timeout=1)

finally:
    ser.close()

今後、いろいろ応用できそうです。
参考
↓ 参考にさせていただきました。
2025.1.30 追記
PC 側のコードを変更。
Raspberry Pi Picoからの受信を別スレッド化し、送信とは非同期にした。これによって、write 後の read 待ちを意識する必要がない。
import psutil
import serial, datetime
import threading

PORT = '/dev/cu.usbmodem1201' # for macOS
ser = serial.Serial(port=PORT, baudrate=115200, timeout=1)
done = False

def serial_read():
    cnt = 0
    while not done:
        buf = ser.readline().decode().strip()
        if len(buf) == 0: continue
        cnt += 1
        print(cnt, buf)

def write(cmd):
    if len(cmd) == 0: return
    _ = ser.write((cmd + '\r\n').encode('utf-8'))

thread_read = threading.Thread(target=serial_read)
thread_read.start()

try:
    while True:
        cpu_percent = psutil.cpu_percent(interval=1)
        mem = psutil.virtual_memory()
        now = datetime.datetime.now().strftime('    %H:%M:%S')
        s = f'{now}/cpu   : {cpu_percent}%/memory: {mem.percent}%'
        write(s)

except Exception as e:
    print(e)
    ser.close()
    ser = serial.Serial(port=PORT, baudrate=115200, timeout=1)

finally:
    ser.close()
以上