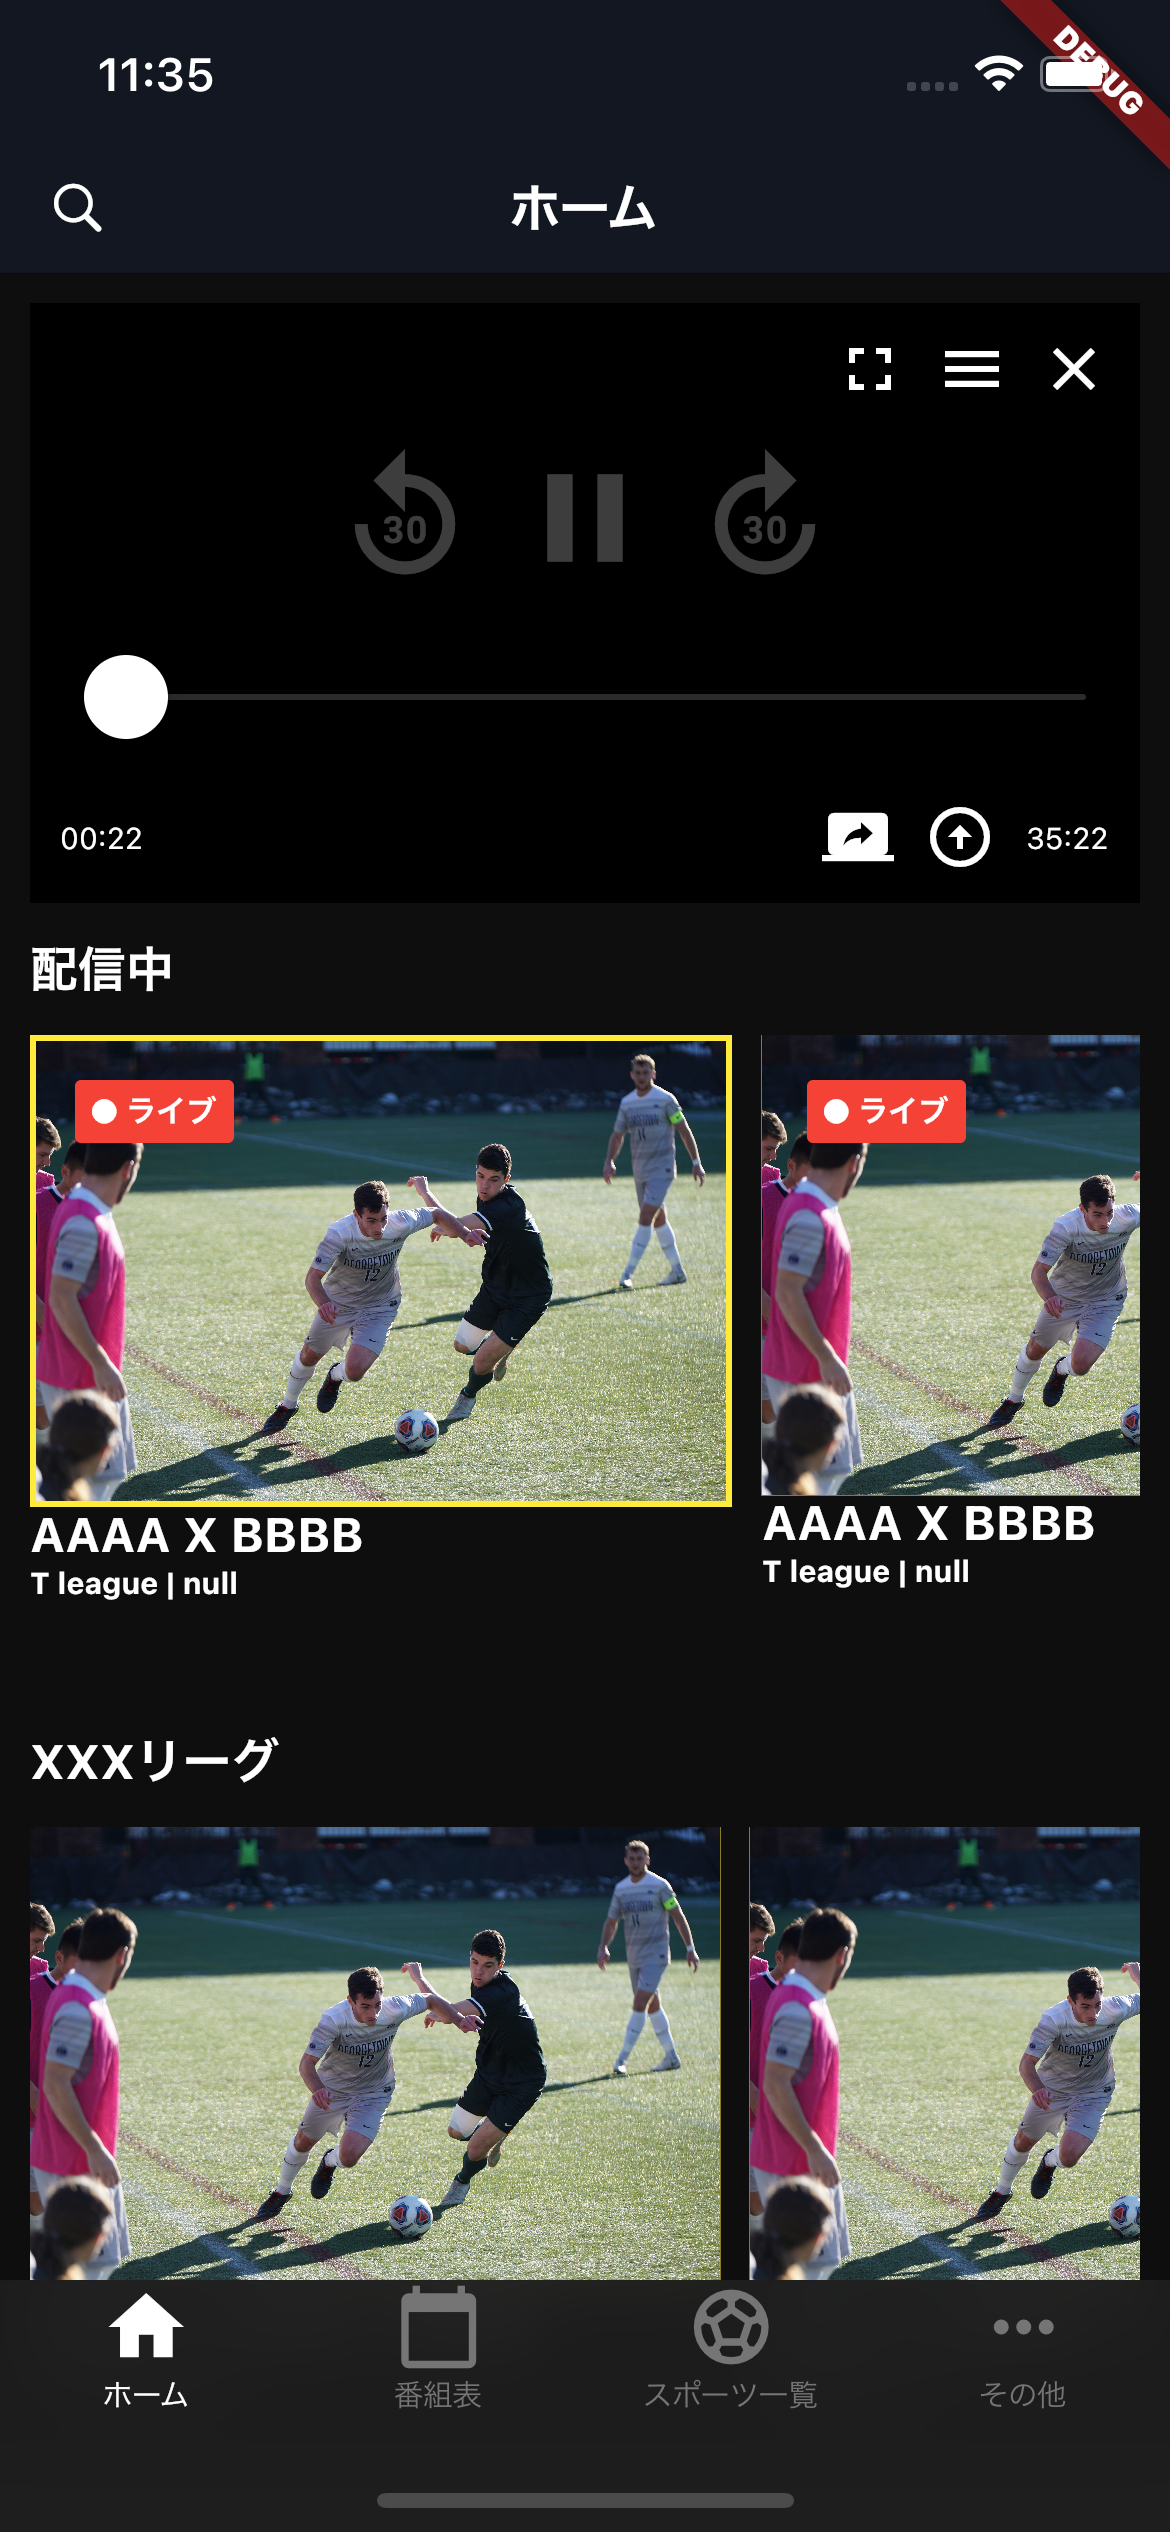
宣言的UIであるFlutterとSwiftUiの実装を比較してみました第二弾です。今回は、某スポーツ専用動画配信アプリを題材としました。難しい箇所が全くないので、初学者でも容易に実装できると思います。
完成版
Flutter
SwiftUi

UIの土台
まずは、Flutterです。
tab切替用のclassであるTopView classにtabタップで表示するviewを設定します。今回は HomeView classのみ作成します。 HomeView classではCupertinoPageScaffold widgetを使って、headerを作成します。SingleChildScrollView widgetを使って、画面サイズが小さい端末の場合は、スクロールしてコンテンツがちゃんと見れるようにしています。
TopView classとHomeView classはStatefulWidget classを継承しています。画面操作のみでUIを変更する可能性がある場合は、このほうが良いです。
class TopView extends StatefulWidget {
  TopView({Key key}) : super(key: key);
  @override
  _TopViewState createState() => _TopViewState();
}

class _TopViewState extends State<TopView> {
  @override
  Widget build(BuildContext context) {
    return CupertinoTabScaffold(
      tabBar: CupertinoTabBar(
        activeColor: Colors.white,
        items: [
          BottomNavigationBarItem(icon: Icon(Icons.home), label: 'ホーム'),
          BottomNavigationBarItem(
              icon: Icon(Icons.calendar_today), label: '番組表'),
          BottomNavigationBarItem(
              icon: Icon(Icons.sports_soccer), label: 'スポーツ一覧'),
          BottomNavigationBarItem(icon: Icon(Icons.more_horiz), label: 'その他'),
        ],
      ),
      tabBuilder: (context, index) {
        return CupertinoTabView(
          builder: (context) {
            switch (index) {
              case 0:
                return HomeView();
                break;
              case 1:
                return Container();
                break;
              case 2:
                return Container();
                break;
              case 3:
                return Container();
                break;
              default:
                return Container();
            }
          },
        );
      },
    );
  }
}
class HomeView extends StatefulWidget {
  final ValueChanged<String> onChangedTitle;

  HomeView({this.onChangedTitle});

  @override
  _HomeViewState createState() => _HomeViewState();
}

class _HomeViewState extends State<HomeView> {
  @override
  Widget build(BuildContext context) {
    //widget.onChangedTitle(value.toString());
    return CupertinoPageScaffold(
        backgroundColor: Colors.black.withOpacity(0.7),
        navigationBar: CupertinoNavigationBar(
            backgroundColor: HexColor.fromHex(baseBackgroundColor),
            leading: Icon(CupertinoIcons.search, size: 20.0),
            middle: TextHeader(text: 'ホーム')),
        child: SingleChildScrollView(
            child: Container(
                padding: EdgeInsets.only(
                    top: 10.0, right: 10.0, left: 10.0, bottom: 50.0),
                child: Column(
                  crossAxisAlignment: CrossAxisAlignment.start,
                  children: [
                    Stack(children: [BigMovieCell(), BigMovieCellOverlay()]),
                    SizedBox(height: 10),
                    Text16(text: '配信中'),
                    SizedBox(height: 10),
                    Broadcasting(),
                    SizedBox(height: 30),
                    Text16(text: 'XXXリーグ'),
                    SizedBox(height: 10),
                    League(),
                  ],
                ))));
  }
}
次は、SwiftUiです。
tab切替用のstructであるTopScreen structの各tabに、Header表示用structである ScreenBase structを設定します。
TopScreen structではtabBarの背景色を黒くして、アイコンを白色にしています。
struct TopScreen: View {
    init() {
        UITabBar.appearance().backgroundColor = .black
        UITabBar.appearance().backgroundImage = UIImage()
        UITabBar.appearance().barTintColor = .white
    }
    var body: some View {
        TabView{
            ScreenBase(child: HomeScreen())
                 .tabItem {
                     VStack {
                         Image(systemName: "house.fill")
                         Text("ホーム")
                     }
             }.tag(1)
            ScreenBase(child: HomeScreen())
                 .tabItem {
                     VStack {
                         Image(systemName: "square.grid.2x2.fill")
                         Text("番組表")
                     }
             }.tag(2)
            ScreenBase(child: HomeScreen())
                 .tabItem {
                     VStack {
                         Image(systemName: "bell.fill")
                         Text("スポーツ一覧")
                     }
             }.tag(3)
            ScreenBase(child: HomeScreen())
                 .tabItem {
                     VStack {
                         Image(systemName: "ellipsis")
                         Text("その他")
                     }
             }.tag(4)
        }.accentColor(.white)

    }
}
ScreenBase structは、headerを表示するためのtemplateです。ここでは検索アイコンと画面タイトルを表示しています。
struct ScreenBase<T: View>: View {

    let child: T

    init(child: T) {

        self.child = child

        let coloredNavAppearance = UINavigationBarAppearance()
            coloredNavAppearance.configureWithOpaqueBackground()
            coloredNavAppearance.backgroundColor = UIColor(hex: headerBackgroundColor)
            coloredNavAppearance.titleTextAttributes = [.foregroundColor: UIColor.white]
            coloredNavAppearance.largeTitleTextAttributes = [.foregroundColor: UIColor.white]
            UINavigationBar.appearance().standardAppearance = coloredNavAppearance
            UINavigationBar.appearance().scrollEdgeAppearance = coloredNavAppearance
    }

    var body: some View {
        NavigationView {
            ScrollView {
                child
            }
            .padding(EdgeInsets.init(top: 10.0, leading: 15.0, bottom: 0.0, trailing: 15.0))
            .background(Color.init(hex: baseBackgroundColor))
            .navigationBarTitle("ホーム", displayMode: .inline)
            .navigationBarItems(leading:
                Button(action: {}) {
                    Image(systemName: "magnifyingglass")
                }
            )
        }
    }
}
HomeScreen structはホーム画面の本体です。ここで動画の再生、サムネイルリストを表示します。
struct HomeScreen: View {

    @ObservedObject var homeViewModel = HomeViewModel()

    @State var isShowMovie = false
    @State var movieHight = 0.0
    @State var isRecord = false
    @State var isWatching = false
    @State var isWatchingId = 0

    var body: some View {
        VStack(alignment: .leading, spacing: 0) {
            if isShowMovie {
                VStack {
                    ZStack {
                        BigMovieCell(movieHight: movieHight, isRecord: isRecord).frame(height: CGFloat(movieHight) + (isRecord ? CGFloat(recordHeight) : 0.0))
                        BigMovieCellOverlay(movieHight: movieHight + (isRecord ? recordHeight : 0.0))
                    }
                    Spacer()
                }
            }
            Broadcasting(isShowMovie: $isShowMovie, movieHight: $movieHight, isRecord: $isRecord, isWatchingId: $isWatchingId)
            Spacer1()
            League(isShowMovie: $isShowMovie, movieHight: $movieHight, isRecord: $isRecord, isWatchingId: $isWatchingId)
        }
    }
}
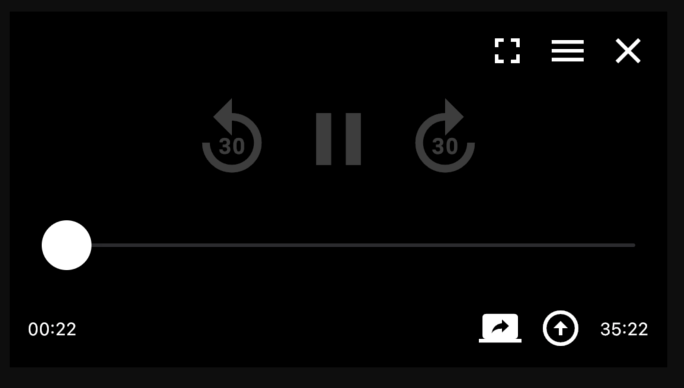
動画再生
Flutter
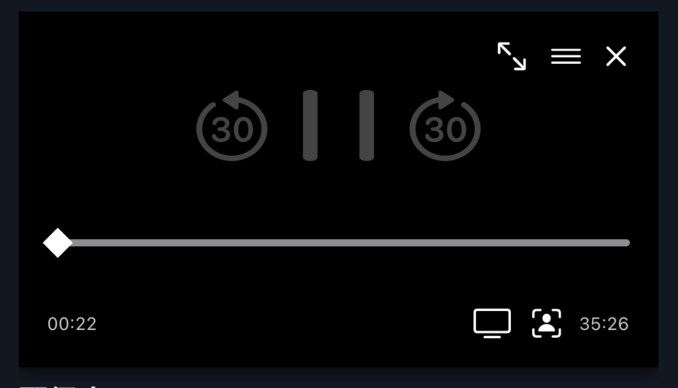
SwiftUi
まずは、Flutterです。
各要素をColumn widgetとRow widgetのMainAxisAlignmentを駆使して適切な位置に配置しています。ポイントとして、SliderはCupertinoTabScaffold widgetを使用する場合は、CupertinoSlider widgetを使用する必要があります。通常のScaffoldの場合は、Slider widgetで問題ありません。
class BigMovieCellOverlay extends StatelessWidget {
  @override
  Widget build(BuildContext context) {
    return Container(
        width: double.infinity,
        padding: EdgeInsets.all(10.0),
        height: 200.0,
        child: Column(
          mainAxisAlignment: MainAxisAlignment.spaceBetween,
          children: [
            Row(mainAxisAlignment: MainAxisAlignment.end, children: [
              Icon(Icons.fullscreen),
              SizedBox(width: 10),
              Icon(Icons.menu),
              SizedBox(width: 10),
              Icon(Icons.clear),
            ]),
            Row(mainAxisAlignment: MainAxisAlignment.center, children: [
              Icon(Icons.replay_30, size: 50.0, color: Colors.white24),
              SizedBox(width: 10),
              Icon(Icons.pause, size: 50.0, color: Colors.white24),
              SizedBox(width: 10),
              Icon(Icons.forward_30, size: 50.0, color: Colors.white24),
            ]),
            SizedBox(
              width: double.infinity,
              child: CupertinoSlider(
                  min: 0,
                  max: 100,
                  divisions: 10,
                  value: 0,
                  onChanged: (d) => {}),
            ),
            Row(mainAxisAlignment: MainAxisAlignment.spaceBetween, children: [
              Text10(text: '00:22', fontWeight: FontWeight.normal),
              Row(
                children: [
                  Icon(Icons.screen_share),
                  SizedBox(width: 10),
                  Icon(Icons.arrow_circle_up),
                  SizedBox(width: 10),
                  Text10(text: '35:22', fontWeight: FontWeight.normal),
                ],
              )
            ]),
          ],
        ));
  }
}
次は、SwiftUiです。
BigMovieCellOverlay structに再生中の動画に対する操作を行うためのcomponentを配置します。VStackとHStackを使って簡単に実現できますね。動画再生の進捗を表すインジケータは ZStack内にRectangleを使って、ツマミとバーを実現しています。
struct BigMovieCellOverlay: View {

    var movieHight = 0.0
    @State private var currentValue: Double = 50

    init(movieHight: Double) {
        self.movieHight = movieHight
    }

    var body: some View {
        VStack(spacing: 0.0) {
            HStack(spacing: 10.0) {
                Spacer()
                Image(systemName: "arrow.up.left.and.arrow.down.right").foregroundColor(Color.init(hex: "ffffff"))
                Image(systemName: "line.horizontal.3").foregroundColor(Color.init(hex: "ffffff"))
                Image(systemName: "multiply").foregroundColor(Color.init(hex: "ffffff"))
            }
            SpacerH(height: 10.0)
            HStack {
                Spacer()
                Image(systemName: "gobackward.30")
                    .resizable()
                    .frame(width: 40.0, height: 40.0, alignment: .center)
                    .foregroundColor(Color.init(hex: "444444"))
                SpacerW(width: 20.0)
                Image(systemName: "pause")
                    .resizable()
                    .frame(width: 40.0, height: 40.0, alignment: .center)
                    .foregroundColor(Color.init(hex: "444444"))
                SpacerW(width: 20.0)
                Image(systemName: "goforward.30")
                    .resizable()
                    .frame(width: 40.0, height: 40.0, alignment: .center)
                    .foregroundColor(Color.init(hex: "444444"))
                Spacer()
            }
            SpacerH(height: 40.0)
            ZStack(alignment: .leading) {
                            Rectangle()
                                .foregroundColor(.gray).frame(height: 4.0).cornerRadius(12)
                            Rectangle()
                                .fill(Color.white)
                                .frame(width:12, height: 12)
                                .rotationEffect(Angle(degrees: 45))

                        }
            SpacerH(height: 30.0)
            HStack {
                Text3(text: "00:22").foregroundColor(Color.init(hex: "ffffff"))
                Spacer()
                Image(systemName: "tv").foregroundColor(Color.init(hex: "ffffff"))
                Image(systemName: "person.fill.viewfinder").foregroundColor(Color.init(hex: "ffffff"))
                Text3(text: "35:26").foregroundColor(Color.init(hex: "ffffff"))
            }
        }
        .padding()
        .frame(height: CGFloat(movieHight), alignment: .topLeading)
        .background(Color.clear)

    }
}
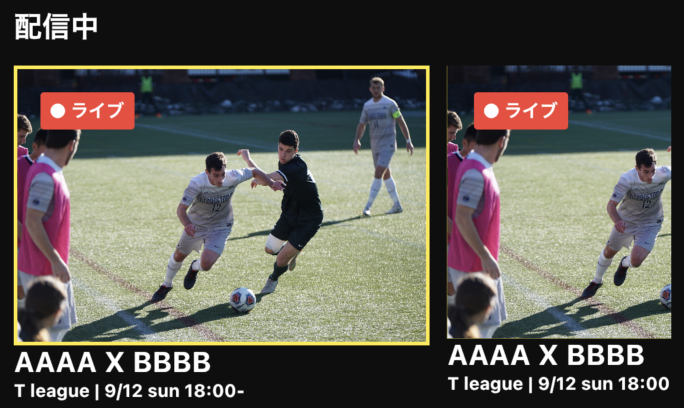
配信中リスト
Flutter
SwiftUi
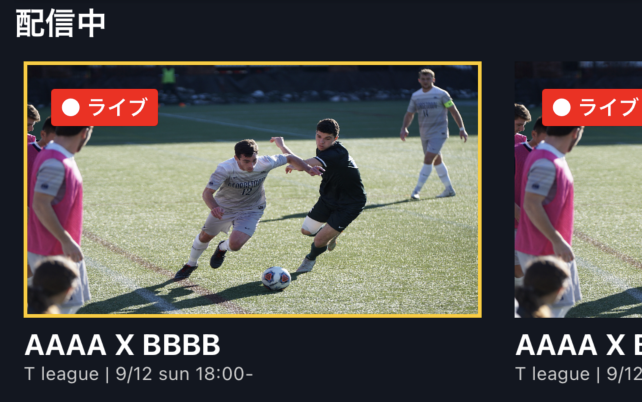
配信中リストは横スクロールのサムネイルを配置するだけです。選択中の動画のサムネイルには黄色枠をつけています。
まずは、Flutterです。
Broadcasting classのListView widgetにAxis.horizontalを設定して、サムネイルの横スクルールリストを実現しています。"●ライブ"は、Stack widgetを使って、サムネイルに重ねて表示しています。各サムネイルは後述するBigPicCell classに実装しています。
class Broadcasting extends StatelessWidget {
  @override
  Widget build(BuildContext context) {
    return Container(
      height: 200.0,
      child: ListView(
        scrollDirection: Axis.horizontal,
        children: [
          Stack(children: [
            BigPicCell(
                isStreaming: true,
                movie: Movie(
                    id: 1,
                    title: 'AAAA X BBBB',
                    imageName: 'bigpic',
                    leagueName: 'T league',
                    dateTime: '9/12 sun 18:00-')),
            Positioned(top: 15, left: 15, child: LiveLabel())
          ]),
          SizedBox(width: 10),
          Stack(children: [
            BigPicCell(
                movie: Movie(
                    id: 2,
                    title: 'AAAA X BBBB',
                    imageName: 'bigpic',
                    leagueName: 'T league',
                    dateTime: '9/12 sun 18:00-')),
            Positioned(top: 15, left: 15, child: LiveLabel())
          ]),
          SizedBox(width: 10),
          Stack(children: [
            BigPicCell(
                movie: Movie(
                    id: 3,
                    title: 'AAAA X BBBB',
                    imageName: 'bigpic',
                    leagueName: 'T league',
                    dateTime: '9/12 sun 18:00-')),
            Positioned(top: 15, left: 15, child: LiveLabel())
          ]),
          SizedBox(width: 10),
          Stack(children: [
            BigPicCell(
                movie: Movie(
                    id: 4,
                    title: 'AAAA X BBBB',
                    imageName: 'bigpic',
                    leagueName: 'T league',
                    dateTime: '9/12 sun 18:00-')),
            Positioned(top: 15, left: 15, child: LiveLabel())
          ]),
          SizedBox(width: 10),
          Stack(children: [
            BigPicCell(
                movie: Movie(
                    id: 5,
                    title: 'AAAA X BBBB',
                    imageName: 'bigpic',
                    leagueName: 'T league',
                    dateTime: '9/12 sun 18:00-')),
            Positioned(top: 15, left: 15, child: LiveLabel())
          ]),
        ],
      ),
    );
  }
}
次は、SwiftUiです。
ScrollViewを使って、サムネイルを横スクロールできるようにします。各サムネイルは後述する BigPicCell structに実装しています。
struct Broadcasting: View {

    @Binding var isShowMovie: Bool
    @Binding var movieHight: Double
    @Binding var isRecord: Bool
    @Binding var isWatchingId: Int

    var body: some View {
        VStack(alignment: .leading, spacing: 0) {
            Text1(text: "配信中")
            Spacer3()
            ScrollView(.horizontal, showsIndicators: false) {
                HStack(spacing: 0) {
                    BigPicCell(id: 1, title: "AAAA X BBBB", imageName: "bigpic", leagueName: "T league", dateTime: "9/12 sun 18:00-", isWatchingId: isWatchingId, isRecord: false)
                    .onTapGesture {
                        withAnimation(.easeOut(duration: 0.2)) {
                            isWatchingId = 1
                            isRecord = false
                            isShowMovie = false
                            isShowMovie = true
                            if isShowMovie {
                                movieHight = 200.0
                            } else {
                                movieHight = 0.0
                            }
                        }
                    }
                    Spacer()
                    BigPicCell(id: 2, title: "AAAA X BBBB", imageName: "bigpic", leagueName: "T league", dateTime: "9/12 sun 18:00-", isWatchingId: isWatchingId, isRecord: false)
                    Spacer()
                    BigPicCell(id: 3, title: "AAAA X BBBB", imageName: "bigpic", leagueName: "T league", dateTime: "9/12 sun 18:00-", isWatchingId: isWatchingId, isRecord: false)
                    Spacer()
                    BigPicCell(id: 4, title: "AAAA X BBBB", imageName: "bigpic", leagueName: "T league", dateTime: "9/12 sun 18:00-", isWatchingId: isWatchingId, isRecord: false)
                    Spacer()
                    BigPicCell(id: 5, title: "AAAA X BBBB", imageName: "bigpic", leagueName: "T league", dateTime: "9/12 sun 18:00-", isWatchingId: isWatchingId, isRecord: false)

                }
            }
        }.frame(minWidth: 0,
                maxWidth: .infinity,
                minHeight: 0,
                maxHeight: .infinity,
                alignment: .topLeading
        ).background(Color.init(hex: baseBackgroundColor))
    }
}
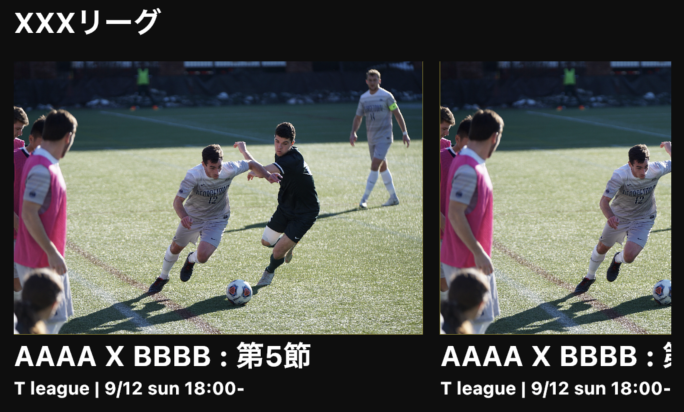
リーグリスト
Flutter
SwiftUi
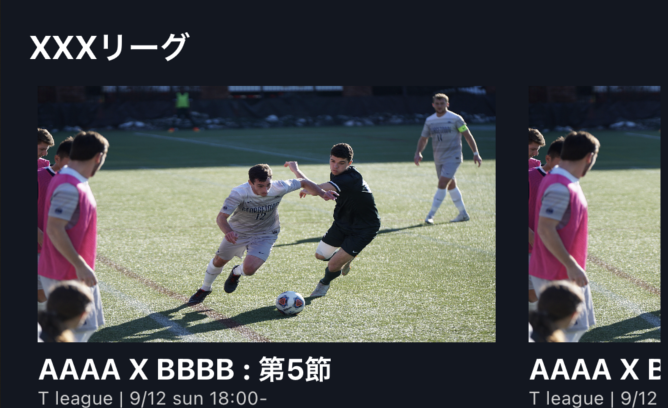
リーグリストは配信中リストと同様に横スクロールのサムネイルを配置するだけですが、選択中の動画のサムネイルには黄色枠をつけています。
まずは、Flutterです。
League classはBroadcasting classとほとんど同じ実装です。各サムネイルは後述する BigPicCell classに実装しています。
class League extends StatelessWidget {
  @override
  Widget build(BuildContext context) {
    return Container(
      height: 200.0,
      child: ListView(
        scrollDirection: Axis.horizontal,
        children: [
          BigPicCell(
              movie: Movie(
                  id: 1,
                  title: 'AAAA X BBBB : 第5節',
                  imageName: 'bigpic',
                  leagueName: 'T league',
                  dateTime: '9/12 sun 18:00-')),
          SizedBox(width: 10),
          BigPicCell(
              movie: Movie(
                  id: 2,
                  title: 'AAAA X BBBB : 第5節',
                  imageName: 'bigpic',
                  leagueName: 'T league',
                  dateTime: '9/12 sun 18:00-')),
          SizedBox(width: 10),
          BigPicCell(
              movie: Movie(
                  id: 3,
                  title: 'AAAA X BBBB : 第5節',
                  imageName: 'bigpic',
                  leagueName: 'T league',
                  dateTime: '9/12 sun 18:00-')),
          SizedBox(width: 10),
          BigPicCell(
              movie: Movie(
                  id: 4,
                  title: 'AAAA X BBBB : 第5節',
                  imageName: 'bigpic',
                  leagueName: 'T league',
                  dateTime: '9/12 sun 18:00-')),
          SizedBox(width: 10),
          BigPicCell(
              movie: Movie(
                  id: 5,
                  title: 'AAAA X BBBB : 第5節',
                  imageName: 'bigpic',
                  leagueName: 'T league',
                  dateTime: '9/12 sun 18:00-')),
        ],
      ),
    );
  }
}
BigPicCell classはサムネイルと下部の追加情報の表示を実装します。
Column widgetにサムネイルと説明用のText widgetを設定しています。
サムネイルはBoxDecoration widgetを使って選択中を表す黄色のボーダーラインを実現しています。
class BigPicCell extends StatelessWidget {
  final Movie movie;
  final bool isStreaming;
  BigPicCell({this.movie, this.isStreaming = false});

  @override
  Widget build(BuildContext context) {
    return Container(
      height: 200,
      child: Column(
        crossAxisAlignment: CrossAxisAlignment.start,
        children: [
          Container(
            decoration: BoxDecoration(
                border: Border.all(
                    color: Colors.yellow, width: isStreaming ? 2.0 : 0.0)),
            child: Image.asset('assets/images/bigpic.jpg', width: 230),
          ),
          Text16(text: movie.title),
          Text10(text: '${movie.leagueName} | ${movie.dateTime}'),
        ],
      ),
    );
  }
}
次は、SwiftUiです。
League structはBroadcasting structとほとんど同じ実装です。各サムネイルは後述する BigPicCell structに実装しています。
struct League: View {

    @Binding var isShowMovie: Bool
    @Binding var movieHight: Double
    @Binding var isRecord: Bool
    @Binding var isWatchingId: Int

    var body: some View {
        VStack(alignment: .leading, spacing: 0) {
            Text1(text: "XXXリーグ")
            Spacer3()
            ScrollView(.horizontal, showsIndicators: false) {
                HStack(spacing: 0) {
                    BigPicCell(id: 11, title: "AAAA X BBBB : 第5節", imageName: "bigpic", leagueName: "T league", dateTime: "9/12 sun 18:00-", isWatchingId: isWatchingId, isRecord: true)
                    .onTapGesture {
                        withAnimation(.easeOut(duration: 0.2)) {
                            isWatchingId = 11
                            isRecord = true
                            isShowMovie = false
                            isShowMovie = true
                            if isShowMovie {
                                movieHight = 200.0
                            } else {
                                movieHight = 0.0
                            }
                        }
                    }
                    Spacer()
                    BigPicCell(id: 12, title: "AAAA X BBBB : 第5節", imageName: "bigpic", leagueName: "T league", dateTime: "9/12 sun 18:00-", isWatchingId: isWatchingId, isRecord: true)
                    Spacer()
                    BigPicCell(id: 13, title: "AAAA X BBBB : 第5節", imageName: "bigpic", leagueName: "T league", dateTime: "9/12 sun 18:00-", isWatchingId: isWatchingId, isRecord: true)
                    Spacer()
                    BigPicCell(id: 14, title: "AAAA X BBBB : 第5節", imageName: "bigpic", leagueName: "T league", dateTime: "9/12 sun 18:00-", isWatchingId: isWatchingId, isRecord: true)
                    Spacer()
                    BigPicCell(id: 15, title: "AAAA X BBBB : 第5節", imageName: "bigpic", leagueName: "T league", dateTime: "9/12 sun 18:00-", isWatchingId: isWatchingId, isRecord: true)

                }
            }
        }.frame(minWidth: 0,
                maxWidth: .infinity,
                minHeight: 0,
                maxHeight: .infinity,
                alignment: .topLeading
        ).background(Color.init(hex: baseBackgroundColor))
    }
}
BigPicCell structはサムネイルと下部の追加情報の表示を実装します。
ZStackに*border(Color.yellow, width: isWatchingId == id ? 2 : 0)*を設定して、サムネイルがタップされた時は黄色枠を表示します。同時にサムネイルがタップされると、そのサムネイルの動画が再生されるので、サムネイル上に Text("● ライブ") を表示します。これは *Group {isRecord ? nil : LiveLabel()}
.padding(EdgeInsets.init(top: 15.0, leading: 15.0, bottom: 0.0, trailing: 0.0))*で実現しています。
struct BigPicCell: View {

    let id: Int
    let title: String
    let imageName: String
    let leagueName: String
    let dateTime: String
    let isWatchingId: Int
    let isRecord: Bool

    init(id: Int, title: String, imageName: String, leagueName: String, dateTime: String, isWatchingId: Int, isRecord: Bool) {
        self.id = id
        self.title = title
        self.imageName = imageName
        self.leagueName = leagueName
        self.dateTime = dateTime
        self.isWatchingId = isWatchingId
        self.isRecord = isRecord
    }

    fileprivate func bigPicCell() -> some View {
        return VStack(alignment: .leading, spacing: 0.0) {
            ZStack(alignment: .topLeading) {
                Image(imageName)
                    .resizable()
                    .frame(height: 140)
                Group {isRecord ? nil : LiveLabel()}
                .padding(EdgeInsets.init(top: 15.0, leading: 15.0, bottom: 0.0, trailing: 0.0))
            }.border(Color.yellow, width: isWatchingId == id ? 2 : 0)
            Spacer3()
            Text2(text: title)
            Text3(text: "\(leagueName) | \(dateTime)")
        }
        .frame(width: 250)
        .padding(EdgeInsets.init(top: 5.0, leading: 5.0, bottom: 5.0, trailing: 5.0))
    }

    var body: some View {
        VStack(spacing: 0.0) {
            bigPicCell()
        }
    }
}
まとめ
今回は、私が愛用しているスポーツ専用動画配信アプリを参考に、FlutterとSwiftUiの比較を行いました。headerの作りはflutterの方が簡単です。SwiftUiはNavigationとtabの装飾が非常にわかりにくいです。ページ遷移を含めたtabの書き方は、タップ要素と遷移先をセットで記述できるSwiftUiの方が簡潔にかけます。ただ、分けて書くflutterの方が好きな人もいると思います。このへんは好みですね。
ただ、SwiftUiでVStackとHStackのdefault spaceを消すために、spacing: 0.0を毎回設定しないといけないのは手間に感じます。