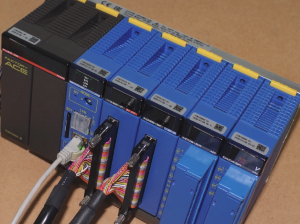
1.はじめに
横河電機の「リアルタイムOSコントローラ(e-RT3)」における入出力モジュールの制御を、Go言語から制御する方法をまとめてみました。

目標としては、前回記事のように、Golangから出力リレーの操作、入力の検知ができることとしています。
リアルタイムOSコントローラ e-RT3 関連記事
| 第1回 | セットアップ編 |
| 第2回 | 入出力ユニット編 (PythonとC言語から制御) |
| 第3回 | Elixirから制御編 |
| 第4回 | ROS2から制御編 |
| 第5回 | Rustから制御編 |
| 第6回(今回) | Goから制御編 |
2.考え方
cgoという仕組みを使って、共有ライブラリにアクセスして、e-RT3のIOを操作します。
大ざっぱな操作の流れのイメージは下記の通りです。
[Go]
↓
[cgo] -> [libm3.so] -> e-RT3のIOユニット
| 名称 | 役割 |
|---|---|
| libm3.so | e-RT3のIOユニット制御のライブラリ(メーカから提供) |
libm3.soの配置状況
$ ls -l /usr/local/lib
total 692
lrwxrwxrwx 1 root root      19 Mar 21  2020 libert3dgc.so -> libert3dgc.so.1.1.1
lrwxrwxrwx 1 root root      19 Mar 21  2020 libert3dgc.so.1 -> libert3dgc.so.1.1.1
-rw-r--r-- 1 root root  662644 Mar 17  2020 libert3dgc.so.1.1.1
lrwxrwxrwx 1 root root      14 Mar  5  2019 libm3.so -> libm3.so.1.0.1
lrwxrwxrwx 1 root root      14 Mar  5  2019 libm3.so.1 -> libm3.so.1.0.1
-rw-r--r-- 1 root root   36348 Mar  5  2019 libm3.so.1.0.1
3.Goのインストール
e-RT3のOSはubuntu18.04ですので、aptでインストールします。
$ sudo apt install golang
(ここでインストールが始まります)

$ go version
go version go1.10.4 linux/arm
4.Goで共有ライブラリの関数を呼び出す仕組み
cgoという仕組みを使います。
ソース例
たとえば、「libmine.so」という共有ライブラリに下記add関数が定義されているとします。
//引数2つの値の和を返す
int add(int a, int b)
{
    return(a + b);
}
上記を共有ライブラリとしてビルドします。
$ gcc -fPIC -shared -o libmine.so mine.c
次に、goから下記のコードで呼び出します。
package main

/*
# cgo LDFLAGS: -ldl
# include <dlfcn.h>

//ここにライブラリの関数の型を定義
int call_func_add(void* p, int a, int b) {
    int (*func)(int a, int b) = p;
    return func(a, b);
}
*/
import "C"
import "fmt"

func main() {


	//共有ライブラリを開く
	handle := C.dlopen(C.CString("<共有ライブラリのパス>/libmine.so"), C.RTLD_LAZY)
	if handle == nil {
		//ライブラリが開けなかった
		panic("Failed to open shared object.")
	}
	defer C.dlclose(handle)

	//関数のポインタを取得
	sharedfunc := C.dlsym(handle, C.CString("add"))
	if sharedfunc == nil {
		//取得できなかった
		panic("Could not found function pointer.")
	}

	//関数を実行して結果を表示
	fmt.Printf(" add : %v\n", C.call_func_add(sharedfunc, 1, 2))
}
実行例
共有ライブラリのadd関数を使って、足し算の結果を取得しています。
$ go run main.go
 add : 3
5.ソースコード
長くなるので、主要な部分だけ抜粋してます。
※※まだGithubにソースを上げていません(21/5/29時点)※※
新規にディレクトリを作成します。
$ cd gitwork/go
$ mkdir ert3io
$ cd ert3io
$ mkdir libm3
e-RT3の共有ライブラリlibm3.soを操作するパッケージを作ります。
package libm3

// ---------------------------------------------
// Golang API Drivers for e-RT3 Relay
// ---------------------------------------------
// Copyright (c) 2021 myasu
// MIT Licence
// ---------------------------------------------

//cgoで共有ライブラリの呼び出しを定義

/*
# cgo LDFLAGS: -ldl
# include <dlfcn.h>

//リレー出力:ブロック
int write_out_relay_call(void* p, int unit, int slot, int pos, int num, unsigned int *data, unsigned int *mask) {
    int (*func)(int unit, int slot, int pos, int num,  unsigned int *data, unsigned int *mask) = p;
    return func(unit, slot, pos, num, &data[0], &mask[0]);
}

・・・(省略)・・・

//リレー入力・ブロック
int read_in_relay_call(void* p, int unit, int slot, int pos, int num, unsigned short *data) {
    int (*func)(int unit, int slot, int pos, int num, unsigned short *data) = p;
    return func(unit, slot, pos, num, &data[0]);
}

・・・(省略)・・・

*/
import "C"

//libm3のパス
const PATHLIBM3 = "/usr/local/lib/libm3.so"

//リレー出力:ブロック
//Description.
//呼び出し先:writeM3OutRelay
// * `unit` - ユニット番号を指定(0~7)
// * `slot` - スロット番号を指定(1~16)
// * `pos` - 出力リレー番号を指定(1, 17, 33, 49)
// * `data` - 書き込みデータ
// * `mask` - 書き込みデータマスク
//Return.
// * 0: Successful , 1: Error
func Write_out_relay(unit int32, slot int32, pos int32, data uint32, mask uint32) int {

	//共有ライブラリを開く
	handle := C.dlopen(C.CString(PATHLIBM3), C.RTLD_LAZY)
	if handle == nil {
		//ライブラリが開けなかった
		panic(errormes("Failed to open shared object."))
	}
	defer C.dlclose(handle)

	//関数のポインタを取得
	sharedfunc := C.dlsym(handle, C.CString("writeM3OutRelay"))
	if sharedfunc == nil {
		//取得できなかった
		panic(errormes("Could not found function pointer."))
	}

	//書き込みデータを配列に代入
	writedata := [...]uint32{(0xffff & (data >> 16)), (0xffff & data), 0, 0}
	writemask := [...]uint32{0xffff & (mask >> 16), 0xffff & mask, 0, 0}

	//関数を実行
	result := C.write_out_relay_call(
		sharedfunc, C.int(unit), C.int(slot), C.int(pos), C.int(2),
		(*C.uint)(&writedata[0]), (*C.uint)(&writemask[0]))

	//実行結果を返す
	return (int(result))
}

・・・(省略)・・・

///リレー入力:ブロック
///Description.
///呼び出し先:readM3InRelayP
/// * `unit` - ユニット番号を指定(0~7)
/// * `slot` - スロット番号を指定(1~16)
//Return.
// * 0: Successful , 1: Error
func Read_in_relay(unit int32, slot int32) int32 {
	handle := C.dlopen(C.CString(PATHLIBM3), C.RTLD_LAZY)
	if handle == nil {
		panic(errormes("Failed to open shared object."))
	}
	defer C.dlclose(handle)

	sharedfunc := C.dlsym(handle, C.CString("readM3InRelay"))
	if sharedfunc == nil {
		panic(errormes("Could not found function pointer."))
	}

	//入力値の受け変数
	var dataread [4]uint16
	//関数を実行
	result := C.read_in_relay_call(sharedfunc, C.int(unit), C.int(slot), C.int(1), C.int(2), (*C.ushort)(&dataread[0]))
	if result >= 0 {
		//返り値がSuccessful
		//読み込んだデータを変換して返す
		val := (dataread[1] << 16) | dataread[0]
		return (int32(val))
	} else {
		//返り値がError
		return (-1)
	}
}

・・・(省略)・・・

//エラーメッセージの生成
//Description.
// * `message` - エラーメッセージの文字列
func errormes(message string) string {
	str := "! <ERROR> : "
	str += message
	return (str)
}
上記を操作します。
package main

// ---------------------------------------------
// Goでe-RT3のIOを操作するテスト
//
// (ベースユニットの配置)
// Slot 2: YD(出力)
// Slot 3: XD(入力)
// ---------------------------------------------
// Copyright (c) 2021 myasu
// MIT Licence
// ---------------------------------------------

import (
	"./libm3"
	"fmt"
	"time"
)

func main() {
	fmt.Println(" ---  libm3 test  ---")

	out_relay()

	in_relay()

	fmt.Println(" done.")
}

/// ---------------------------------------------
/// 各動作チェック用関数
/// ---------------------------------------------

///リレー出力・ブロックまとめて点灯/消灯
func out_relay() {
	fmt.Println(" ---  > Output Block")
	//順番にON・OFF
	for i := 1; i < 4; i++ {
		fmt.Printf(" > Output:  ON %v\n", i)
		//                             点灯データ   マスク:1で有効
		libm3.Write_out_relay(0, 2, 1, 0xf0f0a0a0, 0xffffffff)
		time.Sleep(time.Millisecond * 300)
		fmt.Printf(" > Output: OFF %v\n", i)
		//                             点灯データ   マスク:1で有効
		libm3.Write_out_relay(0, 2, 1, 0x0f0f0a0a, 0xffffffff)
		time.Sleep(time.Millisecond * 300)
	}
}

///リレー入力・ブロックまとめて読み込み
func in_relay() {
	fmt.Println(" ---  > Input Block")
	//順番にON・OFF
	for i := 1; i < 10; i++ {
		fmt.Printf(" > Input : %v\n", libm3.Read_in_relay(0, 3))
		time.Sleep(time.Millisecond * 300)
	}
}
実行例
YDの出力が数回点滅した後、XDの入力状態を500ms毎に10回読み込んで入力状態を数値で表示します。
$ go run main.go
 ---  libm3 test  ---
 ---  > Output Block
 > Output:  ON 1
 > Output: OFF 1
 > Output:  ON 2
 > Output: OFF 2
 > Output:  ON 3
 > Output: OFF 3
 ---  > Input Block
 > Input : 1
 > Input : 3
 > Input : 7
 > Input : 15
 > Input : 1
 > Input : 0
 > Input : 2
 > Input : 0
 > Input : 0
 done.
6.おわりに
最近、C#ばかり書いてたので、久しぶりにポインタ周りを思い出しました・・・(cgoを使うところ)
ひとまず、Python→Elixir→Rust→Golangまで、最近の主要な言語での手順を開拓しました。
いろんな言語で、e-RT3の開発を楽しんでいきましょう!
(今度は何しよう・・・?)