Abstract
最近Webで手書き文字を扱う機会が何度かあったのでどうやれば手書き文字を扱えるのか、どうやれば手書き文字をテキストに変換できるかを検証してみたので紹介しようと思う。
Wacom Inkathon EdTech
なぜ手書き文字を扱ったかと言うと、2017年のInkathon(Wacomさん主催のデジタルインクを使ったハッカソン)に引き続き、今年も参加したから。今年は賞取れると思ったんだけどなぁ...。後で話を聞いたところでは、Wacomの井出社長の評価は1位だったんだとか。んー、残念。
Inkathonに出したものはこちら
https://platform-inkathon.bemyapp.com/#/projects/5d97032195a13e001b5faf93
Webに手で文字を書くには
まず、Web画面に文字を書くには、canvasを使うのが一般的で今回は次の2つについて紹介。
- SVGを使った方法
- WILLを使った方法
ソースコード
今回紹介するソースはこちら
https://github.com/MichitoIchimaru/fujitsu_avc_2019
時間が無く、急ごしらえで作ったのでかなり汚いコード&packとかgulpとか何もしてません。
SVGを使った方法
svgを使った方法は、publicフォルダ配下のsvg.htmlを参照
かなりシンプルなコードです。今回は処理を簡単にするために、svg.jsを使用。
<!DOCTYPE html>
<html>
    <head>
        <title>SVG Sample</title>
        <script type="text/javascript" src="js/svg.min.js"></script>
        <script type="text/javascript" src="js/inkrecognizer.js"></script>
        <script type="text/javascript" src="js/axios.min.js"></script>
        <script>
            let inkRecognizer;

            window.addEventListener("load", () => {
                inkRecognizer = new InkRecognizer();
                init();
            });

            let canvas;
            let drawFlag = false;
            let drawPath = null;
            let drawPoints = [];
            const strokes = [];
            let stroke = {
                color: "#000",
                width: 2,
                linecap: "round",
                linejoin: "round"
            };

            function init() {
                canvas = SVG("canvas").size(1000, 300);
                canvas.rect(1000, 300).attr({ fill: "#cccccc" });
                canvas.on("touchstart", touchStart);
                canvas.on("touchmove", touchMove);
                canvas.on("touchend", touchEnd);
            }

            function touchStart(ev) {
                drawFlag = true;
                drawPath = null;
                drawPoints = [];
            }

            function touchMove(ev) {
                if (drawFlag) {
                    const rectX = document
                        .getElementById("canvas")
                        .getBoundingClientRect().x;
                    const rectY = document
                        .getElementById("canvas")
                        .getBoundingClientRect().y;
                    const touchX = ev.changedTouches[0].clientX;
                    const touchY = ev.changedTouches[0].clientY;
                    const scrollX = document.getElementById("canvas")
                        .scrollLeft;
                    const scrollY = document.getElementById("canvas").scrollTop;
                    const x = touchX + scrollX - rectX;
                    const y = touchY + scrollY - rectY;
                    if (x < 0) x = 0;
                    if (y < 0) y = 0;
                    drawPoints.push({ x: x, y: y });
                    drawFreeHand();
                    event.preventDefault();
                }
            }

            function touchEnd(ev) {
                drawFlag = false;
                if (!drawPath) return;
                drawFreeHand();
                drawPath = null;
            }

            function drawFreeHand() {
                if (drawPath) {
                    drawPath.remove();
                }
                let path = "";
                for (const idx in drawPoints) {
                    const point = drawPoints[idx];
                    if (idx == 0) {
                        path += `M${point.x} ${point.y}`;
                    } else {
                        path += ` L${point.x} ${point.y}`;
                    }
                }
                drawPath = canvas
                    .path(path)
                    .fill("none")
                    .stroke(stroke);
                if (!drawFlag) {
                    strokes.push(path);
                }
            }

            async function convert() {
                const recognized = await inkRecognizer.convert(
                    inkRecognizer.svg2InkRecognizer(strokes)
                );
                const recognizedText = inkRecognizer.getRecognizedText(
                    recognized
                );
                console.log("text = " + recognizedText);
            }
        </script>
    </head>
    <body style="margin:0;padding:0;">
        <div id="canvas" style="margin:0;padding:0;"></div>
        <input type="button" value="convert" onclick="javascript:convert()" />
    </body>
</html>
こちらに関しては特に解説は不要かと思います。touchstart、touchmove、touchendを検知して、moveとendでsvgのpathを生成して描画しているだけ。
moveの際に次の処理を書いていますが、今回のサンプルでは不要です。手書き文字の領域が(0,0)じゃなく、画面の中央などにある場合やスクロールしている場合の考慮。
                    const rectX = document
                        .getElementById("canvas")
                        .getBoundingClientRect().x;
                    const rectY = document
                        .getElementById("canvas")
                        .getBoundingClientRect().y;
                    const touchX = ev.changedTouches[0].clientX;
                    const touchY = ev.changedTouches[0].clientY;
                    const scrollX = document.getElementById("canvas")
                        .scrollLeft;
                    const scrollY = document.getElementById("canvas").scrollTop;
                    const x = touchX + scrollX - rectX;
                    const y = touchY + scrollY - rectY;
また、drawFreeHandはsvgのpath仕様に基づいてMがMove、LがLineTo、つまり、書き始めは指定の座標に移動し、それ以降は指定の座標に線を引くというもの。
                for (const idx in drawPoints) {
                    const point = drawPoints[idx];
                    if (idx == 0) {
                        path += `M${point.x} ${point.y}`;
                    } else {
                        path += ` L${point.x} ${point.y}`;
                    }
                }
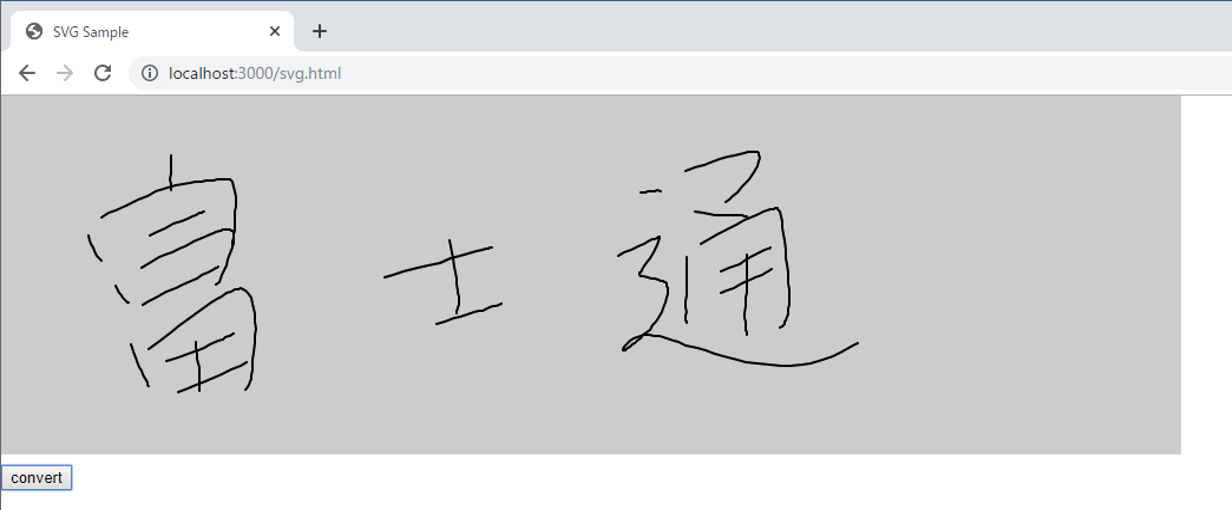
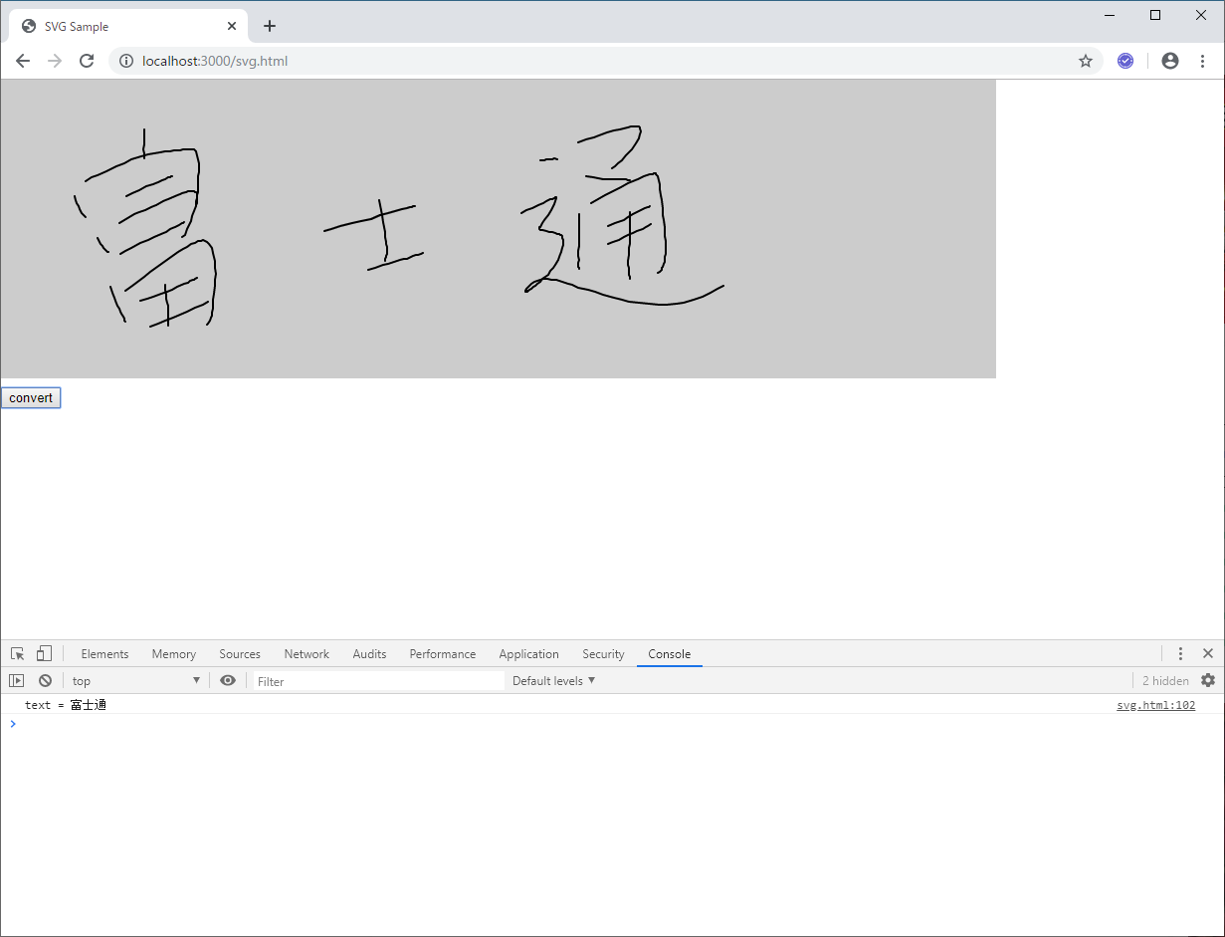
書いてみた画像がこちら。線を書きながらベジェ曲線にすることも可能だけど、実装が面倒だったので今回はポインタ座標をそのまま線で描画してみたら、だいぶカクカクしててキレイではない...。

WILLを使った方法
つぎに、WILLを使った方法について解説します。WILL(Wacom Ink Layer Language)とは、Wacomさんが作成したデジタルインクフレームワーク。
https://www.wacom.com/ja-jp/enterprise/will
https://developer.wacom.com/en-us/will-products
「WILL SDK for Web」は次の手順でダウンロード可能。※Wacomアカウントを作成する必要あり。
https://github.com/Wacom-Developer/will-sdk-for-ink-web/blob/master/GETTING-STARTED.md
※WILLを利用したアプリケーションの開発は無償で可能。商用利用にはライセンス契約が必要。
ソースはpublicフォルダ配下のwill.htmlを参照。ほぼWILLのサンプルのまま。
<!DOCTYPE html>
<html>
    <head>
        <meta charset="utf-8" />
        <meta http-equiv="Content-Type" content="text/html; charset=utf-8" />
        <meta
            name="viewport"
            content="width=device-width, maximum-scale=1.0, minimum-scale=1.0, initial-scale=1.0, user-scalable=no"
        />
        <title>WILL Sample</title>

        <script id="2d-vertex-shader" type="x-shader/x-vertex"></script>
        <script type="text/javascript" src="js/inkrecognizer.js"></script>
        <script type="text/javascript" src="js/axios.min.js"></script>
        <script type="text/javascript" src="js/jquery.min.js"></script>
        <script type="text/javascript" src="js/js.ext.js"></script>
        <script type="text/javascript" src="lib/will/Module.js"></script>
        <script
            async
            type="text/javascript"
            src="lib/will/WacomInkEngine.js"
        ></script>
        <script>
            let inkRecognizer;
            window.addEventListener("load", () => {
                inkRecognizer = new InkRecognizer();
            });

            const WILL = {
                backgroundColor: Module.Color.from(204, 204, 204, 1),
                color: Module.Color.from(0, 0, 0, 0.85),

                strokes: new Array(),

                init: function(width, height) {
                    this.initInkEngine(width, height);
                    this.initEvents();
                },

                initInkEngine: function(width, height) {
                    this.canvas = new Module.InkCanvas(
                        document.getElementById("canvas"),
                        width,
                        height
                    );
                    this.strokesLayer = this.canvas.createLayer();

                    this.clear();

                    this.brush = new Module.SolidColorBrush();

                    this.pathBuilder = new Module.SpeedPathBuilder();
                    this.pathBuilder.setNormalizationConfig(5, 210);
                    this.pathBuilder.setPropertyConfig(
                        Module.PropertyName.Width,
                        5.0,
                        0.0,
                        0.0,
                        NaN,
                        Module.PropertyFunction.Sigmoid,
                        0.1,
                        true
                    );

                    this.smoothener = new Module.MultiChannelSmoothener(
                        this.pathBuilder.stride
                    );

                    this.strokeRenderer = new Module.StrokeRenderer(
                        this.canvas
                    );
                    this.strokeRenderer.configure({
                        brush: this.brush,
                        color: this.color
                    });
                },

                initEvents: function() {
                    const self = this;

                    Module.canvas.addEventListener("pointerdown", function(e) {
                        self.beginStroke(e);
                    });
                    Module.canvas.addEventListener("pointermove", function(e) {
                        self.moveStroke(e);
                    });
                    document.addEventListener("pointerup", function(e) {
                        self.endStroke(e);
                    });

                    document.addEventListener(
                        "touchmove",
                        function(е) {
                            е.preventDefault();
                        },
                        { passive: false }
                    );
                },

                beginStroke: function(e, x, y) {
                    if (e != null) {
                        if (e.button != 0) return;
                    }

                    this.inputPhase = Module.InputPhase.Begin;

                    this.buildPath({
                        x: x != null ? x : e.clientX,
                        y: y != null ? y : e.clientY
                    });
                    this.drawPath();
                },

                moveStroke: function(e, x, y) {
                    if (!this.inputPhase) return;

                    this.inputPhase = Module.InputPhase.Move;
                    this.pointerPos = {
                        x: x != null ? x : e.clientX,
                        y: y != null ? y : e.clientY
                    };

                    if (WILL.frameID != WILL.canvas.frameID) {
                        const self = this;

                        WILL.frameID = WILL.canvas.requestAnimationFrame(
                            function() {
                                if (
                                    self.inputPhase &&
                                    self.inputPhase == Module.InputPhase.Move
                                ) {
                                    self.buildPath(self.pointerPos);
                                    self.drawPath();
                                }
                            },
                            true
                        );
                    }
                },

                endStroke: function(e, x, y) {
                    if (!this.inputPhase) return;

                    this.inputPhase = Module.InputPhase.End;

                    this.buildPath({
                        x: x != null ? x : e.clientX,
                        y: y != null ? y : e.clientY
                    });
                    this.drawPath();

                    const stroke = new Module.Stroke(
                        this.brush,
                        this.path,
                        NaN,
                        this.color,
                        0,
                        1
                    );
                    this.strokes.push(stroke);

                    delete this.inputPhase;
                },

                buildPath: function(pos) {
                    if (this.inputPhase == Module.InputPhase.Begin)
                        this.smoothener.reset();

                    const pathPart = this.pathBuilder.addPoint(
                        this.inputPhase,
                        pos,
                        Date.now() / 1000
                    );
                    const smoothedPathPart = this.smoothener.smooth(
                        pathPart,
                        this.inputPhase == Module.InputPhase.End
                    );
                    const pathContext = this.pathBuilder.addPathPart(
                        smoothedPathPart
                    );

                    this.pathPart = pathContext.getPathPart();
                    this.path = pathContext.getPath();

                    if (this.inputPhase == Module.InputPhase.Move) {
                        const preliminaryPathPart = this.pathBuilder.createPreliminaryPath();
                        const preliminarySmoothedPathPart = this.smoothener.smooth(
                            preliminaryPathPart,
                            true
                        );

                        this.preliminaryPathPart = this.pathBuilder.finishPreliminaryPath(
                            preliminarySmoothedPathPart
                        );
                    }
                },

                drawPath: function() {
                    if (this.inputPhase == Module.InputPhase.Begin) {
                        this.strokeRenderer.draw(this.pathPart, false);
                        this.strokeRenderer.blendUpdatedArea();
                    } else if (this.inputPhase == Module.InputPhase.Move) {
                        this.strokeRenderer.draw(this.pathPart, false);
                        this.strokeRenderer.drawPreliminary(
                            this.preliminaryPathPart
                        );

                        this.canvas.clear(
                            this.strokeRenderer.updatedArea,
                            this.backgroundColor
                        );
                        this.canvas.blend(this.strokesLayer, {
                            rect: this.strokeRenderer.updatedArea
                        });

                        this.strokeRenderer.blendUpdatedArea();
                    } else if (this.inputPhase == Module.InputPhase.End) {
                        this.strokeRenderer.draw(this.pathPart, true);
                        this.strokeRenderer.blendStroke(
                            this.strokesLayer,
                            Module.BlendMode.NORMAL
                        );

                        this.canvas.clear(
                            this.strokeRenderer.strokeBounds,
                            this.backgroundColor
                        );
                        this.canvas.blend(this.strokesLayer, {
                            rect: this.strokeRenderer.strokeBounds
                        });
                    }
                },

                clear: function() {
                    this.strokes = new Array();

                    this.strokesLayer.clear(this.backgroundColor);
                    this.canvas.clear(this.backgroundColor);
                }
            };

            Module.addPostScript(function() {
                Module.InkDecoder.getStrokeBrush = function(paint) {
                    return WILL.brush;
                };

                WILL.init(1000, 300);
            });

            async function convert() {
                const recognized = await inkRecognizer.convert(
                    inkRecognizer.will2InkRecognizer(WILL.strokes)
                );
                const recognizedText = inkRecognizer.getRecognizedText(
                    recognized
                );
                console.log("text = " + recognizedText);
            }
        </script>
    </head>
    <body style="margin:0;padding:0;">
        <canvas id="canvas" oncontextmenu="event.preventDefault();"></canvas>
        <br /><input
            type="button"
            value="convert"
            onclick="javascript:convert()"
        />
    </body>
</html>
少々長いが、ロジック的には先ほどのsvg.htmlと全く同じ。ちょっと特殊なのは、このあたり。
線ではなく、ブラシを定義している。
                    this.brush = new Module.SolidColorBrush();

                    this.pathBuilder = new Module.SpeedPathBuilder();
                    this.pathBuilder.setNormalizationConfig(5, 210);
                    this.pathBuilder.setPropertyConfig(
                        Module.PropertyName.Width,
                        5.0,
                        0.0,
                        0.0,
                        NaN,
                        //Module.PropertyFunction.Power,
                        Module.PropertyFunction.Sigmoid,
                        0.1,
                        true
                    );
あとはWILLのお作法なので、WILLのdocumentを参照した方が私より正確...。
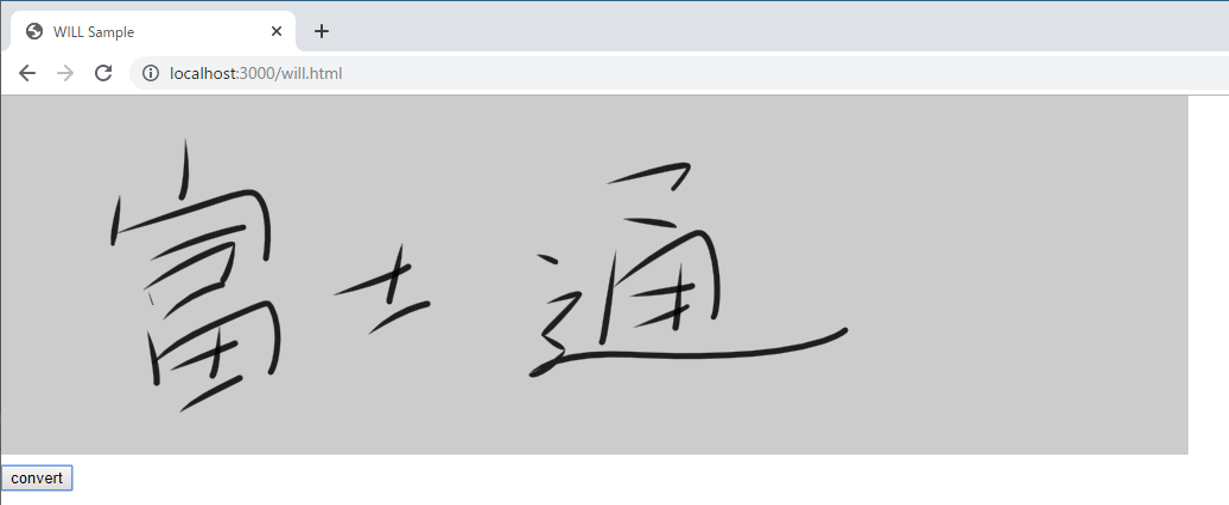
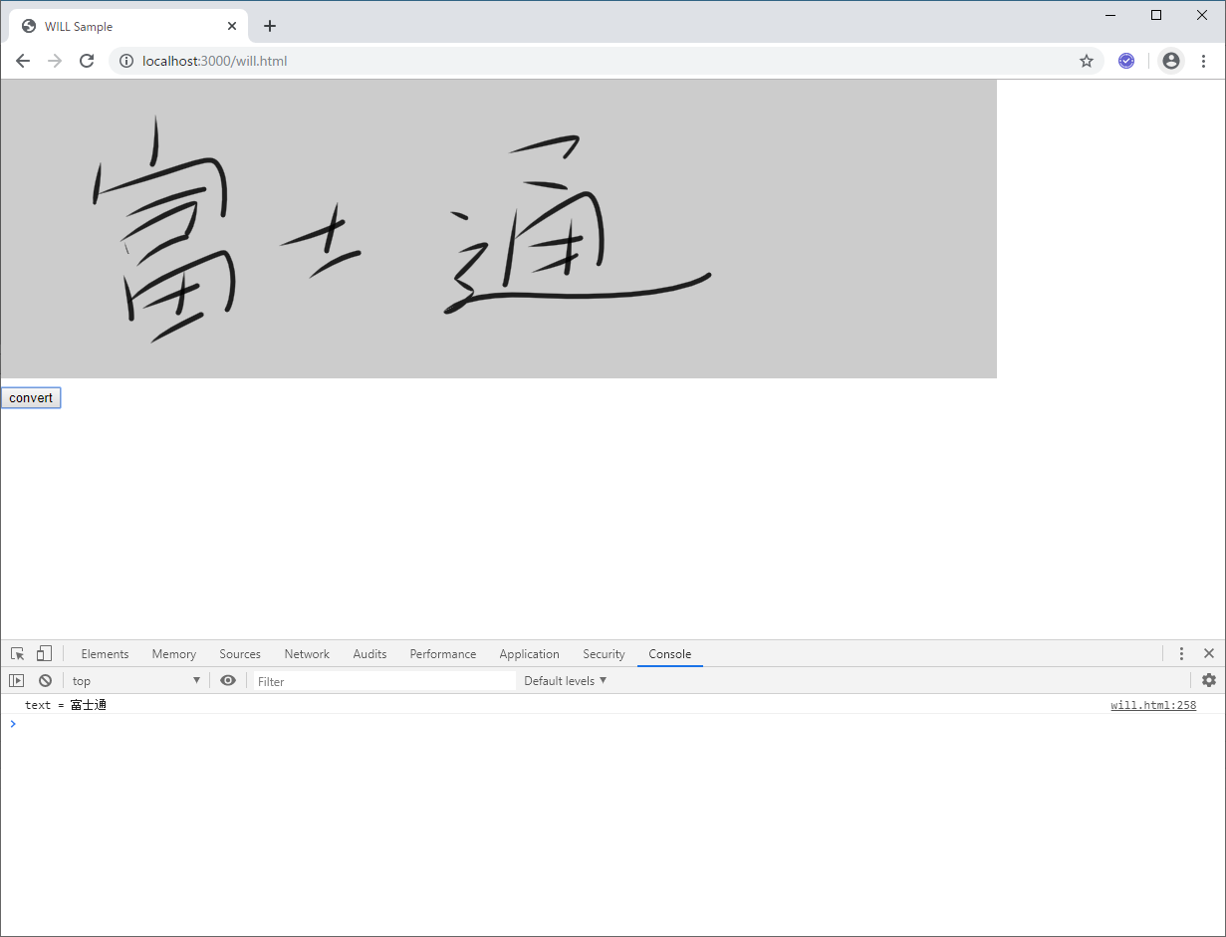
SVGと比べて、かなり筆っぽい。書いた感覚もめちゃくちゃ滑らか。
https://github.com/Wacom-Developer/will-sdk-for-ink-web
に書いてあるWILLのアーキテクチャを見ると、どうやらasm.jsを使ってWebGLで描画しているらしい。

同じ様なライブラリを作れって言われても、作れる富士通のSEはなかなか居ないんじゃないかな...。
Azure Ink Recognizer
Web画面に手書き文字を書くことはできた。次は書いた文字をテキストに変換する。
今回はAzureのプレビュー機能であるInk Recognizerを使用する。
https://azure.microsoft.com/ja-jp/services/cognitive-services/ink-recognizer/
InkRecognizerはストロークのパスを単に配列として渡すだけだけど、
SVG、WILLともに保持しているストロークの形式が単なる配列ではないので、
変換する必要がある。inkrecognizer.jsでストローク情報を変換している。
    svg2InkRecognizer(strokes) {
        const inkRecognizerStrokes = new Array();
        let cnt = 1;
        strokes.forEach(function(stroke) {
            const inkRecognizerStroke = {};
            inkRecognizerStroke.id = cnt;
            inkRecognizerStroke.points = stroke
                .replace(/M/g, "")
                .replace(/L/g, "")
                .replace(/ /g, ",");
            inkRecognizerStrokes.push(inkRecognizerStroke);
            cnt++;
        });
        return { language: "ja-JP", version: 1, strokes: inkRecognizerStrokes };
    }

    will2InkRecognizer(strokes) {
        const inkRecognizerStrokes = new Array();
        let cnt = 1;
        strokes.forEach(function(stroke) {
            const inkRecognizerStroke = {};
            inkRecognizerStroke.id = cnt;
            const strokePoints = new Array();
            for (let idx = 0; idx < stroke.path.points.length; idx++) {
                if (idx % 3 != 2) strokePoints.push(stroke.path.points[idx]);
            }
            inkRecognizerStroke.points = strokePoints.toString();
            inkRecognizerStrokes.push(inkRecognizerStroke);
            cnt++;
        });
        return { language: "ja-JP", version: 1, strokes: inkRecognizerStrokes };
    }
サーバAPIへの送信はaxiosにて実装。
    async convert(strokes) {
        const res = await axios.post(this.basePath + "/convert", {
            strokes: strokes
        });
        if (res.status == 201) {
            return res.data;
        }
    }
今回サーバサイドはkoa.jsを用いて実装しており、routes配下のrecognizer.jsにて
InkRecognizerのAPIを呼び出している。
const Router = require("koa-router");
const uuidv4 = require("uuid/v4");
const axios = require("axios");
const endpoint = process.env.InkRecognizerEndpoint;
const apikey = process.env.InkRecognizerAPIKey;
const router = new Router();

// POST /convert
router.post("/convert", async (ctx, next) => {
    const strokes = ctx.request.body.strokes;

    const res = await axios.put(endpoint + "/v1.0-preview/recognize", strokes, {
        headers: {
            "x-ms-client-request-id": uuidv4(),
            "Ocp-Apim-Subscription-Key": apikey
        }
    });
    ctx.body = res.data;
    ctx.status = 201;
});

module.exports = router;
次の通り環境変数からエンドポイントURLとInkRecognizerのAPI Keyを取得しているので、
Azureのコンソールから取得したEndpointとAPI Keyを設定しておく。
const endpoint = process.env.InkRecognizerEndpoint;
const apikey = process.env.InkRecognizerAPIKey;
先ほど書いたSVGの手書き文字とWILLの手書き文字を実際にAPIで変換してみた。

まとめ
WILLスゲー
WILLを使えば、Web上で簡単にしかもすごく滑らかな手書き文字を実現できる。
Web SDK以外もあるので、様々なプラットフォームに対応できる。会社のプロジェクトで手書き文字を扱うことがあったら、ライセンス料がかかるとしても絶対にWILLを勧めると思う。
昔に比べて文字を書くということが社会全体でなくなってきているけど、署名やICT教育などではこれからどんどん使われてくる技術だと思う。
Azure Ink Recognizerスゲー
こちらもサービスなので利用量に応じて課金が必要だけど、2,000トランザクション/月、200ストローク/トランザクションまで無料となっている。
「富士通」は12画+3画+10画なので25ストローク。「富士通」だけの変換なら、毎月2,000回まで無料ということになる。
あとは1,000トランザクション毎に244円かかる。今はまだパブリック プレビュー価格なのでこの値段だけど、多少金額が上がったとしても、自分たちで変換アルゴリズムを実装するよりもはるかに安いと思う。いつ終了するか分からないってことだけが唯一のリスク。

