前回の続きです。
今回はDBの構築をやっていきます。
ガイド
全体Index:タスク管理ツールをReact + ASP.Coreで作る - Index
データ構造とアプローチ
ASP.NET Coreでデータベースを扱う場合、構築方法は大きく2つの種類があります。一つ目がDBを作成し、DB定義からアプリケーション側にオブジェクトを生成する「データベースファースト」、二つ目が、アプリケーション側にオブジェクトを作り、オブジェクトからDBを生成する「コードファースト」というアプローチです。
今回は「コードファースト」を採用します。
両者のメリットデメリットは今回は割愛しますが、サーバーサイドのプログラムで人手での構築が完結するので、データ構造を作っておけばデータベース構築そのものはエンティティフレームワークが大半やってくれるというのが大きな理由です。
パッケージ追加の準備とパッケージ追加
DBを使用するにあたり、いくつかのパッケージを追加でインストールする必要があります。
パッケージはコマンドラインからでもインストール可能ですが、今回はNuGet Galleryと呼ばれるGUIからNuGetパッケージの管理を可能にする拡張機能をインストールします。
NuGet Galleryの追加
拡張機能追加タブに移動し、検索ゾーンに"nuget"と入れると、nuget関連の拡張機能が表示されるので、Nuget Galleryを探してインストールします
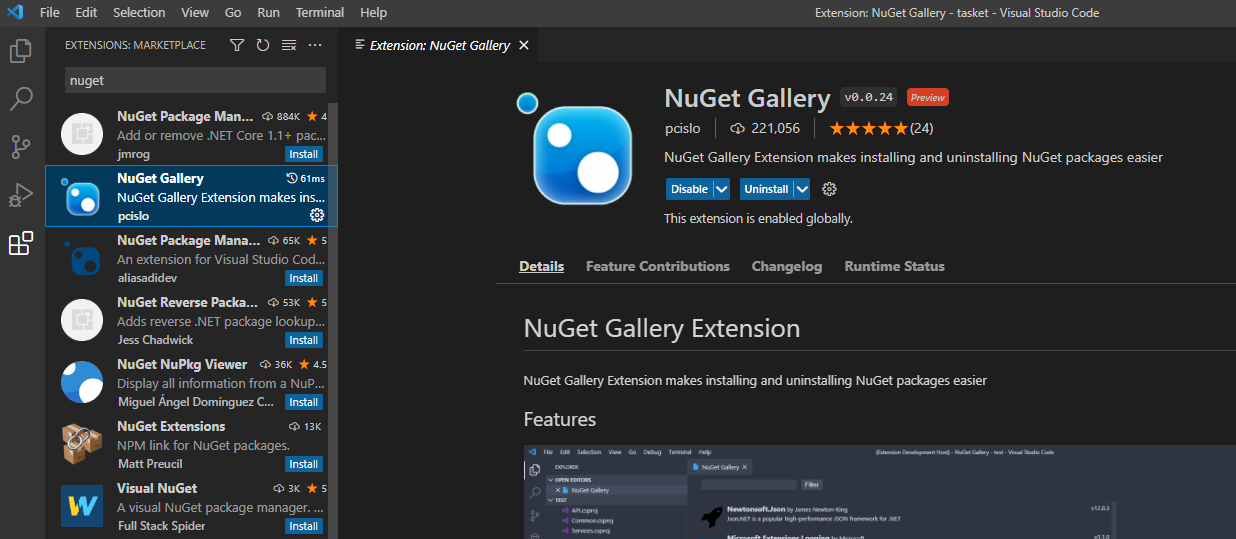
Nuget Galleryを用いてパッケージを追加する
Nuget Galleryを開く
インストールが済むと、F1押下またはCtrl+P→Shift+.でNuget Galleryを開くことができるようになります。
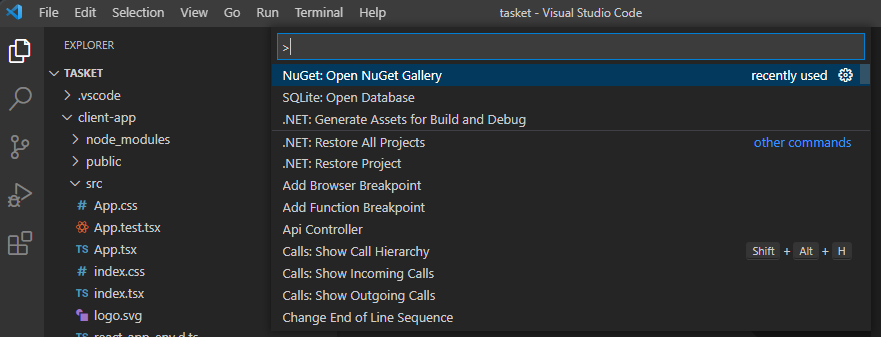
パッケージの探し方
Filterに入力することで絞り込みができるので、必要なパッケージを探してインストールします。
今回インストールするパッケージ一覧
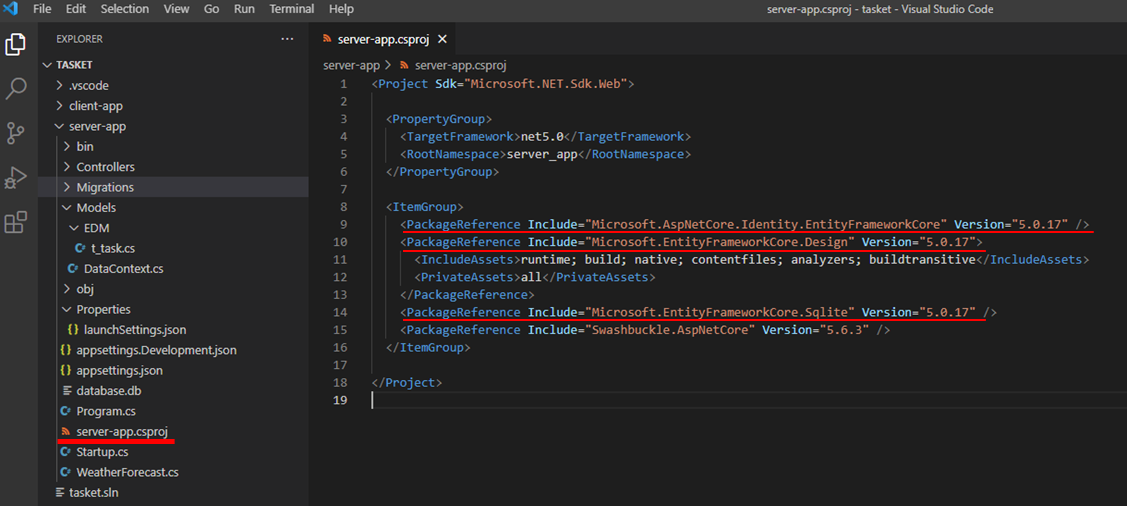
今回は以下のパッケージをインストールします。
今回は.バージョン5をターゲットフレームワークにしているので、バージョン5の中の最新をそれぞれインストールしてあります
- Microsoft.AspNetCore.Identity.EntityFrameworkCore
- Microsoft.EntityFrameworkCore.Design
- Microsoft.EntityFrameworkCore.Sqlite
「Microsoft.AspNetCore.Identity.EntityFrameworkCore」は、認証機能付きでデータを操作するためのパッケージです。
認証機能はまだ使用しませんが、後に実装するときのために今のうちに入れておきます。
「Microsoft.EntityFrameworkCore.Design」はコードファースト関連の機能を使用するときに必要になるパッケージ、「Microsoft.EntityFrameworkCore.Sqlite」はSqliteを使用する際に必要になるパッケージです。
上記のインストールが完了すればパッケージ追加は完了です。
参考:パッケージ追加が成功しているかどうかの確認は以下(開くと表示)
コードの追加とDBの構築
コードの追加
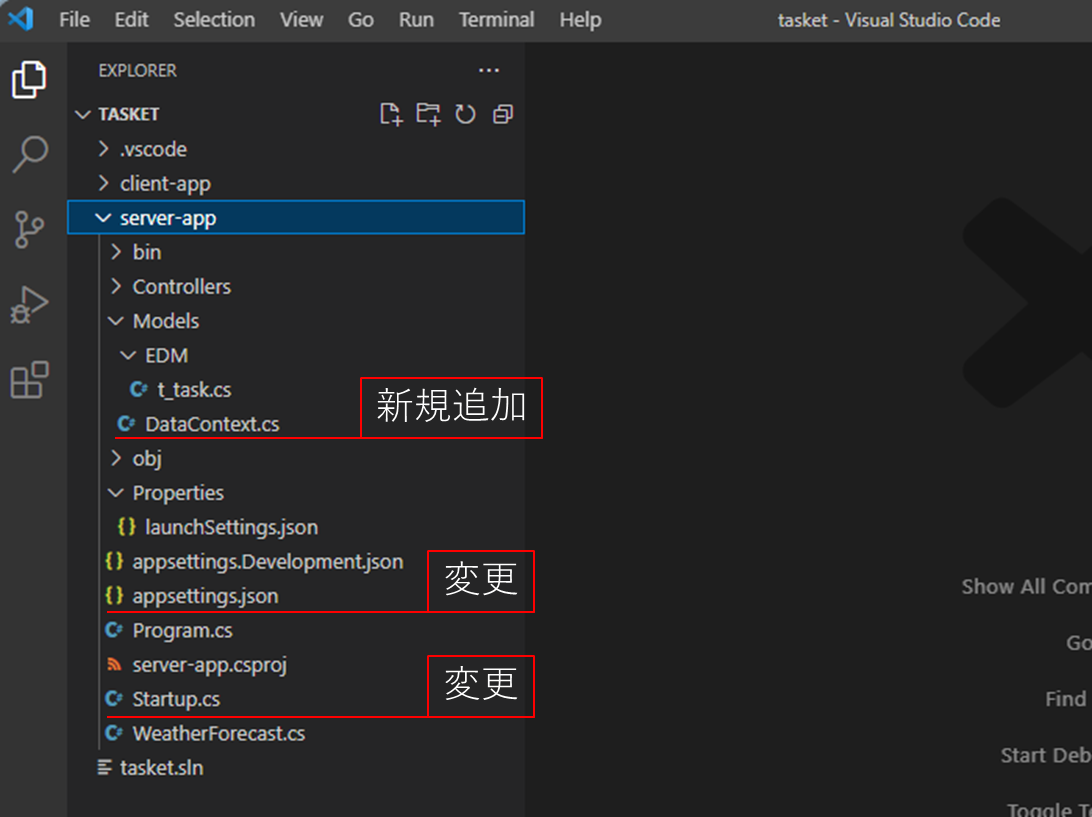
パッケージの追加が出来たので、次にコードを追加or変更していきます。
appsettings.json
DBへの接続文字列を追加します。
{
+  "ConnectionStrings": {
+    "DefaultConnection":"Data Source=database.db"
+  },
  "Logging": {
    "LogLevel": {
      "Default": "Information",
      "Microsoft": "Warning",
      "Microsoft.Hosting.Lifetime": "Information"
    }
  },
  "AllowedHosts": "*"
}
DataContext.cs
ASP.NET Coreでは、データモデルの操作は「EntityFramework」というフレームワークを用いて行われます。
「データモデル」の具体的な対象には、SQL ServerやMysqlなどの各種DBや、XMLファイルなど様々な種類があります。今回はSqliteを使用します。
コンテキストクラスはEntityFrameworkのクラスの一つで、DBに対してデータ取得・登録・削除などの操作や、DB生成・テーブル変更などの操作をすることができます。
今回は以下の様なコードになります。
「t_task」をテーブルに持つDBというのが簡単な説明になります。
「entity.HasKey(e => new { e.id_task });」の部分が、モデルクラスの段階で出てこなかった主キーの設定になります。
using Microsoft.EntityFrameworkCore;

namespace server_app.Models.EDM
{
    public partial class DataContext : DbContext
    {
        public DataContext(DbContextOptions options) : base(options)
        {
        }

        public DbSet<t_task> t_tasks {get; set;}
        protected override void OnModelCreating(ModelBuilder modelBuilder)
        {
            modelBuilder.Entity<t_task>(entity =>
            {
                entity.HasKey(e => new { e.id_task });

            });
        }
    }
}
Startup.cs
Startup.csに、Sqliteの実装で「DataContext」に従ったデータモデルに対する操作の機能を組み込むよ、接続文字列は"DefaultConnection"の定義に従うよという内容を追加します。
using System;
using System.Collections.Generic;
using System.Linq;
using System.Threading.Tasks;
using Microsoft.AspNetCore.Builder;
using Microsoft.AspNetCore.Hosting;
using Microsoft.AspNetCore.HttpsPolicy;
using Microsoft.AspNetCore.Mvc;
+ using Microsoft.EntityFrameworkCore;
using Microsoft.Extensions.Configuration;
using Microsoft.Extensions.DependencyInjection;
using Microsoft.Extensions.Hosting;
using Microsoft.Extensions.Logging;
using Microsoft.OpenApi.Models;
+ using server_app.Models.EDM;

namespace server_app
{
    public class Startup
    {
        public Startup(IConfiguration configuration)
        {
            Configuration = configuration;
        }

        public IConfiguration Configuration { get; }

        // This method gets called by the runtime. Use this method to add services to the container.
        public void ConfigureServices(IServiceCollection services)
        {
+            services.AddDbContext<DataContext>(opt =>
+            {
+             opt.UseSqlite(Configuration.GetConnectionString("DefaultConnection"));
+            } );

            services.AddControllers();
Startup.cs全体(開くと表示)
using System;
using System.Collections.Generic;
using System.Linq;
using System.Threading.Tasks;
using Microsoft.AspNetCore.Builder;
using Microsoft.AspNetCore.Hosting;
using Microsoft.AspNetCore.HttpsPolicy;
using Microsoft.AspNetCore.Mvc;
+ using Microsoft.EntityFrameworkCore;
using Microsoft.Extensions.Configuration;
using Microsoft.Extensions.DependencyInjection;
using Microsoft.Extensions.Hosting;
using Microsoft.Extensions.Logging;
using Microsoft.OpenApi.Models;
+ using server_app.Models.EDM;

namespace server_app
{
    public class Startup
    {
        public Startup(IConfiguration configuration)
        {
            Configuration = configuration;
        }

        public IConfiguration Configuration { get; }

        // This method gets called by the runtime. Use this method to add services to the container.
        public void ConfigureServices(IServiceCollection services)
        {
+            services.AddDbContext<DataContext>(opt =>
+            {
+             opt.UseSqlite(Configuration.GetConnectionString("DefaultConnection"));
+            } );

            services.AddControllers();
            services.AddSwaggerGen(c =>
            {
                c.SwaggerDoc("v1", new OpenApiInfo { Title = "server_app", Version = "v1" });
            });


           services.AddCors(o => o.AddPolicy(MyAllowSpecificOrigins, builder =>
           {
               builder.AllowAnyOrigin()    // Allow CORS Recest from all Origin
                      .AllowAnyMethod()    // Allow All Http method
                      .AllowAnyHeader();   // Allow All request header
           }));
        }

        readonly string MyAllowSpecificOrigins = "_myAllowSpecificOrigins";

        // This method gets called by the runtime. Use this method to configure the HTTP request pipeline.
        public void Configure(IApplicationBuilder app, IWebHostEnvironment env)
        {
            if (env.IsDevelopment())
            {
                app.UseDeveloperExceptionPage();
                app.UseSwagger();
                app.UseSwaggerUI(c => c.SwaggerEndpoint("/swagger/v1/swagger.json", "server_app v1"));
            }

            app.UseHttpsRedirection();

            app.UseRouting();

            app.UseCors(MyAllowSpecificOrigins);   // Add For CORS

            app.UseAuthorization();

            app.UseEndpoints(endpoints =>
            {
                endpoints.MapControllers();
            });
        }
    }
}
DBの生成
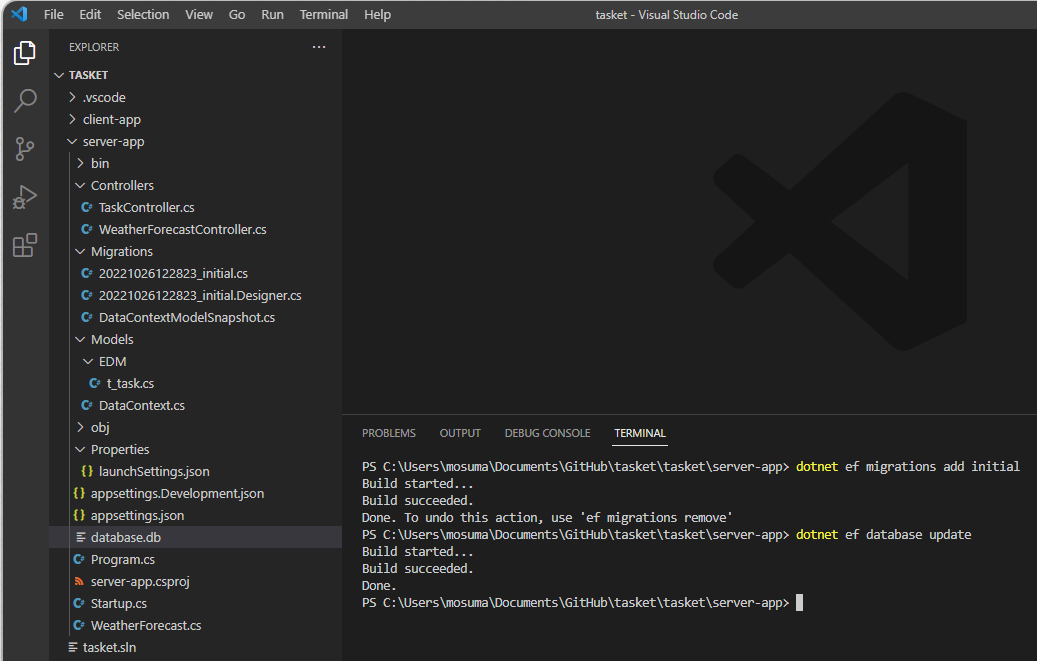
コードの追加が完了したので、以下のコマンドを実行します。
> dotnet ef migrations add initial
> dotnet ef database update
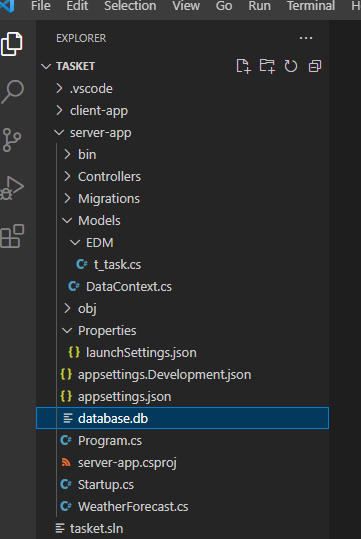
マイグレーションが実施され、コンテキストクラスの内容に従いデータベース「database.db」が生成されます
DB生成後の状態
DBの確認・操作
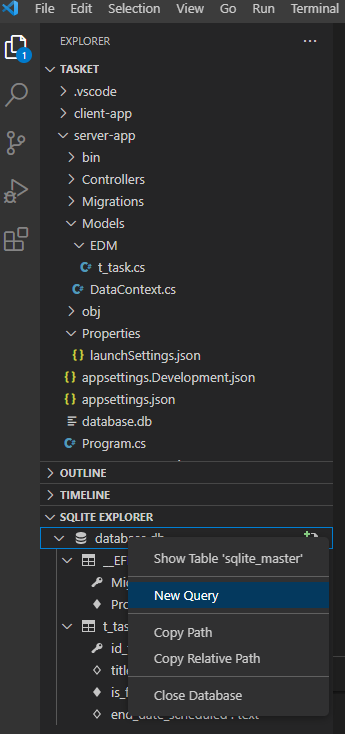
DBの追加が出来たので、内容を確認してみましょう。SQLite拡張機能などで確認できます。

開くと、以下の様にDBが構築されていることが分かります。
(Sqliteの実装ではbooleはint、Datetimeは日付で実装されるのですね)
ダミーデータの投入
構築したSQLiteのテーブルの内容を用いてデータを表示していきたいのですが、現状テーブルが空です。
登録機能の構築はもう少し先になりそうなので、まずダミーデータを投入していこうと思います。
データインサート用のSQLを作って、右クリックで実行します
INSERT INTO t_tasks(id_task, title, is_finish, end_date_scheduled)
 VALUES('e01782d2-4e34-45cc-b101-2118f23bac48', 'title01', 0, '2022-10-27T23:59:40.9458612+09:00');
INSERT INTO t_tasks(id_task, title, is_finish, end_date_scheduled)
 VALUES('80adddd4-9f92-49f3-b220-dcebc27f40be', 'title02', 1, '2022-10-28T23:59:40.9459392+09:00');
上記のSQLをそれぞれ以下の様に実行してデータ追加しました。
(1回のクエリでできるのでしょうけど、SQLiteを直接操作することが今後ない気がするのでやっつけです。)

以下の様にデータが追加されていることが確認できました。
今回は以上です。
続きは次回です


