iOS開発のデフォルトスタンダードとなっている依存関係管理システムといえばCocoaPodsですが、最近登場したCarthageは様々な点でCocoapodsに勝るメリットが享受できます。特に、 プロジェクトのビルドが速くなる という点で圧倒的に素晴らしいです。CarthageはCocoapodsの様にクリーンインストールの都度ライブラリのビルドをし直すということをしないので、その分高速なんですね。
先日、大きめのプロジェクトの一部をCocoapodsからCarthageに変えたところ、ビルド時間を40パーセントも(!)削減できました。そして、これは素晴らしいのでもっと広まって欲しいと思いました。そこでCartahge形式で配布をしたことがない人向けに記事を書いておきます。
とっても簡単なので、ライブラリや、個人プロジェクトなどで利用してみてください。
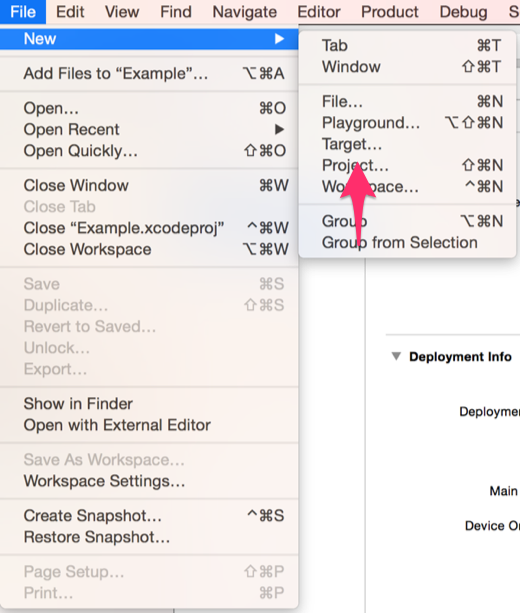
1. 新しいターゲットをフレームワークとして作成する
新しいTargetの追加から、
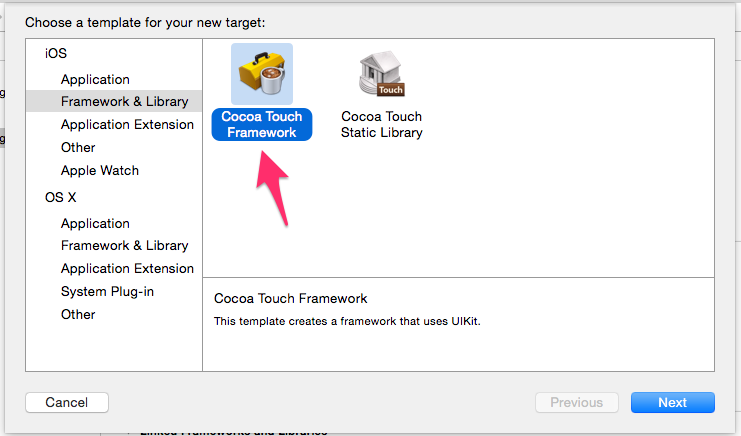
Cocoa Touch Frameworkを選択します。
2. Schemeをシェアする
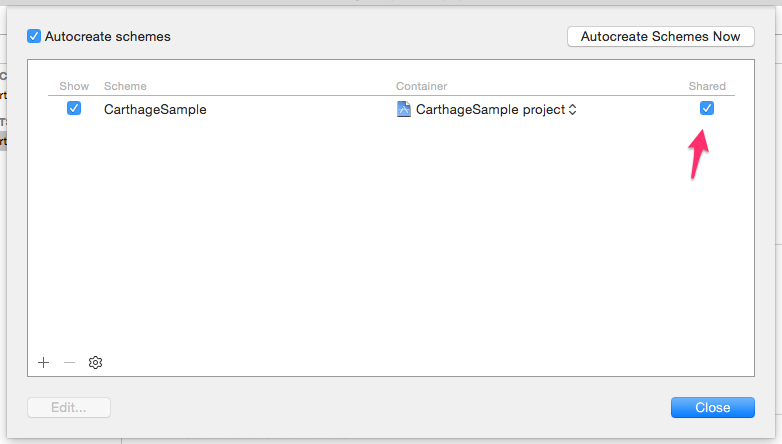
Manage schemes...から、
Sharedにチェックを入れる
3. ビルドして生成物をチェックする
$ carthage build --no-skip-current
上記コマンドでビルドします。Carthage/Buildというディレクトリが出来上がるのでその中身で生成されたフレームワークをチェックします。
4. git push
問題がなければRepositoryにプッシュします。
5. タグをつける
リリースのタブを開いて新しいタグをつけます。
たったこれだけでCarthageの配布準備できます!ライブラリとしてなくても個人的に使うだけでも便利です。


