Ubuntu Core 18リリースのニュースを見たので、VirtualBoxで試してみました。
英Canonical、IoT向けとなる「Ubuntu Core 18」を公開。10年間のセキュリティアップデートを約束
https://mag.osdn.jp/19/01/23/163000
公式サイトにはKVMでのインストール手順がありましたが、VirtualBoxで試します。
Ubuntu Coreとは
上記サイトから引用すると以下の通りです。
Ubuntu Coreは、IoTや組み込み端末に向けたUbuntuベースのディストリビューション。コンテナでの利用にも適しているとしている。パッケージを最小構成にすることで260MBと軽量にし、セキュリティ、信頼性の向上も図っている。
試した環境
Mac : macOS High Sierra(10.13.6)
VirtualBox : 6.0.4
インストール手順
KVMのインストール手順を参考に行います。
Install Ubuntu Core on KVM
https://www.ubuntu.com/download/iot/kvm
Ubuntu SSOアカウントの作成
https://login.ubuntu.com/ からアカウントを作成します。
次に、SSHキーを作成します。
ssh-keygen -t rsa
いくつか質問されるので回答します。
Generating public/private rsa key pair.
Enter file in which to save the key (/Users/xxxxxx/.ssh/id_rsa):[sshキーの名前。「/Users/xxxxxx/.ssh/ubuntu-sso_rsa」としました。]
Enter passphrase (empty for no passphrase):[パスフレーズ。空白も可]
Enter same passphrase again:[パスフレーズをもう一度]
Your identification has been saved in /Users/xxxxxx/.ssh/ubuntu-sso_rsa.
Your public key has been saved in /Users/xxxxxx/.ssh/ubuntu-sso_rsa.pub.
/Users/xxxxxx/.sshディレクトリーにubuntu-sso_rsaとubuntu-sso_rsa.pubが作成されます。
SSHキーが作成できたら、ubuntu-sso_rsa.pubの内容をUbuntu SSOの管理画面に登録します。
Ubuntu Coreのダウンロード
arm64版のイメージをダウンロードします。
http://cdimage.ubuntu.com/ubuntu-core/18/stable/current/ubuntu-core-18-amd64.img.xz
xzフォーマットの展開にはThe Unarchiverを使いました。
HDDフォーマットの変換
ダウンロードしたイメージはRAWフォーマットのため、VirtualBoxで利用できるようにVDIフォーマットに変換します。
VBoxManage convertfromraw ubuntu-core-18-amd64.img ubuntu-core-18-amd64.vdi --format VMDK
HDDのサイズも大きくしておきます
VBoxManage modifyhd ubuntu-core-18-amd64.vdi --resize 20480
仮想環境の構築
VirtualBoxの仮想環境を構築します。
ウィザードに従って作成しますが、HDDは先程作成したものを選択します。
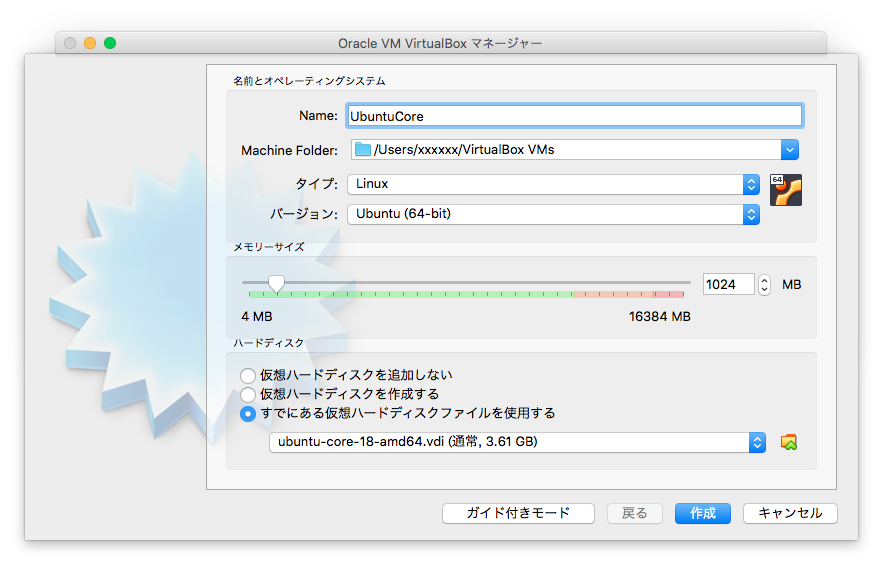
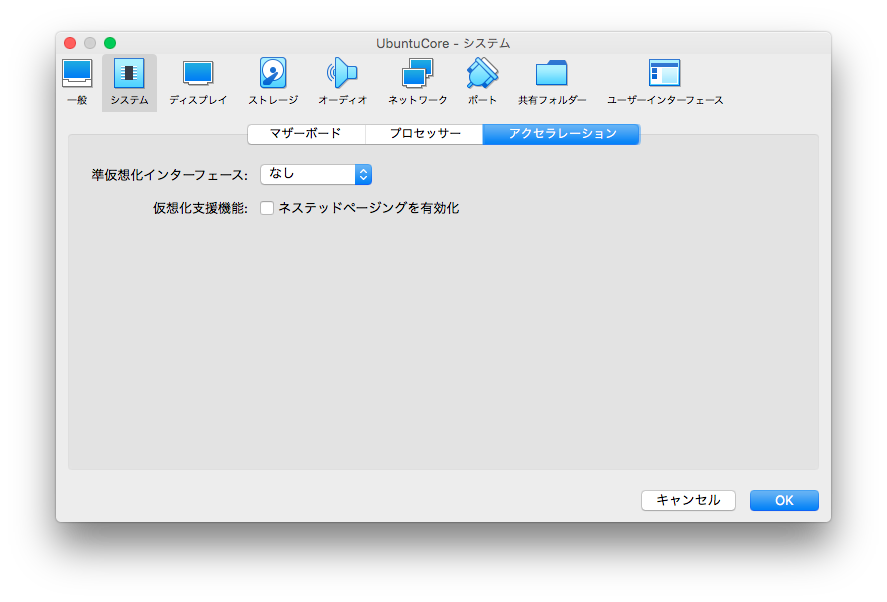
環境を作ったあと、設定を一部変更します。
[システム]->[アクセラレーション]の設定にある準仮想化インターフェイースを「なし」にします。
ここを変更しないとブートの途中で止まってしまいます。
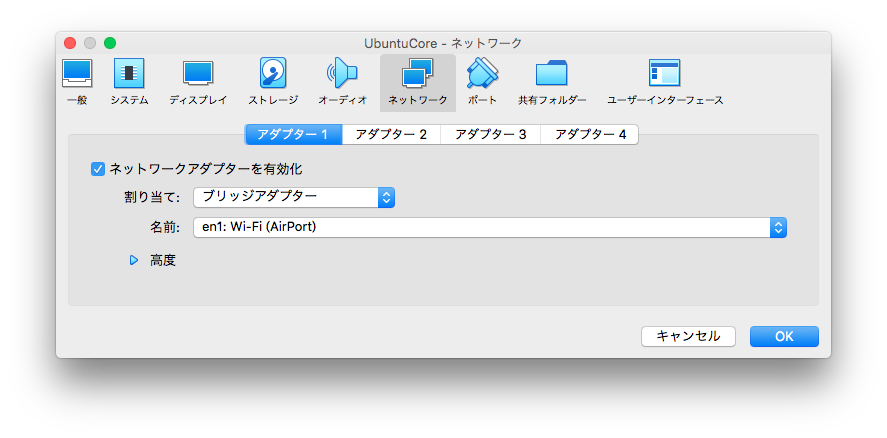
あとは、手順の最後にSSHしますのでネットワーク設定をブリッジアダプターにしておきましょう。
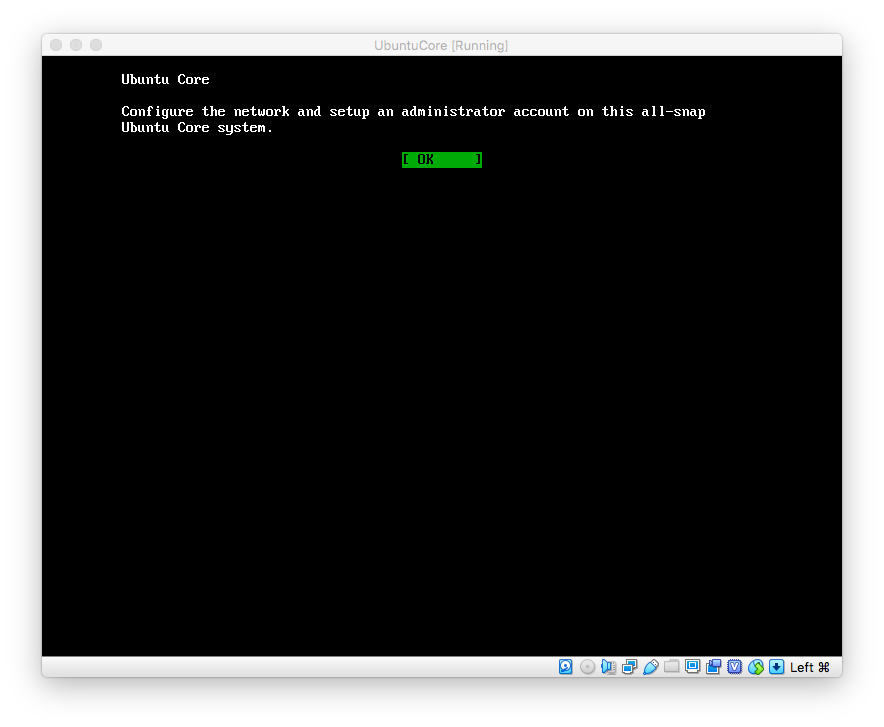
起動、アカウント設定
しばらく、待つと以下の画面になります。のでEnterキーを押します。

Enterキーを押します。
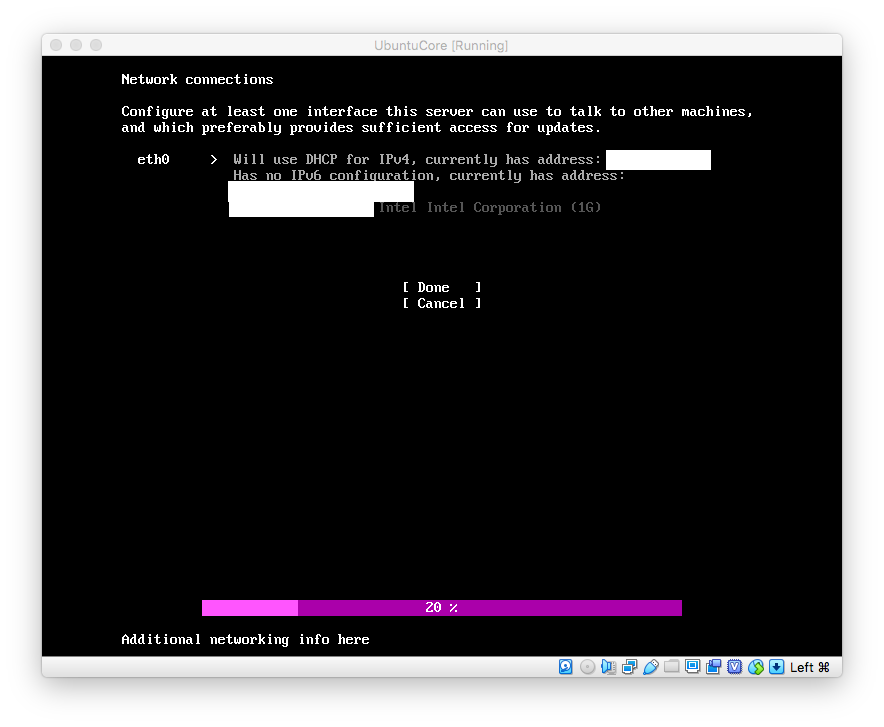
ネットワーク設定の画面が出ますので、Doneを選択します。Tabキーで移動できます。
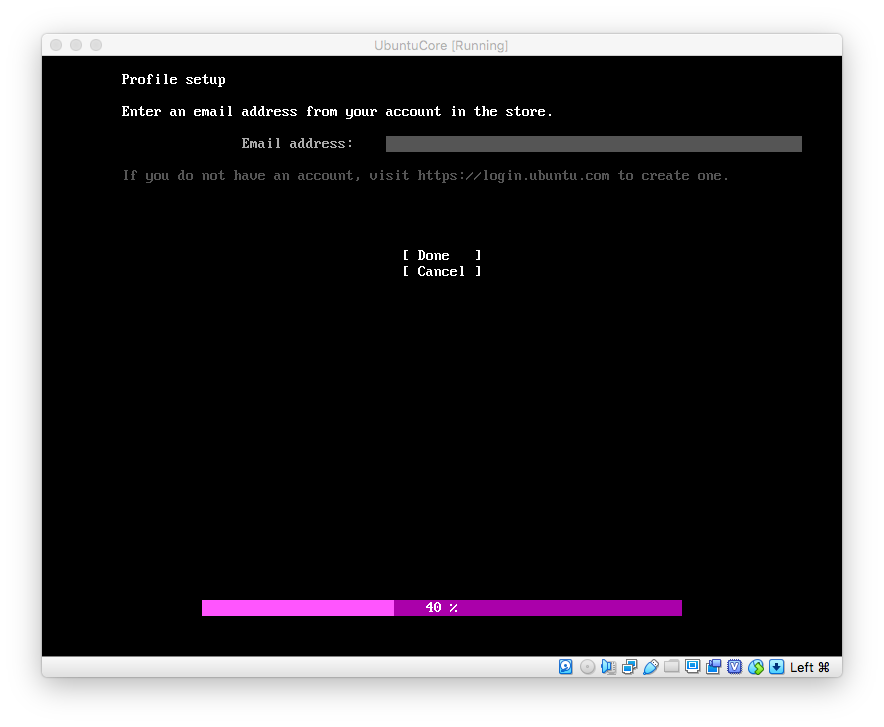
Ubuntu SSOアカウントのメールアドレスを入力します。
英字キーボード設定なので、@はShiftキー+2です。
これで終了です。
SSHでログイン
MacからSSHでログインします。
ssh [Ubuntu SSOのアカウント名]@[Ubuntu Coreの仮想環境のIPアドレス] -i [作成したSSHキー(ubuntu-sso_rsa)]
SSHキーが合っていれば、パスワード無しでログインできます。
つまずきポイント
- ブートプロセスが途中で止まる → VirtualBoxで構築した環境の設定の
準仮想化インターフェイースをなしにします。 - 初期設定中のメールアドレスが入力できない → 英字キーボードなので
@はShiftキー+2です。 - 初期セットアップ後にUbuntu SSOアカウントに登録したSSHキーを変更した → Ubuntu Coreの初期設定中にSSHキーが取得されるようなので、初期設定後にSSHキーを変更しても反映されないようです。はじめからやり直しましょう。(他の方法がわかりませんでした)
Ubuntu Core使ってみる
apt-getやaptはなく、代わりにsnapをつかうようです。
$ apt-get update
-bash: apt-get: command not found
$ apt update
-bash: apt: command not found
$ snap --help
The snap command lets you install, configure, refresh and remove snaps.
Snaps are packages that work across many different Linux distributions,
enabling secure delivery and operation of the latest apps and utilities.

Usage: snap <command> [<options>...]

Commands can be classified as follows:

         Basics: find, info, install, list, remove
        ...more: refresh, revert, switch, disable, enable
        History: changes, tasks, abort, watch
        Daemons: services, start, stop, restart, logs
       Commands: alias, aliases, unalias, prefer
  Configuration: get, set, wait
        Account: login, logout, whoami
    Permissions: interfaces, interface, connect, disconnect
          Other: version, warnings, okay
    Development: run, pack, try, ack, known, download

For more information about a command, run 'snap help <command>'.
For a short summary of all commands, run 'snap help --all'.
Docker → 動きそう
$ snap find docker
Name                    Version        Publisher       Notes  Summary
docker                  18.06.1-ce     canonical✓      -      Docker container runtime
docker-credential-pass  v0.6.0         mvc-aaa         -      Keep Docker credentials safe.
img                     0.4.6          bashfulrobot    -      Unprivileged Dockerfile & OCI compatible container img builder.
dry                     0.9-beta.5     monch0          -      A Docker manager for the terminal
convos                  0.99.34        jhthorsen       -      Multiuser chat application that runs in your web browser
paradrop-agent          0.13.0         pd              -      Paradrop agent for managing an edge computing node
etcd                    3.2.10         tvansteenburgh  -      Resilient key-value store by CoreOS
traefik-nacc            1.0.1          nacc            -      Træfik, a modern reverse proxy
j2                      0.3.1-0        cmars           -      Command-line interface to Jinja2 for templating in shell scripts.
monexec                 v0.1.12-dirty  reddec          -      Light supervisor with optional Consul autoregistration
$ sudo snap install docker
docker 18.06.1-ce from Canonical✓ installed
$ docker --version
Docker version 18.06.1-ce, build e68fc7a
$ sudo docker run hello-world
Unable to find image 'hello-world:latest' locally
latest: Pulling from library/hello-world
1b930d010525: Pull complete
Digest: sha256:2557e3c07ed1e38f26e389462d03ed943586f744621577a99efb77324b0fe535
Status: Downloaded newer image for hello-world:latest

Hello from Docker!
This message shows that your installation appears to be working correctly.

To generate this message, Docker took the following steps:
 1. The Docker client contacted the Docker daemon.
 2. The Docker daemon pulled the "hello-world" image from the Docker Hub.
    (amd64)
 3. The Docker daemon created a new container from that image which runs the
    executable that produces the output you are currently reading.
 4. The Docker daemon streamed that output to the Docker client, which sent it
    to your terminal.

To try something more ambitious, you can run an Ubuntu container with:
 $ docker run -it ubuntu bash

Share images, automate workflows, and more with a free Docker ID:
 https://hub.docker.com/

For more examples and ideas, visit:
 https://docs.docker.com/get-started/
AWS CLI → インストールできず
classic systemsってのが必要らしいですが、どうしていいかわからず
$ sudo snap install  aws-cli
error: snap "aws-cli" requires classic confinement which is only available on classic systems
classic環境ってのはまだstableではないらしい
$ snap info classic
name:      classic
summary:   Classic environment
publisher: Canonical✓
contact:   snaps@canonical.com
license:   Other Open Source
description: |
  Classic environment
snap-id: QbSFwGGAgvG8zHl9nWLY7vEee8lhgFsp
channels:
  stable:       –
  candidate:    –
  beta:         16.04     (26) 4kB  devmode
  edge:         16.04     (42) 12kB devmode
  18/stable:    –
  18/candidate: –
  18/beta:      –
  18/edge:      18.04-0.1 (37) 31MB devmode
--edgeと--devmode付きでclassic環境をインストール
$ sudo snap install classic --edge --devmode
classic (edge) 16.04 from Canonical✓ installed
それでもエラーは変わらず。
$ sudo snap install  aws-cli
error: snap "aws-cli" requires classic confinement which is only available on classic systems
classic環境ってのになると、apt-getができる模様
$ sudo classic
(classic)xxxxx@localhost:~$ sudo apt-get update
Get:1 http://security.ubuntu.com/ubuntu xenial-security InRelease [109 kB]
Hit:2 http://archive.ubuntu.com/ubuntu xenial InRelease
Get:3 http://archive.ubuntu.com/ubuntu xenial-updates InRelease [109 kB]
Get:4 http://archive.ubuntu.com/ubuntu xenial-backports InRelease [107 kB]
Fetched 325 kB in 3s (101 kB/s)
Reading package lists... Done
(classic)xxxxx@localhost:~$
Ubuntu Coreの使い所がいまいち使い方がわからず。。
Greengrassがあると思ったんですが、まだなさそうです。
追記:普通のUbuntu 18.04の場合
普通のUbuntuでもsnapが使えて、更に、classicでのインストールができるようです。
ubuntu@ubuntu-VirtualBox:~$ snap info aws-cli
name:      aws-cli
summary:   Universal Command Line Interface for Amazon Web Services
publisher: aws
contact:   https://console.aws.amazon.com/support
license:   Apache-2.0
description: |
  The AWS CLI is an open source tool built on top of the AWS SDK for Python
  (Boto) that provides commands for interacting with AWS services. With
  minimal configuration, you can start using all of the functionality
  provided by the AWS Management Console from your favorite terminal program.
snap-id: CRrJViJiSuDcCkU31G0xpNRVNaj4P960
channels:
  stable:    1.15.71 (135) 15MB classic
  candidate: ↑
  beta:      ↑
  edge:      1.16.18 (140) 21MB classic
ubuntu@ubuntu-VirtualBox:~$ sudo snap install aws-cli
[sudo] password for ubuntu:
error: This revision of snap "aws-cli" was published using classic confinement and thus may perform
       arbitrary system changes outside of the security sandbox that snaps are usually confined to,
       which may put your system at risk.

       If you understand and want to proceed repeat the command including --classic.
ubuntu@ubuntu-VirtualBox:~$ sudo snap install aws-cli --classic
aws-cli 1.15.71 from 'aws' installed
ubuntu@ubuntu-VirtualBox:~$ aws --version
aws-cli/1.15.71 Python/3.5.2 Linux/4.15.0-29-generic botocore/1.10.70
参考サイト