Oculus Rift Advent Calendar 2017の13日目の記事です!
はじめに
HoloLensの登場により、外部環境のすべてがシステムのアウトプット領域になりました。
これは同時に外部環境のすべてがインプット領域になったということでもあります。
外部環境を認識・解析し、アプリケーション側のINPUTとすれば、よりユーザーに寄り添ったアプリケーションの作成が可能となるでしょう。
この外部環境解析を行うために、Microsoft AzureのCognitive ServicesをHoloLensで使ってみたいと思います。
今回はCustom Vision Servicesを使用してみます。
「そもそもCustom Vision Servicesって何?」という方のためにもってこいの記事が下記にありますので
まずはこちらの方の記事をご参照頂くことをお勧めします。
人工知能パーツ Microsoft Cognitive Services で食べ物画像判定 BOT を作ろう! [Custom Vision 編]
2018/9/18補記
下記スライド39ページにも記載しましたが、APIバージョンによっては戻り値の大文字小文字の違いにより
値が取得できない場合があります。
[簡単!!HoloLensで始めるCognitive Services~de:code 2018特別バージョン~]
(https://www.slideshare.net/ShingoMori2/hololenscognitive-servicesdecode-2018)
そのような場合は戻り値のプロパティ名を確認し、Classのフィールド名を一致させてください。

環境
OS:Windows 10 CreatersUpdate
Unity:5.6.2f1
HoloToolkit:1.5.8.0
完成イメージ
HoloLens+Custom Vision APIの例。犬と猫の識別。
— morio (@morio36) 2017年9月22日
犬の一枚目はProbabilityが低いが、一度Trainを追加することでProbabilityが高くなっている。#HoloLens #CognitiveServices pic.twitter.com/OvvPwnhtXl
流れ
0.事前準備
1.Custom Vision Servicesでプロジェクトを作成
2.UnityでHoloLens用実装
3.動作確認
4.再トレーニング
0.事前準備
本サンプルを試すためには、Azureのアカウントが必要です。
下記の方の記事を参考にアカウント作成と「Custom Vision ポータルへのアクセス」までを行ってください。
人工知能パーツ Microsoft Cognitive Services で食べ物画像判定 BOT を作ろう! [Custom Vision 編]
それと、Custom Vision Servicesは画像の事前収集がなかなかしんどいです。
今回は猫と犬の分類を行いますので、それぞれ5枚以上の画像を取得し、ローカルに保存しておいてください。
タグ一つあたり、最低5枚以上の学習用画像が必要です。
推奨はタグひとつにつき20枚以上だそうです。
自動で取得を試みている方がいましたので、そのリンクも貼っておきます。
Bingの画像検索APIを使って画像を大量に収集する
2017.10.6追記
画像のデータセットはこちらのサイトが便利でした。
犬、猫を品種毎にたくさん用意してくれています。
http://www.robots.ox.ac.uk/~vgg/data/pets/
動物以外にも食品や風景など、データセットをまとめたリポジトリはこちらをご参照ください。
https://github.com/arXivTimes/arXivTimes/tree/master/datasets
1.Custom Vision Servicesでプロジェクトを作成
Unity側の作り込みを行う前に、Custom Vision Servicesのプロジェクト作成を行っておきます。
- 自身のアカウントのトップから「New Project」をクリック(”HoloLenser”は過去の私のテストプロジェクトなので無視してください)。

- プロジェクト名と説明を入力し、「Create Project」を押下。Domainsは「General」のままでOK。

- 画像の登録画面が出てくるので、「Add Images」を押下。 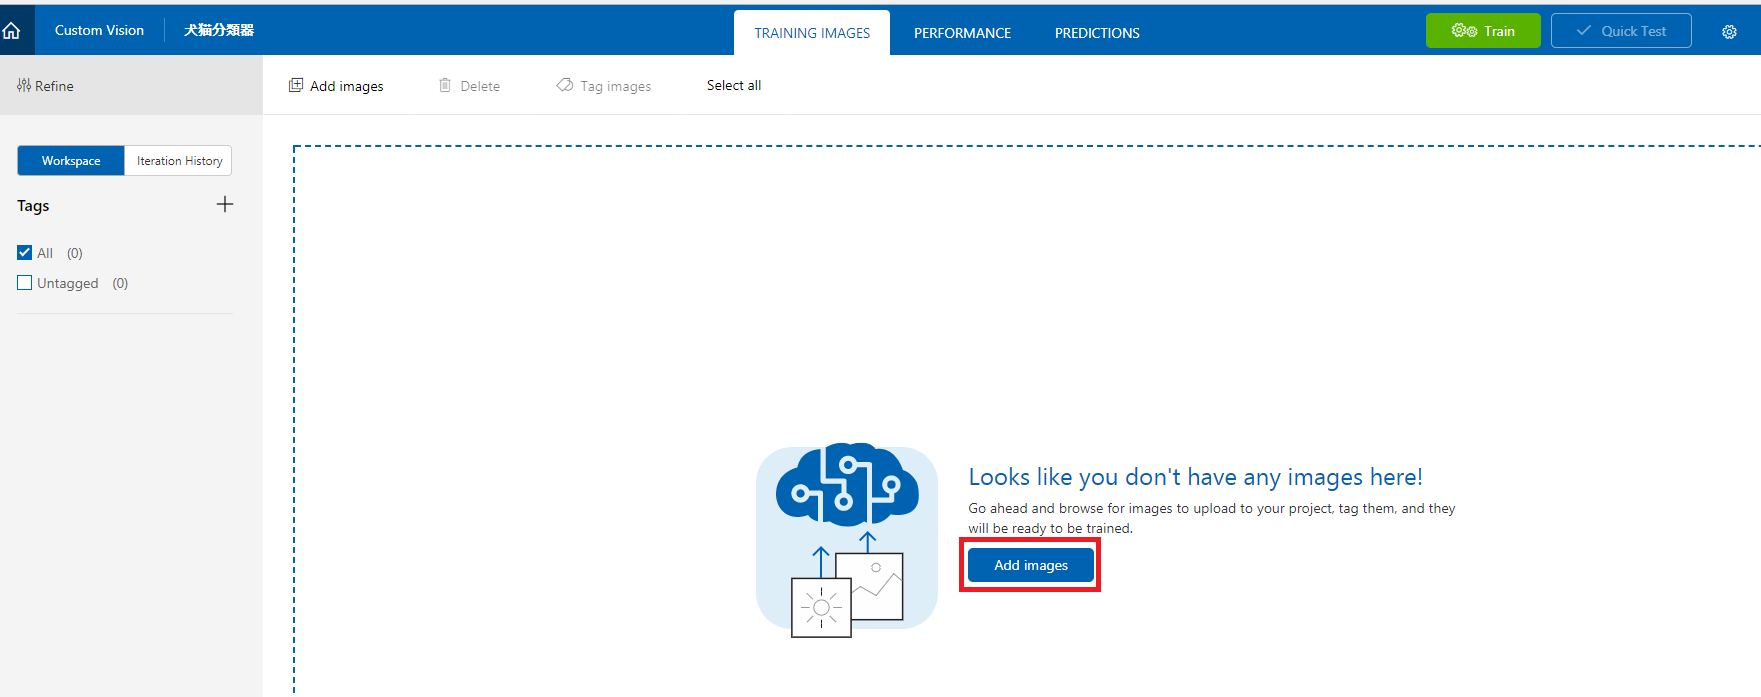
- 「Browse local files」を押下。 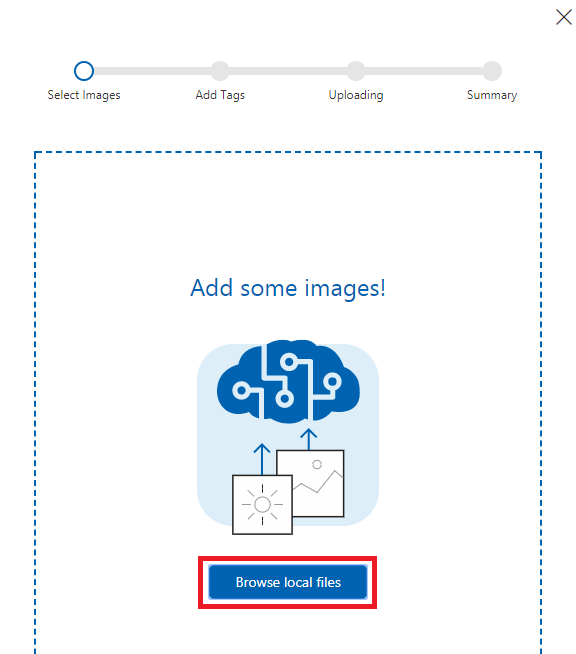
- あらかじめ取得しておいた猫の画像をまとめて選択。「猫」というタグを入力した上で「Upload 5 files」を押下。
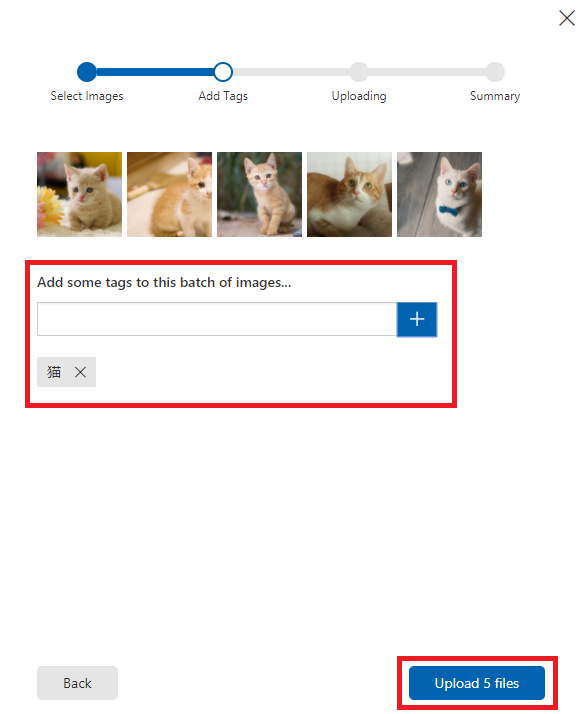

- 犬も同様に登録。 
- 下記のようにTagsと画像が登録されているはず。「Train」を押下。 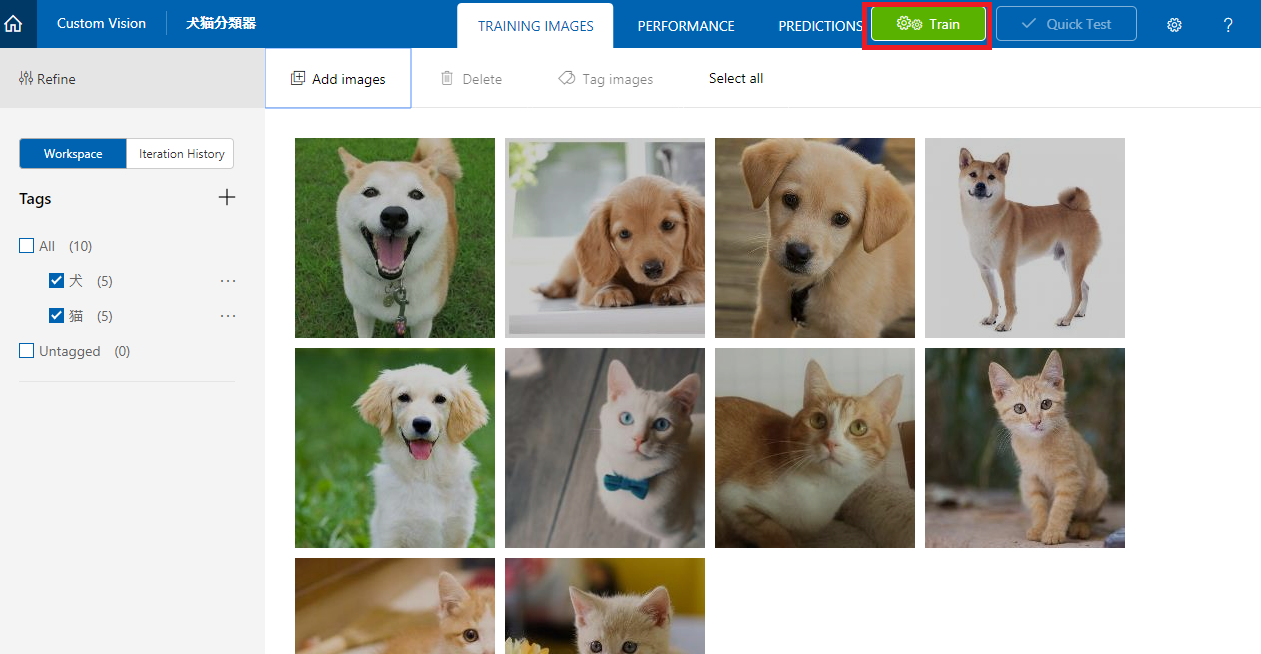
- 学習中
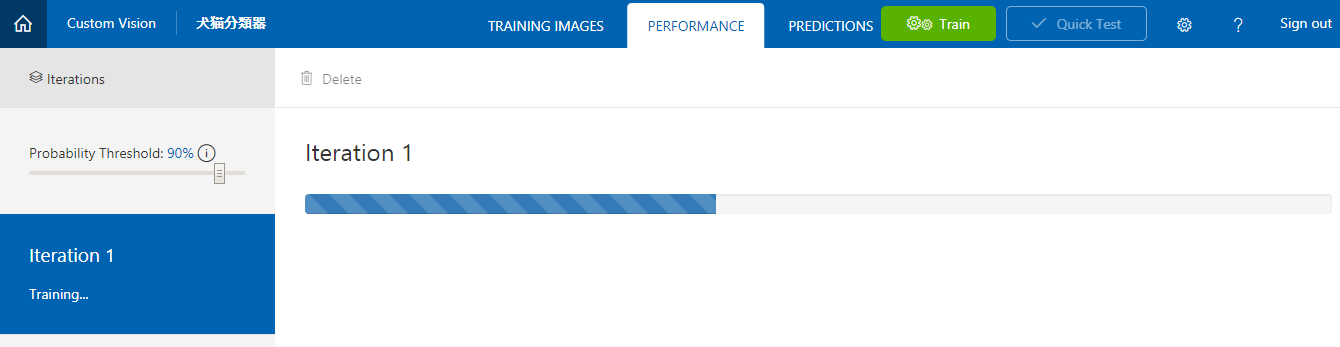
学習完了。
Precision(タグの精度)もRecall(画像から物体を想い起こす度合い)も問題なさそうです。

PrecisionやRecallについて、詳しくは下記をご参照ください。
https://docs.microsoft.com/ja-jp/azure/cognitive-services/custom-vision-service/getting-started-build-a-classifier - 「Make Default」を押下。
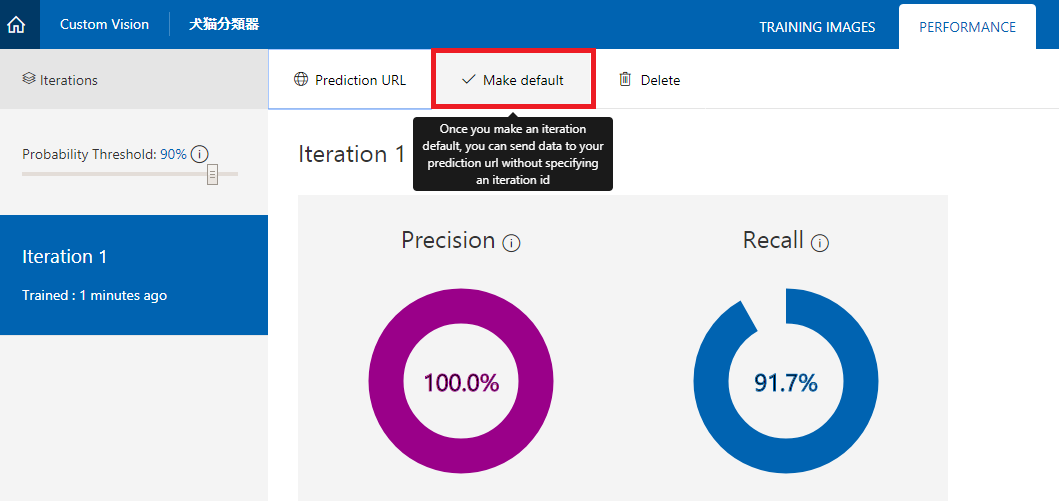
こうすることで、デフォルトのURLが設定され、URLにいちいちイテレーションIDを付与する必要がなくなります。
要は、学習のたびにURLが変わってしまうのを防ぐことができます。
完了したら「Prediction URL」を押下しましょう。

- 「If you have an image file:」のほうのURLと、「Prediction-Key」をコピーしておいてください。
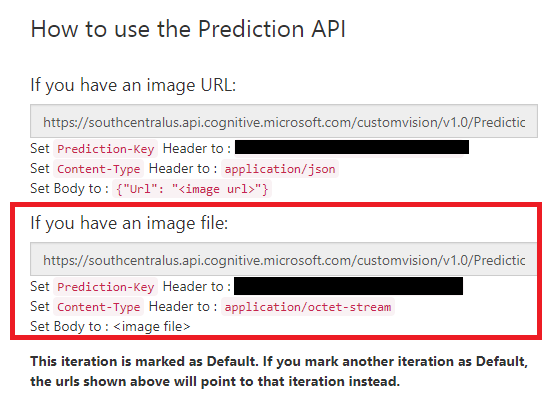
これらはUnity側で使用します。
ここまででCustom Vision Services側の準備は完了です。
ここでQuick Testを使用すると、このプロジェクトの確認が簡単に行えます。
出来具合が気になる方は実施してみてください。
2.UnityでHoloLens用実装
Unity側を実装します。
とはいえ今回は非常に単純なアプリなので、UIとしては
・カメラ
・キャプチャを反映するためのパネル(実際にはCubeを薄くしたもの)
・結果表示用テキストエリア
を置くだけの簡単なものです。
- HoloLens用のプロジェクト設定 こちらは詳細割愛します。 HoloToolKit 1.5.8.0をインポートし、プロジェクト設定を行ってください。 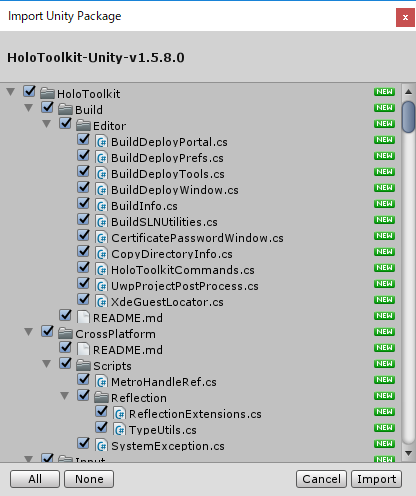 **CapabilitiesのInternetClient,WebCamは必須です!!** その後、適当な名前でシーンを保存しておいてください(ここではHoloCustomVisionとしました)。
- UI部品を配置
デフォルトのカメラを削除し、HoloToolkitからHoloLensCameraを配置してください。
また、InputManagerとBasicCursorも配置してください。
次にCanvasを配置し、TagalongとBillboardをアタッチ。
Canvasの下にUI/Imageオブジェクトを配置。さらにImageの下にUI/Textを配置します。
それぞれの設定はお好みですが、いったん下記のようにしておきましょう。
■Canvas

■Image

いつも「UIが地味」と言われてしまうので、今回はback.jpgという画像ファイルを作成し、テキストエリアの背景にしました。
この背景画像はMicrosoft PowerPointを使用し、jpgで保存したものをUnityにインポートしています。


Unity側ではTexureTypeを変更しておきます。

■Text

さらに、キャプチャした画像を写すためのオブジェクトも配置します。
Cubeを下記のように設定して配置し、名前は適当にFrameObjectにしましょう。

配置し終わった後は下記のようになっているはずです(名前は任意)。

- スクリプト実装
画像をキャプチャし、APIを呼び出し、戻ってきた値を編集してテキストエリアに表示する処理を実装します。
Asset配下にScriptsフォルダを作成し、ImageToCustomVisionAPI.csを新規作成してください。
半分くらいはカメラ設定であり、わりと単純なプログラムになります。
本体はGetVisionDataFromImagesで実装しています。
キャプチャした画像をAPIに送り、戻ってきた値のうち、一番確率が高いものを表示します。ImageToCustomVisionAPI.csusing UnityEngine; using System.Collections; using System; using System.Collections.Generic; using UnityEngine.UI; using HoloToolkit.Unity.InputModule; using UnityEngine.VR.WSA.WebCam; using System.Linq; public class ImageToCustomVisionAPI : MonoBehaviour, IInputClickHandler { string customVisionURL = "URL"; // 自身のCustom Vision Services URL(filesのほう)を貼り付ける string apiKey = "API"; //自身のPrediction-Key(filesのほう)を貼り付ける public GameObject ImageFrameObject; public Text textObject; PhotoCapture photoCaptureObject = null; void Start() { InputManager.Instance.PushFallbackInputHandler(gameObject); } //カメラの設定 ここから。 void OnPhotoCaptureCreated(PhotoCapture captureObject) { photoCaptureObject = captureObject; Resolution cameraResolution = PhotoCapture.SupportedResolutions.OrderByDescending((res) => res.width * res.height).First(); CameraParameters c = new CameraParameters(); c.hologramOpacity = 0.0f; c.cameraResolutionWidth = cameraResolution.width; c.cameraResolutionHeight = cameraResolution.height; c.pixelFormat = CapturePixelFormat.JPEG; captureObject.StartPhotoModeAsync(c, OnPhotoModeStarted); } void OnStoppedPhotoMode(PhotoCapture.PhotoCaptureResult result) { photoCaptureObject.Dispose(); photoCaptureObject = null; } private void OnPhotoModeStarted(PhotoCapture.PhotoCaptureResult result) { if (result.success) { photoCaptureObject.TakePhotoAsync(OnCapturedPhotoToMemory); } else { } } //カメラの設定 ここまで。 private void OnCapturedPhotoToMemory(PhotoCapture.PhotoCaptureResult result, PhotoCaptureFrame photoCaptureFrame) { if (result.success) { List<byte> imageBufferList = new List<byte>(); // Copy the raw IMFMediaBuffer data into our empty byte list. photoCaptureFrame.CopyRawImageDataIntoBuffer(imageBufferList); DisplayImage(imageBufferList.ToArray()); //画像表示処理呼び出し StartCoroutine(GetVisionDataFromImages(imageBufferList.ToArray())); //API呼び出し } photoCaptureObject.StopPhotoModeAsync(OnStoppedPhotoMode); } /// <summary> /// Get data from the Cognitive Services Custom Vision Services /// Stores the response into the responseData string /// </summary> /// <returns> IEnumerator - needs to be called in a Coroutine </returns> IEnumerator GetVisionDataFromImages(byte[] imageData) { var headers = new Dictionary<string, string>() { { "Prediction-Key", apiKey }, { "Content-Type", "application/octet-stream" } }; WWW www = new WWW(customVisionURL, imageData, headers); yield return www; string responseData = www.text; // Save the response as JSON string Debug.Log(responseData); ResponceJson json = JsonUtility.FromJson<ResponceJson>(responseData); float tmpProbability = 0.0f; string str = ""; for (int i = 0; i < json.Predictions.Length; i++) { Prediction obj = (Prediction)json.Predictions[i]; Debug.Log(obj.Tag + ":" + obj.Probability.ToString("P")); if (tmpProbability < obj.Probability) { str = obj.Probability.ToString("P") + "の確率で" + obj.Tag + "です"; tmpProbability = obj.Probability; } } textObject.text = str; } // キャプチャした画像をImageに貼り付ける(ImageFrameObject実態はCubeを薄くしたもの) private void DisplayImage(byte[] imageData) { Texture2D imageTxtr = new Texture2D(2, 2); imageTxtr.LoadImage(imageData); ImageFrameObject.GetComponent<Renderer>().material.mainTexture = imageTxtr; } // エアタップの取得 public void OnInputClicked(InputClickedEventData eventData) { textObject.text = "Call Custom Services..."; PhotoCapture.CreateAsync(false, OnPhotoCaptureCreated); } } [Serializable] public class ResponceJson { public string Id; public string Project; public string Iteration; public string Created; public Prediction[] Predictions; } [Serializable] public class Prediction { public string TagId; public string Tag; public float Probability; }画像キャプチャ部分は下記を参考に実装しました。
https://developer.microsoft.com/en-us/windows/mixed-reality/locatable_camera_in_unityAPIの戻り値は下記が参考になります。
https://southcentralus.dev.cognitive.microsoft.com/docs/services/eb68250e4e954d9bae0c2650db79c653/operations/58acd3c1ef062f0344a42813このスクリプトを、適当なGameObjectにアタッチします。
ここではControllerという空のGameObjectを作成し、アタッチしました。ImageFrameObjectにはFrameObjectを、TextObjectにはTextをセットしてください。

この時点でUnityのPlayボタンを押下すると、エディタ側で実行可能です。
簡単に動作確認しておきましょう。
おそらく、Webカメラに写った自分の顔と、よほど猫っぽい人でない限り「0.00%の確率で猫です。」が表示されることでしょう。

3.動作確認
Unityでビルドし、VisualStudioからHoloLensへビルド&デプロイを行って下さい。
繰り返しますが、
CapabilitiesのInternetClient,WebCamは必須です!!
ご注意ください。
アプリケーションを起動し、エアタップするとキャプチャを取得してそのままAPIをコールします。
身近に猫や犬がいる方は猫や犬を写してみてください。
私は身近にどちらもいないので、ネットで拾った画像をキャプチャしました。

猫はいい感じですね。

犬が低いですね。
犬自体の画像の大きさに比べてノートPCが大きく写り込んでしまったのも原因の一つかもしれません。
ですが、アプリケーションの動作としては問題ないことが確認できました。
4.再トレーニング
判断結果が芳しくなくても落ち込む必要はありません。
むしろ、ここからがCustom Vision Servicesの本領発揮と言えるでしょう。
Custom Vision ServicesにPOSTしたデータは「PREDICTIOONS」というタブにすべて貯められています。
これらはTrain前のデータとして、我々がタグ付けしてあげるのを待っているのです。

対象の画像を開き、タグを指定してセーブします。
複数画像をまとめてタグづけすることも可能です。
タグ付けが完了したら、忘れずにTrainしましょう。
こうすることでさらに賢くなります。
(誤ったタグ付けを行うと、逆に精度が下がることもあります)

再度実行してみます。

自信度が高くなりました!!
このように自信度が低かった画像もきちんとタグをつけて再度Trainしてあげることで、さらに頭がよくなります。
このイテレーションを繰り返すことで、プロジェクトはどんどん賢くなり、精度が上がっていくのです。
ソースコード
下記にアップしていますので、必要に応じてご参照ください。
https://github.com/haveagit/HoloCustomVision
最後に
Custom Vision Servicesは2017年9月現在、プレビュー版です。
これからAPIの変更もありえますし、機能の追加なども考えられます。
HoloLensとの相性は良いと思いますので、今後の発展に期待です!