この記事はLIFULL Advent Calendar その3の24日目の記事です。
概要
・認証周りについて動く物を作りながら理解を深めたいなと、RailsでOAuthによるログイン機能のサンプル作りました
・作るに辺り先人の記事が大いに参考になったのですが所々々ハマった箇所もあり、より詳細に手順を残しておければとまとめました
ゴール
1 認証を行うproviderをlocalhost:3000に構築する
2 providerの認証を得ることでログインできるclientサーバをlocalhost:3001に構築する
3 1で認証を行ったのち、2のコンテンツにアクセスする
実行環境
MacOS High Sierra 10.13
Rails version: 5.2.2
Ruby version: 2.4.0 (x86_64-darwin17)
構築手順
Ruby on Railsのインストール
こちらの記事を参考にさせていただきました。
https://qiita.com/yoshiokatsuneo@github/items/d75d4fef9e75afb65126#mac%E3%81%A7%E3%81%AErails%E3%82%A4%E3%83%B3%E3%82%B9%E3%83%88%E3%83%BC%E3%83%AB
尚、Rails起動時に下記のようにRailsがinstallされてないよーと言われた際は
% rails
Rails is not currently installed on this system. To get the latest version, simply type:
rbenvのPathが通っていないので、下記の記事に習ってPathを通すといけます。
・zshの方は
https://qiita.com/seijikohara/items/79b479c9dd2e3b950301
・bashの方は
https://qiita.com/w7tree/items/0860e2856f2429b20eee
Providerサーバ構築
これ以降の作業は下記の記事が大変に参考になりました。
provider側は基本的に同じ内容になりますが、client側の細かい部分で追加作業が必要になります。
https://qiita.com/8398a7/items/9b13ac2e7c401dee4a39
尚、以後はホームディレクトリ内にworkspaceというディレクトリを切って作業していきます。
この場所はお好みでOKです。
% mkdir ~/workspace && cd ~/workspace
provider用に、workspace内でRailsプロジェクトを新規作成します。
(後ほど同じ場所にclientsプロジェクトも作っていくことになります)
% rails new provider
providerディレクトリが出来ていれば成功です
% ls
provider
移動しておく
% cd proveder
私の端末にRailsをインストールしたのは初めてだったので、一度起動してみました
% rail s
http://localhost:3000
にアクセス
Yay出来ていたら成功です。うれしい
正常に起動が出来ていることが確認できたら、「Ctrl-C」で、サーバを一度停止します
必要なGemをインストールしていきます
Gemfileの末尾に下記を追記します
gem 'devise'
gem 'doorkeeper'
deviseのインストールとUserテーブルの作成を行います
% rails g devise:install
% rails g devise User
% rake db:migrate
先の記事に習いUserテーブルにカラムを追加
% rails g migration AddOmniauthToUser uid name admin:boolean
% rake db:migrate
modelの作成を行います。
modeldevise用のオプションを指定することができます。
オプションの種類については下記にまとめてくださっています。
https://qiita.com/cigalecigales/items/73d7bd7ec59a001ccd74#2-devise%E3%83%A2%E3%82%B8%E3%83%A5%E3%83%BC%E3%83%AB%E6%A6%82%E8%A6%81
下記のように修正
class User < ActiveRecord
  # Include default devise modules. Others available are:
  # :confirmable, :lockable, :timeoutable and :omniauthable
  devise :database_authenticatable, :registerable,
         :recoverable, :rememberable, :trackable, :validatable
  after_create :update_uid!

  def update_uid!
    update(uid: id)
  end
end
次はdoorkeeperのインストールとDB構築を行います。
% rails g doorkeeper:install
% rails g doorkeeper:migration
% rake db:migrate
doorkeeperの設定を行います。
Doorkeeper.configureブロック内、resource_owner_authenticatorとadmin_authenticatorを追記します
Doorkeeper.configure do
  # Change the ORM that doorkeeper will use (needs plugins)
  orm :active_record

  resource_owner_authenticator do
    session[:return_to] = request.fullpath
    current_user || redirect_to(new_user_session_url)
  end

  admin_authenticator do
    current_user.try(:admin) || redirect_to(new_user_session_url)
  end
end
ちなみにこのままだとrootへのURLが引けなくてdoorkeeperの管理画面でエラーを吐くので、routes.rbにrootの設定をしてあげます(ここでは仮のcontrollerにしておきます)
 Rails.application.routes.draw do
   use_doorkeeper
   devise_for :users
   # For details on the DSL available within this file, see http://guides.rubyonrails.org/routing.html
   root to: 'home#show'
 end
認証用のUserを作成します
railsのコンソールから直接データを投入することが出来ます
ここで投入するemail、passwordを後ほど認証に利用します
% rails c
> User.create(email: 'hoge@bar.com', password: 'hogehoge', name: 'fuga', admin: true)
これでdoorkeeperで必要な設定が出来ました。
「Ctrl-D」でコンソールを抜けた後に、Railsサーバを起動します
% rails s
起動出来たら下記にアクセスします。
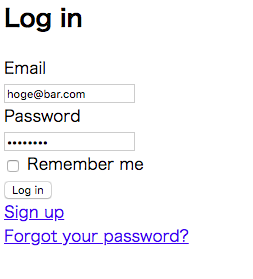
まずdeviseにより、下記のような認証を求める画面に遷移します。
先ほどUserテーブルに投入したemail、paswordを入力してログインできます
http://localhost:3000
に遷移してエラーが出るかと思いますが、認証には成功しています
(本筋には影響ないのでスルー)
改めて、下記にアクセス、doorkeeperの認証キーを作成するページに移動します。
http://localhost:3000/oauth/applications
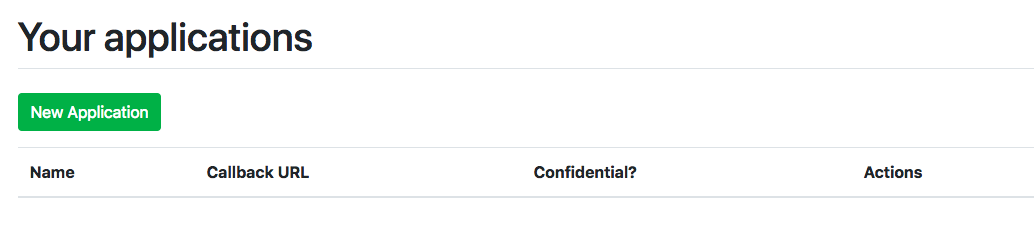
「New Application」から認証キーを新規発行します。
Name: Mock
Redirect URL: http://localhost:3001/users/auth/doorkeeper/callback
のように入力します
→(訂正) URL: http://localhost:3001/users/auth/mock/callback
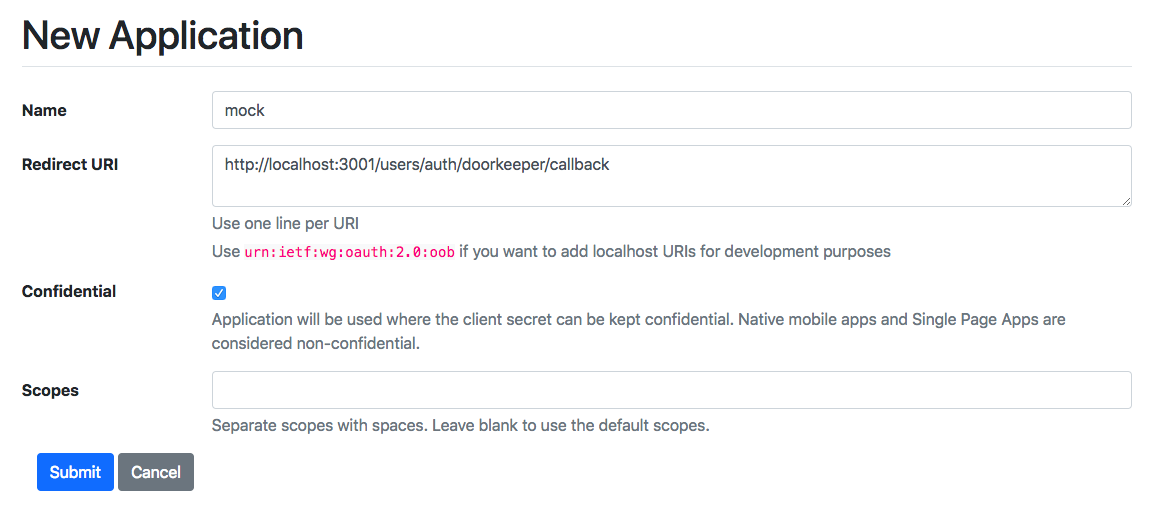
設定したらSubmitすると、Application UID、とSecretが発行されます。
この認証キーが漏れると第三者からのアクセスが可能となってしまうので、秘匿情報として扱うのが良いかと思います(localのみで実行する分には大丈夫ですが、念のため)。
最後にユーザ情報を取得するAPIを追加します
% rails g controller api/v1/api
class Api::V1::ApiController < ApplicationController
  private
  def current_resource_owner
    User.find(doorkeeper_token.resource_owner_id) if doorkeeper_token
  end
end
% rails g controller api/v1/users
class Api::V1::UsersController < Api::V1::ApiController
  before_action :doorkeeper_authorize!
  respond_to :json

  def me
    respond_with current_resource_owner
  end
end
ログイン後のリダイレクト処理を記述
% rails g controller users/sessions
class Users::SessionsController < Devise::SessionsController
  def create
    self.resource = warden.authenticate!(auth_options)
    set_flash_message(:notice, :signed_in) if is_flashing_format?
    sign_in(resource_name, resource)
    yield resource if block_given?
    if session[:return_to]
      redirect_to session[:return_to]
      session[:return_to] = nil
    else
      respond_with resource, location: after_sign_in_path_for(resource)
    end
  end
end
最後にroutesを設定して完了です
Rails.application.routes.draw do
  use_doorkeeper
  devise_for :users, controllers: {
    sessions: 'users/sessions'
  }
  # For details on the DSL available within this file, see http://guides.rubyonrails.org/routing.html
  namespace :api do
    namespace :v1 do
      get '/me' => 'users#me'
    end
  end
  root to: 'home#show'
end
Client側サーバ構築
次にCLientsサーバを構築していきます
Railsプロジェクトを新規作成
%cd ~/.workspace/ && rails new client && cd client
deviseとomuniauthのインストール
Gemfileに必要なモジュールを記述
Railsプロジェクトを新規作成
gem 'devise'
gem 'omniauth'
gem 'omniauth-oauth2'
deviseインストールとUserテーブルの作成
% rails g devise:install
% rails g devise User
% rake db:migrate
omuniauthでの認証結果を格納するカラムを追加
% rails g migration AddOmniauthToUser uid provider name token raw:text
% rake db:migrate
starategiesの作成
module OmniAuth
  module Strategies
    class Mock < OmniAuth::Strategies::OAuth2
      RAW_INFO_URL = 'api/v1/me'

      uid { raw_info['uid'] }

      info do
        {
          email: raw_info['email'],
          name: raw_info['name']
        }
      end

      extra do
        { raw_info: raw_info }
      end

      def raw_info
        @raw_info ||= JSON.parse(access_token.get(RAW_INFO_URL).response.body)
      end
    end
  end
end
deviseの設定
provider側で先ほど発行したAPI_IDとAPP_SECRETを設定します
require File.expand_path('../../../lib/omniauth/strategies/mock', __FILE__)
Devise.setup do |config|
  config.omniauth :mock, 'APP_ID', 'APP_SECRET', client_options: { site: 'http://localhost:3000' }
end
providerで認証の後にコールバックされるURLの受け先を作成します
% rails g controller users/omniauth_callbacks
コントローラに下記を追記
class Users::OmniauthCallbacksController < Devise::OmniauthCallbacksController
  def mock
    @user = User.find_for_mock(request.env['omniauth.auth'])

    if @user.persisted?
      flash[:notice] = I18n.t 'devise.omniauth_callbacks.success', kind: 'mock'
      sign_in_and_redirect @user, event: :authentication
    else
      session['devise.mock_data'] = request.env['omniauth.auth']
      redirect_to new_user_session_url, alert: @user.errors
    end
  end
end
下記Userモデルの作成
ここでdeviseのオプションに「:omuniauthable」を設定しておく必要があります
class User < ApplicationRecord
 devise :database_authenticatable, :registerable,
        :recoverable, :rememberable, :validatable, :omniauthable

 def self.find_for_mock(auth)
    parameters = {
      name:     auth.info.name,
      email:    auth.info.email,
      provider: auth.provider,
      uid:      auth.uid,
      token:    auth.credentials.token,
      password: Devise.friendly_token[0, 20],
      raw: auth.extra.to_json
    }
    user = User.find_by(uid: auth.uid)
    return update_mock!(user, parameters) if user

    User.create(parameters)
  end

  def self.update_mock!(user, parameters)
    user.update(parameters)
    user
  end
end
routingの設定をすれば完了です
Rails.application.routes.draw do
  devise_for :users, :controllers => {
    :omniauth_callbacks => "users/omniauth_callbacks"
  }
end
3001番ポートでClient側サーバを起動します
% rails s -p 3001
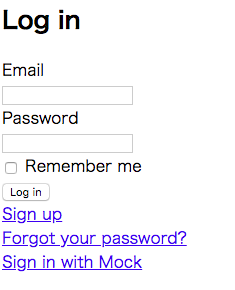
http://localhost:3001/users/sign_in
にアクセスするとリンクに「Sign in with Mock」というリンクが表示されています
このリンクをクリックすると、Provider側の認証ページに遷移します
認証先のページでAuthorizeをクリックすると、Providerサーバでの認証後にClientサーバへのコールバックが実行され、
localhost:3001
にリダイレクトされると思います
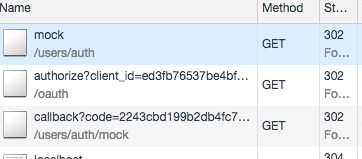
流れとしては、
http://localhost:3001/user/sign_in
↓ 「Sign in with Mock」をクリックすると下記リンクに遷移
http://localhost:3001/users/auth/mock
↓ 認証用URLにリダイレクト
http://localhost:3000/oauth/authorize
↓ ログインしていければ認証情報を入力、認証後、コールバック関数を実行
http://localhost:3001/users/auth/mock/callback?code=xxxxx
Client側でのログインを行わずに、Providerサーバでの認証を行えていることが分かります
(ChromeのNetWorkタブを利用すると分かりやすいです)
おまけ
このままだと認可が与えられているか分かりにくいので、下記処理を追加しました。
今回は「localhost:3001/home」をログインしないと参照できないページと見立てています。
ログイン後に表示させるページ用のcontrollerを作成
bundle exec rails generate controller home index
Clientサーバ側のrouteに下記を追記してあげます。
「as: "user_root」をつけるとリダイレクト先のページを指定することができます。
get "home", to: "home#index", as: "user_root
Controllerに認証済みのuserかを確認するように修正
class HomeController < ApplicationController
  before_action :authenticate_user!
  def index
  end
end
これで、「localhost:3001/home」にアクセスした際に認証が済んでいないと、ログイン画面に戻されるようになるかと思います。
参考
Devise, Doorkeeper, omuniauth周り
https://tech.mof-mof.co.jp/blog/rails5-devise-doorkeeper.html
https://qiita.com/8398a7/items/9b13ac2e7c401dee4a39
https://qiita.com/kami_zh/items/94aec2d94a2b4e9a1d0b
https://qiita.com/kyonsuke19101/items/407f3cdfec38d1108e9d
https://easyramble.com/create-views-on-rails-devise.html
https://teratail.com/questions/143329
ログイン前後の処理周りは
https://qiita.com/ytkt/items/d78841f7dea5e29f38ee
おわりに
・勉強のために作リ始めたはずが結構時間がかかってしまった・・まだ理解が浅いのでもう少し深掘りしたい
・諸所でうまく行かない箇所を潰しながら進めたので、同じ手順で動かないなどあればご連絡いただけるとありがたいです
・参考にさせていただいた記事の執筆者の方々、大変ありがとうございます