2023年5月1日を持ちまして、株式会社KDDIウェブコミュニケーションズのTwilioリセール事業が終了したため、本記事に記載されている内容は正確ではないことを予めご了承ください。
はじめに
みなさん、こんにちは。
KDDIウェブコミュニケーションズのTwilioエバンジェリストの高橋です。
この記事は、2020年10月に書いたものを、Twilio Flex Advent Calendar 2021用に最新版にリライトしたものです。
今までは、基本的にはTwilio管理コンソール内だけで対応ができる範囲でのカスタマイズを説明してきましたが、いよいよ今回からFlex Pluginsについて触れていきたいと思います。
Twilio Flex Plugins CLI とは
Twilio Flex の概要やインストールについては、以下の記事をご参照ください。
Twilio Flex の特長はなんといってもその拡張性にあります。
そして、Flex Plugins は Flex をユーザ自身で拡張するためのしくみで、Flex の UI を変更したり、内部の動きを拡張したりできます。
従来のプラグイン(バージョン3まで)は、 create-flex-pluginというプラグインを作成するためのプログラムで作成していましたが、こちらはあくまでプラグインの雛形を作成することができるツールであり、作成したプラグインをデプロイするためには、自分自身でAssetsに格納するなどの作業が必要でした。
今回 Flex Plugins のバージョンが4になり、Flex には Plugins Dashboard が提供されるようになりました。このダッシュボードを使うことで、バージョン4以上のプラグインを簡単にON/OFFできたり、過去のバージョンに戻したりすることが可能になります。
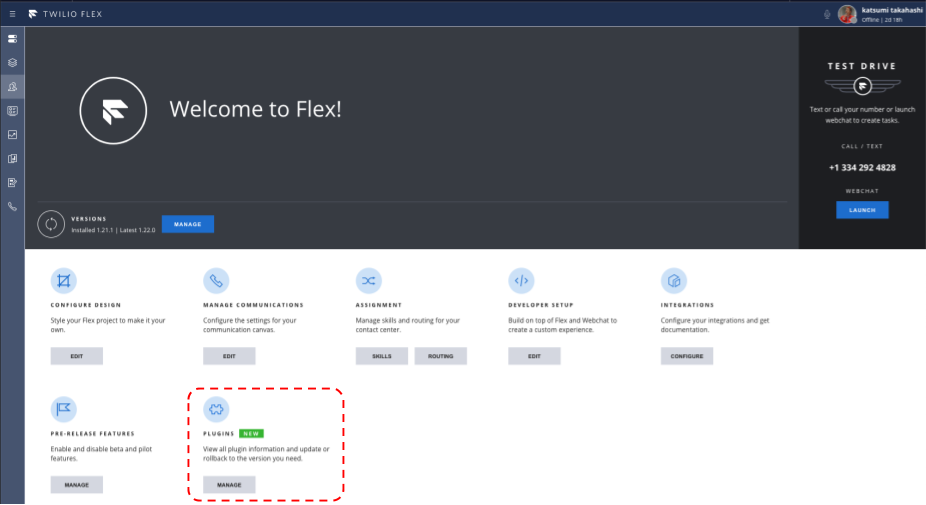
バージョン4になって提供されるようになった Flex Plugins CLI はその名の通り、CLI ベースで新しいバージョンのプラグインの作成やデプロイ、古いプラグインのマイグレーションなどがサポートされるため、CD/CI と連携させた自動デプロイなどもできるようになります。また、新規作成時はテンプレートを適用させることもできます。
インストール
Twilio Flex Plugins CLI のインストールするためには、事前に Twilio CLI をインストールしておく必要があります。
Twilio CLI のインストールについては、以下の記事をご覧ください。
Flex Plugins CLI のインストールは、以下のコマンドで行います(Node.jsのバージョンが12.22.1以上である必要があります)。
twilio plugins:install @twilio-labs/plugin-flex
インストールを確認するためには、以下のコマンドを利用します。
twilio plugins
@twilio-labs/plugin-flex 5.1.3
なお、2022/9/1時点でのバージョンは、5.1.3です。
もし旧バージョンの create-flex-pluginがインストールされている場合は、以下のコマンドをつかって削除しておくことをおすすめします。
npm uninstall -g create-flex-plugin
現時点で用意されているコマンドは以下の通りです。
twilio flex:plugins --help
Create, develop and deploy Flex plugins using the Twilio CLI.

USAGE
  $ twilio flex:plugins:COMMAND

TOPICS
  flex:plugins:archive   Archives a Flex Plugin, Version or Configuration. Archived entities cannot be deployed to your Flex application and
                         cannot be undone. Exercise extreme caution when using this command.
  flex:plugins:describe  Provides details of the Flex Plugin, Version, Configuration or Release.
  flex:plugins:list      Lists the Flex Plugins, Versions, Configurations or Releases on the account.

COMMANDS
  flex:plugins:build                 Builds the Flex plugin and creates a JavaScript and sourcemap bundle. This command needs to be invoked
                                     inside a plugin directory.
  flex:plugins:create                Creates a new Twilio Flex Plugin project
  flex:plugins:create-configuration  Creates a Flex Plugin Configuration. This command needs to be invoked inside a plugin directory.
  flex:plugins:deploy                Builds and deploys a new version of the Flex plugin to your Flex application. This command needs to be
                                     invoked inside a plugin directory.
  flex:plugins:diff                  Finds the diff between two Flex Plugin Configurations.
  flex:plugins:release               Creates a Flex Plugin Release. Enables the plugins (passed as params or via the Flex Configuration) on your
                                     Flex application.
  flex:plugins:start                 Starts a dev-server to build the Flex plugin locally.
  flex:plugins:test                  Runs the test suite. This command needs to be invoked inside a plugin directory.
  flex:plugins:upgrade-plugin        Upgrades your plugin to use the latest version of the Plugin CLI.
プラグインプロジェクトの新規作成
プラグインプロジェクトを新規作成するためには、以下のコマンドを利用します。なお、名前は必ずplugin-から始まる必要があります(この例では、plugin-cli-testというプロジェクトを作成します)。
--installオプションを指定すると、プロジェクト作成後に必要なライブラリ(dependencies)のインストールが自動的に行われます。
Flex UI v2を使うために、--flexui2オプションも指定できます。
twilio flex:plugins:create plugin-cli-test --install
✔ Creating project directory
✔ Installing dependencies

   ┌────────────────────────────────────────────────────────────────────┐
   │                                                                    │
   │   Your Twilio Flex Plugin project has been successfully created!   │
   │                                                                    │
   │                                                                    │
   │   Development:                                                     │
   │   $ cd plugin-cli-test/                                            │
   │   $ twilio flex:plugins:start                                      │
   │                                                                    │
   │   Build Command:                                                   │
   │   $ cd plugin-cli-test/                                            │
   │   $ twilio flex:plugins:build                                      │
   │                                                                    │
   │   Deploy Command:                                                  │
   │   $ cd plugin-cli-test/                                            │
   │   $ twilio flex:plugins:deploy                                     │
   │                                                                    │
   │   For more info check the README.md file or go to:                 │
   │   ➡ https://www.twilio.com/docs/flex                               │
   │                                                                    │
   └────────────────────────────────────────────────────────────────────┘
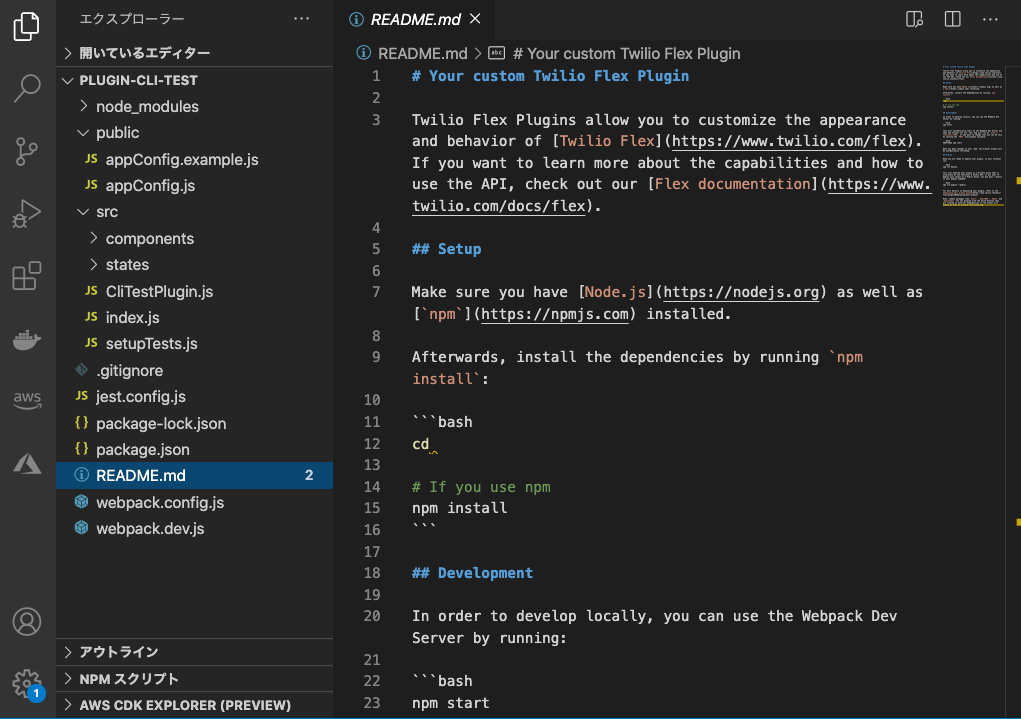
では、作成されたプロジェクトフォルダに移動して内容を確認してみます。
cd plugin-cli-test
では、セットアップされたプラグインを早速ローカル環境で実行してみます。
twilio flex:plugins:start

Compiled successfully!

Your plugin app is running in the browser on:

	Local        http://localhost:3000/
	Network      http://192.168.1.112:3000/

Local Plugins:

	plugin-cli-test      /Users/katsumi/Documents/workspace/twilioFlex/plugin-cli-test

This is a development build and is not intended to be used for production.
To create a production build, use:

	 twilio flex:plugins:build
ローカルログイン
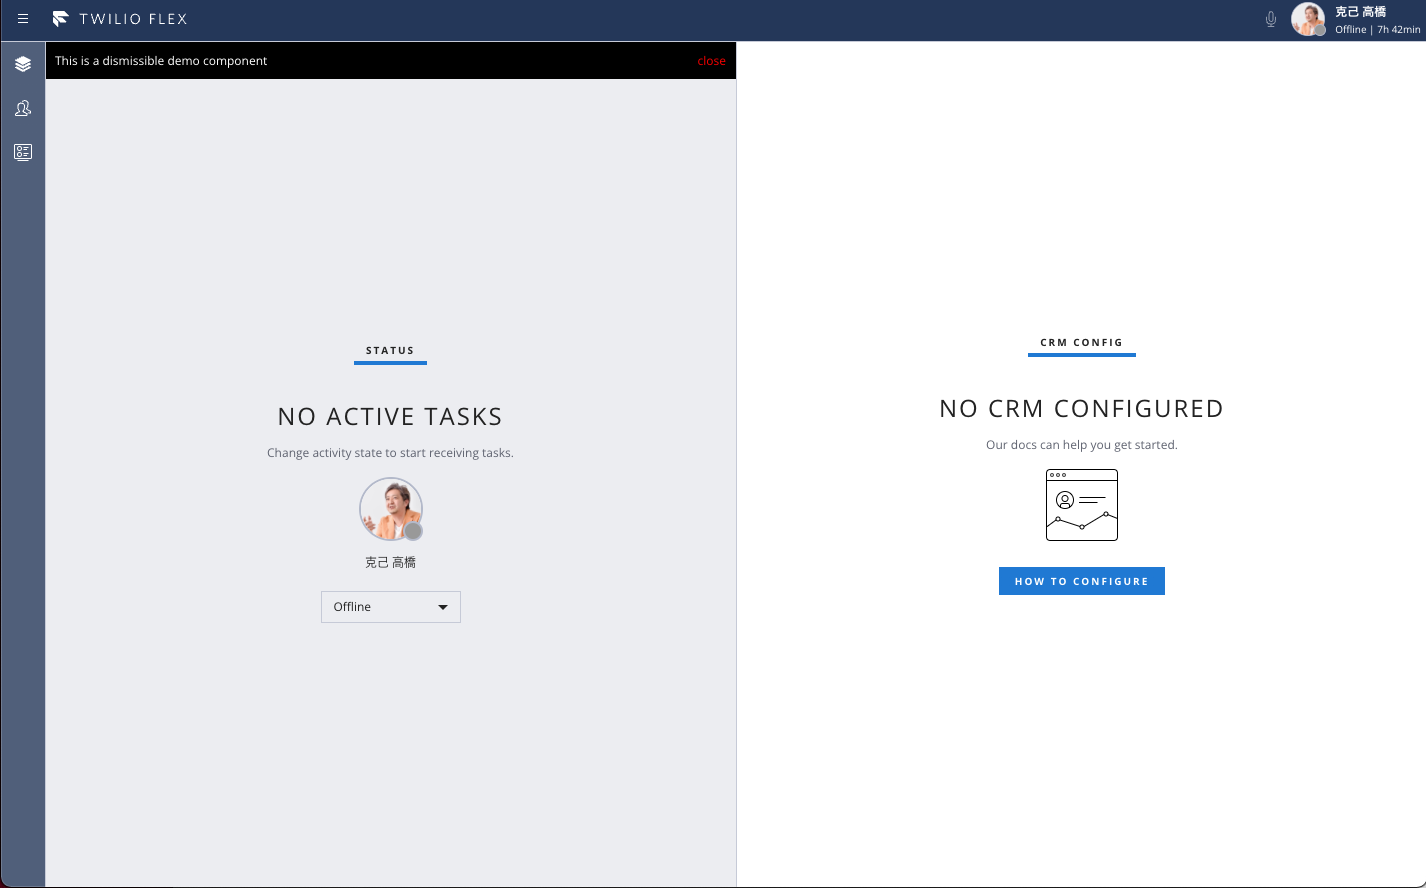
これでローカル環境の実行が完了し、ブラウザに以下のような画面が表示されます。
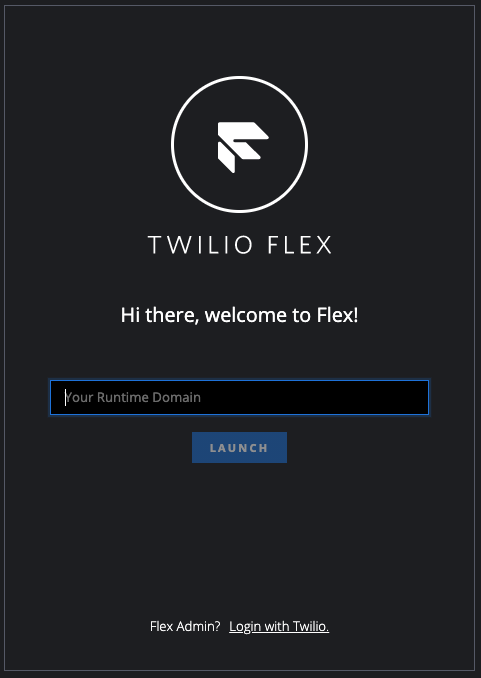
プラグインを開発される皆さんは多分 Flex Admin なはずですので、一番下のリンクをクリックします。
すると以下のようなログイン画面が表示されますが、ここで注意が必要です。
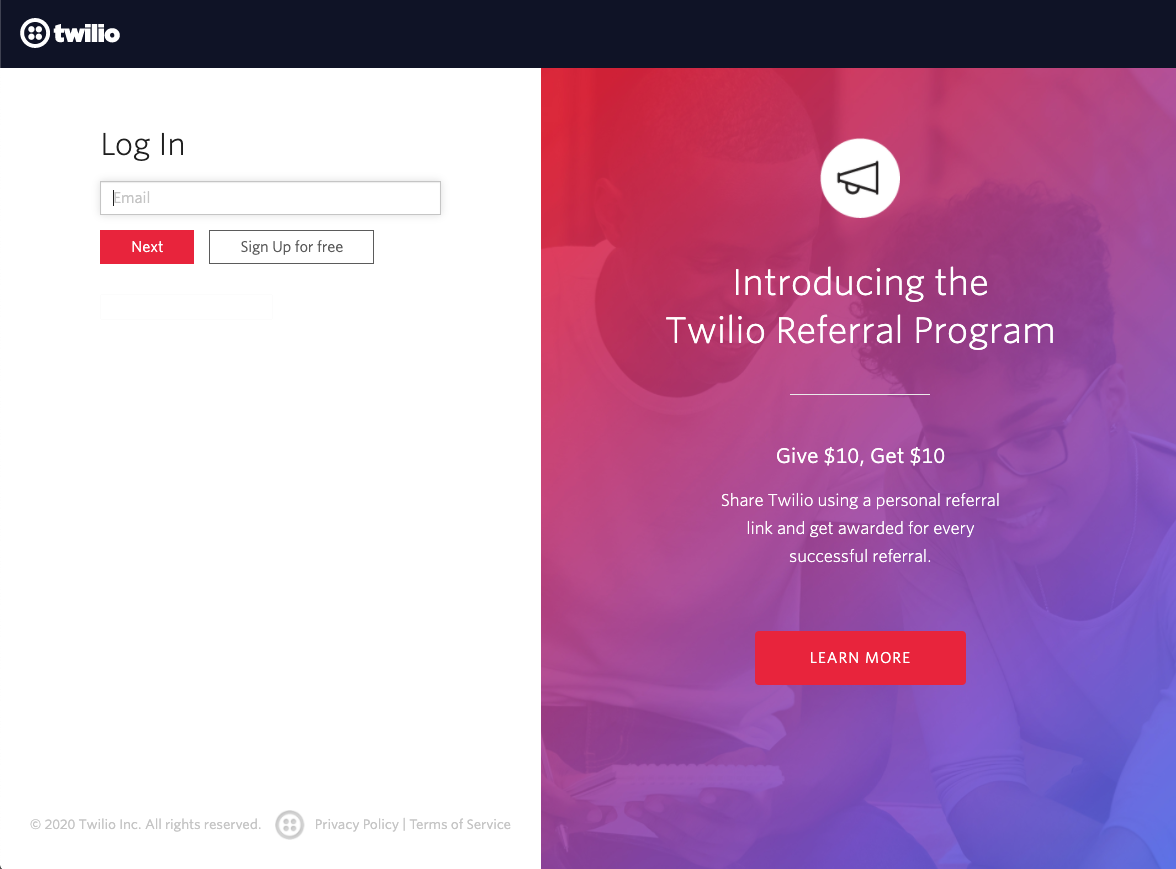
KWCでアカウントを作った方は、この画面からログインしてはいけません。
KWC経由でアカウントを作成した方は、大変面倒なのですが現在表示されているURLを一部変更してください。
https://www.twilio.com/login?g=・・・
↓
https://www.twilio.com/login/kddi-web/?g=・・・
URLを変更すると、以下のようにKWC側のログイン画面が表示されますので、こちらからいつも使っているIDでログインします。

これで無事にローカル環境でのプラグイン開発環境が完成しました。localhost:3001でプラグイン部分が実行されているのがわかります。
ちなみにプラグイン以外についてはサーバー側で動作していますので、すでに登録されているエージェント情報や Studio Flow、Task Router などはそのまま動きます。
ローカルサーバーを停止するには、Ctrl+Cを押下します。
プラグインのビルド
では次に、作成したプラグインをビルドしてみましょう。
twilio flex:plugins:build
Using profile FlexQiita (ACxxxxxxxxxxxxxxxxxxxxxxxxxxxxxxx)

Compiling a production build...

Browserslist: caniuse-lite is outdated. Please run:
npx browserslist@latest --update-db

Why you should do it regularly:
https://github.com/browserslist/browserslist#browsers-data-updating
Plugin plugin-cli-test was successfully compiled.

2 files were compiled:
         39.2 KB         build/plugin-cli-test.js
         0.1 KB          build/plugin-cli-test.js.map
特にエラーもなくコンパイルが完了したことを確認したら、次はデプロイです。
プラグインのデプロイ
デプロイも CLI 経由で行います。なお、デプロイするときには、--changelogオプションの指定が必須となります。
twilio flex:plugins:deploy --changelog='First deploy'
Using profile FlexQiita (ACxxxxxxxxxxxxxxxxxxxxxxxxxxxxxxxx)

✔ Validating deployment of plugin plugin-cli-test
⠹ Compiling a production build of plugin-cli-testBrowserslist: caniuse-lite is outdated. Please run:
npx browserslist@latest --update-db

Why you should do it regularly:
https://github.com/browserslist/browserslist#browsers-data-updating
✔ Compiling a production build of plugin-cli-test
✔ Uploading plugin-cli-test
✔ Registering plugin plugin-cli-test with Plugins API
✔ Registering version v0.0.1 with Plugins API

🚀 Plugin (private) plugin-cli-test@0.0.1 was successfully deployed using Plugins API

Next Steps:
Run $ twilio flex:plugins:release --plugin plugin-cli-test@0.0.1 --name "Autogenerated Release 1639989429613" --description "The description of this Flex Plugin Configuration." to enable this plugin on your Flex application
デプロイも無事に終了し、プラグインがサーバー上にアップロードされました。
プラグインのリリース
デプロイしただけではプラグインは有効にはならず、リリース作業を行うことによってはじめて有効にすることが可能となります。デプロイとリリースが分かれている理由は、複数のプラグインを作成して、それらをまとめてリリースすることができるようにするためです。ただし、今回はとくに意識することなくこのままリリースしていきましょう。
プラグインのリリースについては、先程デプロイしたときに表示されたコマンドをそのまま利用するのがもっとも簡単です。
twilio flex:plugins:release --plugin plugin-cli-test@0.0.1 --name "Autogenerated Release 1639989429613" --description "The description of this Flex Plugin Configuration."
Using profile FlexQiita (ACxxxxxxxxxxxxxxxxxxxxxxxxxx)

✔ Creating configuration
✔ Enabling configuration FJfa2cc9db24eb598c717c6fed6d2217f6

🚀 Configuration FJfa2cc9db24eb598c717c6fed6d2217f6 was successfully enabled.

Next Steps:
Visit https://flex.twilio.com/admin/plugins to see your plugin(s) live on Flex.
無事にリリースされたことがわかります。
では、今度はローカル環境ではなく、Twilio サーバー側の Flex にログインし、Manage Plugins画面に移動し、今リリースしたプラグインが正しく表示されていることを確認します。
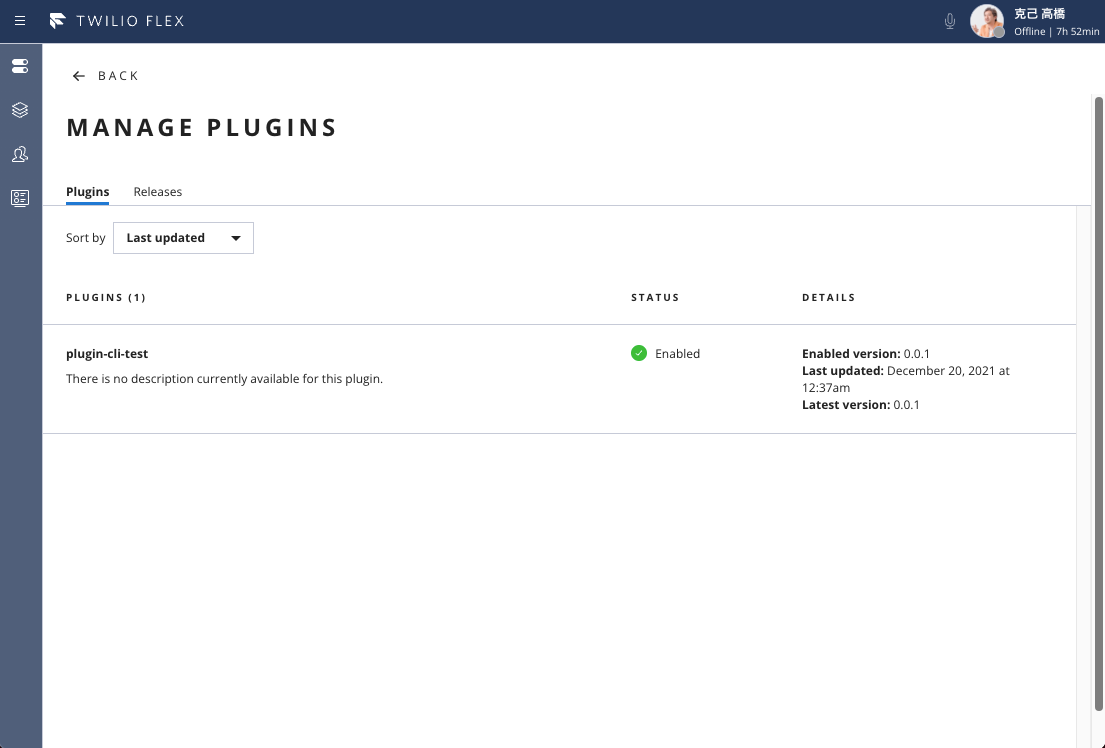
これで一連のプラグインの作成からリリースまでの手順は完了となります。
旧バージョンで作成されたプラグインのマイグレーション
Flex Plugins CLI を使うと、過去に作成した古いバージョンのプラグインを最新バージョンにマイグレーションすることができます。
twilio flex:plugins:upgrade-plugin --beta --install
Using profile FH5forKWC (ACxxxxxxxxxxxxxxxxxxxxxxxxxxxxxxxx)


   ┌────────────────────────────────────────────────────────────────────────────────────────────┐
   │                                                                                            │
   │   ⚠ You are about to upgrade your plugin to use the latest version of Flex Plugin CLI. ⚠   │
   │                                                                                            │
   └────────────────────────────────────────────────────────────────────────────────────────────┘

? Please backup your plugin either locally or on GitHub. Do you want to continue? (y/n) y
Upgrading your plugin from v3 to v4

✔ Cleaning up the scaffold
✔ Updating package dependencies
⠋ Removing package scripts
> Script build was not removed because it has been modified. Please review and remove it manually.
✔ Removing package scripts
⠹ Installing dependencies  SOLINK_MODULE(target) Release/.node
⠙ Installing dependencies  CXX(target) Release/obj.target/fse/fsevents.o
⠼ Installing dependencies  SOLINK_MODULE(target) Release/fse.node
⠏ Installing dependenciesadded 472 packages from 290 contributors, removed 658 packages, updated 68 packages and moved 53 packages in 37.981s
✔ Installing dependencies

🎉 Your plugin was successfully migrated to use the latest (v4) version of Flex Plugins CLI.

Next Steps:
Run $ twilio flex:plugins --help to find out more about the new CLI..
デプロイ
マイグレーションがうまくいったので、早速デプロイしましょう。
もし、古いバージョンのプラグインが動作している場合は、事前にそちらを削除します。削除は以下のコマンドで行います。
twilio flex:plugins:upgrade-plugin --remove-legacy-plugin
Using profile FH5forKWC (ACxxxxxxxxxxxxxxxxxxxxxxxxxxxxxxxx)


   ┌─────────────────────────────────────────────────────────────────────────────────────────────────────┐
   │                                                                                                     │
   │   ⚠ You are about to delete your legacy plugin plugin-fasthelp5 bundle hosted on Twilio Assets. ⚠   │
   │                                                                                                     │
   └─────────────────────────────────────────────────────────────────────────────────────────────────────┘

? Please confirm that you have already migrated this plugin to use the Plugins API. Do you want to continue? (y/n) y
✔ Deleting your legacy plugin

🎉 Your legacy plugin plugin-fasthelp5 bundle was successfully removed from Twilio Assets. The migration of your plugin to Plugins API is now complete.
削除が成功したら、いよいよデプロイです。デプロイは以下のコマンドで行います。なお、--changelogパラメータが必須となりますので、なにかコメントを記載しておきます。
twilio flex:plugins:deploy --changelog='Migration from ver.3.0.0'
twilio flex:plugins:deploy --changelog='Migration from ver.3.0.0'
Using profile FH5forKWC (ACxxxxxxxxxxxxxxxxxxxxxxxxxxxxxxxx)

✔ Validating deployment of plugin plugin-fasthelp5
⠧ Compiling a production build of plugin-fasthelp5Plugin plugin-fasthelp5 was successfully compiled with some warnings.
✔ Compiling a production build of plugin-fasthelp5
✔ Uploading plugin-fasthelp5
✔ Registering plugin plugin-fasthelp5 with Plugins API
✔ Registering version v0.0.2 with Plugins API

🚀 Plugin (private) plugin-fasthelp5@0.0.2 was successfully deployed using Plugins API

Next Steps:
Run $ twilio flex:plugins:release --plugin plugin-fasthelp5@0.0.2 --name "Autogenerated Release 1601774051627" --description "The description of this Flex Plugin Configuration" to enable this plugin on your Flex application
Flex の Plugins Dashboard を確認してみると、プラグインがちゃんと表示されています。
では先程と同じように、デプロイしたときの最後に表示されていたreleaseコマンドを使って、このプラグインを利用できるようにします。
twilio flex:plugins:release --plugin plugin-fasthelp5@0.0.2 --name "Autogenerated Release 1601774051627" --description "The description of this Flex Plugin Configuration"
Using profile FH5forKWC (ACxxxxxxxxxxxxxxxxxxxxxxxxxxxxxxxx)

✔ Creating configuration
✔ Enabling configuration FJxxxxxxxxxxxxxxxxxxxxxxxxxxxxxx

🚀 Configuration FJxxxxxxxxxxxxxxxxxxxxxxxxxxxxxx was successfully enabled.

Next Steps:
Visit https://flex.twilio.com/admin/plugins to see your plugin(s) live on Flex.
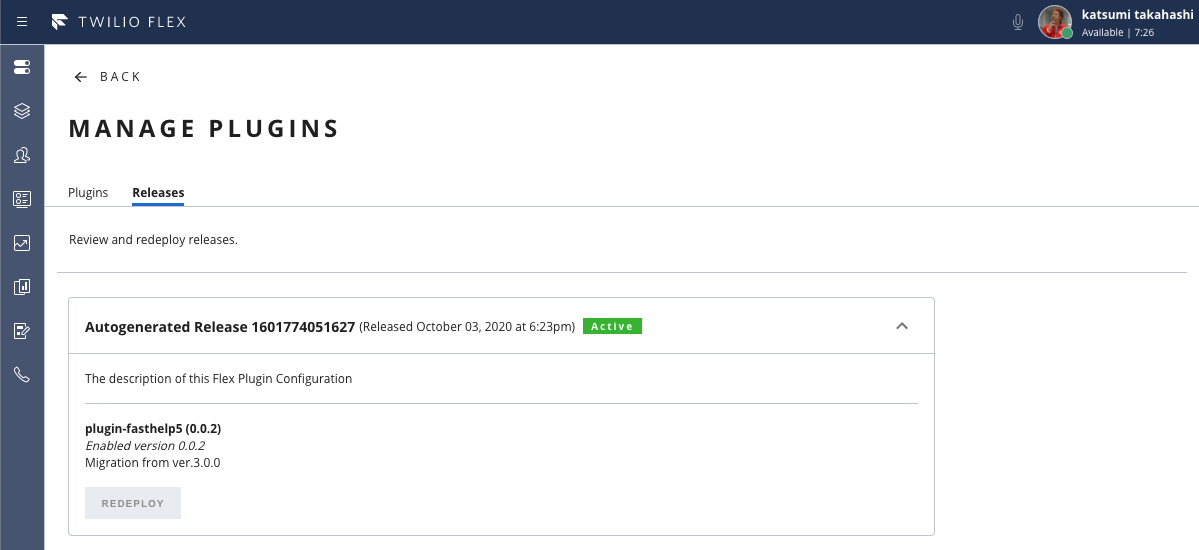
Flex の MANAGE PLUGINS を確認してみます。
ちゃんとプラグインがリリースされていますね。
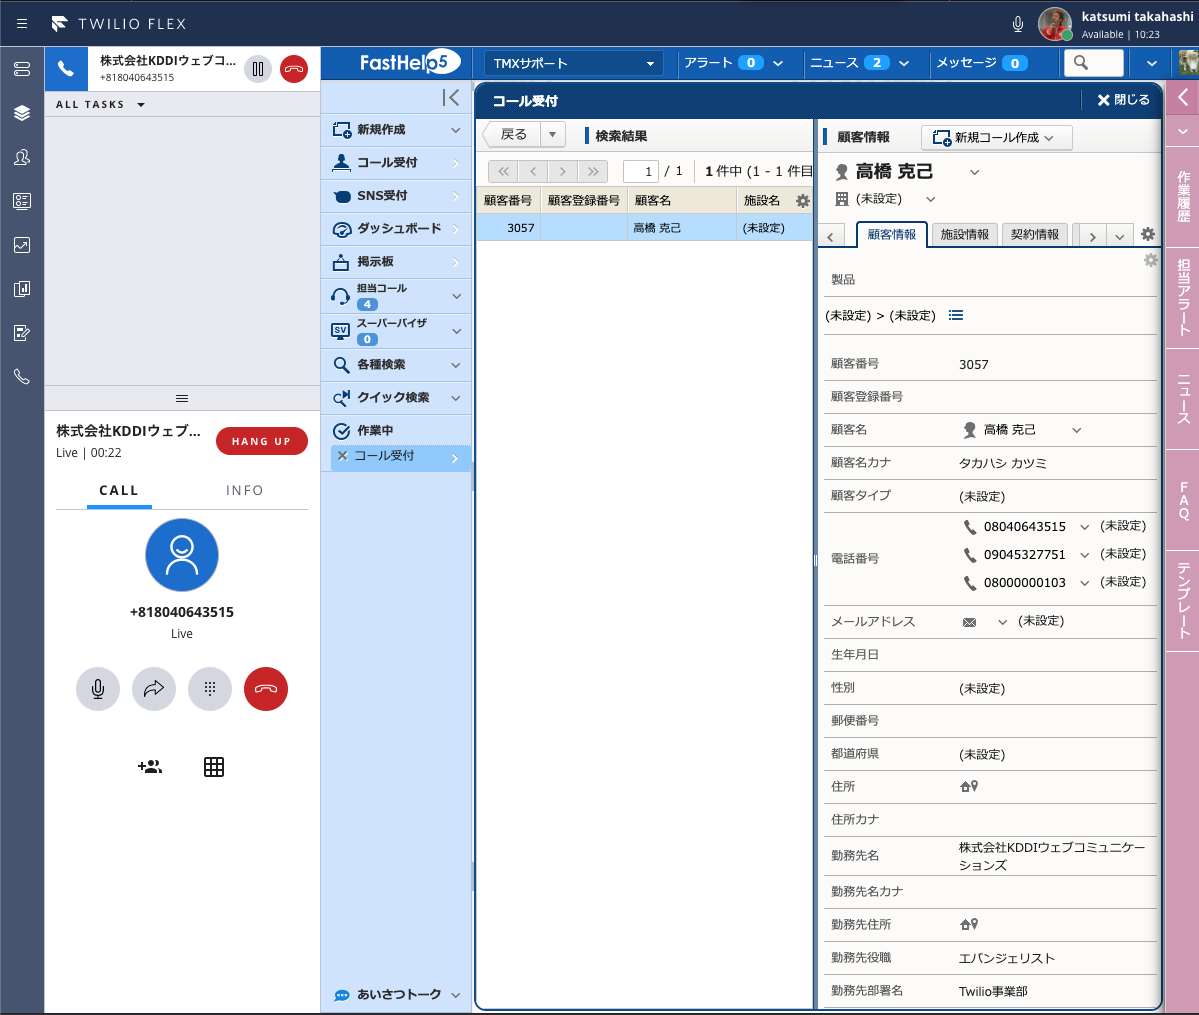
実際に動作も確認してみると、ちゃんとプラグインが有効になっています。このプラグインでは、着信した電話番号で、FastHelp5 の顧客情報を参照して、自動的に顧客データを表示しています。
まとめ
Flex の UI カスタマイズなどでは必ずプラグインを作成する必要がありますので、今回ご紹介した手順はとても大切です。
実際のカスタマイズ方法については、色々と説明しなくてはならないことが多いので、次回以降に回したいと思います。
★次の記事
FlexプラグインTips(着信時に音を鳴らす)
Twilio(トゥイリオ)とは
https://cloudapi.kddi-web.com
Twilioは音声通話、メッセージング(SMS/チャット)、ビデオなどの 様々なコミュニケーション手段をアプリケーションやビジネスへ容易に組み込むことのできるクラウドAPIサービスです。初期費用不要な従量課金制で、各種開発言語に対応しているため、多くのハッカソンイベントやスタートアップなどにも、ご利用いただいております。
