記事を読んでいただきありがとうございます。
モブエンジニア(@mob-engineer)です。
過去に執筆した自作アプリをDockerで構築する手順を応用して、EC2内にOpenshiftを導入して自作アプリを動かしてみるハンズオン記事を執筆しました。あくまで、個人の技術キャッチアップの一環として執筆しましたが、OpenShift初学者向けに分かるように平易な表現で執筆しております。
OpenShiftページは以下に示しております。
今回のハンズオン作成にあたってClaudeで手順作成⇒個人環境で検証を行いながら作成いたしました。
事前準備
OpenShiftを導入するEC2を構築してください。
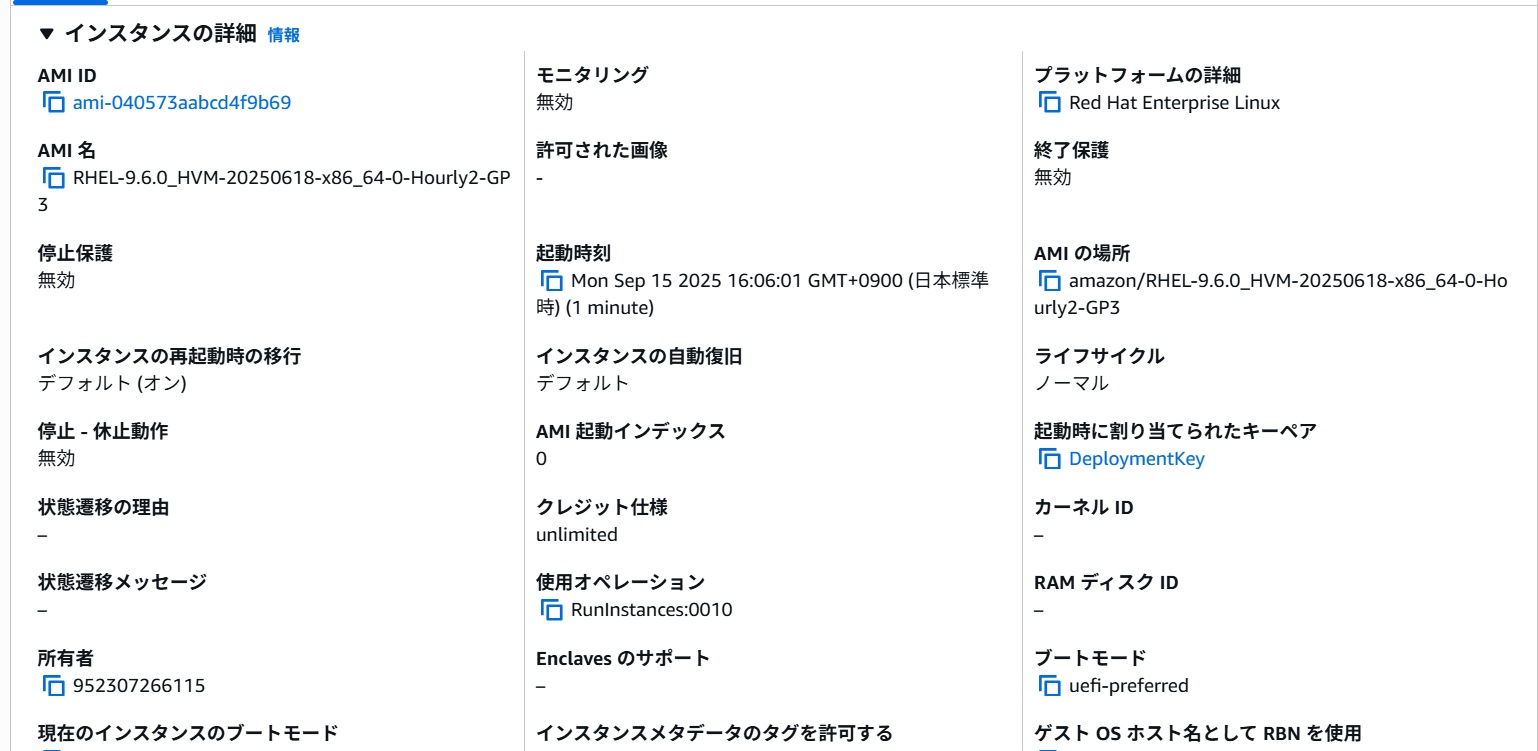
EC2はRHEL9を利用する想定です。
今回のハンズオンではRedHatアカウントを作成する必要があります。
作成していない場合は作成をお願いします。
AWS環境でROSAを有効化させる
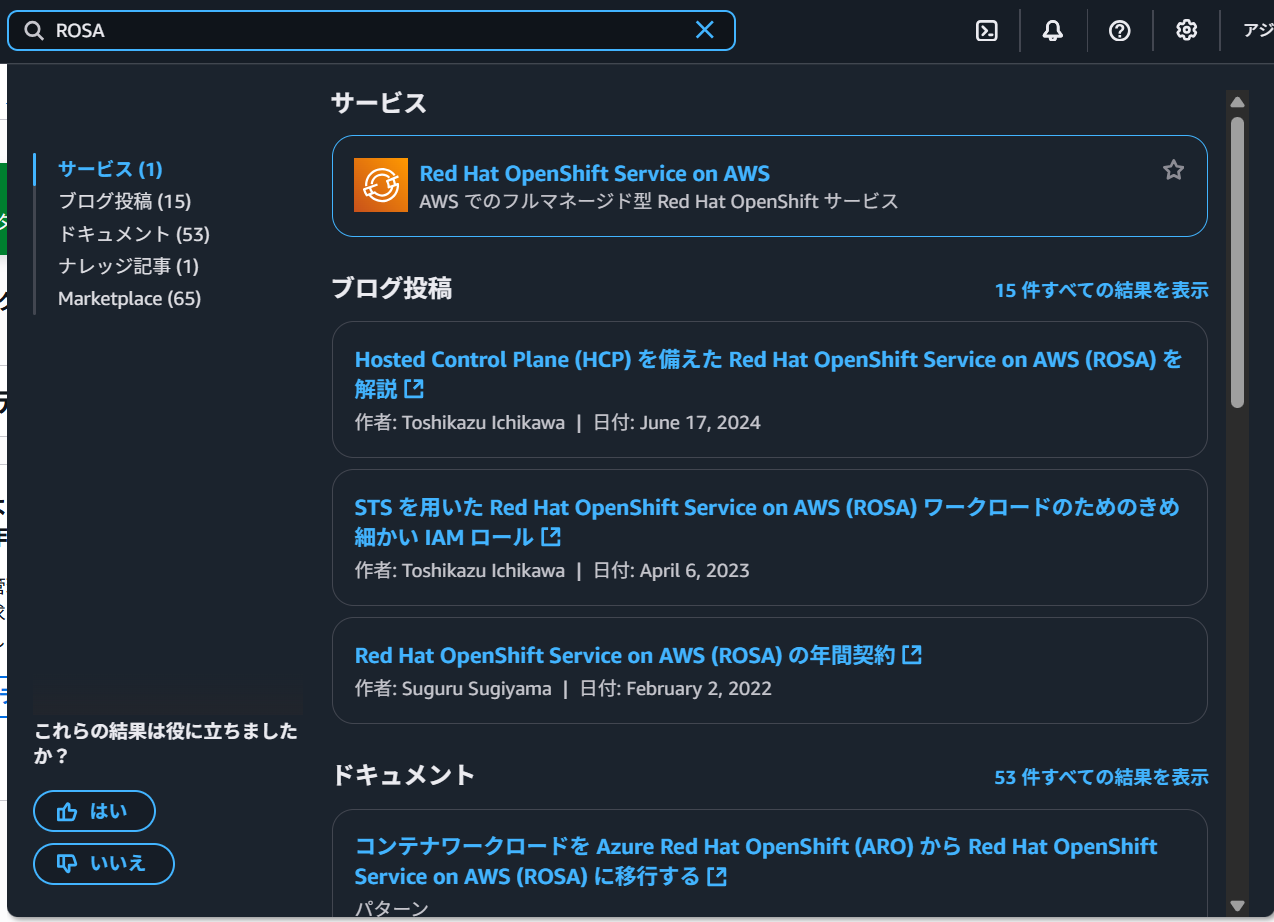
AWS環境でROSAを有効化させることでOpenShiftのトークン情報を設定することが出来ます。
検索ボックスに「ROSA」と入力して表示された結果をクリックします。
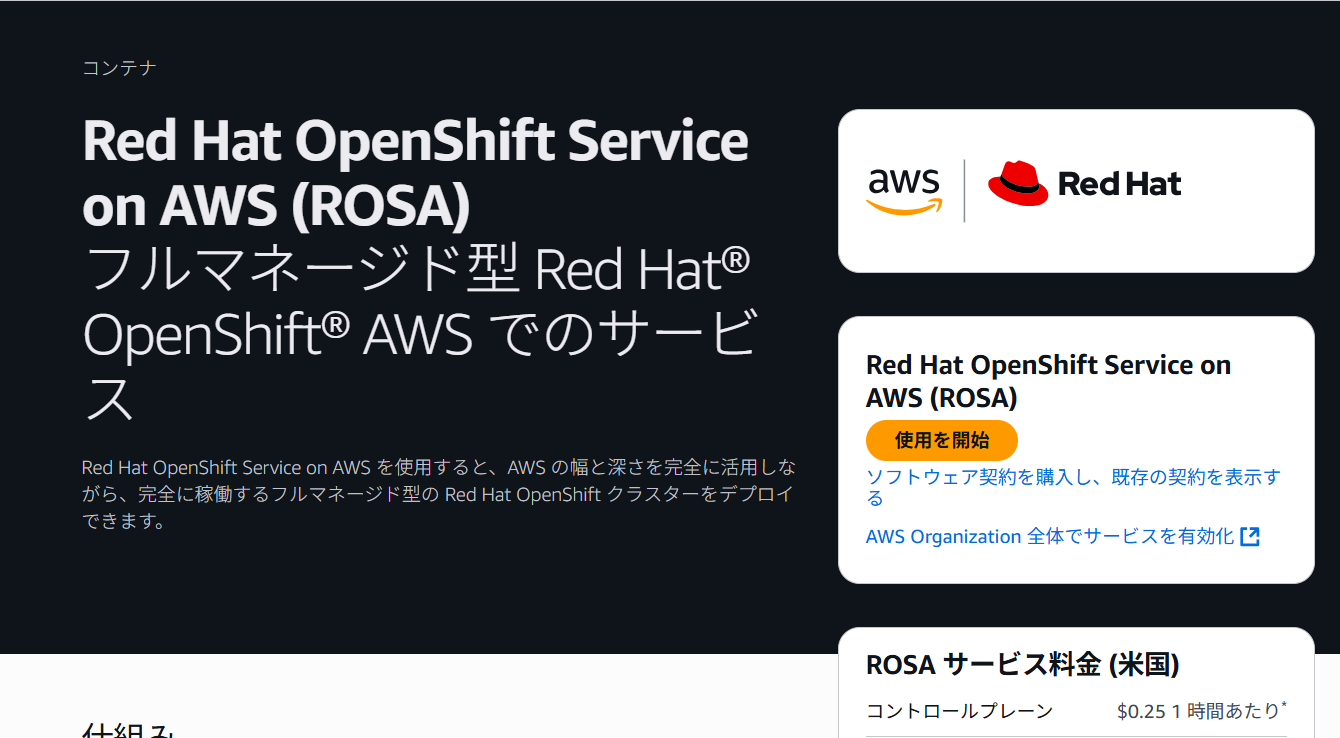
画面右側の「使用を開始」ボタンをクリックします。
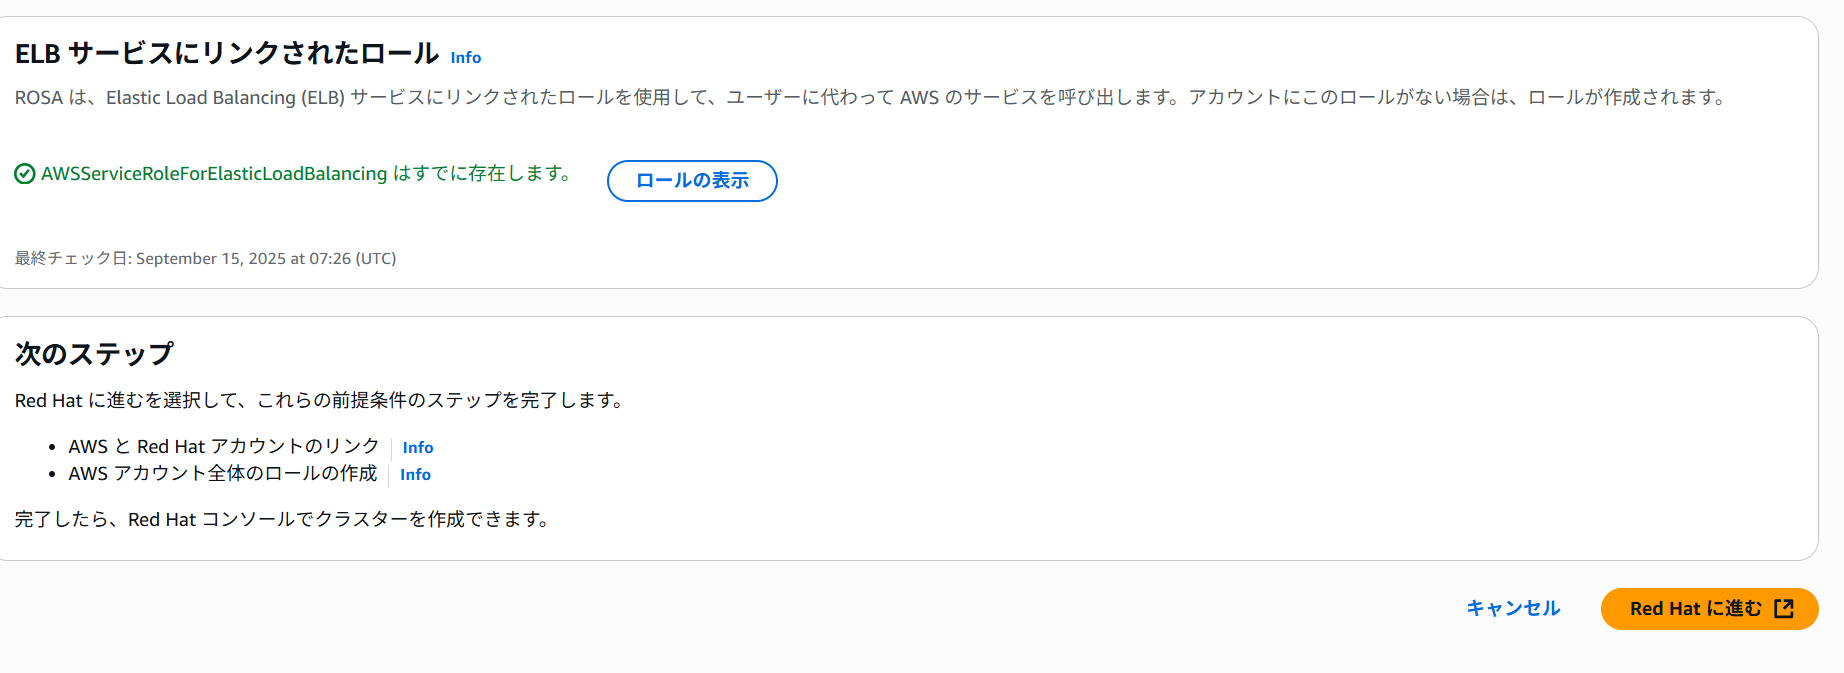
最下部までスクロールし「Red Hatへ進む」ボタンをクリックします。
Red Hatの設定画面が表示されるため以下の通り設定後、「Connect Accounts」ボタンをクリックします。
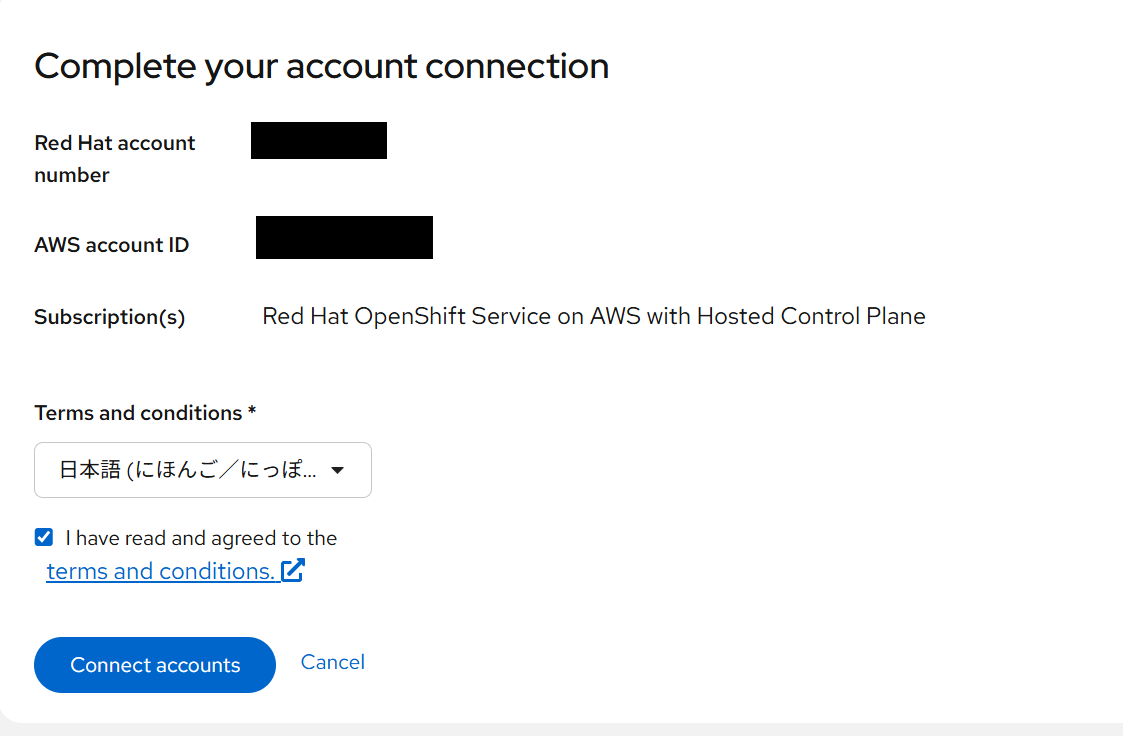
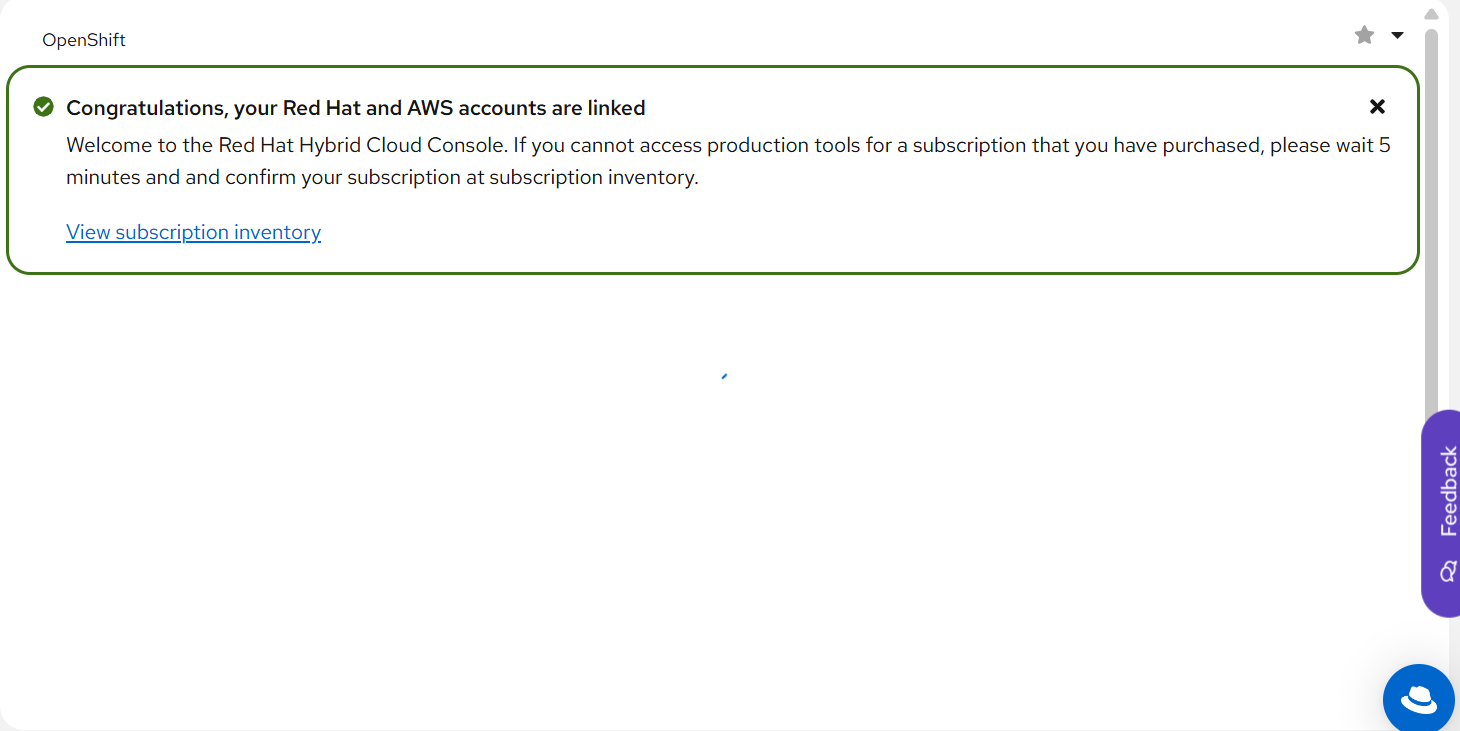
設定後以下画面が表示されます。
Red Hat用のトークン情報を取得します。
以下URLへアクセスしてください。
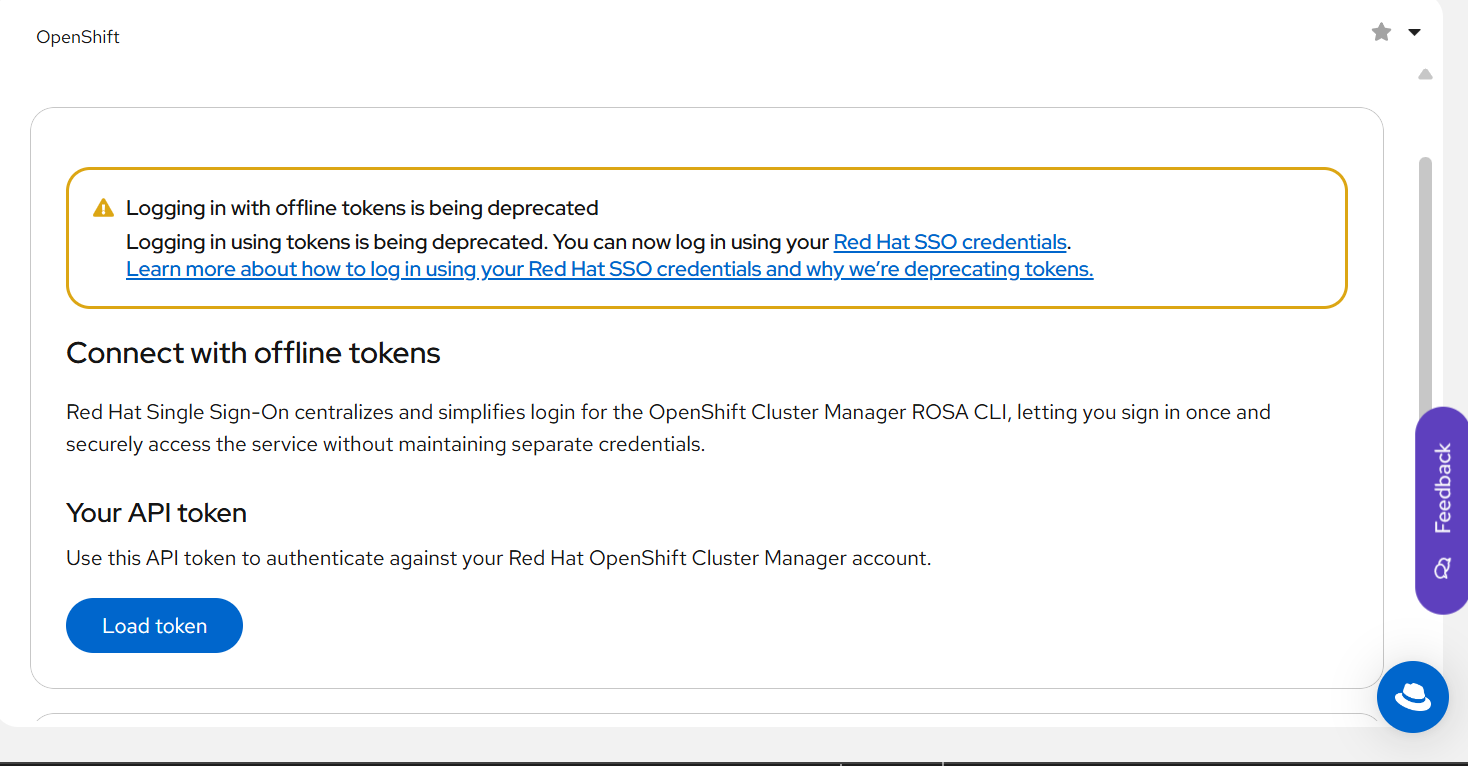
「Load Token」ボタンをクリックすることでトークン情報を取得することが出来ます。
EC2での各種設定
Teratermなどを用いてEC2へログインしましょう。
必要パッケージをインストールしておきます
sudo dnf update -y
sudo dnf install -y wget curl unzip tar git jq vim
AWS CLIが必要なるためインストールしておきます。
curl "https://awscli.amazonaws.com/awscli-exe-linux-x86_64.zip" -o "awscliv2.zip"
unzip awscliv2.zip
sudo ./aws/install
AWS CLIインストール後バージョン確認を行います。
[ec2-user@ip-172-31-22-85 ~]$ aws --version
aws-cli/2.30.1 Python/3.13.7 Linux/5.14.0-570.22.1.el9_6.x86_64 exe/x86_64.rhel.9
[ec2-user@ip-172-31-22-85 ~]$
AWS CLIの認証情報を設定します。
[ec2-user@ip-172-31-22-85 ~]$ aws configure
AWS Access Key ID [None]: <アクセスキー>
AWS Secret Access Key [None]: <シークレットキー>
Default region name [None]: ap-northeast-1
Default output format [None]:
[ec2-user@ip-172-31-22-85 ~]$
認証確認コマンドを実行して結果が表示されたらOKです。
[ec2-user@ip-172-31-22-85 ~]$ aws sts get-caller-identity
{
    "UserId": "XXX",
    "Account": "XXX",
    "Arn": "arn:aws:iam::XXXX:user/XXXX"
}
ROSA CLIインストール
ROSA CLIをインストールします。
curl -L "https://mirror.openshift.com/pub/openshift-v4/clients/rosa/latest/rosa-linux.tar.gz" -o rosa-linux.tar.gz
インストール後、フォルダの展開・インストール作業を行います。
tar -xvf rosa-linux.tar.gz
sudo mv rosa /usr/local/bin/rosa
sudo chmod +x /usr/local/bin/rosa
インストール後、バージョン確認を行います。
[ec2-user@ip-172-31-22-85 ~]$ rosa version
I: 1.2.53
I: Your ROSA CLI is up to date.
[ec2-user@ip-172-31-22-85 ~]$
OCコマンドもインストールする必要があります。
インストールするバージョンとファイルを変数で指定します。
OC_VERSION="stable"
curl -L "https://mirror.openshift.com/pub/openshift-v4/clients/ocp/${OC_VERSION}/openshift-client-linux.tar.gz" -o openshift-client-linux.tar.gz
OCコマンドを展開⇒インストールを行います。
tar -xvf openshift-client-linux.tar.gz
sudo mv oc kubectl /usr/local/bin/
sudo chmod +x /usr/local/bin/oc /usr/local/bin/kubectl
インストール後、バージョン確認を行います。
[ec2-user@ip-172-31-22-85 ~]$ oc version --client
kubectl version --client
Client Version: 4.19.10
Kustomize Version: v5.5.0
Client Version: v1.32.1
Kustomize Version: v5.5.0
[ec2-user@ip-172-31-22-85 ~]$
最後に自動補完設定を入れておきます。
echo 'source <(oc completion bash)' >> ~/.bashrc
echo 'source <(kubectl completion bash)' >> ~/.bashrc
source ~/.bashrc
ROSAログイン
前手順で取得したトークンを変数として設定します。
rosa login --token=<your-rosa-token>
ログイン後、以下コマンドを実行します。
rosa whoami
実行後、RedHatの認証情報が表示されていることを確認してください。
その後、認証情報とクォータ情報を確認します。
[ec2-user@ip-172-31-22-85 ~]$ rosa verify permissions --region us-east-1
I: Verifying permissions for non-STS clusters
I: Validating SCP policies...
I: AWS SCP policies ok
[ec2-user@ip-172-31-22-85 ~]$ rosa verify quota --region us-east-1
I: Validating AWS quota...
I: AWS quota ok. If cluster installation fails, validate actual AWS resource usage against https://docs.openshift.com/rosa/rosa_getting_started/rosa-required-aws-service-quotas.html
クラスター構築
クラスター構築前にAWS用ロールを作成します。
rosa create account-roles --mode auto --yes
以下コマンドを実行してロールが表示されていれば問題ありません。
aws iam list-roles --query 'Roles[?contains(RoleName, `ManagedOpenShift`)].[RoleName, Arn]' --output table
ROSAクラスターを構築します。
rosa create cluster \
  --cluster-name my-rhel9-rosa-cluster \
  --sts \
  --mode auto \
  --region ap-northeast-1 \
  --version 4.18.23 \
  --compute-nodes 3 \
  --compute-machine-type m5.xlarge
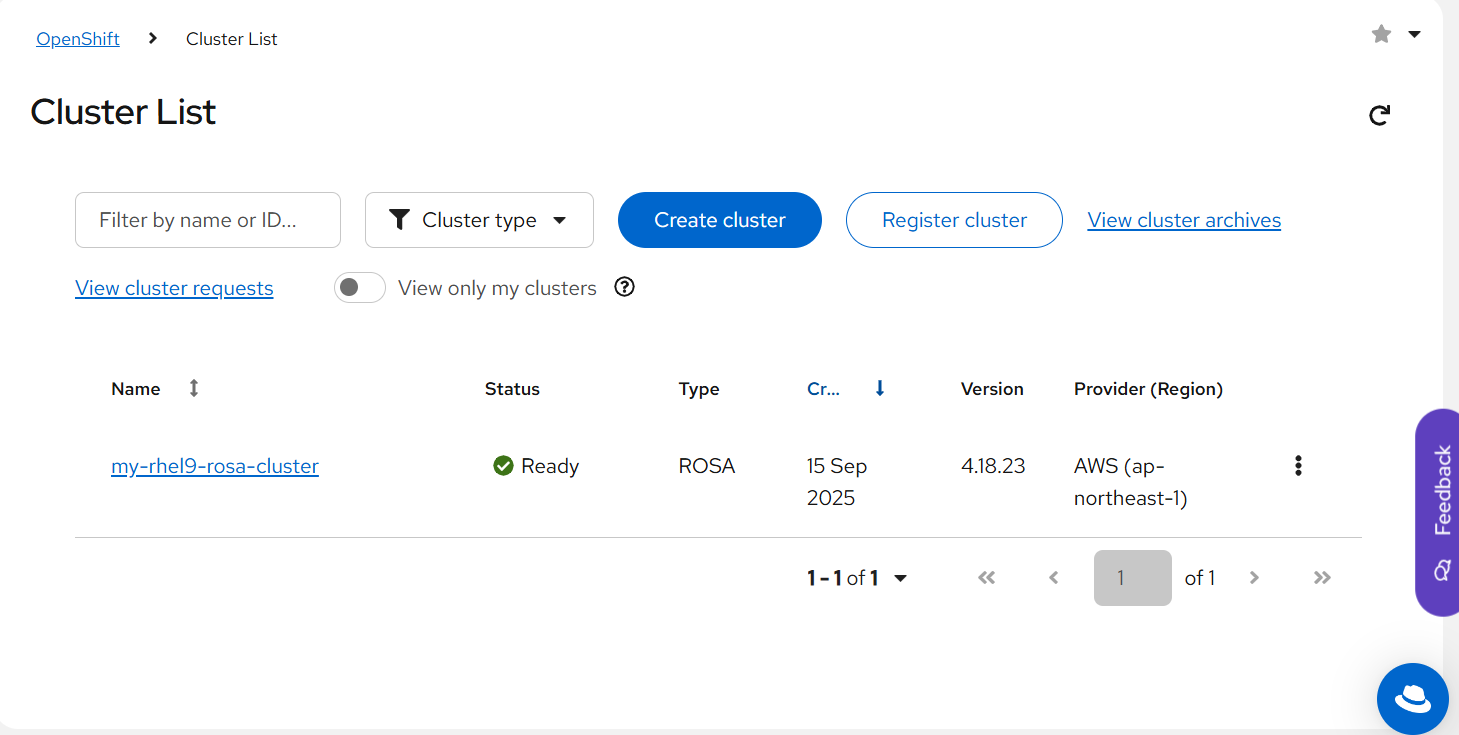
Red Hat Hybrid Cloud Consoleからクラスターの作成状況についてモニタリングすることが可能です。
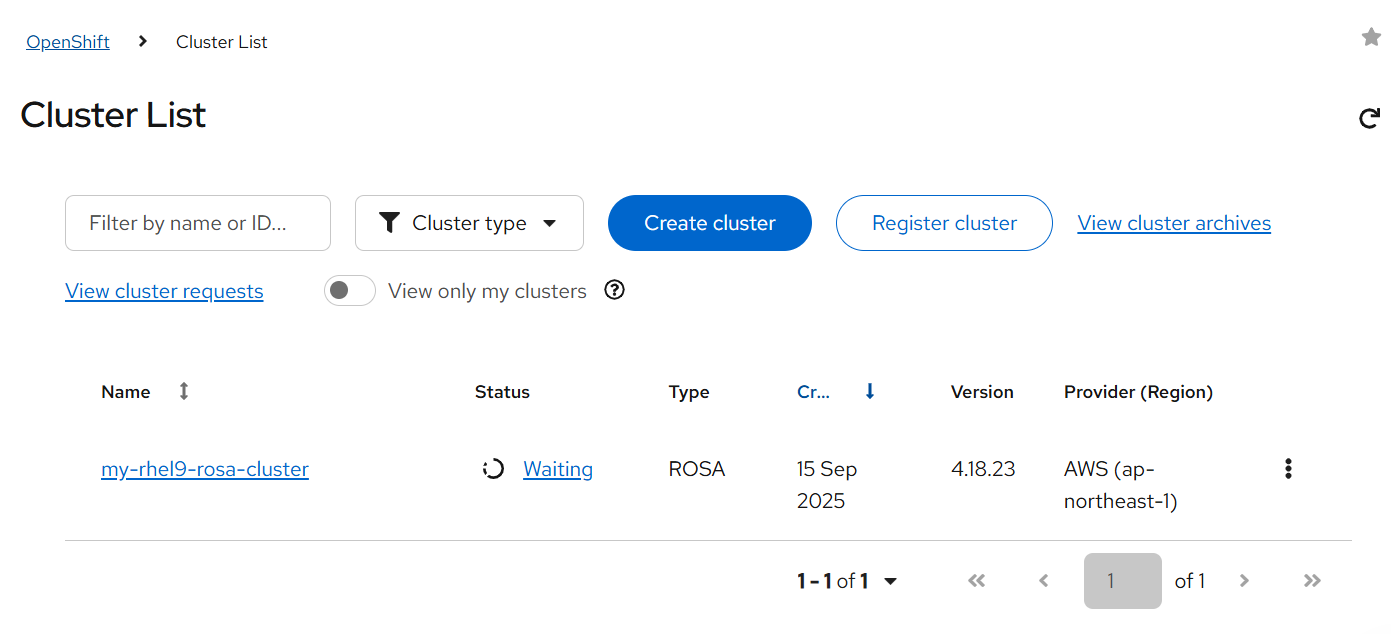
クラスター構築まで約1時間ほどかかります。
その間、コーヒーを飲むことをおススメします。
自作アプリの構築
クラスター構築まで時間があるため、自作アプリを作成しましょう。
アプリを格納するディレクトリを作成します。
mkdir -p ~/rosa-apps/rhel9-sample-app
cd ~/rosa-apps/rhel9-sample-app
それでは、アプリを作成しましょう。
cat > app.js << 'EOF'
const express = require('express');
const os = require('os');
const fs = require('fs');
const app = express();
const port = process.env.PORT || 8080;

// RHEL9環境情報の取得
function getRHELInfo() {
  try {
    const releaseInfo = fs.readFileSync('/etc/redhat-release', 'utf8').trim();
    return releaseInfo;
  } catch (error) {
    return 'Unknown OS';
  }
}

app.get('/', (req, res) => {
  const rhelInfo = getRHELInfo();
  res.send(`
    <h1>Hello from OpenShift on RHEL9!</h1>
    <h2>環境情報</h2>
    <p><strong>ホスト名:</strong> ${os.hostname()}</p>
    <p><strong>OS情報:</strong> ${rhelInfo}</p>
    <p><strong>Node.js バージョン:</strong> ${process.version}</p>
    <p><strong>現在時刻:</strong> ${new Date().toLocaleString('ja-JP', {timeZone: 'Asia/Tokyo'})}</p>
    <p><strong>プラットフォーム:</strong> ${os.platform()}</p>
    <p><strong>アーキテクチャ:</strong> ${os.arch()}</p>
    <h2>コンテナ情報</h2>
    <p><strong>Pod名:</strong> ${process.env.HOSTNAME}</p>
    <p><strong>Namespace:</strong> ${process.env.POD_NAMESPACE || 'Unknown'}</p>
    <style>
      body { font-family: Arial, sans-serif; margin: 40px; }
      h1 { color: #c00; }
      h2 { color: #666; }
      p { margin: 10px 0; }
    </style>
  `);
});

app.get('/health', (req, res) => {
  res.status(200).json({
    status: 'OK',
    timestamp: new Date().toISOString(),
    hostname: os.hostname(),
    platform: os.platform(),
    nodeVersion: process.version
  });
});

app.get('/rhel-info', (req, res) => {
  const info = {
    hostname: os.hostname(),
    platform: os.platform(),
    architecture: os.arch(),
    nodeVersion: process.version,
    rhelRelease: getRHELInfo(),
    uptime: os.uptime(),
    loadavg: os.loadavg(),
    totalMemory: os.totalmem(),
    freeMemory: os.freemem()
  };
  res.json(info);
});

app.listen(port, () => {
  console.log(`RHEL9 OpenShift アプリケーションがポート ${port} で起動しました`);
  console.log(`OS情報: ${getRHELInfo()}`);
  console.log(`Node.js バージョン: ${process.version}`);
});
EOF
cat > package.json << 'EOF'
{
  "name": "rhel9-openshift-sample-app",
  "version": "1.0.0",
  "description": "RHEL9環境でのOpenShiftサンプルアプリケーション",
  "main": "app.js",
  "scripts": {
    "start": "node app.js",
    "dev": "node app.js"
  },
  "keywords": ["openshift", "rhel9", "nodejs", "rosa"],
  "author": "RHEL9 OpenShift Developer",
  "license": "MIT",
  "dependencies": {
    "express": "^4.18.2"
  },
  "engines": {
    "node": ">=18.0.0"
  }
}
EOF
cat > Dockerfile << 'EOF'
FROM registry.access.redhat.com/ubi9/nodejs-18:latest

# RHEL9環境の情報
LABEL maintainer="RHEL9 OpenShift Developer" \
      version="1.0" \
      description="RHEL9環境でのOpenShiftサンプルアプリケーション"

# 作業ディレクトリの設定
WORKDIR /opt/app-root/src

# package.jsonとpackage-lock.jsonをコピー
COPY package*.json ./

# RHEL9環境でのnpmインストール
USER 0
RUN npm ci --only=production && npm cache clean --force
USER 1001

# アプリケーションファイルをコピー
COPY . .

# ポート公開
EXPOSE 8080

# ヘルスチェック
HEALTHCHECK --interval=30s --timeout=3s --start-period=5s --retries=3 \
  CMD curl -f http://localhost:8080/health || exit 1

# 非rootユーザーで実行
USER 1001

# アプリケーション起動
CMD ["npm", "start"]
EOF
クラスター構築確認
20分ほど経過すると以下の通りインスタンスが立ち上がります。
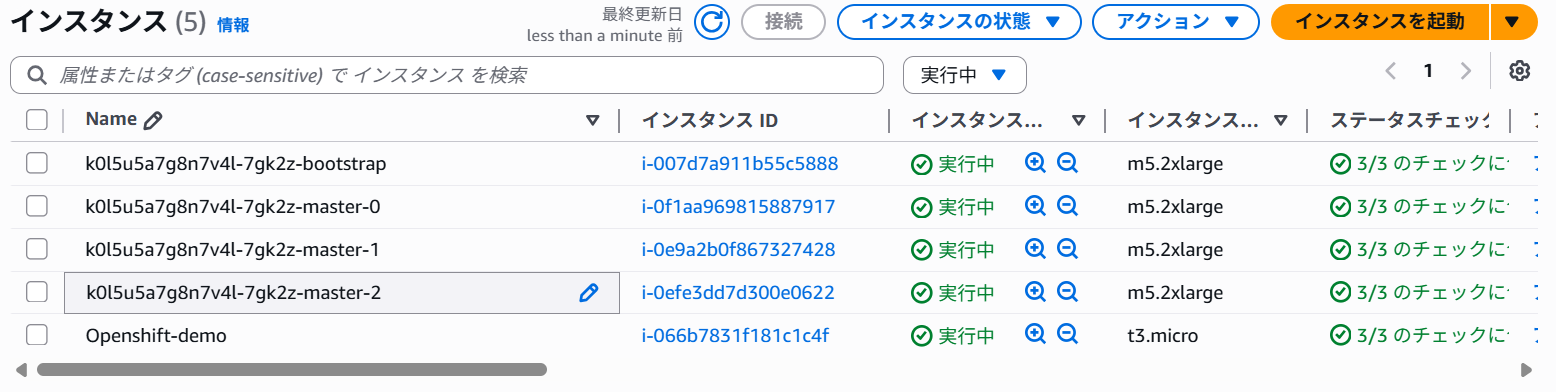
以下コマンドを実行するとクラスターの構築状況をリアルタイムで把握することが出来ます。
rosa logs install --cluster my-rhel9-rosa-cluster --watch
Red Hatコンソールの表記が以下に変わったらクラスター構築完了しています。
管理者アカウント設定
クラスターの管理者アカウント設定を行っていきます。
rosa create admin --cluster my-rhel9-rosa-cluster
出力結果のパスワード情報は後で利用するのでコピペしておきましょう。
[ec2-user@ip-172-31-22-85 rhel9-sample-app]$ rosa create admin --cluster my-rhel9-rosa-cluster
I: Admin account has been added to cluster 'my-rhel9-rosa-cluster'.
I: Please securely store this generated password. If you lose this password you can delete and recreate the cluster admin user.
I: To login, run the following command:

   oc login https://api.k0l5u5a7g8n7v4l.3fje.p1.openshiftapps.com:6443 --username cluster-admin --password <パスワード情報>

I: It may take several minutes for this access to become active.
パスワード情報を保存しておきましょう。
echo "oc login https://api.my-rhel9-rosa-cluster.abc123.p1.openshiftapps.com:6443 --username cluster-admin --password <パスワード情報>" > ~/rosa-admin-login.sh
chmod 600 ~/rosa-admin-login.sh
WebコンソールのURL情報を入手しましょう
[ec2-user@ip-172-31-22-85 rhel9-sample-app]$ rosa describe cluster --cluster my-rhel9-rosa-cluster | grep "Console URL"
Console URL:                https://console-openshift-console.apps.k0l5u5a7g8n7v4l.3fje.p1.openshiftapps.com
[ec2-user@ip-172-31-22-85 rhel9-sample-app]$
URLへアクセスすると以下画面が表示されます。

OCコマンドでクラスターへログインしましょう。
oc login <ROSA URL> \
  --username cluster-admin \
  --password <admin-password>
ROSA URLについては以下コマンドを実行することで確認できます。
rosa describe cluster --cluster my-rhel9-rosa-cluster
正しくログインできたか確認しましょう。
[ec2-user@ip-172-31-22-85 rhel9-sample-app]$ rosa describe cluster --cluster my-rhel9-rosa-clusteroc whoami
oc whoami --show-server
oc whoami --show-context
E: Failed to get cluster 'my-rhel9-rosa-clusteroc': There is no cluster with identifier or name 'my-rhel9-rosa-clusteroc'
https://api.k0l5u5a7g8n7v4l.3fje.p1.openshiftapps.com:6443
default/api-k0l5u5a7g8n7v4l-3fje-p1-openshiftapps-com:6443/cluster-admin
[ec2-user@ip-172-31-22-85 rhel9-sample-app]$ oc get nodes -o wide
oc get namespaces
oc cluster-info
NAME                                             STATUS                     ROLES                  AGE     VERSION    INTERNAL-IP   EXTERNAL-IP   OS-IMAGE                                                KERNEL-VERSION                 CONTAINER-RUNTIME
ip-10-0-11-0.ap-northeast-1.compute.internal     Ready                      worker                 26m     v1.31.11   10.0.11.0     <none>        Red Hat Enterprise Linux CoreOS 418.94.202508261658-0   5.14.0-427.85.1.el9_4.x86_64   cri-o://1.31.11-2.rhaos4.18.git65ec77a.el9
ip-10-0-11-57.ap-northeast-1.compute.internal    Ready,SchedulingDisabled   control-plane,master   37m     v1.31.11   10.0.11.57    <none>        Red Hat Enterprise Linux CoreOS 418.94.202508261658-0   5.14.0-427.85.1.el9_4.x86_64   cri-o://1.31.11-2.rhaos4.18.git65ec77a.el9
ip-10-0-18-8.ap-northeast-1.compute.internal     Ready                      infra,worker           8m6s    v1.31.11   10.0.18.8     <none>        Red Hat Enterprise Linux CoreOS 418.94.202508261658-0   5.14.0-427.85.1.el9_4.x86_64   cri-o://1.31.11-2.rhaos4.18.git65ec77a.el9
ip-10-0-2-58.ap-northeast-1.compute.internal     Ready                      control-plane,master   37m     v1.31.11   10.0.2.58     <none>        Red Hat Enterprise Linux CoreOS 418.94.202508261658-0   5.14.0-427.85.1.el9_4.x86_64   cri-o://1.31.11-2.rhaos4.18.git65ec77a.el9
ip-10-0-36-138.ap-northeast-1.compute.internal   Ready,SchedulingDisabled   infra,worker           8m23s   v1.31.11   10.0.36.138   <none>        Red Hat Enterprise Linux CoreOS 418.94.202508261658-0   5.14.0-427.85.1.el9_4.x86_64   cri-o://1.31.11-2.rhaos4.18.git65ec77a.el9
ip-10-0-37-41.ap-northeast-1.compute.internal    Ready                      worker                 25m     v1.31.11   10.0.37.41    <none>        Red Hat Enterprise Linux CoreOS 418.94.202508261658-0   5.14.0-427.85.1.el9_4.x86_64   cri-o://1.31.11-2.rhaos4.18.git65ec77a.el9
ip-10-0-38-99.ap-northeast-1.compute.internal    Ready                      worker                 26m     v1.31.11   10.0.38.99    <none>        Red Hat Enterprise Linux CoreOS 418.94.202508261658-0   5.14.0-427.85.1.el9_4.x86_64   cri-o://1.31.11-2.rhaos4.18.git65ec77a.el9
ip-10-0-50-118.ap-northeast-1.compute.internal   Ready                      control-plane,master   37m     v1.31.11   10.0.50.118   <none>        Red Hat Enterprise Linux CoreOS 418.94.202508261658-0   5.14.0-427.85.1.el9_4.x86_64   cri-o://1.31.11-2.rhaos4.18.git65ec77a.el9
NAME                                               STATUS   AGE
dedicated-admin                                    Active   9m12s
default                                            Active   41m
kube-node-lease                                    Active   41m
kube-public                                        Active   41m
kube-system                                        Active   41m
openshift                                          Active   34m
openshift-addon-operator                           Active   11m
openshift-apiserver                                Active   35m
openshift-apiserver-operator                       Active   39m
openshift-aqua                                     Active   10m
openshift-authentication                           Active   34m
openshift-authentication-operator                  Active   39m
openshift-backplane                                Active   9m59s
openshift-backplane-cee                            Active   11m
openshift-backplane-csa                            Active   11m
openshift-backplane-cse                            Active   11m
openshift-backplane-csm                            Active   11m
openshift-backplane-managed-scripts                Active   10m
openshift-backplane-mcs-tier-two                   Active   10m
openshift-backplane-mobb                           Active   10m
openshift-backplane-srep                           Active   10m
openshift-backplane-tam                            Active   10m
openshift-catalogd                                 Active   35m
openshift-cloud-controller-manager                 Active   39m
openshift-cloud-controller-manager-operator        Active   39m
openshift-cloud-credential-operator                Active   40m
openshift-cloud-network-config-controller          Active   40m
openshift-cloud-platform-infra                     Active   39m
openshift-cluster-csi-drivers                      Active   40m
openshift-cluster-machine-approver                 Active   39m
openshift-cluster-node-tuning-operator             Active   39m
openshift-cluster-olm-operator                     Active   39m
openshift-cluster-samples-operator                 Active   39m
openshift-cluster-storage-operator                 Active   39m
openshift-cluster-version                          Active   41m
openshift-codeready-workspaces                     Active   10m
openshift-config                                   Active   39m
openshift-config-managed                           Active   39m
openshift-config-operator                          Active   39m
openshift-console                                  Active   27m
openshift-console-operator                         Active   27m
openshift-console-user-settings                    Active   27m
openshift-controller-manager                       Active   35m
openshift-controller-manager-operator              Active   39m
openshift-custom-domains-operator                  Active   10m
openshift-customer-monitoring                      Active   10m
openshift-deployment-validation-operator           Active   10m
openshift-dns                                      Active   34m
openshift-dns-operator                             Active   39m
openshift-etcd                                     Active   40m
openshift-etcd-operator                            Active   39m
openshift-host-network                             Active   36m
openshift-image-registry                           Active   40m
openshift-infra                                    Active   41m
openshift-ingress                                  Active   34m
openshift-ingress-canary                           Active   30m
openshift-ingress-operator                         Active   40m
openshift-insights                                 Active   39m
openshift-kni-infra                                Active   39m
openshift-kube-apiserver                           Active   40m
openshift-kube-apiserver-operator                  Active   40m
openshift-kube-controller-manager                  Active   40m
openshift-kube-controller-manager-operator         Active   40m
openshift-kube-scheduler                           Active   40m
openshift-kube-scheduler-operator                  Active   39m
openshift-kube-storage-version-migrator            Active   35m
openshift-kube-storage-version-migrator-operator   Active   39m
openshift-logging                                  Active   9m51s
openshift-machine-api                              Active   40m
openshift-machine-config-operator                  Active   39m
openshift-managed-node-metadata-operator           Active   10m
openshift-managed-upgrade-operator                 Active   10m
openshift-marketplace                              Active   39m
openshift-monitoring                               Active   39m
openshift-multus                                   Active   36m
openshift-must-gather-operator                     Active   10m
openshift-network-console                          Active   26m
openshift-network-diagnostics                      Active   36m
openshift-network-node-identity                    Active   36m
openshift-network-operator                         Active   39m
openshift-node                                     Active   34m
openshift-nutanix-infra                            Active   39m
openshift-oauth-apiserver                          Active   35m
openshift-observability-operator                   Active   10m
openshift-ocm-agent-operator                       Active   10m
openshift-openstack-infra                          Active   39m
openshift-operator-controller                      Active   35m
openshift-operator-lifecycle-manager               Active   39m
openshift-operators                                Active   39m
openshift-operators-redhat                         Active   9m39s
openshift-osd-metrics                              Active   9m45s
openshift-ovirt-infra                              Active   39m
openshift-ovn-kubernetes                           Active   36m
openshift-package-operator                         Active   9m19s
openshift-rbac-permissions                         Active   9m15s
openshift-route-controller-manager                 Active   35m
openshift-route-monitor-operator                   Active   8m57s
openshift-security                                 Active   8m53s
openshift-service-ca                               Active   35m
openshift-service-ca-operator                      Active   39m
openshift-splunk-forwarder-operator                Active   8m54s
openshift-sre-pruning                              Active   8m24s
openshift-user-workload-monitoring                 Active   39m
openshift-validation-webhook                       Active   10m
openshift-vsphere-infra                            Active   39m
Kubernetes control plane is running at https://api.k0l5u5a7g8n7v4l.3fje.p1.openshiftapps.com:6443

To further debug and diagnose cluster problems, use 'kubectl cluster-info dump'.
[ec2-user@ip-172-31-22-85 rhel9-sample-app]$
kubeconfigファイル管理
kubeconfigファイルを作成します。
echo $KUBECONFIG
ls -la ~/.kube/config
cp ~/.kube/config ~/.kube/config.backup.$(date +%Y%m%d_%H%M%S)
export KUBECONFIG=~/.kube/config:~/.kube/rosa-config
oc config get-contexts
oc config use-context rosa-cluster
アプリ起動
それではアプリを起動しましょう。
その前にGitの設定を行っておきます。
git config --global user.name "<ユーザー名>"
git config --global user.email "<メールアドレス>"
git init
git add .
git commit -m "Initial commit: RHEL9 OpenShift sample app"
OCコマンドでアプリを起動します。
oc new-app nodejs:18-ubi8~. \
  --name=rhel9-sample-app \
  --labels=app=rhel9-sample,version=v1.0
oc start-build rhel9-sample-app --from-dir=. --follow
以下コマンドを実行することで起動状況を確認することが出来ます。
[ec2-user@ip-172-31-22-85 rhel9-sample-app]$ oc get builds
oc logs -f build/rhel9-sample-app-1
NAME                 TYPE     FROM   STATUS    STARTED   DURATION
rhel9-sample-app-1   Source          Pending
time="2025-09-15T09:24:37Z" level=info msg="Not using native diff for overlay, this may cause degraded performance for building images: kernel has CONFIG_OVERLAY_FS_REDIRECT_DIR enabled"
I0915 09:24:37.745800       1 defaults.go:112] Defaulting to storage driver "overlay" with options [mountopt=metacopy=on].
Caching blobs under "/var/cache/blobs".
Trying to pull image-registry.openshift-image-registry.svc:5000/openshift/nodejs@sha256:3a895f2b85ffeda82b2d50ce1ae554bc5bc62448aba48b3fd56ce94b694b3b2a...
Getting image source signatures
Copying blob sha256:046eb6416170db2ab33e464d04c6f7c0c8c6cc8563597aca8e9fb7736dff00f9
Copying blob sha256:b610fd6091ba2163b8943d2214e20665977bc8064dc769d47be9ae868e48a301
Copying blob sha256:43ddc3bd12b8691687c9f6c273331ca07e3a89b50a619e0db9b040a8a629386d
デプロイメント状況を確認します。
[ec2-user@ip-172-31-22-85 rhel9-sample-app]$ oc get pods -l app=rhel9-sample
oc get deployments
oc get services
No resources found in default namespace.
NAME               READY   UP-TO-DATE   AVAILABLE   AGE
rhel9-sample-app   0/1     0            0           61s
NAME               TYPE           CLUSTER-IP      EXTERNAL-IP                            PORT(S)    AGE
kubernetes         ClusterIP      172.30.0.1      <none>                                 443/TCP    45m
openshift          ExternalName   <none>          kubernetes.default.svc.cluster.local   <none>     39m
rhel9-sample-app   ClusterIP      172.30.233.96   <none>                                 8080/TCP   61s
[ec2-user@ip-172-31-22-85 rhel9-sample-app]$
外部アクセスできるように設定を行います。
oc expose service rhel9-sample-app
oc get routes
oc describe route rhel9-sample-app
アクセスできるかヘルスチェックを行います。
ROUTE_URL=$(oc get route rhel9-sample-app -o jsonpath='{.spec.host}')
echo "アプリケーションURL: http://$ROUTE_URL"
curl -s http://$ROUTE_URL | head -20
curl -s http://$ROUTE_URL/health | jq .
curl -s http://$ROUTE_URL/rhel-info | jq .
上手くいかない場合、アプリケーションを削除してから再実行してみてください
・全てのアプリ関連リソースを削除
oc delete all,is,bc -l app=rhel9-sample-app
・ImageStreamを直接削除(念のため)
oc delete imagestream rhel9-sample-app
・削除確認
oc get all,is,bc -l app=rhel9-sample-app
セキュアな接続を行うためにHTTPS設定を行います。
[ec2-user@ip-172-31-22-85 rhel9-sample-app]$ oc create route edge rhel9-sample-app-secure \
  --service=rhel9-sample-app \
  --port=8080
route.route.openshift.io/rhel9-sample-app-secure created
[ec2-user@ip-172-31-22-85 rhel9-sample-app]$ SECURE_URL=$(oc get route rhel9-sample-app-secure -o jsonpath='{.spec.host}')
echo "セキュアURL: https://$SECURE_URL"
セキュアURL: https://rhel9-sample-app-secure-default.apps.k0l5u5a7g8n7v4l.3fje.p1.openshiftapps.com
[ec2-user@ip-172-31-22-85 rhel9-sample-app]$
出力されたURLへアクセスしてみましょう。
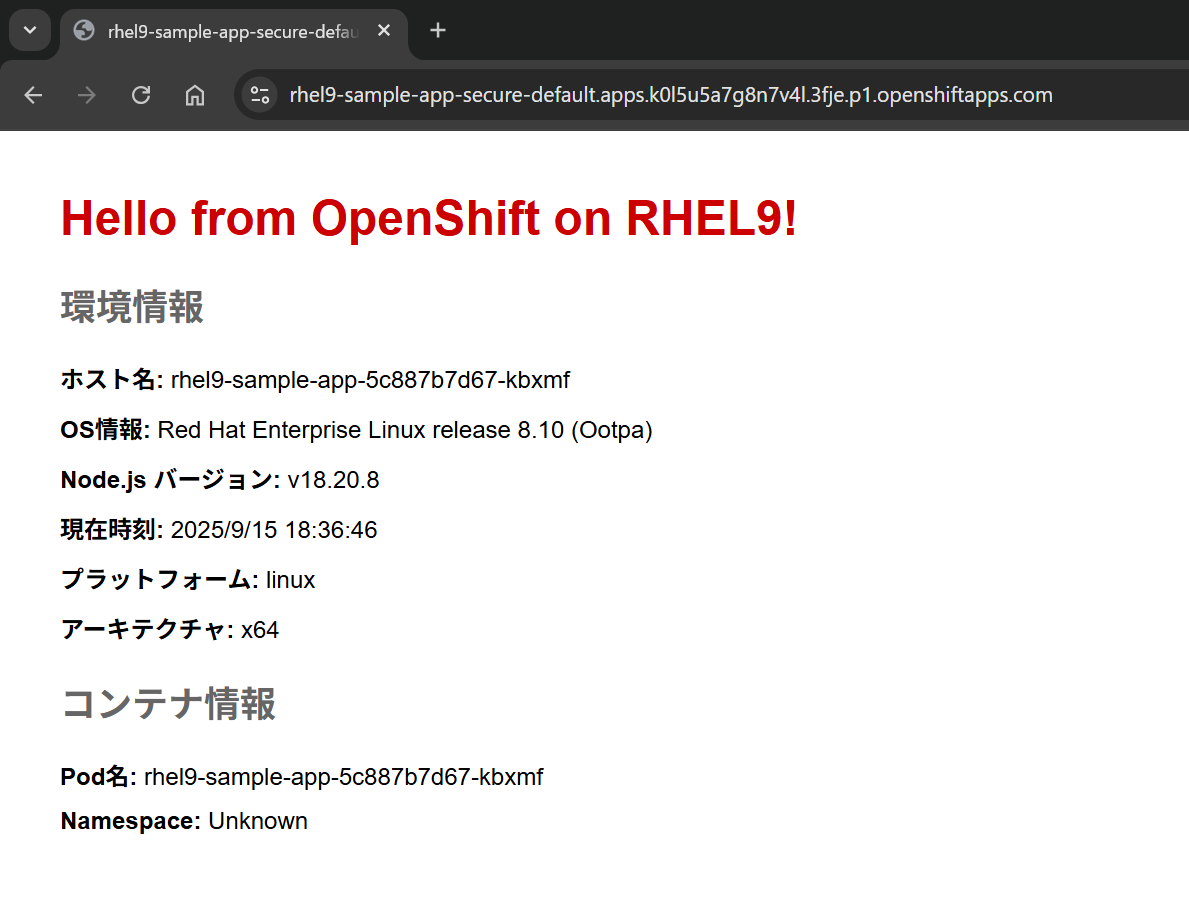
無事アプリが立ち上がっていることを確認できました。
応用的な設定
ConfigMapを設定してみます。
oc create configmap rhel9-app-config \
  --from-literal=DATABASE_HOST=postgres.example.com \
  --from-literal=DATABASE_PORT=5432 \
  --from-literal=APP_ENV=production \
  --from-literal=RHEL_VERSION=9 \
  --from-literal=TIMEZONE=Asia/Tokyo
Secretファイルも作成してみます
oc create secret generic rhel9-app-secrets \
  --from-literal=DATABASE_PASSWORD=supersecret \
  --from-literal=API_TOKEN=abc123def456
環境変数として設定することで簡単に設定を行うことが出来ます。
oc set env deployment/rhel9-sample-app --from=configmap/rhel9-app-config
oc set env deployment/rhel9-sample-app --from=secret/rhel9-app-secrets
リソースの削除
リソース削除は忘れずにおこなってください。
多額のクラウド課金が発生します。
以下コマンドを実行します。
oc delete route rhel9-sample-app rhel9-sample-app-secure
oc delete service rhel9-sample-app
oc delete deployment rhel9-sample-app
oc delete configmap rhel9-app-config
oc delete secret rhel9-app-secrets
oc delete pvc rhel9-app-storage
oc delete hpa rhel9-sample-app
クラスタを削除しましょう
rosa describe cluster --cluster my-rhel9-rosa-cluster
rosa delete cluster --cluster my-rhel9-rosa-cluster --yes
rosa logs uninstall --cluster my-rhel9-rosa-cluster --watch
削除に関しては20分から40分ほどで完了します。
作成したオペレータロールも削除しましょう。
rosa delete operator-roles --cluster my-rhel9-rosa-cluster --mode auto --yes
rosa delete account-roles --mode auto --yes
ROSAクラスターが存在しないことを確認しましょう
[ec2-user@ip-172-31-22-85 rhel9-sample-app]$ rosa list clusters
I: No clusters available
[ec2-user@ip-172-31-22-85 rhel9-sample-app]$
ハンズオンとしては以上で終了です。
所感
本手順でOpenShiftを用いて自作アプリを動かす方法をキャッチアップすることが出来たと思います。そのうえで、実案件で利用する場合、「パイプライン設計をどうするか」や「ConfigMapの設定をどのようにしていくか」を考えていく必要があると思います。基本作業はCLIで行えるので、自動化させることも容易だと個人的には思いました。
(一度、ハンズオンを行っておくと理解が深まるかと)
最後まで記事をお読みいただきありがとうございます。