内容
Nuxt + firebase で web アプリを作る方法についての内部向けメモです。基本、下記あたりの記事を見てそのままやっただけです。
- Nuxt 公式
- Nuxt/Firebase 公式
- Nuxt.jsでfirebaseを使う方法
- Nuxt.js + Firebase Authentication + FireStoreでwebアプリケーションハンズオン
nuxt2 + firebase v8 です。nuxt3 + firebase9 は下記に書いてます
手順
準備
Ubuntu 20.04LTS でやります。
$ npm -v
6.14.15
$ node -v
v14.18.1
$ yarn -v
1.22.11
$ firebase --version
9.20.0
インストールの手順は下記を参照のこと。
Nuxt
Javascript, Vuetify, ESLint を選択してます。
$ yarn create nuxt-app first
...
✨  Generating Nuxt.js project in first
? Project name: first
? Programming language: JavaScript
? Package manager: Yarn
? UI framework: Vuetify.js
? Nuxt.js modules: (Press <space> to select, <a> to toggle all, <i> to invert selection)
? Linting tools: ESLint
? Testing framework: None
? Rendering mode: Universal (SSR / SSG)
? Deployment target: Static (Static/Jamstack hosting)
? Development tools: (Press <space> to select, <a> to toggle all, <i> to invert selection)
? Continuous integration: None
? Version control system: Git
...
firebase の hosting を使う場合、Deployment target は Static/Jamstack hosting にする必要がある。
作成できたらテスト。
$ cd first
$ yarn dev
http://localhost:3000 にブラウザでアクセスして、下記のようになればOK。vuetify を入れてるので、ない場合とは少し表示が違う(多分)。
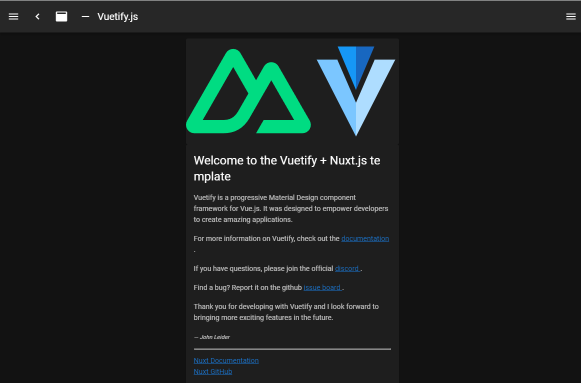
問題なく動いたら、build と start してみる。
$ yarn build
$ yarn start
firebase の設定
基本はNuxt Firebase:Getting Startの通り。
$ yarn add firebase@8.10.0
$ yarn add @nuxtjs/firebase@7.6.1
firebase のモジュールはバージョンを指定しないと 9.0.0 が入る。9.0.0 系は 8.0.0 系と使い方が微妙に違っていて、ネットに転がってる記事がそのまま通用しないことがある。
v9 でも compat を使えば v8 のように使えるけど、それなら普通に v8 を使うでいいような気もするんですが、どうなんでしょうね?
とりぜず、以下では firebase v8 でやってます。
@nuxtjs/firebase は 8.0.0 以上だと firebase v9 対応になってしまい、firebase v8 以下との併用ができないぽい。firebase v8 を使う場合は @nuxjs/firebase もバージョンを指定する必要あり。
初期化
$ yarn generate
$ firebase init hosting
? Please select an option: Use an existing project
? Select a default Firebase project for this directory: myproject (myproject)
? What do you want to use as your public directory? dist
? Configure as a single-page app (rewrite all urls to /index.html)? No
? Set up automatic builds and deploys with GitHub? No
✔  Wrote dist/404.html
? File dist/index.html already exists. Overwrite? No
public directory に dist を指定する。あらかじめ yarn build か yarn generate してないと生成されていないので、先にしておく。
テスト
$ yarn generate
$ firebase serve --only hosting
firebase コマンドでテストやデプロイする場合は、yarn build ではなくて yarn generate する必要がある。これ重要。
これで http://localhost:5000 にアクセスして yarn dev のときと同じ結果になっていればOK。
デプロイ
$ firebase deploy --only hosting
これで https://myproject.web.app にアクセスして、ローカルのときと同じ表示になっていればOK。
apiKey とかの設定
Nuxt Firebase:Getting Start にあるように、nuxt.config.js に apiKey などを設定する。
    modules: ['@nuxtjs/firebase'],
    firebase:
      {
        config: {
          apiKey: '<apiKey>',
          authDomain: '<authDomain>',
          projectId: '<projectId>',
          storageBucket: '<storageBucket>',
          messagingSenderId: '<messagingSenderId>',
          appId: '<appId>',
          measurementId: '<measurementId>'
        },
        services: {
          auth: true // Just as example. Can be any other service.
        }
      },
使いたいサービスにあわせて Nuxt Firebase:Options を見て true を設定する。ローカルエミュレータを使う場合はもう少し設定が必要。上の麗では auth だけ有効になっている。
Nuxt のファイル構造の基本的な理解
とりあえず、機能を試すのに必要なファイル以外を削除したのが下記の構成。これで、ルートのページには index.vue の中身が表示され、inspire ボタンを押すと inspire.vue の中身が表示される。
assets
└── variables.scss
layouts
├── default.vue
└── error.vue
static
└── favicon.ico
pages
├── index.vue
└── inspire.vue
components
nuxt.config.js
package.json
index.vue の中身は / を指定したときに表示される。
<template>
  <v-container>
    Hello World
    <v-btn to="/inspire">
      inspire
    </v-btn>
  </v-container>
</template>
pages/ 以下の index.vue 以外のファイルは、pages/xxxx.vue というファイル名にすることで /xxxx というパスでアクセスできるようになる。vue-router に相当するものは、build したときに .nuxt/router.js に自動的に生成される。
<template>
  <v-container>
    inspire
    <v-btn to="/">
      Home
    </v-btn>
  </v-container>
</template>
layouts/default.vue には全ページに共通するヘッダやフッダのような、ページの外枠になるUIを書いておく。ファイル中に <Nuxt /> タグを書くと、そこにパスと一致する pages/xxxx.vue の中身を配置してくれる。
<template>
  <v-app dark>
    <v-main>
      <v-container>
        <Nuxt />
      </v-container>
    </v-main>
  </v-app>
</template>

<script>
export default {
  data () {
    return {}
  }
}
</script>
ページによって外観を変えたい場合は、下記のように layout: 'hogex' とかしておいて、
<script>
export default {
  layout: 'hogex',
  ...
}
</script>
pages のほうのファイルで、たとえば、
<template>
  <v-container>
    Hogex
  </v-container>
</template>
<script>
<script>
export default {
  name: 'hoge',
  layout: 'hogex'
}
</script>
みたいなかんじで layout を指定すると、hogex という layout を持つ vue ファイルが外観として使用される。ぽい。
エラーページを出すには layouts/error.vue というファイルを作る。layout に empty が指定されているけど、empty という特別なレイアウトの名前があるわけではないらしい。あと、layouts/ 以下にあるけど、error.vue 自体はページ扱いされる(らしい)。
<template>
  <v-app dark>
    <h1 v-if="error.statusCode === 404">
      {{ pageNotFound }}
    </h1>
    <h1 v-else>
      {{ otherError }}
    </h1>
    <NuxtLink to="/">
      Home page
    </NuxtLink>
  </v-app>
</template>

<script>
export default {
  layout: 'empty',
  props: {
    error: {
      type: Object,
      default: null
    }
  },
  data () {
    return {
      pageNotFound: '404 Not Found',
      otherError: 'An error occurred'
    }
  },
  head () {
    const title =
      this.error.statusCode === 404 ? this.pageNotFound : this.otherError
    return {
      title
    }
  }
}
</script>

<style scoped>
h1 {
  font-size: 20px;
}
</style>
assets ディレクトリ
assets/variables.scss は Vuetify のカスタマイズ用のグローバル設定を書くところ。空でもいいけど、存在しないとエラーになる。nuxt.config.js の下記の設定を消すと、エラーにならなくなる。
 vuetify: {
    customVariables: ['~/assets/variables.scss'],
    ...
 }
Vuetify 用の設定なので、Nuxt には直接関係はない(はず)。
static ディレクトリ
static/favicon.ico は、置いておかないとブラウザが勝手に探しに行って 404 エラーが発生しまくるので、それの回避のためだけに置いてあるだけ。
static 以下にファイルを置くと、直接そのファイルを参照できる。たとえば static/hoge.png みたいなファイルがあるとき、<template> タグの中で、下記のような感じで参照できる。
<template>
   <img src="/hoge.png"/>
</template>
このとき、パスに static は含めない。
ローカルの javascript も static に置ける(asset に置くこともできる)。たとえば static/local.js を参照したい場合は、nuxt.config.js の中に、次のような記述を書くことで読み込める。
  head: {
    script: [
      {
        src: "/local.js",
      }
    ],
  }
画像などの固定リソースは、assets 以下に置く方法もある。
layouts の適用ルール
上記によれば、layout の適用はこのようになるらしい。
- すべてのページはレイアウトdefault.vueでロードされます
- ページのレイアウトを指定した場合は、指定したレイアウトで読み込まれます。
- 指定されたレイアウトが利用できない場合、ページはdefault.vueでロードされます
- nuxtがlayoutsフォルダーにdefault.vueという名前のファイルを表示しない場合、ページは空のレイアウトで読み込まれます
empty を指定したからといって、レイアウトがなしになるわけではなくて、layout: 'empty' と書かれている layouts/ 以下のファイルを探しに行くだけだそうな。
参考:
テスト再び
ここまでの状態で yarn dev すると、下記のような画面になるはず。
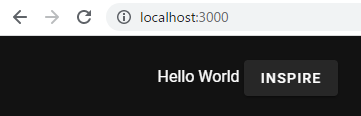
inspire を押すとこうなる。
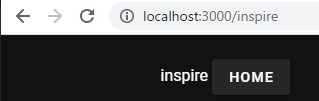
存在しないパスを指定するとこうなる。
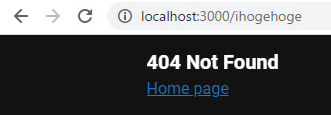
URL を直接指定して http://localhost:3000/inspire にアクセスしてもエラーになる。
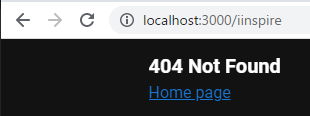
あくまで、home から遷移してしか inspire には行けない。このあたりは vue-router のときと同じ。
firebaseui + firebase authentication でログインする
準備
バージョンを指定して firebaseui モジュールをインストールしておく。バージョンを指定しないと 9.0.0 対応のモジュールが入ってしまって、うまく動かないことがある。(2021/10現在)
$ yarn add firebaseui@5.0.0
apiKey を取得しておく。上のほうで nuxt.config.js に指定済なら問題なし。
ログインページの作成
<template>
  <v-container>
    <div>
        <div id="firebaseui-auth-container"></div>
    </div>
    <v-btn to="/">
        home
    </v-btn>
  </v-container>
</template>
<script>
export default {
  mounted() {

    const firebaseui = require('firebaseui');
    require("firebaseui/dist/firebaseui.css");
    const ui = firebaseui.auth.AuthUI.getInstance() || new firebaseui.auth.AuthUI(this.$fire.auth);
    const tmp = this;

    const config = {
      signInOptions: [
        //firebase.auth.EmailAuthProvider.PROVIDER_ID,
        this.$fireModule.auth.EmailAuthProvider.PROVIDER_ID,
        // firebase.auth.GoogleAuthProvider.PROVIDER_ID
        //this.$fireModule.auth.GoogleAuthProvider.PROVIDER_ID
      ],
      signInSuccessUrl: '/',
      callbacks: {
        signInSuccessWithAuthResult() {
          console.log('ok');
          tmp.$router.push('/');
        },
        uiShown: function () {
          console.log('ui');
        }
      }
    };

    ui.start('#firebaseui-auth-container', config);
  }
};
</script>
$fireModule をつかうのがみそ。signInSuccessUrl が機能してないかんじがするので、直接とばしている。要調査。
オプションとか細かいところは、下記と同じ。
SSR に対応してないプラグインを使うときの注意
Vue とか Vuetify 用で、SSR に対応していないモジュールを使うときは、<client-only> タグを使う
vuetify-markdown-editor を使おうとしたら、document is not found というエラーが出たので、原因を調べたらこれだった。 <no-ssr> タグを使うように書かれている記事が見つかるけど、このタグは nuxt3 で削除されるので、今後は <client-only> を使いなさいということらしい。
<template>
  <v-app>
    <v-main>
      <client-only>
        <Editor
            mode="preview"
            ref="editor"
            hint="Hint"
            :outline="false"
            :render-config="renderConfig"
            v-model="text"
        />
      </client-only>
    </v-main>
  </v-app>
</template>
<script>
import { Editor } from "vuetify-markdown-editor";
export default {
    name: "App",
    components: {
        Editor,
    },
    data: () =>({
      renderConfig: {
        mermaid: {

        }
      }
    }),
    mounted: function(){
        this.$vuetify.theme.dark = false;
        console.log("editor module");
    },
    methods: {
    }
}
</script>
こんな感じ。もちろん使うには下記が必要。
$ yarn add vuetify-markdown-editor