やること
- Vue.js + Firebase を使って爆速でユーザ認証を実装する
- Vue.js+Firebase Authenticationで認証画面を爆速実装!
- Vue.js (Vuex, vue-router, vuetify) とFirebaseで始めるユーザー管理
- Vuetify + Firebase UI で簡単にログイン機能を追加とナビゲーションメニュー
これらの記事を足して 3 で割ったような感じ。
- Vue.js (vue2) + Vuetify を使う
- Firebase Authentication でメールアドレス認証をする
- Firebase UI を使ってログインフォームを表示する
-
v-app-barを画面上部に出したままrouter-viewでメイン画面だけを切り替える。 - ログインしてないときは
/に強制的にリダイレクトする
firebase は v8 です。
用意
インストールとバージョン
vue cli, firebase-tools 関連のインストール、firebase 自体の準備は下記など参照のこと。
この記事で試したときの、各コマンドのバージョンは以下の通り。
$ npm -v
7.21.0
$ yarn -v
1.22.11
$ node -v
v14.17.4
$ firebase --version
9.16.6
$ vue --version
@vue/cli 4.5.13
vue cli は 3 以上でないと create コマンドは使用できないぽい。
firebase はプロジェクトをひとつ作成し、web アプリケーションをひとつ作成しておく。
Firebase Authentication の準備と apiKey の取得
下記を参照のこと。
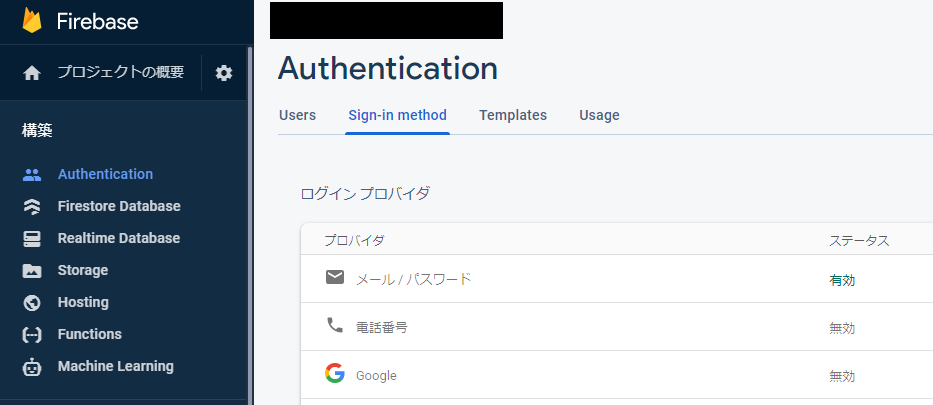
プロジェクトの Authentication の Sign-In Method のタブで、メール/アカウントの項目を有効にしておく。
プロジェクトの作成
vue + vuetify プロジェクトを作成。vue2 を使います。
$ vue create firebase-auth-sample
..
 Please pick a preset: Default ([Vue 2] babel, eslint)
...
$ cd firebase-auth-sample
$ vue add vuetify
 WARN  There are uncommitted changes in the current repository, it's recommended to commit or stash them first.
? Still proceed? Yes
...
? Choose a preset: Default (recommended)
...
$
firebase の初期化。すでに作成済みのプロジェクトを使用。
$ firebase init hosting
Please select an option: Use an existing project
? Select a default Firebase project for this directory: fir-hider-sample-2021-01 (yourprojectname)
i  Using project fir-hider-sample-2021-01 (yourprojectname)
? What do you want to use as your public directory? dist
? Configure as a single-page app (rewrite all urls to /index.html)? No
? Set up automatic builds and deploys with GitHub? No
✔  Wrote dist/404.html
✔  Wrote dist/index.html
public の代わりに dist を指定する。あとはデフォルトで OK。
firebase. vue-router, mdi-font を yarn で追加しておく。 mdi-font は、アイコン類を使わなければ不要。
$ yarn add firebase@^8.10.0
$ yarn add firebaseui@^5.0.0
$ yarn add vue-router@^3.2.0
$ yarn add @mdi/font
日本語版の firebaseui-jp を使う場合はそれも追加する。firebase は 9.0.0 だと import でエラーが出たりしたので、バージョンを指定してます。
vue-router も最新のものだと vue2 でうまく動かない可能性があるので、バージョンを指定します。
動作確認
$ yarn serve
  App running at:
  - Local:   http://localhost:8080/
  - Network: http://127.0.0.1:8080/
ブラウザで http://localhost:8000 にアクセスする。
こんな感じの画面になればOK。
firebase コマンドでも試しておく。
$ yarn build
$ firebase serve
i  hosting: Serving hosting files from: dist
✔  hosting: Local server: http://localhost:5000
ブラウザで http://localhost:5000 にアクセスして、同じ画面が出たらOK。
コードを書く
ファイル構成はこんなかんじで。
$ tree src
src
├── App.vue
├── components
│   ├── HomeView.vue
│   ├── LoginView.vue
│   └── LogoutView.vue
├── main.js
├── plugins
│   └── vuetify.js
└── routes
    └── index.js
どこかので時点で ESLint の仕様の変更?か jsconfig の出力内容の変更か何かがあったようで、vue ファイルはひとつの単語では許してもらえなくなったぽい(たとえば Home.vue というファイル名は弾かれる)。そのため、ファイル名を二つの単語にしてます。
main.js
firebase の apiKey 関連のコードはここに書いておく。firebaseConfig の部分は、環境変数を読む形にする方法もあり。
import Vue from 'vue';
import vuetify from './plugins/vuetify';

import '@mdi/font/css/materialdesignicons.css';     // mdi-xxx のために必要
import router from './routes/index';                // router

import App from './App.vue';

import firebase from 'firebase/app';
// 以下に apiKey のコードを貼る
var firebaseConfig = {
  apiKey: "xxxxxxxxxxxxxxxxxxxxxxxxxxxxxxxxxxxxxxx",
  authDomain: "yourprojectname.firebaseapp.com",
  projectId: "yourprojectname",
  storageBucket: "yourprojectname.appspot.com",
  messagingSenderId: "yyyyyyyyyyyyyyy",
  appId: "zzzzzzzzzzzzzzzzzzzzzzzzzzzzzzzzzzzz"
};
// Initialize Firebase
firebase.initializeApp(firebaseConfig);

Vue.config.productionTip = false

new Vue({
  vuetify,
  router,  // router を使う
  render: h => h(App)
}).$mount('#app')
App.vue
ページ上部に固定のバーを置いて、メイン画面は router で切り替える。デフォルトでは Home を表示する。
firebase.auth().onAuthStateChanged() は、認証の状態に変更が起こると呼ばれるので、そこでサインイン、サインアウトの表示を切り替える。
<template>
  <v-app>
    <v-app-bar
      app
      color="primary"
      dark
    >

      <v-toolbar-title class="text-h6">
        <span>Auth Sample</span>
      </v-toolbar-title>

      <v-spacer></v-spacer>

      <v-btn icon to="/">
          <v-icon>mdi-home</v-icon>
      </v-btn>

      <v-btn v-if="isLogin==false"
          outlined
          to="/login"
      >
        Sign In
      </v-btn>
      <v-btn v-else
          outlined
          to="/logout"
      >
          {{ loginUser.displayName }}
      </v-btn>

    </v-app-bar>

    <v-main>
      <router-view/>
    </v-main>
  </v-app>
</template>

<script>
import firebase from 'firebase/app'
export default {
    name: 'App',
    data: () => ({
        isLogin: false,
        loginUser: null,
    }),
    mounted(){
        const tmp = this;
        firebase.auth().onAuthStateChanged(user => {
            console.log("onAuthStateChanged", user);

            // ログイン状態の取得
            if ( user != null ) {
                tmp.isLogin = true;
                tmp.loginUser = user;
            }else{
                tmp.isLogin = false;
                tmp.loginUser = null;
            }
        });
    },
}
</script>
routes/index.js
vue-router を使って、パスに対応する表示内容を対応付ける。
import Vue from 'vue';
import Router from 'vue-router';
import Home from   '../components/HomeView';
import Login from  '../components/LoginView';
import Logout from '../components/LogoutView';

Vue.use(Router);

export default new Router({
  mode: 'history',
  routes: [
    {
      path: '/',
      name: 'home',
      component: Home
    },
    {
      path: '/login',
      name: 'login',
      component: Login
    },
    {
      path: '/logout',
      name: 'logout',
      component: Logout
    }
  ]
});
components/LoginView.vue
ログイン画面を表示する。Sign-In の UI の部分は firebase-ui-auth をそのまま使用。
未登録のメールアドレスを入れると、自動的に登録モードになる。kiyaku と policy はコードを書いてないので、クリックすると 404 エラーになる。
<template>
  <v-container>
    <h1>ログイン</h1>
    <div id="firebaseui-auth-container"></div>
  </v-container>
</template>

<script>
import firebase from 'firebase/app';
/*
// 上のでダメな場合は下をためす
import * as firebase from 'firebase/app'
*/

import "firebaseui/dist/firebaseui.css";
// require("firebaseui/dist/firebaseui.css"); // 上がだめならこれ
import "firebase/auth";
import * as firebaseui from 'firebaseui';
// import firebaseui from 'firebaseui' // 上がダメならこれ


export default {
    name: "Login",
    mounted(){
        let user = firebase.auth().currentUser;
        console.log ( user );

          var uiConfig = {
          signInSuccessUrl: '/', // ログインに成功したときに飛ぶページ
          signInOptions: [
            {
              provider: firebase.auth.EmailAuthProvider.PROVIDER_ID
              //メール認証のみ使用する。google 認証などを使う場合はさらに羅列する。
            }
          ],

          tosUrl: '/kiyaku',           // 規約とかを書いたページ
          privacyPolicyUrl: '/policy'  // プライバシーポリシーを書いたページ
        };

        // firebase auth ui を使用
        let ui = new firebaseui.auth.AuthUI(firebase.auth());
        ui.start('#firebaseui-auth-container', uiConfig);
        // <div id="firebaseui-auth-container"></div> の部分にUIを展開する
    },
}
</script>
components/LogoutView.vue
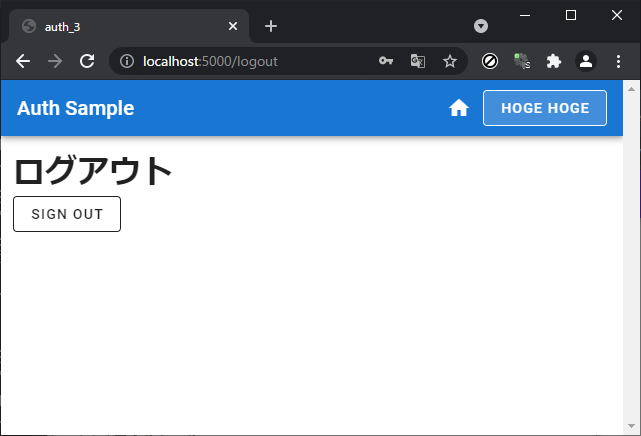
ボタンを押すと確認なくログアウトする。
<template>
  <v-container>
    <h1>ログアウト</h1>
    <v-btn
        outlined
        @click="signOut"
    >
        Sign Out
    </v-btn>
  </v-container>
</template>
<script>
import firebase from 'firebase/app';
export default {
    methods: {
        signOut: function () {
            firebase.auth().signOut().then(() => {
                // ログアウトに成功した場合は / に強制遷移する
                this.$router.push('/');
            });
        }
    }
}
</script>
components/HomeView.vue
デフォルト / 画面。
<template>
  <v-container>
    <h1>ホーム画面</h1>
  </v-container>
</template>
実行
$ yarn build
$ firebase serve
i  hosting: Serving hosting files from: dist
✔  hosting: Local server: http://localhost:5000
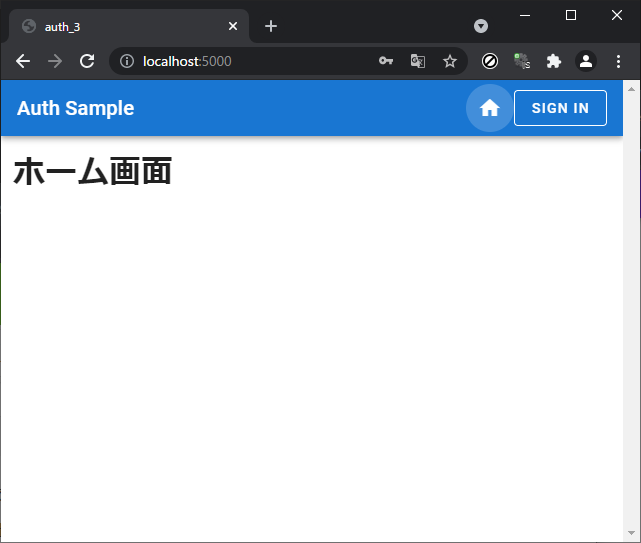
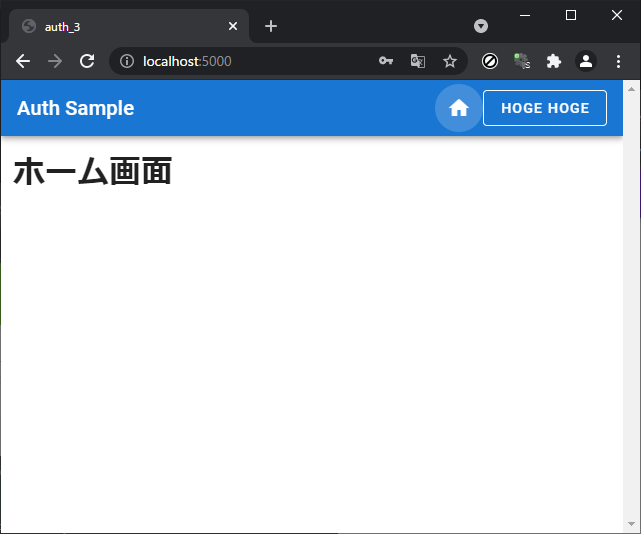
これで http://localhost:5000 をブラウザで開くと、下記画面が出るはず。出ない場合はエラーメッセージやブラウザのコンソールを確認。
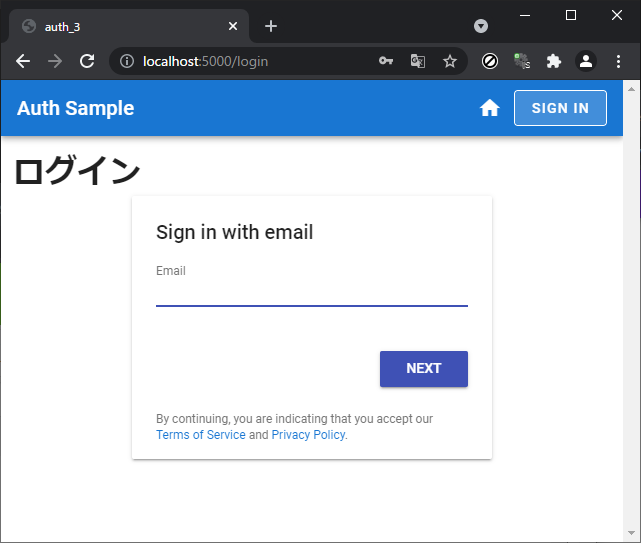
右上の Sign In を押すと次の画面になる。
メールアドレスを入力する。
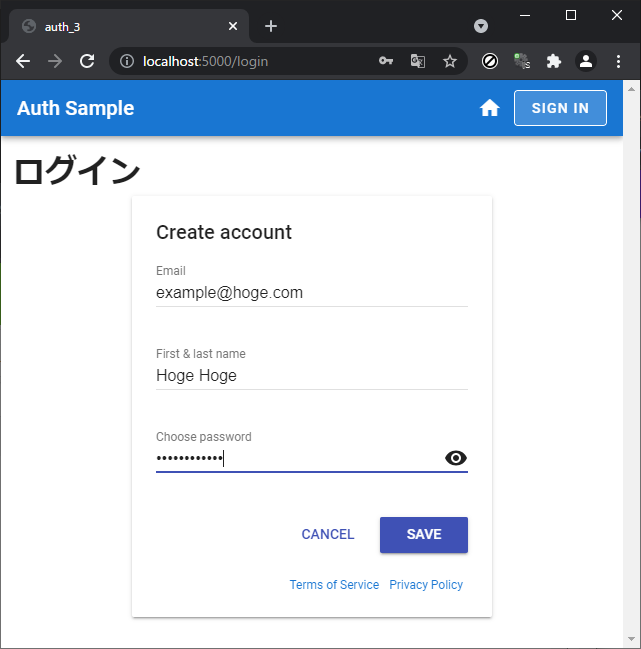
未登録のアドレスを入れると、自動的に登録モードになる。名前とパスワードを入れると登録されて、ログイン状態になる。
ログインできると、右上の表示が登録した名前になる。
ログインしている状態で、右上の名前のところを押すと、ログアウト画面になる。ここで Sign out を押すと、ログアウトしてホーム画面に戻る。
ログイン状態のチェック
firebase.auth().currentUser を取得して、null でなければログインしている。これを使って、ログイン時とそうでないときの表示を切り替えればOK(多分)。
メールアドレスが確認済みかどうかは firebase.auth().emailVerified で取得できる。
このへんは下記参照のこと
おわり
分かってしまえば簡単(有限)だけど、わからないと無限にわからない「フレームワーク問題」ってどうにかなりませんかね。
