内容
Nuxt3 + Firebase v9 を使うときに発生する諸問題についての対処法に関するメモです。
- Nuxt3 + Firebase の設定方法
- Firebase への deploy
-- nitro を使わない無料(SPARK)プランでの deploy
-- nitro server の deploy 先 region の変更
-- nitro を使う有料(BLAZE)プランでの deploy
参考
functions (ntro server) の deploy 時のエラーは下記も参照のこと。
準備
Vue3 相当なので firebase は v9 を使います。なお、firebase のプロジェクトは作成済みという前提です。
Firebase の初期化やツールのインストールなどは下記を見てください。v8 用の記事ですが、プロジェクトの作成と firebase-tools のインストール、使い方は v9 になっても同じです。
$ firebase --version
12.1.0
$ nuxi -v
Nuxi 3.5.1
$ node -v
v16.16.0
# firebase functions が v16 を要求するため
$ yarn -v
1.22.19
$ npm -v
9.6.7
初期化
$ nuxi create nuxt-firebase-app
$ cd nuxt-firebase-app
$ yarn
$ firebase init
Hosting, Functions と Emulator (Authentication, Hosting, Functions) だけ有効にしています。他も必要なら、他も有効にします。
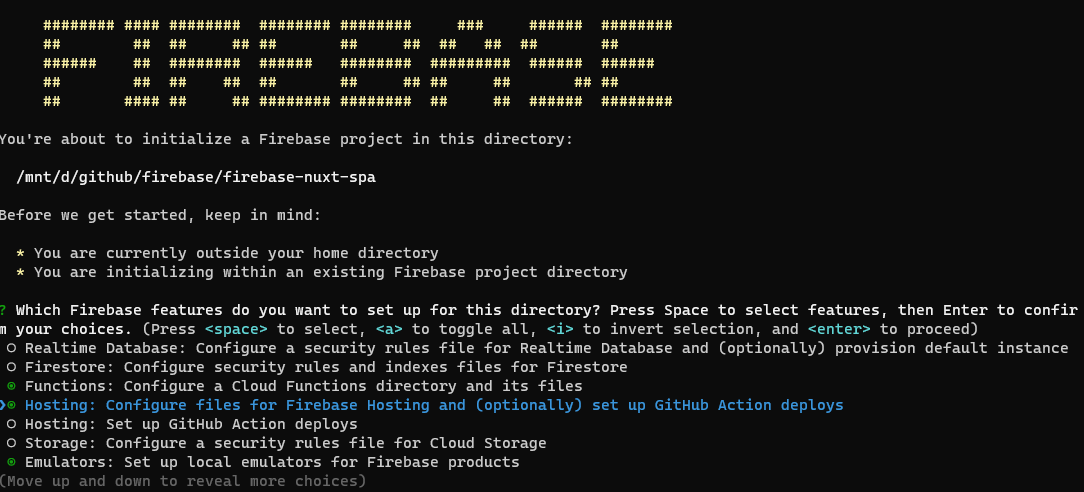
functions は nitro サーバの deploy のために必要です(後述しますが、SSRを使用しない場合は必要ありません)。
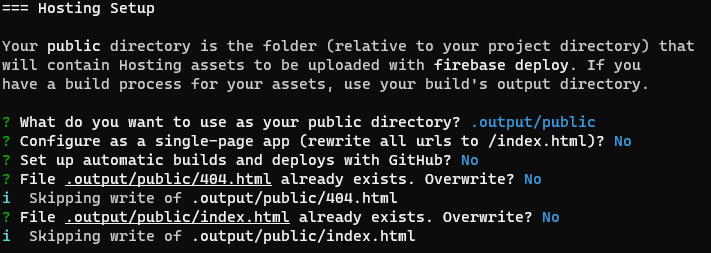
Hosting Setup では public directory に .output/public を指定します。他はデフォルトのままでOKです。
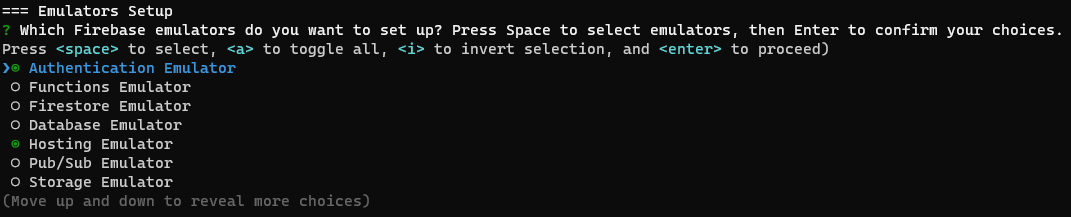
Emulator は Authentication、Hosting, Functions を有効化しています。Emulator を使用しない場合は不要です。

全体のログは下記のとおりです。プロジェクトは、初期化済みのものを選びます。
$ firebase init

     ######## #### ########  ######## ########     ###     ######  ########
     ##        ##  ##     ## ##       ##     ##  ##   ##  ##       ##
     ######    ##  ########  ######   ########  #########  ######  ######
     ##        ##  ##    ##  ##       ##     ## ##     ##       ## ##
     ##       #### ##     ## ######## ########  ##     ##  ######  ########

You're about to initialize a Firebase project in this directory:

  /mnt/d/github/firebase/your-project-name

Before we get started, keep in mind:

  * You are currently outside your home directory
  * You are initializing within an existing Firebase project directory

? Which Firebase features do you want to set up for this directory? Press Space to select features, then Enter to confirm your choices. Functions: Configure a Cloud Functions directory and its files, Hosting: Configure files for Firebase Hosting and (optionally) set up GitHub Action deploys, Emulators: Set up local emulators for Firebase products

=== Project Setup

First, let's associate this project directory with a Firebase project.
You can create multiple project aliases by running firebase use --add,
but for now we'll just set up a default project.

i  Using project your-project-name (your-project-name)

=== Functions Setup
Let's create a new codebase for your functions.
A directory corresponding to the codebase will be created in your project
with sample code pre-configured.

See https://firebase.google.com/docs/functions/organize-functions for
more information on organizing your functions using codebases.

Functions can be deployed with firebase deploy.

? What language would you like to use to write Cloud Functions? JavaScript
? Do you want to use ESLint to catch probable bugs and enforce style? No
✔  Wrote functions/package.json
✔  Wrote functions/index.js
✔  Wrote functions/.gitignore
? Do you want to install dependencies with npm now? Yes

added 234 packages, and audited 235 packages in 1m

15 packages are looking for funding
  run `npm fund` for details

found 0 vulnerabilities

=== Hosting Setup

Your public directory is the folder (relative to your project directory) that
will contain Hosting assets to be uploaded with firebase deploy. If you
have a build process for your assets, use your build's output directory.

? What do you want to use as your public directory? .output/public
? Configure as a single-page app (rewrite all urls to /index.html)? No
? Set up automatic builds and deploys with GitHub? No
? File .output/public/404.html already exists. Overwrite? No
i  Skipping write of .output/public/404.html
? File .output/public/index.html already exists. Overwrite? No
i  Skipping write of .output/public/index.html

=== Emulators Setup
? Which Firebase emulators do you want to set up? Press Space to select emulators, then Enter to confirm your choices. A
uthentication Emulator, Functions Emulator, Hosting Emulator
i  Port for auth already configured: 9099
? Which port do you want to use for the functions emulator? 5001
i  Port for hosting already configured: 5000
i  Emulator UI already enabled with port: (automatic)
? Would you like to download the emulators now? No

i  Writing configuration info to firebase.json...
i  Writing project information to .firebaserc...

✔  Firebase initialization complete!
firebase モジュールのインストール
これ、いつも超忘れるやつ!
firebase-admin などは nitro のビルドに必要です。
$ yarn add firebase
$ yarn add --dev firebase-admin firebase-functions firebase-functions-test
firebase.client.ts の作成
下記の記事に、エミュレータの設定を追記しています。
plugins/firebase.client.ts にファイルを作成します。
import { initializeApp } from 'firebase/app';
import { getFunctions, connectFunctionsEmulator } from "firebase/functions";
//import { getFirestore, connectFirestoreEmulator } from "firebase/firestore";
//import { getStorage, connectStorageEmulator } from "firebase/storage";
import { getAuth, connectAuthEmulator } from "firebase/auth";

import { defineNuxtPlugin } from '#app';

export default defineNuxtPlugin(() => {

    const firebaseConfig = {
      apiKey: "",
      authDomain: "",
      databaseURL: "",
      projectId: "",
      storageBucket: "",
      messagingSenderId: "",
      appId: ""
    };
    initializeApp(firebaseConfig);

    const isEmulating = window.location.hostname === "localhost";
    if (isEmulating) {
        const auth = getAuth();
        connectAuthEmulator(auth, "http://localhost:9099");

        //const storage = getStorage();
        //connectStorageEmulator(storage, "localhost", 9199);

        //const db = getFirestore();
        //connectFirestoreEmulator(db, 'localhost', 8080);

        const functions = getFunctions();
        connectFunctionsEmulator(functions, "localhost", 5001);
    }
});
上記コードでは、ローカル起動のときにエミュレータを使うように設定しています。エミュレータは Authentication と functions を有効にしています。他も有効化するときは、コメントを外します。
起動テスト
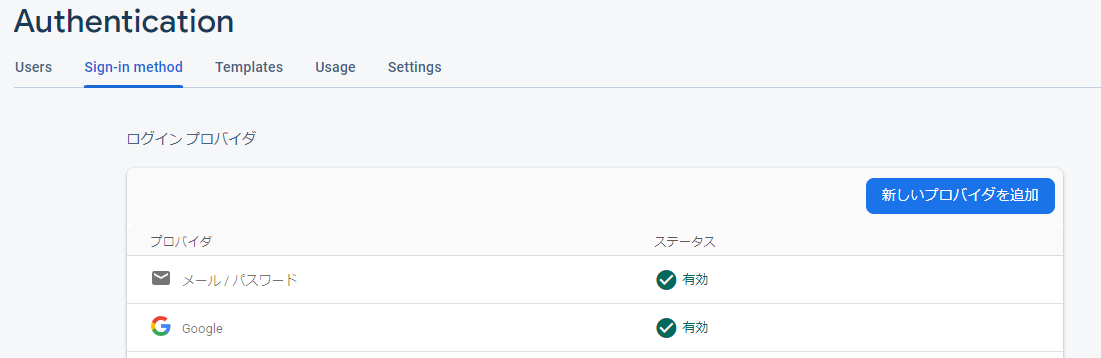
google 認証を使っています。Firebase のコンソールで、Google 認証を有効にしておく必要があります。
以下はログインのサンプルコードです。
<template>
  <div>
    <h1>Firebase Authentication Example</h1>
    <p class="lead">This example is a quick exercise to sign in with a google acount.</p>
    <div v-if="currentUser == null">
        <button type="button" role="button" @click="signIn">
            Sign In
        </button>
    </div>
    <div v-else>
        <button type="button" role="button" @click="signOutUser">
            Sign Out
        </button>
    </div>
  </div>
</template>

<script>
import {
    getAuth,
    onAuthStateChanged,
    GoogleAuthProvider,
    signInWithPopup,
    signOut,
} from 'firebase/auth';

export default {
    data: () => ({
        currentUser: null
    }),
    mounted(){
        onAuthStateChanged(getAuth(), (user) => {
            if ( user != null ){
                this.currentUser = user;
            }else{
                this.currentUser = null;
            }
        });
    },
    methods: {
        signIn() {
            var provider = new GoogleAuthProvider();
            signInWithPopup(getAuth(), provider)
            .then((auth) => {
                console.log("login", auth.user );
            })
            .catch((error) => {
                const errorCode = error.code;
                const errorMessage = error.message;
                console.log("faild to login", errorCode, errorMessage );
            });
        },
        signOutUser() {
            signOut(getAuth());
        }
    }
}
</script>
エミュレータを起動しておくと、ローカルだけでテストできます。エミュレータの設定については、下記を参照してください。
$ firebase emulators:start
i  emulators: Starting emulators: auth, hosting
i  hosting: Serving hosting files from: dist
✔  hosting: Local server: http://127.0.0.1:5000
i  ui: Emulator UI logging to ui-debug.log

┌─────────────────────────────────────────────────────────────┐
│ ✔  All emulators ready! It is now safe to connect your app. │
│ i  View Emulator UI at http://127.0.0.1:4000                │
└─────────────────────────────────────────────────────────────┘

┌────────────────┬────────────────┬────────────────────────────┐
│ Emulator       │ Host:Port      │ View in Emulator UI        │
├────────────────┼────────────────┼────────────────────────────┤
│ Authentication │ 127.0.0.1:9099 │ http://127.0.0.1:4000/auth │
├────────────────┼────────────────┼────────────────────────────┤
│ Hosting        │ 127.0.0.1:5000 │ n/a                        │
└────────────────┴────────────────┴────────────────────────────┘
  Emulator Hub running at 127.0.0.1:4400
  Other reserved ports: 4500

Issues? Report them at https://github.com/firebase/firebase-tools/issues and attach the *-debug.log files.
この状態で、yarn dev してから、localhost:3000 を開きます。yarn dev でテストする場合は、Functions は使用されません。
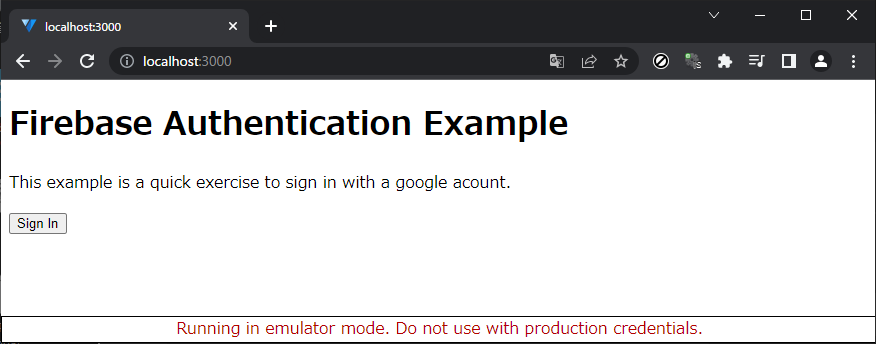
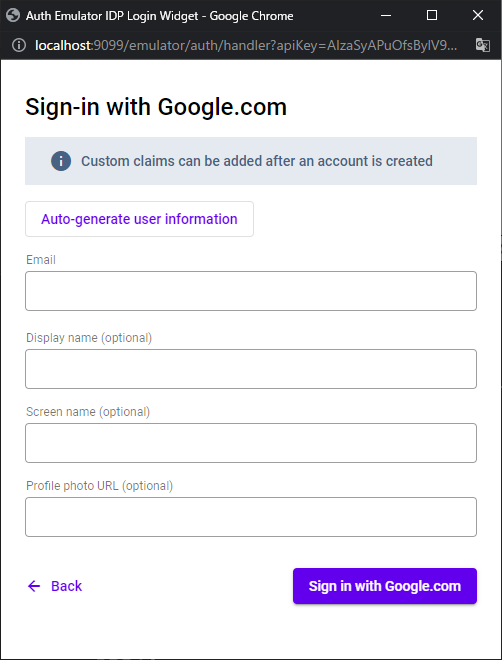
ページを開いたときの状態。Sign In のボタンを押すと、Google アカウントでログインするためのウィンドウがポップアップします。エミュレータ使用の場合は、下記のようなテストアカウント作成画面がでる(アカウントがエミュレータ上に作成されていない場合)ので、適当に情報を入れます。
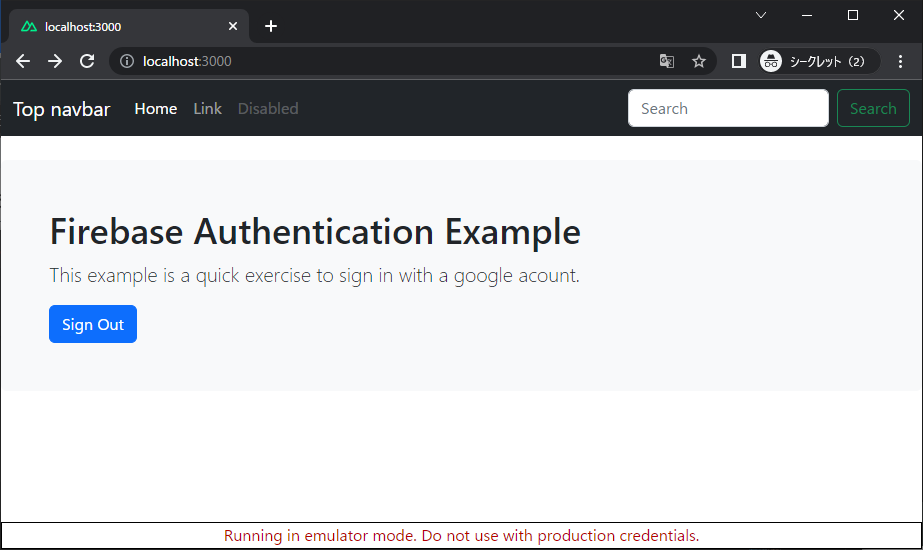
サインインするとこうなります。この状態で、サインアウトすると、最初の状態に戻ります。
firebase への deploy
nuxt3 は、デフォルトでは SSR を使うため、nitro サーバを作成します。firebase に deploy するときは、nitro サーバが Firebase Functions としてビルドされ server という名前の関数(Function)になります。
2022年12月現在、functions を使用するためには firebase のプロジェクトが blaze プラン (functions が使える状態)である必要があります。
つまり、デフォルトの SSR を使う設定では、deploy するためには有料プランにする必要があるということです。
ただし、Nuxt 3.0.0 では SSR を使わない設定で build することも可能になったため、SPA として build することで無料プランで deploy することも可能です。
無料プランで deploy する方法については、後述します。
SSR (nitro server) を使う設定で deploy する方法
基本は、下記に書かれている通りです。
firebase.json の書き換え
functions と hosts の項目に追記します。
{
  "hosting": {
    "public": ".output/public",
    "cleanUrls": true,
    "rewrites": [
      {
        "source": "**",
        "function": "server"
      }
    ],
    "ignore": [
      "firebase.json",
      "**/.*",
      "**/node_modules/**"
    ]
  },
  "emulators": {
    "auth": {
      "port": 9099
    },
    "hosting": {
      "port": 5000
    },
    "ui": {
      "enabled": true
    },
    "singleProjectMode": true,
    "functions": {
      "port": 5001
    }
  },
  "functions": [
    {
      "source": ".output/server",
      "codebase": "nitro"
    },
    {
      "source": "functions",
      "codebase": "default",
      "ignore": [
        "node_modules",
        ".git",
        "firebase-debug.log",
        "firebase-debug.*.log"
      ]
    }
  ]
}
以下、上記の firebase.json の設定を使うものとします(ntro server を codebase: nitro とする)。
上記でダメな場合は、下記も試してください。
{
  "hosting": {
    "public": ".output/public",
    "cleanUrls": true,
    "rewrites": [
      {
        "source": "**",
        "function": "server"
      }
    ],
    "ignore": [
      "firebase.json",
      "**/.*",
      "**/node_modules/**"
    ]
  },
  "emulators": {
    "auth": {
      "port": 9099
    },
    "hosting": {
      "port": 5000
    },
    "ui": {
      "enabled": true
    },
    "singleProjectMode": true,
    "functions": {
      "port": 5001
    }
  },
  "functions": [
    {
      "source": ".output/server",
      "codebase": "default"
    },
    {
      "source": "functions",
      "codebase": "original",
      "ignore": [
        "node_modules",
        ".git",
        "firebase-debug.log",
        "firebase-debug.*.log"
      ]
    }
  ]
}
nuxt.config.ts へ追記
nitro の項目を追記します。
export default defineNuxtConfig({
  nitro: {
    preset: "firebase",
  },
  ...
}
firebase-admin などの追加
$ yarn add --dev firebase-admin firebase-functions
nitro server のビルドに必要です。
ローカルでのテスト
$ yarn build
$ firebase emulators:start
firebase の emulator が error になって落ちる場合
エミュレータの起動中に Error: An unexpected error has occurred. という表示が出て落ちてしまうことがあります。ログを見たときに Could not find functions.yaml というエラーが出ている場合は、下記に書かれた方法で対処できます。
build するたびにコマンドを入力する必要があるので、package.json に下記のような記述を加えて yarn fix などとして対処するのがよさそうです。
  "scripts": {
    "build": "nuxt build",
    "dev": "nuxt dev",
    "generate": "nuxt generate",
    "preview": "firebase emulators:start",
    "postinstall": "nuxt prepare",
    "fix": "mkdir .output/server/node_modules/.bin && cp -r node_modules/.bin/firebase-functions .output/server/node_modules/.bin && cp -rfu node_modules/firebase-functions/ .output/server/node_modules"
  },
deploy 時にエラーが出る場合でも、同じ方法で直ることがあります。
deploy
$ firebase deploy
node のバージョンが 16 以外だと怒られるかもしれません。
nitro server の deploy 先の region を変更する
デフォルトでは us-central1 に設定されています。他のリソースが asia-northeast1 とかにある場合、nitro server も asia-northeast1 に持ってきたい場合は、下記のようにすれば良いようです。
firebase deploy する直前に
.output/server/chunks/nitro/firebase.mjs のコードを書き換えます。
const server = functions.https.onRequest(toNodeListener(nitroApp.h3App));
この部分を、
const server = functions.region('asia-northeast1').https.onRequest(toNodeListener(nitroApp.h3App));
このように書き換えます。これで deploy すると server のデプロイ先の region を変更できます。
今のところ、この方法でしか変更できないぽいです。
nitro server なしで SPA として無料プランで deploy する
nuxt.config.ts を下記のようにします。
export default defineNuxtConfig({
  ssr: false,
  ...
}
これで functions なしで(nitroなしで)deploy できます。
ビルド
yarn build ではなく yarn generate します。
$ yarn generate
テスト
firebase emulators:start もしくは、エミュレータを使用しない場合は furebase serve --only hosting とします。
これで、http://localhost:5000 をブラウザで開いて、ページが表示されたら成功です。
deploy
普通に deploy します。
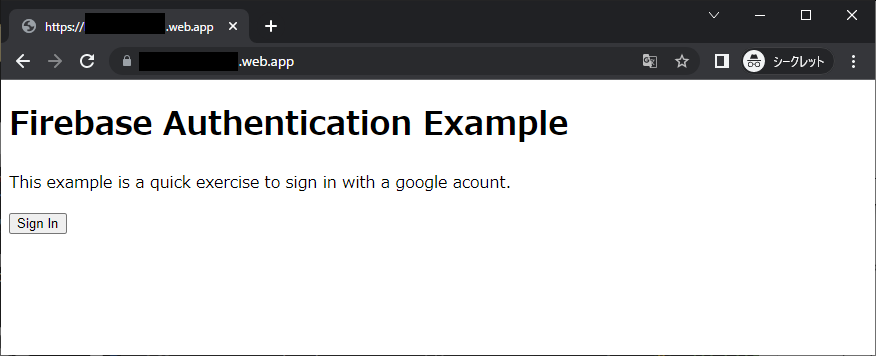
$ firebase deploy
deploy 先をブラウザで開いて確認します。
おまけ
script setup を使ったログインのサンプルコード
<template>
  <div>
    <h1>Firebase Authentication Example</h1>
    <p>This example is a quick exercise to sign in with a google acount.</p>
    <div v-if="currentUser == null">
        <button type="button" role="button"
            @click="signIn">
            Sign In
        </button>
    </div>
    <div v-else>
        <button type="button" role="button"
            @click="signOutUser">
            Sign Out
        </button>
    </div>
  </div>
</template>

<script setup>
import {
    getAuth,
    onAuthStateChanged,
    GoogleAuthProvider,
    signInWithPopup,
    signOut,
} from 'firebase/auth';

import {ref} from 'vue';

const currentUser = ref(null);

onMounted(() => {
    onAuthStateChanged(getAuth(), (user) => {
        if ( user != null ){
            currentUser.value = user;
        }else{
            currentUser.value = null;
        }
    });
});

function signIn()
{
    const provider = new GoogleAuthProvider();
    signInWithPopup(getAuth(), provider)
    .then((auth) => {
        console.log("login", auth );
    })
    .catch((error) => {
        console.log("faild to login", error.code, error.message );
    });
}

function signOutUser()
{
    signOut(getAuth());
}

</script>
実行結果は、前のコードと同じです。