はじめに
HTTP POST で Azure IoT Hub にメッセージを送信するメモです。

Node.js & MQTT のメモはNode.jsでAzure IoT Hubにテレメトリを送信するサンプルコードを動かすメモにまとめています。
公式ドキュメントはこちら:IoT Hub REST。
欲しい情報が全然見つからなかったので、下記の記事も参考にさせていただきました。
- Azure IoT Hubを生MQTTS(mosquitto)やHTTP RESTで使う方法 (@ma2shita さん)
- HTTP REST APIでAzure IoT Hubにメッセージを送信する (C#)
(2021/02/11 追記)
リファレンス見つかりました。
→デバイスからメッセージを送信する(https://docs.microsoft.com/ja-jp/rest/api/iothub/device/senddeviceevent)
準備
-
手順を参考に、IoT Hub をデプロイする(スケールは
F1を選択)。
HTTP POSTでメッセージを送信する
URL
https://{IOT_HUB_NAME}.azure-devices.net/devices/{DEVICE_ID}/messages/events?api-version=2018-06-30
| 項目 | 内容 | 備考 |
|---|---|---|
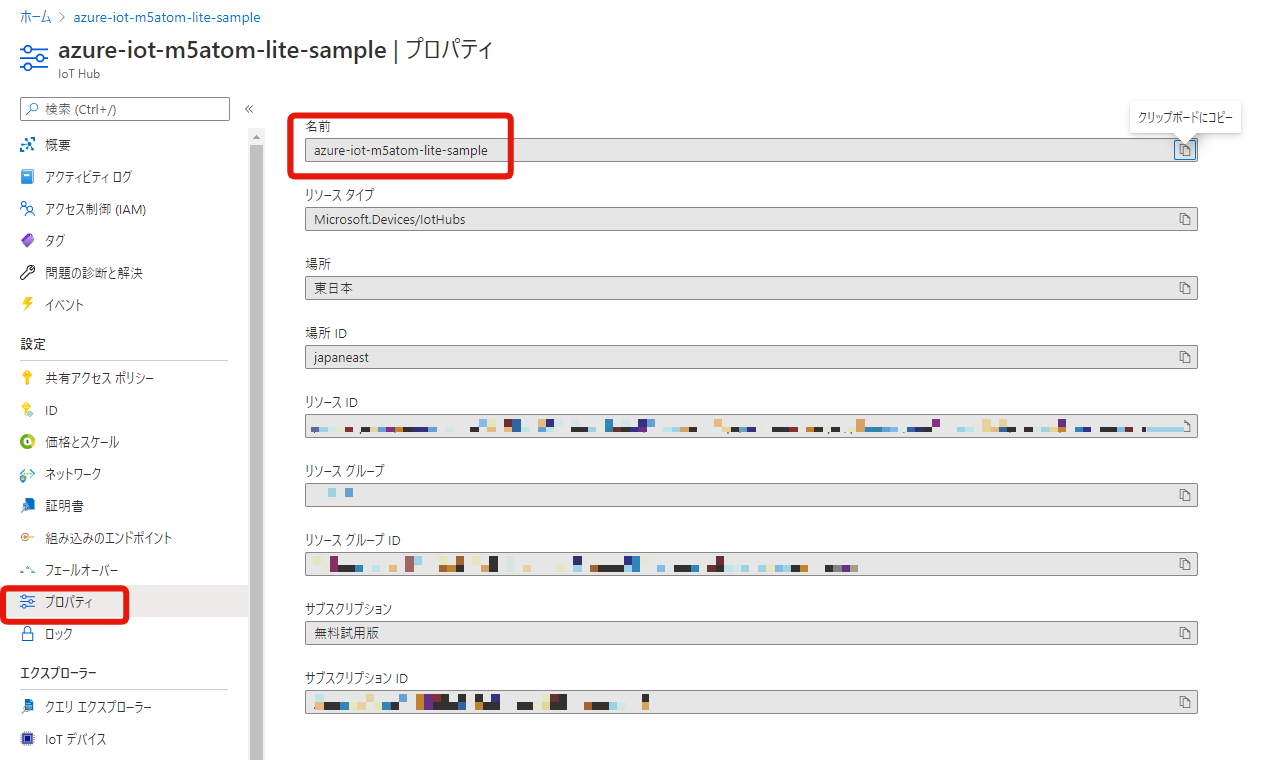
IOT_HUB_NAME |
Azure IoT Hubの名前 |
サイドバー > プロパティ > 名前から取得可能 |
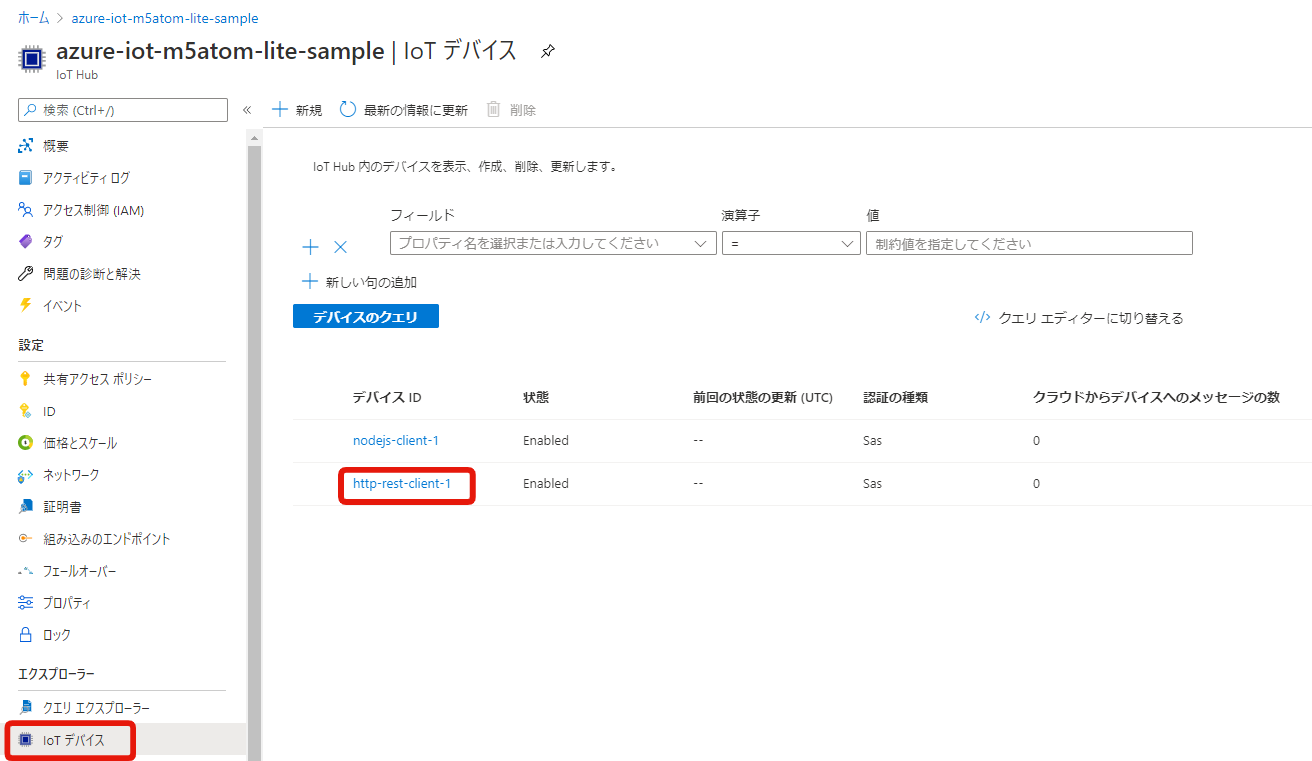
DEVICE_ID |
デバイスID |
サイドバー > IoTデバイス > デバイス一覧 > デバイスIDから取得可能 |
私の場合、以下のようになります。
https://azure-iot-m5atom-lite-sample.azure-devices.net/devices/http-rest-client-1/messages/events?api-version=2018-06-30
HTTPヘッダーにSASトークンを設定する
IoT Hub へのアクセスの制御に SAS トークンの発行方法が書いてあります。
今回は、Azure CLI を使用してみます。
Azure CLIのインストール
Azure Command-Line Interface (CLI) documentationから、Azure CLI をインストールします。
インストールできたらターミナルでazコマンドを実行してみましょう。
以下のように表示されれば OK です。
$az

Welcome to Azure CLI!
---------------------
Use `az -h` to see available commands or go to https://aka.ms/cli.

Telemetry
---------
The Azure CLI collects usage data in order to improve your experience.
The data is anonymous and does not include commandline argument values.
The data is collected by Microsoft.

You can change your telemetry settings with `az configure`.


     /\
    /  \    _____   _ _  ___ _
   / /\ \  |_  / | | | \'__/ _\
  / ____ \  / /| |_| | | |  __/
 /_/    \_\/___|\__,_|_|  \___|

(略)
忘れずに、Azure CLI でもログインしておきます。
$ az login
SASトークンを発行する
ターミナルで以下のコマンドを実行します。
$ az iot hub generate-sas-token --hub-name {IOT_HUB_NAME}
私の場合はこうなります。
$ az iot hub generate-sas-token --hub-name azure-iot-m5atom-lite-sample
実行すると、SAS トークンが発行されました。
{
  "sas": "SharedAccessSignature sr=azure-iot-m5atom-lite-sample.azure-devices.net&sig=xxxxxxxxxxxxxxxxxxxxxxxxxxxxxxxxxxxxxxxxxxxxx&se=xxxxxxxxxxxxxxx&skn=iothubowner"
}
こちらを HTTP ヘッダーのAuthorizationに設定します。
POSTする
CURL ではこんな感じのリクエストになります。
curl -i -X POST \
   -H "Content-Type:application/json" \
   -H "Authorization:SharedAccessSignature sr=azure-iot-m5atom-lite-sample.azure-devices.net&sig=xxxxxxxxxxxxxxxxxxxxxxxxxxxxxxxxxxxxxxxxxxxxx&se=xxxxxxxxxxxxxxx&skn=iothubowner" \
   -d '"test"' \
 'https://azure-iot-m5atom-lite-sample.azure-devices.net/devices/http-rest-client-1/messages/events?api-version=2018-06-30'
動作確認します。
前記事で作成した Node.js の受信プログラムを動かしておき、きちんと受信できるか確認します。
まとめ
Azure IoT Hub に HTTP POST でメッセージを送ることができました。
公式ドキュメントが読み解きにくくてちょっと迷いました。
メッセージを送る方法として、MQTT と HTTP POST はメリットデメリットがありそうですが、よく検討して使っていこうと思います。

