概要
簡易コーポレイトサイトアプリをAndroidで作成していきます。
Top画面・お問い合わせ画面の中身を作成していきます。
Top画面作成
fragment_home.xml(res > layout > fragment_top.xml)を編集します。
ConstraintLayout
デザインとコードの間にある「ComponentTree」を確認します。
「frameLayout」となっています。

これを変更して「ConstraintLayout」に変更します。
こちらのほうがレスポンシブデザインの画面を作りやすいということです。
右クリックで「Convert view....」をクリックします。

「ConstraintLayout」を選択して「Apply」します。

FrameLayoutからConstraintLayoutに変更されました。

textView削除
一旦余計なTextViewを削除します。
fragment_top.xmlのコードを編集して以下を削除します。
	<?xml version="1.0" encoding="utf-8"?>
	<androidx.constraintlayout.widget.ConstraintLayout xmlns:android="http://schemas.android.com/apk/res/android"
	    xmlns:tools="http://schemas.android.com/tools"
	    android:layout_width="match_parent"
	    android:layout_height="match_parent"
	    tools:context=".TopFragment">

-	    <!-- TODO: Update blank fragment layout -->
-	    <TextView
-	        android:layout_width="match_parent"
-	        android:layout_height="match_parent"
-	        android:text="@string/hello_blank_fragment" />

	</androidx.constraintlayout.widget.ConstraintLayout>
画像追加
Top画面には画像を挿入していきたいです。
PaletteからCommon > ImageViewを探し、ドラッグアンドドロップします。

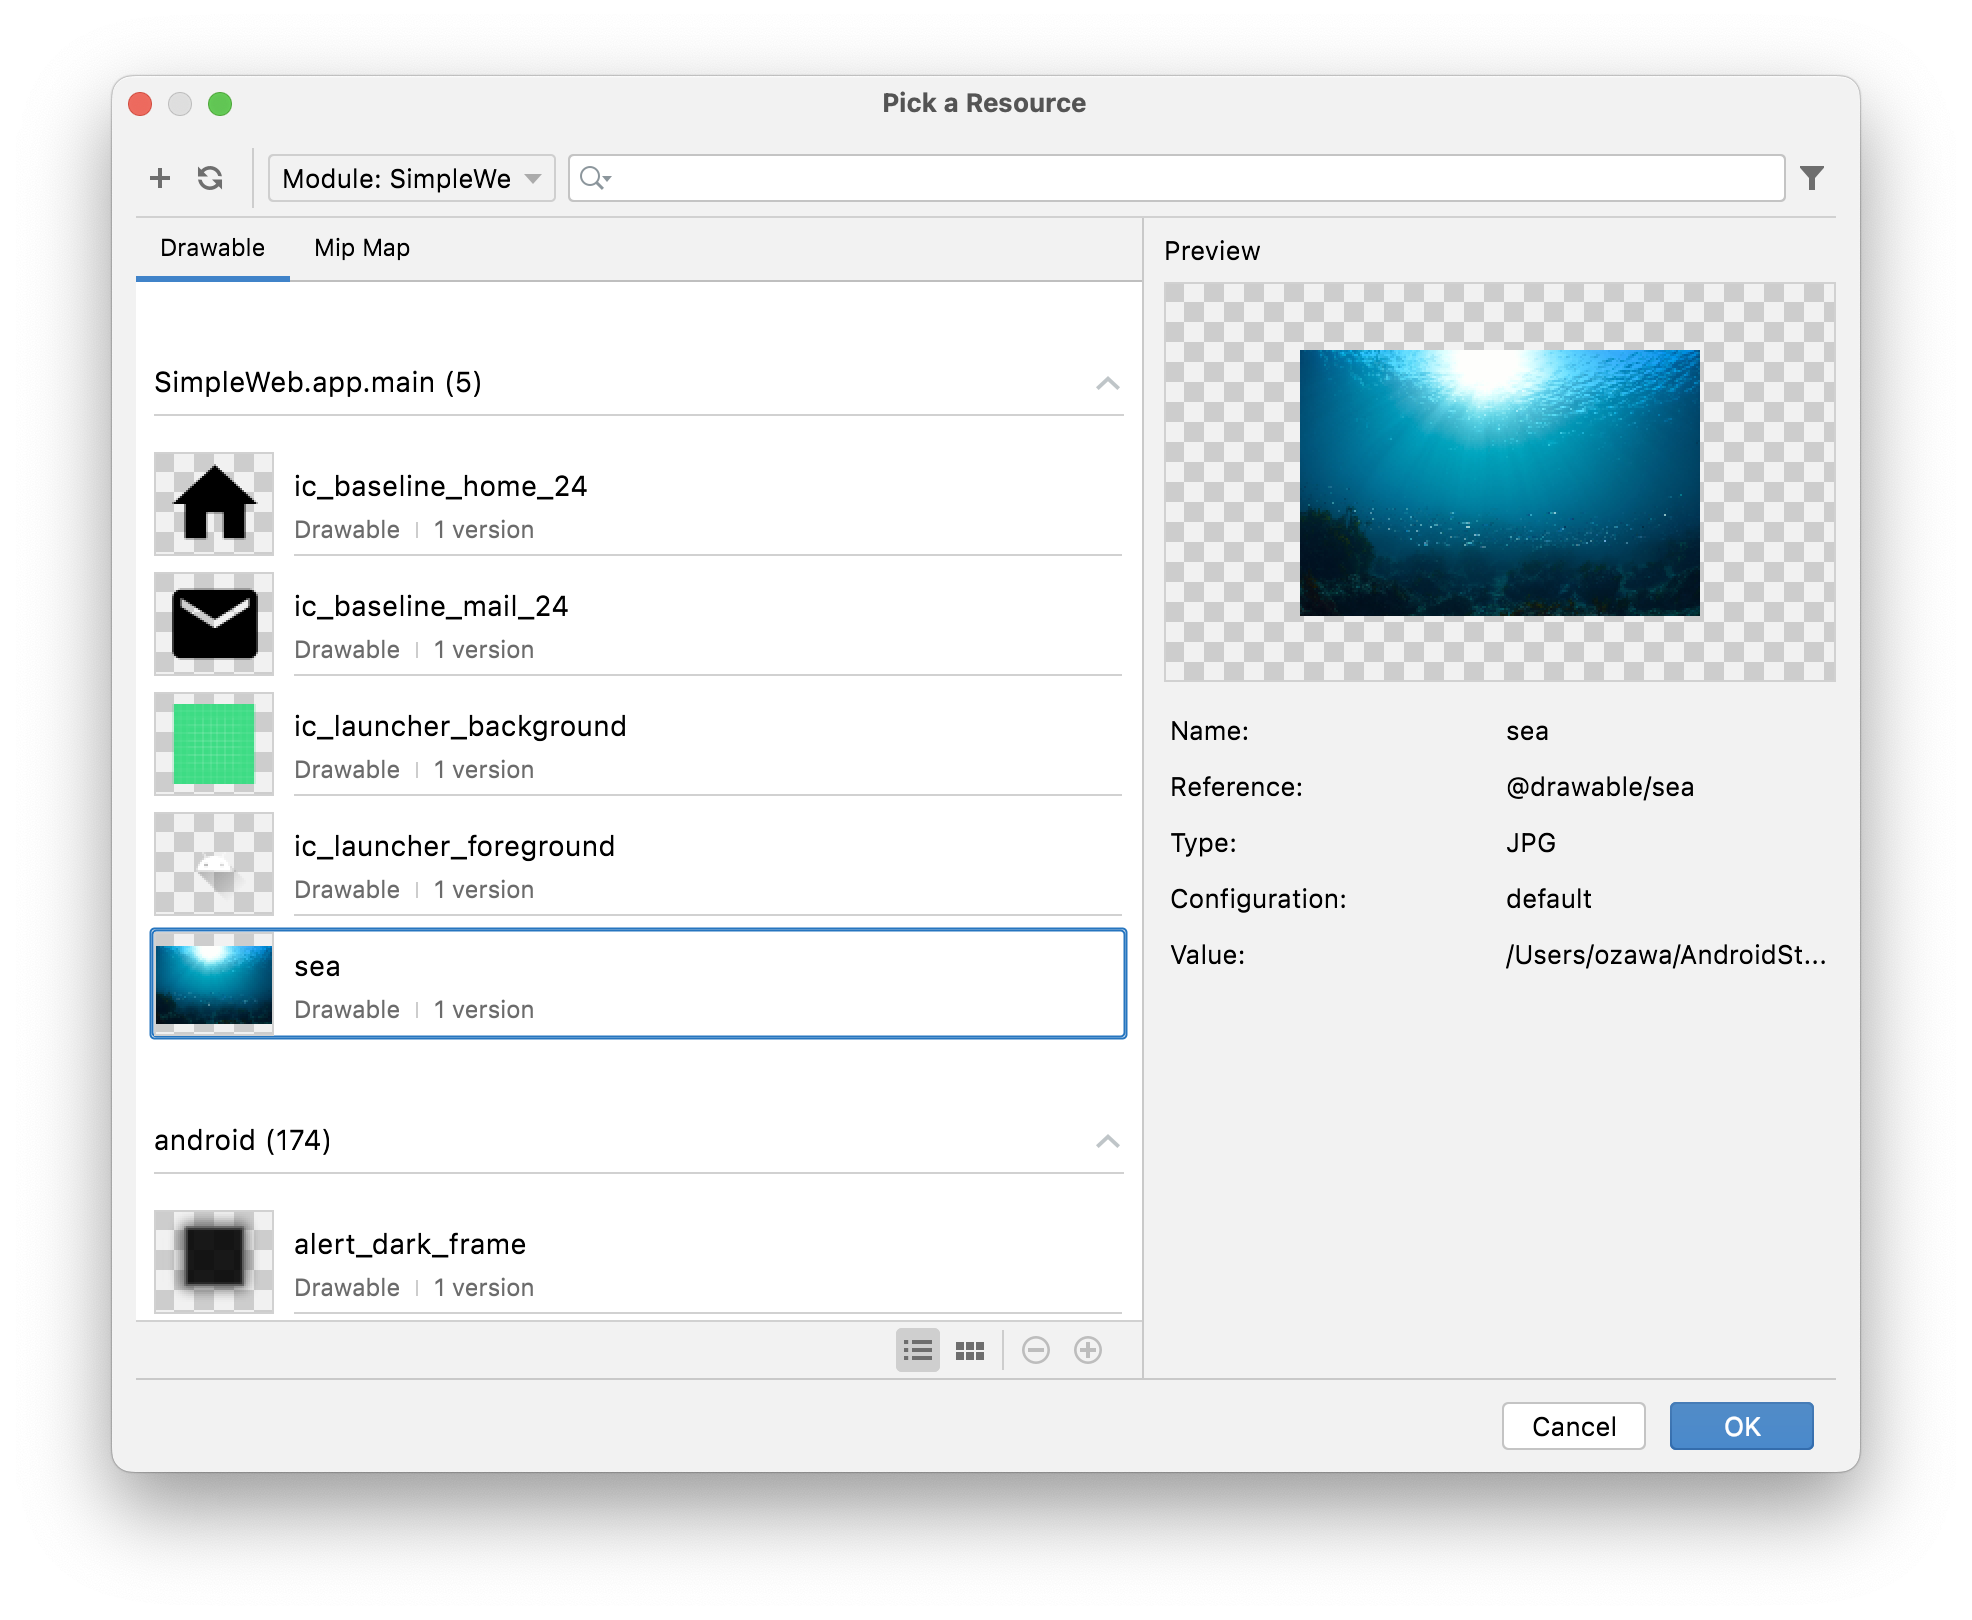
追加したい画像をImportします。

 インポートできたら、Drawbleの中から選びます。
 すると反映されます。

レイアウトを調整します。
まず、layoutWidgetで上・左右を0にします。
また、画像の上の余白がいらないので、表示位置をスクリーンにフィットさせるようにします。
    <?xml version="1.0" encoding="utf-8"?>
    <androidx.constraintlayout.widget.ConstraintLayout xmlns:android="http://schemas.android.com/apk/res/android"
        xmlns:app="http://schemas.android.com/apk/res-auto"
        xmlns:tools="http://schemas.android.com/tools"
        android:layout_width="match_parent"
        android:layout_height="match_parent"
        tools:context=".HomeFragment">


        <ImageView
            android:id="@+id/imageView"
            android:layout_width="match_parent"
            android:layout_height="wrap_content"
+           android:scaleType="fitStart"
            android:src="@drawable/sea"
            app:layout_constraintEnd_toEndOf="parent"
            app:layout_constraintStart_toStartOf="parent"
            app:layout_constraintTop_toTopOf="parent" />


    </androidx.constraintlayout.widget.ConstraintLayout>
タイトル追加
PaletteからTextViewをドラッグアンドドロップして設置します。
ドラッグアンドドロップで設置できたらデザインとコードを駆使しながらコードが下記のようになるようにします。(コードを以下の様に設置すればできますが、デザイン画面から編集して好きなように色々編集してみても楽しいです)
    <?xml version="1.0" encoding="utf-8"?>
    <androidx.constraintlayout.widget.ConstraintLayout xmlns:android="http://schemas.android.com/apk/res/android"
        xmlns:app="http://schemas.android.com/apk/res-auto"
        xmlns:tools="http://schemas.android.com/tools"
        android:layout_width="match_parent"
        android:layout_height="match_parent"
        tools:context=".HomeFragment">


        <ImageView
            android:id="@+id/imageView"
            android:layout_width="match_parent"
            android:layout_height="wrap_content"
            android:scaleType="fitStart"
            android:src="@drawable/sea"
            app:layout_constraintEnd_toEndOf="parent"
            app:layout_constraintStart_toStartOf="parent"
            app:layout_constraintTop_toTopOf="parent" />

+       <TextView
+           android:id="@+id/textView2"
+           android:layout_width="wrap_content"
+           android:layout_height="wrap_content"
+           android:layout_marginTop="100dp"
+           android:text="Bluecode,lifestyle developer."
+           android:textColor="#ffffff"
+           android:textSize="18sp"
+           app:layout_constraintEnd_toEndOf="parent"
+           app:layout_constraintHorizontal_bias="0.498"
+           app:layout_constraintStart_toStartOf="parent"
+           app:layout_constraintTop_toTopOf="@+id/imageView" />


    </androidx.constraintlayout.widget.ConstraintLayout>
<TextView
    android:id="@+id/textView2"
    android:layout_width="wrap_content"
    android:layout_height="wrap_content"
    android:layout_marginTop="100dp"
    android:text="Bluecode,lifestyle developer."
    android:textColor="#ffffff"
    android:textSize="18sp"
    app:layout_constraintEnd_toEndOf="parent"
    app:layout_constraintHorizontal_bias="0.498"
    app:layout_constraintStart_toStartOf="parent"
    app:layout_constraintTop_toTopOf="@+id/imageView" />
同様にサブタイトル、下の小見出しを追加して下記のようにしてTop画面を完成させます。
こちらはプログラムは必要ないので見た目だけできればOKです。
<?xml version="1.0" encoding="utf-8"?>
<androidx.constraintlayout.widget.ConstraintLayout xmlns:android="http://schemas.android.com/apk/res/android"
    xmlns:app="http://schemas.android.com/apk/res-auto"
    xmlns:tools="http://schemas.android.com/tools"
    android:layout_width="match_parent"
    android:layout_height="match_parent"
    tools:context=".TopFragment">

    <ImageView
        android:id="@+id/imageView"
        android:layout_width="wrap_content"
        android:layout_height="wrap_content"
        android:scaleType="fitStart"
        android:src="@drawable/sea"
        app:layout_constraintEnd_toEndOf="parent"
        app:layout_constraintStart_toStartOf="parent"
        app:layout_constraintTop_toTopOf="parent" />

    <TextView
        android:id="@+id/textView2"
        android:layout_width="wrap_content"
        android:layout_height="wrap_content"
        android:layout_marginTop="100dp"
        android:text="Bluecode,lifestyle developer."
        android:textColor="#ffffff"
        android:textSize="18sp"
        app:layout_constraintEnd_toEndOf="parent"
        app:layout_constraintHorizontal_bias="0.498"
        app:layout_constraintStart_toStartOf="parent"
        app:layout_constraintTop_toTopOf="@+id/imageView" />

    <TextView
        android:id="@+id/textView3"
        android:layout_width="wrap_content"
        android:layout_height="wrap_content"
        android:text="Bluecodeへようこそ"
        app:layout_constraintBottom_toBottomOf="@+id/imageView"
        app:layout_constraintEnd_toEndOf="parent"
        app:layout_constraintStart_toStartOf="@+id/imageView"
        app:layout_constraintTop_toBottomOf="@+id/textView2"
        app:layout_constraintVertical_bias="0.300" />

    <TextView
        android:id="@+id/textView6"
        android:layout_width="wrap_content"
        android:layout_height="wrap_content"
        android:layout_marginTop="24dp"
        android:text="最新情報を表示します"
        app:layout_constraintEnd_toEndOf="parent"
        app:layout_constraintStart_toStartOf="parent"
        app:layout_constraintTop_toBottomOf="@+id/textView3" />


</androidx.constraintlayout.widget.ConstraintLayout>
Contact画面作成
fragment_contact.xmlを編集していきます。
fragment_contact.xmlを開いて「split」を設定しておきます。
ConstraintLayout
Home画面同様、中央下部の「Component Tree」から「FlameLayout」を「ConstraintLayout」に変更しておきます。
レイアウト作成
デフォルトのTextViewを削除したら始めます。
ContactはHome画面とことなりEditText(plane text)を使っていきます。
ただ、使い方レイアウトの方法はほとんど同じです。
一旦、レイアウトを置けた状態のコードが以下のとおりです。
それぞれ、ContactFragment.ktで制御していく必要があるのでID名をわかりやすいように変更しています。
<?xml version="1.0" encoding="utf-8"?>
<androidx.constraintlayout.widget.ConstraintLayout xmlns:android="http://schemas.android.com/apk/res/android"
    xmlns:app="http://schemas.android.com/apk/res-auto"
    xmlns:tools="http://schemas.android.com/tools"
    android:layout_width="match_parent"
    android:layout_height="match_parent"
    tools:context=".ContactFragment">


    <TextView
        android:id="@+id/textView"
        android:layout_width="match_parent"
        android:layout_height="100dp"
        android:background="#3462eb"
        android:gravity="center_horizontal|center_vertical"
        android:text="お問合せフォーム"
        android:textColor="#ffffff"
        app:layout_constraintEnd_toEndOf="parent"
        app:layout_constraintStart_toStartOf="parent"
        app:layout_constraintTop_toTopOf="parent" />

    <EditText
        android:id="@+id/etName"
        android:layout_width="match_parent"
        android:layout_height="wrap_content"
        android:layout_marginStart="8dp"
        android:layout_marginTop="24dp"
        android:layout_marginEnd="8dp"
        android:ems="10"
        android:inputType="textPersonName"
        android:minHeight="48dp"
        android:text="お名前"
        app:layout_constraintEnd_toEndOf="parent"
        app:layout_constraintStart_toStartOf="parent"
        app:layout_constraintTop_toBottomOf="@+id/textView" />

    <TextView
        android:id="@+id/nameErr"
        android:layout_width="wrap_content"
        android:layout_height="wrap_content"
        android:layout_marginStart="8dp"
        android:layout_marginTop="8dp"
        android:text="お名前は必須です。"
        android:textColor="#FF0000"
        app:layout_constraintStart_toStartOf="parent"
        app:layout_constraintTop_toBottomOf="@+id/etName" />

    <EditText
        android:id="@+id/etEmail"
        android:layout_width="match_parent"
        android:layout_height="wrap_content"
        android:layout_marginStart="8dp"
        android:layout_marginTop="16dp"
        android:layout_marginEnd="8dp"
        android:ems="10"
        android:inputType="textEmailAddress"
        android:minHeight="48dp"
        android:text="Email"
        app:layout_constraintEnd_toEndOf="parent"
        app:layout_constraintStart_toStartOf="parent"
        app:layout_constraintTop_toBottomOf="@+id/nameErr" />

    <TextView
        android:id="@+id/emailErr"
        android:layout_width="wrap_content"
        android:layout_height="wrap_content"
        android:layout_marginStart="8dp"
        android:layout_marginTop="8dp"
        android:text="Emailは必須かつEmailの形式で入力してください。"
        android:textColor="#FF0000"
        app:layout_constraintStart_toStartOf="parent"
        app:layout_constraintTop_toBottomOf="@+id/etEmail" />

    <EditText
        android:id="@+id/etBody"
        android:layout_width="match_parent"
        android:layout_height="wrap_content"
        android:layout_marginStart="8dp"
        android:layout_marginTop="16dp"
        android:layout_marginEnd="8dp"
        android:ems="10"
        android:inputType="textPersonName"
        android:minHeight="48dp"
        android:text="お問合せ内容"
        app:layout_constraintEnd_toEndOf="parent"
        app:layout_constraintStart_toStartOf="parent"
        app:layout_constraintTop_toBottomOf="@+id/emailErr" />

    <TextView
        android:id="@+id/bodyErr"
        android:layout_width="wrap_content"
        android:layout_height="wrap_content"
        android:layout_marginStart="8dp"
        android:layout_marginTop="8dp"
        android:text="お問合せ内容は10文字以内で入力してください。"
        android:textColor="#FF0000"
        app:layout_constraintStart_toStartOf="parent"
        app:layout_constraintTop_toBottomOf="@+id/etBody" />

    <Button
        android:id="@+id/button"
        android:layout_width="wrap_content"
        android:layout_height="wrap_content"
        android:layout_marginTop="24dp"
        android:text="Button"
        app:layout_constraintEnd_toEndOf="parent"
        app:layout_constraintStart_toStartOf="parent"
        app:layout_constraintTop_toBottomOf="@+id/bodyErr" />


</androidx.constraintlayout.widget.ConstraintLayout>
エミュレータで確認するとこのような感じにデザインが作成されました。


