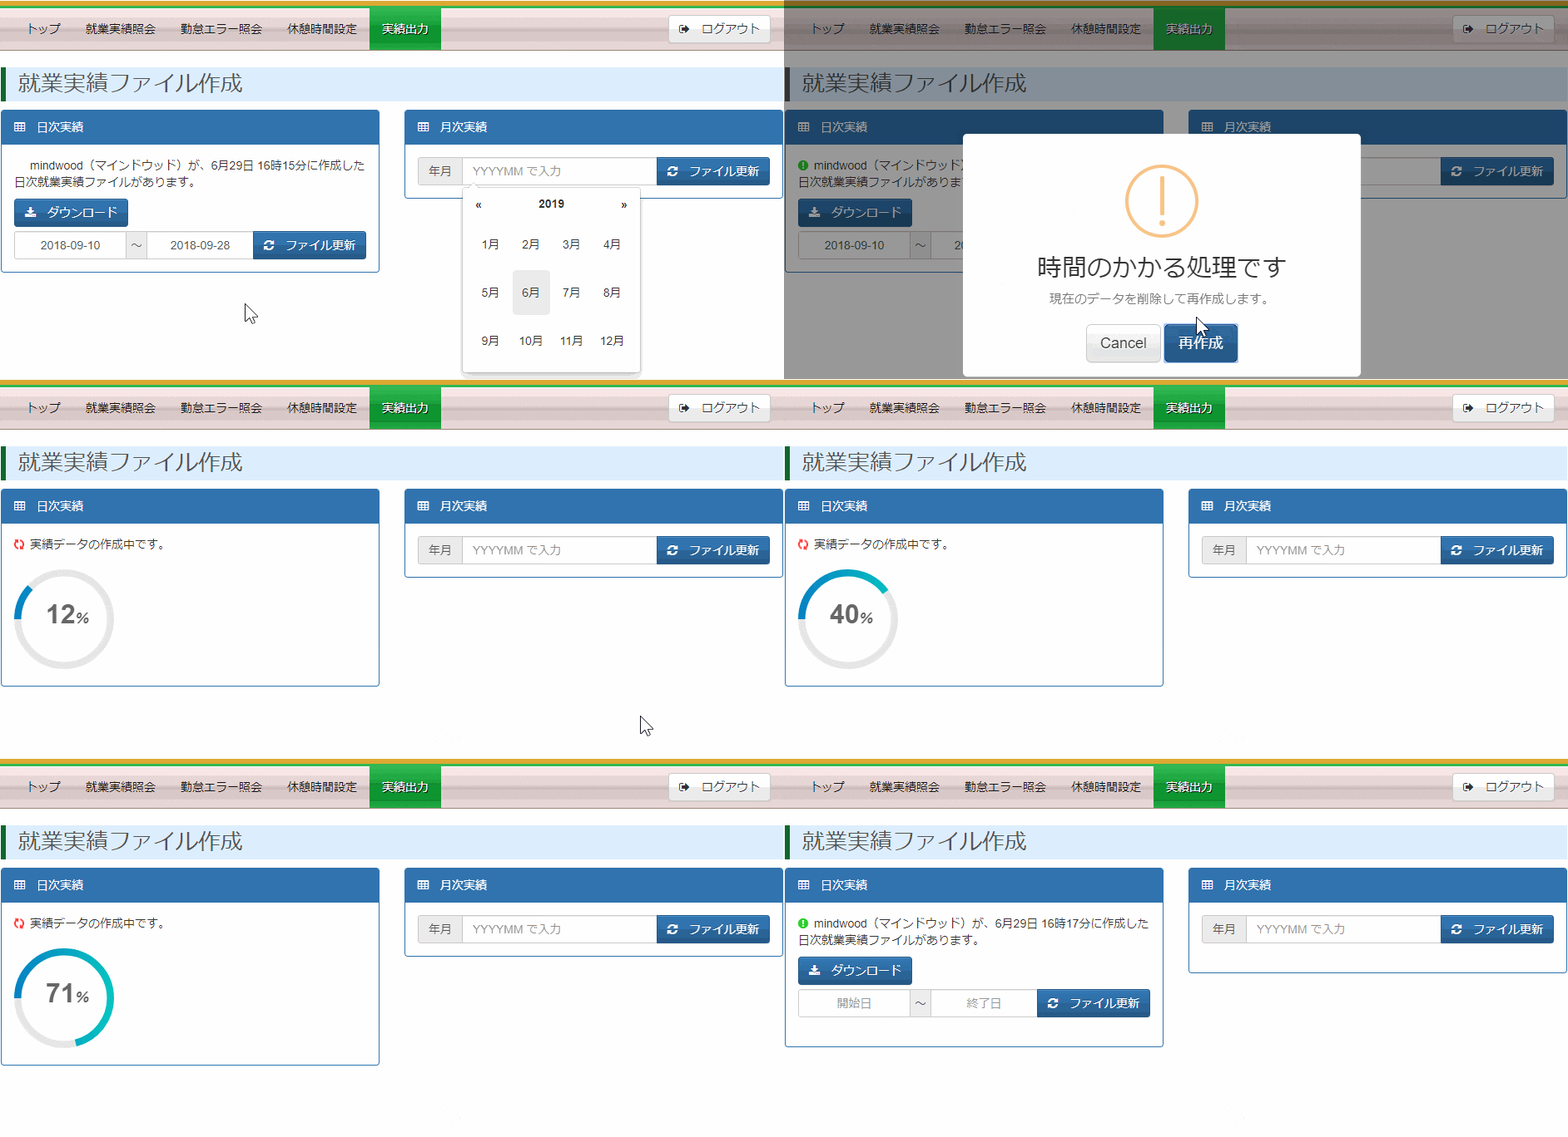
企業向けに作成した勤怠管理のWebアプリケーションが、従業員数が増えてきた影響で、計算結果のダウンロードが始まるまで1分以上も待たされるようになってきた。
UIとして好ましくないし、リクエストがタイムアウトする危険もあるので、重たい処理は裏で非同期に実行し、プログレスサークルでその進捗状況を表示するように改修した。
プログレスサークルとは、下の動画にあるような進捗度を表すサークルバーのことだ。

プログレスサークルを実装するjQueryプラグインは探せば色々と出てくると思うが、今回は jquery-circle-progress を使うことにした。
Laravelでは、ジョブをキューに登録することで非同期処理を容易に実現できる。
クライアント側の処理
JavaScript
ジョブの進捗度をサーバからJSON形式で受け取り、プログレスサークルを表示する。
$(function(){
  var funcProgress = function(data){
    var circle = $('#daily > .circle');
    if(data.daily_progress < 0){
      circle.hide();  // サークルバーを非表示
    } else {
      circle.show();  // サークルバーを表示
      circle.find('strong').html(data.daily_progress + '<i>%</i>');  // 進捗度
      // サークルバーの設定
      circle.circleProgress({
        value: data.daily_progress / 100,
        size: 120,
        animation: false,
        fill: { gradient: ['#0681c4', '#07c6c1'] }
      });
    }
  }
  var funcInterval = function(){
    // HTTPのGET通信を行い、JOSN形式に変換されたデータをサーバから受け取る
    $.getJSON("{{ route('reports.progress') }}",funcProgress);
  }
  progressInterval = setInterval(funcInterval,1800);  // 一定時間が経過するごとに処理を実行
ジョブの初期化(事前チェック)と登録を行う。なお、アラートの表示には SweetAlert を使っている。
swal(
{
  title: '時間のかかる処理です',
  text: '現在のデータを削除して再作成します。',
  type: 'warning',
  showCancelButton: true,
  confirmButtonText: '再作成'
},
  function(){  // ジョブの初期化
    $.getJSON("{{ route('reports.init') }}",
      {
        jobname: job,
        term: term
      },
      function(data){
        if(data.result > 0){
          swal('実績データがありません','期間を確認して下さい。','error');
        }else{  // ジョブキューに登録
          $.get("{{ url('reports/jobs') }}/"+job+'/'+term);
        }
      }
    );
  }
);
サーバ側の処理
View
プログレスサークルの表示領域を確保する。
本画面では、プログレスサークルを2つ表示するとき(daily用とmonthly用)があるので、id属性ではなくclass属性で指定している。
<div class="panel-body" id="daily">
  :
  <div class="circle"><strong><i></i></strong></div>
</div>
Controller
必要な処理は下表の3つで、すべてJavaScriptから起動する。
| Route Name | Action | 処理内容 |
|---|---|---|
| reports.init | ReportController@getJsonInit | ジョブの初期化(事前チェック) |
| reports.jobs | ReportController@jobs | ジョブの登録(ディスパッチ) |
| reports.progress | ReportController@getJsonProgress | ジョブの進捗度合を返す |
namespace App\Http\Controllers;
use Illuminate\Http\Request;
use Illuminate\Support\Facades\Auth;
use App\Models\ResultFileCreator;
use App\Jobs\ProcessDailyFile;
use App\Jobs\ProcessMonthlyFile;

class ReportController extends Controller
{
    // ジョブの初期化(事前チェック)
    public function getJsonInit(Request $request)
    {
        $creator = new ResultFileCreator($request->jobname, Auth::user()->userid, $request->term);
        // チェック結果をJSONで返す
        return [
            'result' => $creator->init()  // 0以外ならデータが無い
        ];
    }

    // ジョブの登録(ディスパッチ)
    public function jobs($jobname, $term)
    {
        switch ($jobname) {
        case 'daily':
            ProcessDailyFile::dispatch(Auth::user()->userid, $term);
            break;
        case 'monthly':
            ProcessMonthlyFile::dispatch(Auth::user()->userid, $term);
            break;
        }
        return;
    }

    // ジョブの進捗度合を返す
    public function getJsonProgress(Request $request)
    {
        $daily = new ResultFileCreator('daily', Auth::user()->userid);
        $monthly = new ResultFileCreator('monthly', Auth::user()->userid);
        // JSONで返す
        return [
            'daily_progress'   => $daily->getProgress(),
            'daily_leftover'   => $daily->leftover(),
            'monthly_progress' => $monthly->getProgress(),
            'monthly_leftover' => $monthly->leftover(),
        ];
    }
}
Model
Controllerとジョブクラスから呼ばれる ResultFileCreator を定義しているが、アプリケーション固有のビジネスロジックなのでコードは省略させていただく。
ジョブクラス
ジョブクラスはキューワーカ(後述)が実行する。
php artisan make:job ProcessDailyFile
で雛形クラスを作成し、実行したい処理を handle メソッドに追加していくだけだ。
namespace App\Jobs;
use Illuminate\Bus\Queueable;
use Illuminate\Queue\SerializesModels;
use Illuminate\Queue\InteractsWithQueue;
use Illuminate\Contracts\Queue\ShouldQueue;
use Illuminate\Foundation\Bus\Dispatchable;
use App\Models\ResultFileCreator;

class ProcessDailyFile implements ShouldQueue
{
    use Dispatchable, InteractsWithQueue, Queueable, SerializesModels;

    public $tries = 1;    // リトライしない
    public $timeout = 0;  // 実行時間無制限

    protected $userid;    // どのユーザーが作成したか
    protected $term;      // 期間

    /**
     * Create a new job instance.
     *
     * @return void
     */
    public function __construct($userid, $term)
    {
        $this->userid = $userid;
        $this->term   = $term;
    }

    /**
     * Execute the job.
     *
     * @return void
     */
    public function handle()
    {
        $creator = new ResultFileCreator('daily', $this->userid, $this->term);
        $creator->run();   // 時間のかかる処理
    }
}
環境設定
Laravelプロジェクトでキューを使うのが初めてなら環境設定を行う。
データベースにキューのテーブルを追加
php artisan queue:table
php artisan migrate
キューワーカをサービスに登録
キューワーカとは、キューを監視して新しいジョブを実行してくれるものだ。
このサービスはデータベースを掴むので、データベースの再作成などをする前には停止すること。
[Unit]
Description=Laravel queue worker

[Service]
User=apache
Group=apache
Restart=on-failure
ExecStart=/bin/php /var/www/html/foo/artisan queue:work --daemon

[Install]
WantedBy=multi-user.target
起動確認
systemctl start laravel-queue.service
systemctl status laravel-queue.service
自動起動を有効化
systemctl enable laravel-queue.service