これは何?
Laravel(PHP)を適当に触りながら、売買botを作ってみる、という記録です。
初心者故にバッドプラクティスや無駄な書き方を多分にしてしまっている気がするので、あまり真に受けないでください。
基本的にLaravelの無駄遣いな感じです。
※今回では完成しません
環境
- Windows 10 Home
- AWS Cloud9
- t2.micro
- Cloud9Default-2019-04-26T15-18 (ami-01e86b109a9e95f06)
- PHP 7.3.4
- Laravel
- Installer 2.0.1
- Framework 5.8.15
- node v8.16.0
- vue 3.7.0
環境構築の記事はこちら。
やったこと
Hello Worldしてみる
右も左も分からないので、とりあえずHello World的なことをしてみた。
これはこの記事を参考に特に問題なくできた。
以下を学びました。
-
routes/web.phpを編集していくと、サーバ起動後のパスで指定した関数(ここではControllerのメソッドを指定)のを呼べる- SpringBootに似ている感覚
- Controllerはartisanのコマンドで作れる
php artisan make:controller HelloController- これくらいなら手で作っても良い気もしつつ…
- Controllerは
app/Http/Controllers下にできる
- Controllerから
views下のHTML(拡張子は.php)を返すことができる
HTTPリクエストを投げてみる
いったんviewは無視して、Controllerの処理内に、HTTPリクエストを投げる処理を実装してみます。
とりあえずLiquid(仮想通貨取引所)の以下のAPIで試してみます。
baseURL : https://api.liquid.com/
GET     : /products
さて、HTTPリクエストを投げる方法を調べていくと、Controllerで受け取ったHTTPリクエストを解析する方法ばかりが出てきます。
まあ、普通PHPはWebサーバ側に使う印象なので、そうなるのでしょう…。
LaravelでHTTPクライアントを作るには、Guzzleというのが良いらしい(こちらの記事を参照)ので、入れてみます。
composer require guzzlehttp/guzzle
HelloControllerを以下のように書き換えます。
<?php

namespace App\Http\Controllers;

use Illuminate\Http\Request;

class HelloController extends Controller
{
  public function get_request($base_url, $path){
        $client = new \GuzzleHttp\Client([
          'base_uri' => $base_url,
        ]);
        $response = $client->request('GET', $path,
            [
                'allow_redirects' => true,
            ]);
        $response_body = (string) $response->getBody();
        echo $response_body;
  }

  public function index()
  {
    $this->get_request("https://api.liquid.com", "/products");
    return view('hello');
  }

}
base_uri(urlではなく)だったりとか、$this->get_requestとしないといけないあたりで、ややハマりましたが、以下のように出力されました。

特にセキュリティグループの設定などは不要でした。
認証を通してみる
レートはPublic APIなので、素直にリクエストすれば取得可能でしたが、当然ながら発注したり、自分の約定を取得したりするためには認証を通す必要があります。
こちらもLiquidの公式ドキュメントを参照しながら実装してみます。
まずLiquidで取引可能なAPIを作成します。
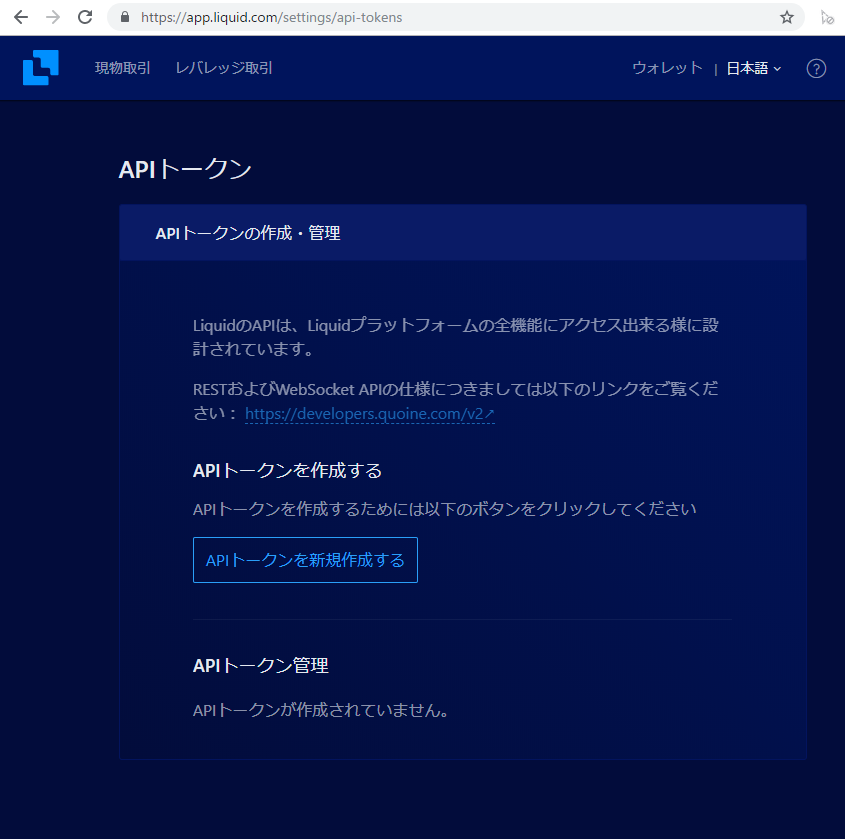
作成したAPIトークンのIDと秘密鍵を記録しておきましょう。
続いて、Authenticated APIに必要な実装をしていきます。
さすがにControllerクラスに書くのは違和感があるので、別のクラスに書きたい。
さてどこに置いたものか…?
少し調べた限り、LaravelではMVCのモデルに該当するディレクトリ(models)を敢えて用意しておらず、アクティブレコードパターンの(DBテーブルに紐づく)クラスはapp直下に、それ以外は好きなところに置いてね、というスタンスらしい。(参考)
習作であまり悩んでいても仕方ないので、app/Http/Requestersというディレクトリを作り、その下にLiquidRequester.phpを作ることにします。
ついでに処理を受け付けるLiquidApiController.phpもapp/Http/Controllersの下に作ります。
そして色々やって以下のような感じになりました。
<?php

namespace App\Http\Requesters;

use GuzzleHttp\Client;
use Illuminate\Http\Request;
use Firebase\JWT\JWT;

class LiquidRequester
{
  private $client;

  public function __construct(){
      $this->client = new Client([
          'base_uri' => "https://api.liquid.com",
        ]);
  }

  private function public_get_request($path){

        $response = $this->client->request('GET', $path,
            [
                'allow_redirects' => true,
            ]);
        $response_body = (string) $response->getBody();
        echo $response_body;
  }

  private function sign($path){
      $auth_payload = [
          'path' => $path,
          'nonce' => time(),
          'token_id' => config('liquidtoken.token_id')
      ];

      $signature = JWT::encode($auth_payload, config('liquidtoken.secret_key'));
      return $signature;
  }

  private function authenticated_request($path, $body_json, $http_method){
      $headers = [
          'X-Quoine-API-Version' => '2',
          'X-Quoine-Auth' => $this->sign($path),
          'Content-Type' => 'application/json',
      ];
      $response;
      switch($http_method){
          case 'POST':
          case 'PUT':
            $response = $this->client->request($http_method, $path, [
              'headers' => $headers,
              'body' => $body_json
            ]);
            break;
          case 'GET':
            $response = $this->client->request($http_method, $path, [
              'headers' => $headers
            ]);
      }
      $response_body = (string) $response->getBody();
      echo $response_body;
  }

  public function get_products(){
      $this->public_get_request('/products');
  }

  public function get_orders($funding_currency = null, $product_id = null, $status = null, $with_details = null){
      $path = '/orders';
      $params = '';
      if($funding_currency != null){
          if($params == ''){
              $params .= '?';
          }
          $params .= 'funding_currency=' . $funding_currency;
      }
      if($product_id != null){
          if($params == ''){
              $params .= '?';
          }else{
              $params .= '&';
          }
          $params .= 'product_id=' . $product_id;
      }
      if($status != null){
          if($params == ''){
              $params .= '?';
          }else{
              $params .= '&';
          }
          $params .= 'status=' . $status;
      }
      if($with_details != null){
          if($params == ''){
              $params .= '?';
          }else{
              $params .= '&';
          }
          $params .= 'with_details=' . $with_details;
      }
      if($params != ''){
          $path .= $params;
      }
      $this->authenticated_request($path,null,'GET');
  }

  public function get_order_by_id($id){
      $path = '/orders/' . $id;
      $this->authenticated_request($path,null,'GET');
  }

  public function get_fiat_accounts(){
      $path = '/fiat_accounts';
      $this->authenticated_request($path,null,'GET');
  }

  public function create_order($order_type, $product_id, $side, $quantity, $price, $price_range = null){
      $path = '/orders/';
      $params = [
          'order_type' => $order_type,
          'product_id' => $product_id,
          'side' => $side,
          'quantity' => $quantity,
          'price' => $price,
          ];
      if($order_type == 'market_with_range'){
          $params['price_range'] = $price_range;
      }

      $this->authenticated_request($path,json_encode($params),'POST');
  }

  public function create_fiat_account($currency){
      $path = '/fiat_accounts';
      $params = [
          'currency' => $currency
          ];
      $this->authenticated_request($path,json_encode($params),'POST');
  }
}
<?php

namespace App\Http\Controllers;

use Illuminate\Http\Request;
use App\Http\Requesters\LiquidRequester;

class LiquidApiController extends Controller
{
    public function index ()
    {
        $requester = new LiquidRequester();
        $requester->create_order('limit', 5, 'buy', 0.001, 500000);
        // $requester->get_fiat_accounts();
        // $requester->get_order_by_id(689869887);
        // $requester->get_orders(null,5);
        // $requester->create_fiat_account('USD');
        return view('liquid_api');
    }
}
これで発注を行うと、下記のようなHTTPレスポンスが返ってきます。
{"id":1027277701,"order_type":"limit","quantity":"0.001","disc_quantity":"0.0","iceberg_total_quantity":"0.0","side":"buy","filled_quantity":"0.0","price":500000.0,"created_at":1557045422,"updated_at":1557045422,"status":"live","leverage_level":1,"source_exchange":"QUOINE","product_id":5,"product_code":"CASH","funding_currency":"JPY","crypto_account_id":null,"currency_pair_code":"BTCJPY","average_price":0.0,"target":"spot","order_fee":0.0,"source_action":"manual","unwound_trade_id":null,"trade_id":null}
執行中注文からも確認できます。

ハマったポイントをまとめます。
- payloadに対する
json_encodeは不要。- 直接
JWT::encodeに渡せば良い。 - json_encodeでパスのエスケープ対応するために
JSON_UNESCAPED_SLASHES付けるかどうか悩んでいたが、そもそも不要だった。
- 直接
- Guzzleでリクエストヘッダ作る場合、連想配列で指定する。
- 公式を信じろ。
- POSTメソッドのbodyは
json_encodeで作る。
また、上記を書くにあたって、以下を行っています。
- JWTのパッケージを利用可能にする。(参考)
- 何種類かありますが、HS256対応していればどれでも問題ないはず。
- 最初は
lcobucci/jwtを使おうとしていましたが、ハッシュ関数毎にクラスが用意されている(SHA256.phpみたいな)ため、やや不便かも?
composer require firebase/php-jwt
- 設定ファイル(liquidtoken.php)を
configディレクトリ配下に用意する。- さすがにソースにべた書きは微妙かなって…。
<?php

return [

    // Liquid APIトークンの設定を環境変数から読み込む
    'token_id' => env('LIQUID_TOKEN_ID'),
    'secret_key' => env('LIQUID_SECRET_KEY'),
    ];
-
.envに環境変数を追加する。- 当然ながら、実際は先程記録したAPIトークンのIDと秘密鍵を記載します。
LIQUID_TOKEN_ID=xxxxx
LIQUID_SECRET_KEY=xxxxx
ここまでの参考サイト
- Javaしか知らない人がPHPでコードを書くためにはじめに流し読みしておくと良いもの その1
- QUOINEのAPIでの購入処理について(PHP)
- PHP-JWTでJWTのエンコード/デコードをする
- QUOINEXのAPIのJWT認証をPHPで通してみた。
画面を作ってみる(ここからVue.js編)
さて折角なので、画面も多少まともにしていきたいです。
今回はVue.jsを使ってみたいと思います。(興味本位でこれもほぼ初めて触る)
APIの実行をボタンで行えて、その結果をJSONから加工して表示させてみます。
環境準備
npm install
簡単!
ルーティング
あらゆるアクセスでwelcome.blade.phpを返すようにします。
Route::get('/{any}', function () {
    return view('welcome');
})->where('any', '.*');
上記のwhereの部分で{any}に適用する正規表現を定義しています。
example-componentを表示してみる
resources/js/componentsに置かれているExampleComponentを表示してみましょう。
welcome.blade.phpに書かれていた諸々を加筆修正(大部分は削除)します。
<!doctype html>
<html lang="{{ str_replace('_', '-', app()->getLocale()) }}">
    <head>
        <meta charset="utf-8">
        <meta name="csrf-token" content="{{ csrf_token() }}">
        <meta name="viewport" content="width=device-width, initial-scale=1">

        <link rel="stylesheet" href="css/app.css"/>

        <title>Liquid Api</title>

        <!-- Fonts -->
        <link href="https://fonts.googleapis.com/css?family=Nunito:200,600" rel="stylesheet">

        <!-- Styles -->
        <style>
            html, body {
                background-color: #fff;
                color: #636b6f;
                font-family: 'Nunito', sans-serif;
                font-weight: 200;
                height: 100vh;
                margin: 0;
            }

            .full-height {
                height: 100vh;
            }

            .flex-center {
                align-items: center;
                display: flex;
                justify-content: center;
            }

            .position-ref {
                position: relative;
            }

            .top-right {
                position: absolute;
                right: 10px;
                top: 18px;
            }

            .content {
                text-align: center;
            }

            .title {
                font-size: 84px;
            }

            .links > a {
                color: #636b6f;
                padding: 0 25px;
                font-size: 13px;
                font-weight: 600;
                letter-spacing: .1rem;
                text-decoration: none;
                text-transform: uppercase;
            }

            .m-b-md {
                margin-bottom: 30px;
            }
        </style>
    </head>
    <body>
        <div id="app">
            <example-component></example-component>
        </div>
    <script src="js/app.js"></script>
    </body>
</html>
色々読む限り、Vue.jsとやり取りする上で必要そうなので追記したのは、以下の箇所です。
<meta name="csrf-token" content="{{ csrf_token() }}"><link rel="stylesheet" href="css/app.css"/><script src="js/app.js"></script>
※2,3番目の書き方は、パスをmixやassetで括っている場合もあるが、今は違いが分からないのでやらないでおきます
また、<example-component></example-component>の部分でExampleComponentを呼び出しています。
※この名前はresources/js/app.jsで以下のように定義されています。
Vue.component('example-component', require('./components/ExampleComponent.vue').default);
npm run watchとphp artisan serve --port=8080を(別の)ターミナルからそれぞれ実行すると、ブラウザにはこんな感じで表示されます。

Liquid APIのテーブルを作ってみる
何となく雰囲気は分かったので、Liquid APIの一覧表を作ってみます。
APIの名前と説明、HTTPメソッドの種類、PublicかAuthenticatedか、実行ボタンあたりを要素にします。
パラメータが必要なAPIはそれも自動で入力欄が作られると良いですが、一旦はテキストフィールドで作ります。
…ここまではコンポーネントを自作する気でいたのですが、調べていくとVuetifyなるコンポーネントライブラリが大変便利そうなので、そちらをうまく使いながらやっていきます。
以下でインストールし、
npm install vuetify
resource/js/app.jsとwelcome.blade.phpに色々書き足します。(不要なものもあるかも)
require('./bootstrap');

window.Vue = require('vue');
import Vue from 'vue';
import Vuetify from 'vuetify';
import 'vuetify/dist/vuetify.min.css';

Vue.use(Vuetify);
        <!-- Fonts -->
        <link href="https://fonts.googleapis.com/css?family=Nunito:200,600" rel="stylesheet">
        <link href='https://fonts.googleapis.com/css?family=Roboto:100,300,400,500,700,900|Material+Icons' rel="stylesheet">
Vuetifyから適当なコンポーネントを見繕います。
今回はData tableを利用します。
GitHubのソースをそのまま、resources/js/components下に作ったLiquidApiTable.vueに貼り付けます。
※Vuetify Example Penで出てくるように、HTMLとJSで分けて記載する書き方も出来そうだが今は分からないため全てvueファイルに記載しておく
(サンプルのままなのでデザートのテーブルになっている)
<template>
  <v-data-table
    :headers="headers"
    :items="desserts"
    class="elevation-1"
  >
    <template v-slot:items="props">
      <td>{{ props.item.name }}</td>
      <td class="text-xs-right">{{ props.item.calories }}</td>
      <td class="text-xs-right">{{ props.item.fat }}</td>
      <td class="text-xs-right">{{ props.item.carbs }}</td>
      <td class="text-xs-right">{{ props.item.protein }}</td>
      <td class="text-xs-right">{{ props.item.iron }}</td>
    </template>
  </v-data-table>
</template>

<script>
  export default {
    data () {
      return {
        headers: [
          {
            text: 'Dessert (100g serving)',
            align: 'left',
            sortable: false,
            value: 'name'
          },
          { text: 'Calories', value: 'calories' },
          { text: 'Fat (g)', value: 'fat' },
          { text: 'Carbs (g)', value: 'carbs' },
          { text: 'Protein (g)', value: 'protein' },
          { text: 'Iron (%)', value: 'iron' }
        ],
        desserts: [
          {
            name: 'Frozen Yogurt',
            calories: 159,
            fat: 6.0,
            carbs: 24,
            protein: 4.0,
            iron: '1%'
          },
// 中略
          {
            name: 'KitKat',
            calories: 518,
            fat: 26.0,
            carbs: 65,
            protein: 7,
            iron: '6%'
          }
        ]
      }
    }
  }
</script>
そしたらresources/js/app.jsに以下の行を書き足し、
Vue.component('liquid-api-table', require('./components/LiquidApiTable.vue').default);
welcome.blade.phpのbodyに以下の行を書き足します。
        <div id="app">
          <liquid-api-table></liquid-api-table>
        </div>
これで以下のようにデザートの表を出すことが出来ました。

後はこれを直していきます。
四苦八苦した結果、以下のように表示されるようになりました。

上の表でPublicのAPIを実行した結果が、下の表に出力されています。
上の表
今はまだ引数の無いGETメソッドしか対応できていないです。
<template>
  <div>
    <v-data-table
      :headers="headers"
      :items="liquid_apis"
      class="elevation-1"
    >
      <template v-slot:items="props">
        <td>{{ props.item.name }}</td>
        <td class="text-xs-right">{{ props.item.explanation }}</td>
        <td class="text-xs-right">
          <div v-if="props.item.need_auth">Authenticated</div>
          <div v-else>Public</div>
        </td>
        <td class="text-xs-right">{{ props.item.http_method }}</td>
        <td class="justify-center layout px-0">
          <v-btn color="primary" dark @click="execute(props.item)">Execute
            <v-icon dark right>check_circle</v-icon>
          </v-btn>
        </td>
      </template>
    </v-data-table>
    <liquid-api-result-table :results="results"/>
  </div>
</template>

<script>
  import result_table from "./LiquidApiResultTable.vue";
  import axios from 'axios';
  export default {
    data() {
      return {
        headers: [
          {
            text: 'Liquid APIs',
            align: 'left',
            sortable: false,
            value: 'name'
          },
          { text: 'Explanation', value: 'explanation' },
          { text: 'Authenticated?', value: 'need_auth' },
          { text: 'HTTP Method', value: 'http_method' },
          { text: 'Execute', value: 'execute' }
        ],
        liquid_apis: [
          {
            name: 'Get Products',
            explanation: 'Get the list of all available products.',
            need_auth: false,
            http_method: 'GET',
            execute: 'execute button',
            path: '/api/liquid/get_products'
          },
          {
            name: 'Create an Order',
            explanation: 'Create a new order.',
            need_auth: true,
            http_method: 'POST',
            execute: 'execute button'
          },
          {
            name: 'Get an Order',
            explanation: 'Get an order info by order id.',
            need_auth: true,
            http_method: 'GET',
            execute: 'execute button'
          },
          {
            name: 'Get Orders',
            explanation: 'Get orders info (filter available).',
            need_auth: true,
            http_method: 'GET',
            execute: 'execute button'
          },
          {
            name: 'Cancel an Order',
            explanation: 'Cancel an existing order by order id.',
            need_auth: true,
            http_method: 'PUT',
            execute: 'execute button'
          },
          {
            name: 'Get Fiat Accounts',
            explanation: 'Get fiat accounts info',
            need_auth: true,
            http_method: 'GET',
            execute: 'execute button'
          },
          {
            name: 'Create a Fiat Accounts',
            explanation: 'Create a new fiat account by currency',
            need_auth: true,
            http_method: 'POST',
            execute: 'execute button'
          }
        ],
        results: [],
        components: {
          result_table
        }
      };
    },

    methods: {
      execute (item) {
        switch(item.http_method){
          case 'GET':
            return axios.get(item.path)
             .then((res) => {
                 this.results = res.request.response;
              }
            );
        }
      },
    },
  };
</script>
下の表
上の表の子コンポーネントです。
こちらも本当は動的に表を作りたいですが、カラムはべた書きで取得しています。
(全カラム出しても使い勝手が悪いので、ある程度の取捨は必要な気もしますが…)
<template>
  <v-card>
    <v-card-title>
      API Result
      <v-spacer></v-spacer>
      <v-text-field
        v-model="search"
        append-icon="search"
        label="Search"
        single-line
        hide-details
      ></v-text-field>
    </v-card-title>
    <v-data-table
      :headers="headers"
      :items="api_results"
      :search="search"
    >
      <template v-slot:items="props">
        <td>{{ props.item.currency_pair_code }}</td>
        <td class="text-xs-right">{{ props.item.id }}</td>
        <td class="text-xs-right">{{ props.item.code }}</td>
        <td class="text-xs-right">{{ props.item.market_ask }}</td>
        <td class="text-xs-right">{{ props.item.market_bid }}</td>
        <td class="text-xs-right">{{ props.item.volume_24h }}</td>
      </template>
      <template v-slot:no-results>
        <v-alert :value="true" color="error" icon="warning">
          Your search for "{{ search }}" found no results.
        </v-alert>
      </template>
    </v-data-table>
  </v-card>
</template>

<script>
  export default {
    data () {
      return {
        search: '',
        headers: [
          {
            text: 'Currency Pair',
            align: 'left',
            sortable: false,
            value: ''
          },
          { text: 'ID', value: 'id' },
          { text: 'Code', value: 'code' },
          { text: 'Market Ask', value: 'market_ask' },
          { text: 'Market Bid', value: 'market_bid' },
          { text: 'Volume(24h)', value: 'volume_24h' }
        ],
      };
    },
    computed: {
        api_results: function () {
            console.log(this.results);
            if(this.results.length != 0){
                var obj= JSON.parse(this.results || "null");
            }
            return obj;
        }
    },
    props: ['results']
  };
</script>
色々ハマったところを書いておきます。
- 最初beforeのように書いていたら、チェックマーク部分しかクリックに反応しなかった。
//      <v-btn color="primary" dark>Execute // before
//        <v-icon dark right>check_circle @click="execute"</v-icon> // before
        <v-btn color="primary" dark @click="execute">Execute // after
          <v-icon dark right>check_circle</v-icon> // after
        </v-btn>
-
子コンポーネントの書き方
-
<v-data-table>と以下に並列に書くかで悩む。 -
公式にも記載の通り、まとめて
<div></div>とかで括ればOK
-
-
親から子コンポーネントに渡したデータを加工してテーブルに出す。
- 親のresultと子のresultを連動させる
- 子で
computedを使い、加工しつつ算出プロパティとして、v-data-tableの要素にする - ※これが素直なやり方かはあまり自信はない…。
逆に非同期のHTTP通信はaxiosで、JSON文字列とオブジェクトの変換はJSON.parseですんなりできました。
ここまでの参考
- STEP01:Laravel5.7 + Vue2.5 でLaravelからVueにデータを渡す
- 【Laravel × Vue.js チュートリアル】HelloWorldをやってみる
- この他にも色々あるが書ききれず…。
雑なまとめ
GWも終わってしまったので一回区切りますが、続きます。(たぶん)
今度はやる前にちゃんと公式を読み込もう。
関係ないことを色々興味本位でやっているため、完成が遠い。
ソースコード