Node.js で一言ブログ的なものを作りました。
環境構築
仮想は使わなくても良いですが、Windows 10.1703 に Vagrant で構築した Ubuntu 1604 上で行いました。
ホストのエディタで編集して、rsync してゲストで node server.js を実行して、
ホストのブラウザからIPアドレスとポート番号を指定してアクセスしました。
-
Node.js のインストール
-
NVMを README に従いインストール。
curl -o- https://raw.githubusercontent.com/creationix/nvm/v0.33.4/install.sh | bash nano ~/.bash_profile > export NVM_DIR="$HOME/.nvm" > [ -s "$NVM_DIR/nvm.sh" ] && \. "$NVM_DIR/nvm.sh" > [ -s "$NVM_DIR/bash_completion" ] && \. "$NVM_DIR/bash_completion" # の三行を追加 exec $SHELL -l -
Node.js のインストール
nvm ls-remote --lts # 最新のLTSを探す
>  :
>  :
> v6.10.3   (LTS: Boron)
> v6.11.0   (LTS: Boron)
> v6.11.1   (LTS: Boron)
> v6.11.2   (LTS: Boron)
> v6.11.3   (Latest LTS: Boron)
# Latest LTSのものをインストールする
nvm install v6.11.3
# インストールされていることを確認
node -v
> v6.11.3
npm -v
> 5.4.2
-
-
モジュールのインストール
npm init
npm install ejs --save-dev
npm install mongodb --save-dev
sudo apt install mongodb-server
sudo apt install mongodb-clients
変数定義
var http = require('http');
var fs = require('fs');
var ejs = require('ejs');
var qs = require('querystring');
var MongoClient = require('mongodb').MongoClient;
var settings = require('./settings');
var server = http.createServer();
var templete = fs.readFileSync(__dirname + '/public_html/bbs.ejs', 'utf-8');
var logintemplete = fs.readFileSync(__dirname + '/public_html/login.html', 'utf-8');
var posts = [];
var pastposts = [];
表示のための関数
function renderForm(posts, res, url) {
    var data = ejs.render(templete, {
        posts: posts,
        account: url.substr(1),
    });
    res.writeHead(200, { 'Content-Type': 'text/html' });
    res.write(data);
    res.end();
}

function renderLogin(res) {
    res.writeHead(200, { 'Content-Type': 'text/html' });
    res.write(logintemplete);
    res.end();
}
データ保存
if (req.method === 'POST') {
    req.data = "";
    req.on("readable", function() {
        var next = req.read();
        if (next !== '') {
            req.data += next;
        }
    });
    req.on("end", function() {
        var query = qs.parse(req.data);
        posts.push({ name: accountname, text: query.text, createdAt: (new Date()).toLocaleString() });
        console.log(posts);
        MongoClient.connect("mongodb://localhost/" + settings.db, function(err, db) {
            db.collection("posts", function(err, collection) {
                if (posts[0].text != '') {
                    collection.insert(posts, function(err, result) {
                        console.log(result);
                    });
                }
            });
        });
    });
}
データ取り出し
MongoClient.connect("mongodb://localhost/" + settings.db, function(err, db) {
    db.collection("posts", function(err, collection) {
        if (posts[0].text != '') {
            collection.insert(posts, function(err, result) {
                console.log(result);
            });
        }
        if (accountname === 'all') {
            var stream = collection.find().sort({ 'createdAt': -1 }).stream();
        } else {
            var stream = collection.find({ name: accountname }).sort({ 'createdAt': -1 }).stream();
        }
        stream.on("data", function(item) {
            console.dir(item.text);
            pastposts.push(item);
        });
        stream.on("end", function() {
            console.log("finished.");
            renderForm(pastposts, res, req.url);
        });
    });
});
表示について
ejs は erb のようにHTML内で <% %> で囲んで javascript を実行できます。
<% for (var i = 0; i < posts.length; i++){ %>
    <div>
        <%= posts[i].name %>
        <%= posts[i].text %>
    </div>
    <div>
        <%= posts[i].createdAt %>
    </div>
<% } %>
などとして埋め込むと表示できます。
できた図
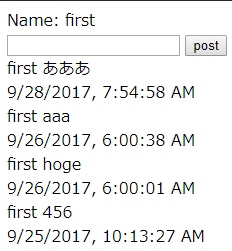
画像のような状態になりました。