概要
ruby on railsのアプリケーションをdockerを使ってherokuにデプロイしてcircleciするメモとして書きます。
1. docker環境の構築
1のステップでは以下のような構成にフォルダをすることを目標とします。
./
|- docker-compose.yml
|- web/
   |- Dockerfile
|- Gemfile
|- Gemfile.lock
|- entrypoint.sh
docker-compose.ymlの作成は以下のようにします。
version: '3.5'
services:
  web:
    build:
      context: .
      dockerfile: web/Dockerfile
    container_name: rails-web
    command: bash -c "rm -f tmp/pids/server.pid && bundle exec rails s -p 3000 -b '0.0.0.0'"
    volumes:
      - .:/app
      - /var/tmp
    ports:
      - 3200:3000
    depends_on:
      - db
    tty: true
    stdin_open: true
    networks:
      - sample

  db:
    image: postgres:9.6.2-alpine
    container_name: rails-db
    environment:
      POSTGRES_PASSWORD: 12345678
      TZ: "Asia/Tokyo"
    volumes:
      - pg-data:/var/lib/postgresql/data
    restart: always
    ports:
      - 5432:5432
    networks:
      - sample

  pgadmin:
    image: dpage/pgadmin4:4.18
    restart: always
    environment:
      PGADMIN_DEFAULT_EMAIL: postgres@linuxhint.com
      PGADMIN_DEFAULT_PASSWORD: 12345678
      PGADMIN_LISTEN_PORT: 80
    ports:
    - 8080:80
    depends_on:
      - db
    volumes:
    - pgadmin-data:/var/lib/pgadmin
    links:
    - "db:pgsql-server"
    networks:
      - sample

networks:
  sample:

volumes:
  pg-data:
  pgadmin-data:
Dockerfileは以下のようにします。
FROM ruby:2.6.5

RUN curl -sL https://deb.nodesource.com/setup_12.x | bash - && apt-get update && \
    apt-get install -y nodejs --no-install-recommends && rm -rf /var/lib/apt/lists/*

RUN apt-get update -qq && apt-get install -y build-essential libpq-dev

RUN apt-get update && apt-get install -y curl apt-transport-https wget && \
    curl -sS https://dl.yarnpkg.com/debian/pubkey.gpg | apt-key add - && \
    echo "deb https://dl.yarnpkg.com/debian/ stable main" | tee /etc/apt/sources.list.d/yarn.list && \
    apt-get update && apt-get install -y yarn

RUN apt-get update -qq && \
    apt-get install -y build-essential \
    libpq-dev \
    sudo

RUN yarn add node-sass

WORKDIR /app
RUN mkdir -p tmp/sockets
COPY Gemfile /app/Gemfile
COPY Gemfile.lock /app/Gemfile.lock
RUN bundle install
COPY . /app

# COPY entrypoint.sh /usr/bin/
# RUN chmod +x /usr/bin/entrypoint.sh
# ENTRYPOINT ["entrypoint.sh"]

CMD bash -c "rm -f tmp/pids/server.pid && bundle exec puma -C config/puma.rb"
entrypoint.shは以下の様に書きます。 (docker-composeのコマンドで叩くので不要です)
# !/bin/bash
set -e

# Remove a potentially pre-existing server.pid for Rails.
rm -f /myapp/tmp/pids/server.pid

# Then exec the container's main process (what's set as CMD in the Dockerfile).
exec "$@"
次に以下のコマンドを叩いてGemfileとGemfile.lockを作成して下さい。
bundle init
touch Gemfile.lock
gem 'rails', '~> 6'
そして以下のコマンドを叩くことでファイルが展開されます。
docker-compose run web rails new . --force --no-deps --database=postgresql --skip-bundle
そして次にbundle installをすることでgemをインストールしていきます。
docker-compose build
dockerを起動させます。
docker-compose up
2.Webpackのインストール
このままだと以下のエラーが発生してしまいます。
Webpacker configuration file not found /app/config/webpacker.yml.
以下のコマンドを叩いてyarn.lockをインストールしていきます。
docker-compose run web yarn install --check-files
以下のコマンドを叩くことでwebpackの設定ファイルをインストールしていきます。
docker-compose run web bin/rails webpacker:install
DBの設定
このままだとDBに接続できないのでdatabase.ymlの設定を変えていきます。
default: &default
  adapter: postgresql
  encoding: unicode
  # For details on connection pooling, see Rails configuration guide
  # https://guides.rubyonrails.org/configuring.html#database-pooling
  pool: <%= ENV.fetch("RAILS_MAX_THREADS") { 5 } %>
  username: postgres

development:
  <<: *default
  database: app_development
  # hostをdbに変更
  host: db
  password: 12345678

・
・
・

test:
  <<: *default
  database: app_test
  host: <%= ENV['DB_HOST'] || 'db' %>
  password: <%= ENV['DB_PASSWORD'] || '12345678' %>
そして以下のコマンドを叩くことでdbを展開していきます。
docker-compose run --rm web rails db:create
docker-compose run --rm web rails db:migrate
3.railsの起動
railsの起動を行っていきます。
以下のコマンドでdockerを起動していきます。
docker-compose up
以下のように表示されればokです。

4.pdadminの起動
pdadminはpostgresqlをguiで操作できるツールです。
これがあることでテーブルの確認等を行うことができます。
docker-compose.ymlでpgadminを同時に起動させているのでログインしてきます。
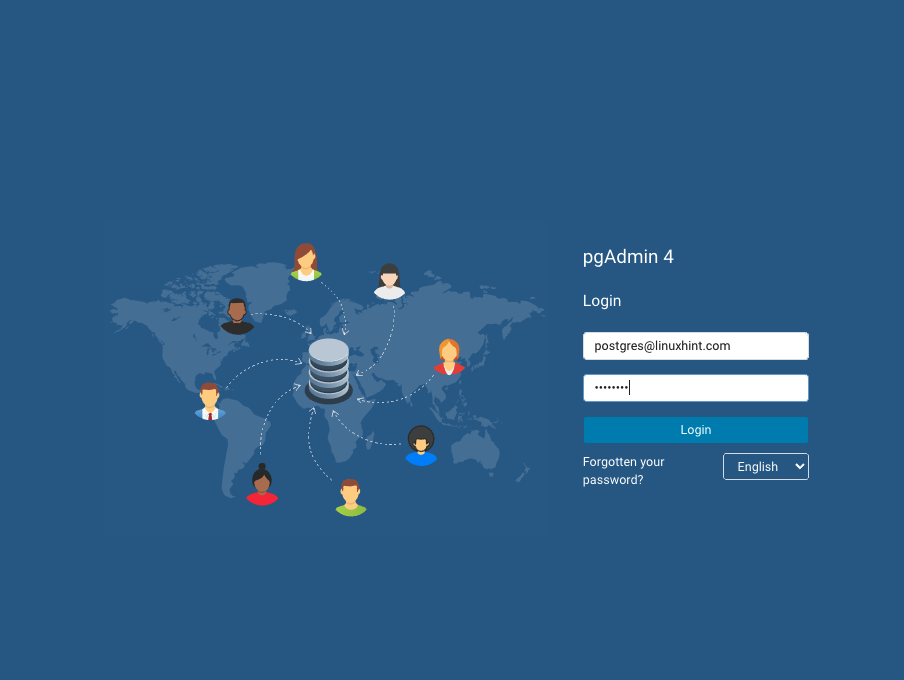
http://localhost:8080 にアクセスすると以下のようなログイン画面が出るので、
id: postgres@linuxhint.com
pass: 1235678
でログインしていきます。
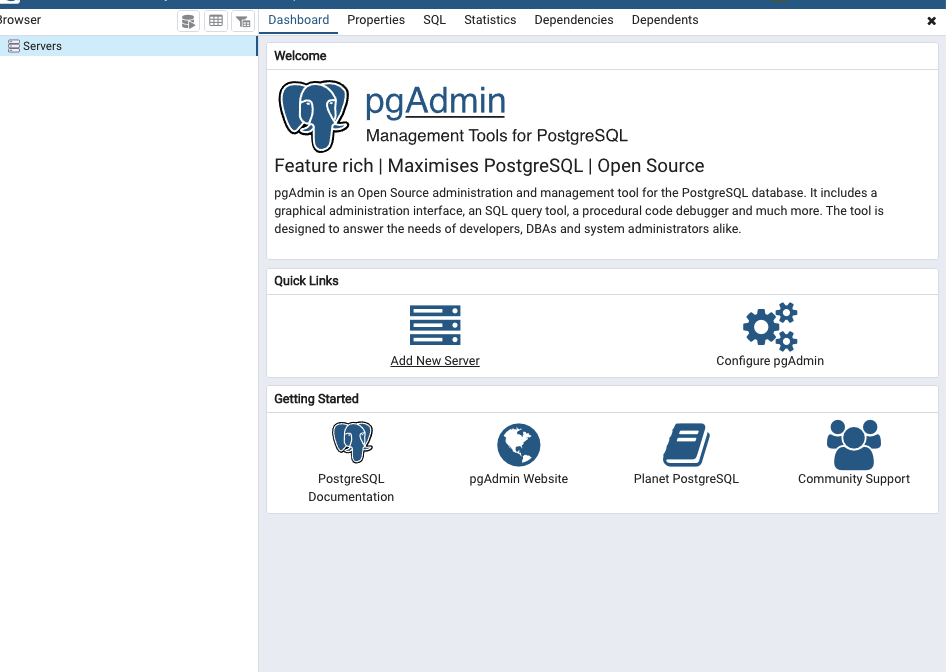
add new server より新しいコネクションを作ります。
以下の情報を入力します。
Name: 好きなもの
Host: db (127.0.0.1出ないので注意)
Port: 5432
database: app_development
Username: postgres
password: 12345678

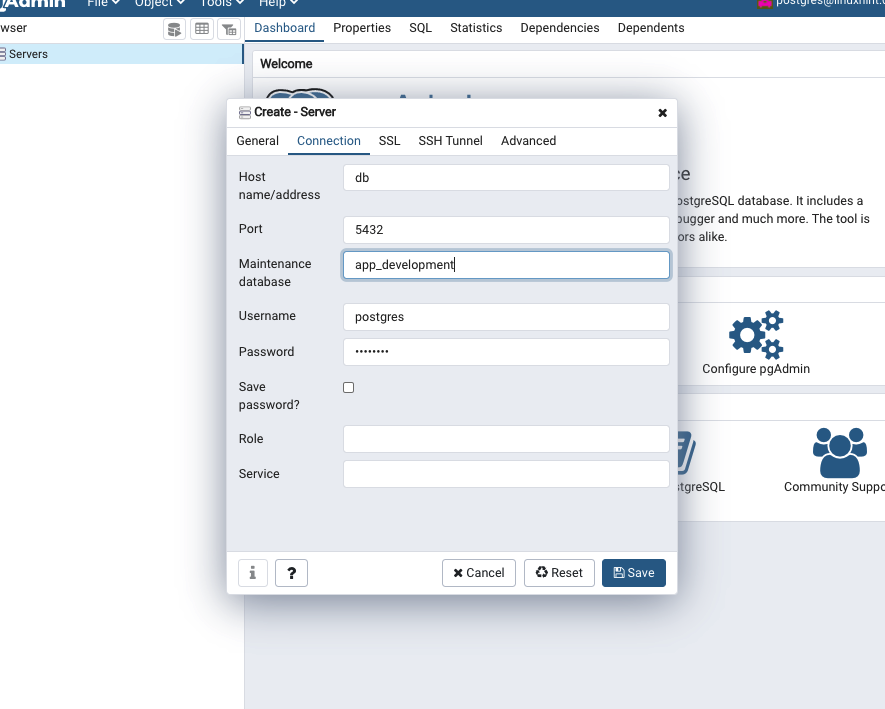
以下のようにdbを登録できたら成功です。

5.webpackerを使用するデモ
webpackを読み取れるようにapplication.html.erbを変更します。
<!DOCTYPE html>
<html>
  <head>
    <title>App</title>
    <meta name="viewport" content="width=device-width,initial-scale=1">
    <%= csrf_meta_tags %>
    <%= csp_meta_tag %>

   - <%= stylesheet_link_tag 'application', media: 'all', 'data-turbolinks-track': 'reload' %>
   - <%= javascript_pack_tag 'application', 'data-turbolinks-track': 'reload' %>
   + <%= stylesheet_pack_tag 'application', media: 'all', 'data-turbolinks-track': 'reload' %>
   + <%= javascript_pack_tag 'application', 'data-turbolinks-track': 'reload' %>
  </head>

  <body>
    <%= yield %>
  </body>
</html>
以下のようにしてサンプルページを作成していきます。
docker-compose run --rm web rails generate controller Hello index
次にroutes.rbの設定をいじります。
Rails.application.routes.draw do
  get 'hello/index', to: 'hello#index'
  # For details on the DSL available within this file, see https://guides.rubyonrails.org/routing.html
end
http://localhost:3200/hello/index に接続して以下のような画面になることを確認して下さい。

webpackerではpacks配下のapplication.jsのファイルが変換され、表示できる形となります。
そのため、scssやjs, imageのファイルを最終的にapplication.jsにインポートすることでまとめてバンドルして、追加されます。
webpackのフォルダの最終形は以下のようになるようにします。
./app/javascript
|- packs/
   |- application.js   # 全体を読み込むためのファイル
   |- hello.js

|- scss/
   |- application.scss
   |- style.scss
   |- hello/
      |- hello.scss

|- js/
   |- application.js
   |- hello_world.js

|- images/
   |- test.png  # 好きな写真を追加しておく
では実際に、やってみましょう!
まず、scssとjs,imageを追加していきましょう。
まず、app/javascriptの配下にscss, js, imageのフォルダを追加します。
cd app/javascript
mkdir js scss images
まずはscssを追加していきます。
# scssの配下で
touch application.scss style.scss
mkdir hello
touch hello/hello.scss
@import 'style';
@import 'hello/hello';
p {
    color: red;
}
次にjsを設定していきます。
# jsの配下で
touch application.js hello_world.js
import hello_world from './hello_world'
window.onload = () => {
    document.getElementsByTagName("H1")[0].innerText = 'Hello World';
}
そしてpacksの配下にhello.jsを作成して下さい。
touch hello.js
console.log("hello")
最後に全体を読み込むためにpacksのは以下のapplication.jsに以下の追記をします。
・
・
import '../js/application'
import '../scss/application'
const images = require.context('../images', true)
次に以下のようにviwes/hello/index.html.erbを変更し、ブラウザをリロードすることで以下のように文字の色が変更されているのが確認できると思います。
# このように個々のファイルの呼び出しもできる
<%= javascript_pack_tag 'hello', 'data-turbolinks-track': 'reload' %>
<h1>Hello#index</h1>
<p>Find me in app/views/hello/index.html.erb</p>
<%= image_pack_tag 'test.png' %>

左上の表示はなにか?
どうやら左上の数字の表示は調べてみるとrailsのパフォーマンスが計測できるrack-mini-profilerというgemのせいだそうです。
今回あると邪魔なので、Gemfileのrack-mini-profilerの部分を以下のように書き換えます。
gem 'rack-mini-profiler', '~> 2.0', require: false
そしてbundle installをすると表示が消えるはずです。
6.データベースの作成
次にデータベースの内容が表示されるか確認するために実際に一つテーブルを作ってみましょう。
rails g model Hello hello:text content:text

rails db:migrate
次にrails c で実際にカラムを追加していきます。
post = Hello.new(hello:"ohayou", content:"konnnitiha")
post.save()
そうすると実際にテーブルにカラムが追加されているのが確認できますので実際にindex.html.erb内で表示してみましょう。

controller/hello_controller.rbにまずは変更を加えます。
class HelloController < ApplicationController
  def index
    @hello = Hello.all
  end

  def create
    @get = Hello.new(content:params[:content])
    @get.save

    redirect_to("/hello/index")
  end
end
次にindex.html.erbを変更して実際に表示してみます。
<%= javascript_pack_tag 'hello', 'data-turbolinks-track': 'reload' %>
<h1>Hello#index</h1>
<p>Find me in app/views/hello/index.html.erb</p>
<%= image_pack_tag 'test.png' %>

<% @hello.each do |h| %>
    <%= h.content %>
<% end %>

<%= form_tag("/hello/create") do %>
<div class="form">
    <div class="form-body">
        <textarea  name="content"></textarea>
        <input type="submit" value="挨拶を追加">
    </div>
</div>
<% end %>
routes.rbも新規登録できるように以下のように書き換えます。
Rails.application.routes.draw do
  get 'hello/index', to: 'hello#index'
  # For details on the DSL available within this file, see https://guides.rubyonrails.org/routing.html
  post 'hello/create', to: 'hello#create'
end
結果、以下のように表示されれば成功です。

rspecの導入
次にrspecの導入をします。
Gemfileに以下の記述を追記します。
・
・
gem 'rspec-rails'file
・
・
bundle installします。
docker-comopse run --rm web bundle install
コンテナにはいり以下を実行します。
rails generate rspec:install
rails db:migrate RAILS_ENV=test
rails g rspec:model hello
そしてspec/models/hello_spec.rbに以下を記述します。
require 'rails_helper'

RSpec.describe Hello, type: :model do
    it "is valid with title, text" do
      hello = Hello.new(
        hello: "こんばんわに",
        content:"ちゃす"
        )
      expect(hello).to be_valid
    end
end
7.CircleCIの設定
rspecが通るかどうかのCircleCIの設定をします。
まず、ルートディレクトリに戻って以下のコマンドを叩いてcircleciの設定ファイルを作成します。
mkdir .circleci
touch .circleci/config.yml
version: 2.1

jobs:
  test_backend:
    docker:
    # dockerイメージで使っているrubyバージョンと一致させる
      - image: circleci/ruby:2.6.5-stretch-node
        environment:
          RAILS_ENV: test
          DB_HOST: 127.0.0.1
          DB_PASSWORD: ''
      - image: circleci/postgres:9.6.2-alpine
        environment:
          POSTGRES_USER: root
          POSTGRES_DB: circleci_testdb
          POSTGRES_HOST_AUTH_METHOD: trust # パスワードなし

    working_directory: ~/repo

    steps:
      - checkout

      # restore gem from cache
      - restore_cache:
          keys:
            - gem-cache-v1-{{ checksum "~/repo/Gemfile.lock" }}
            - gem-cache-v1-
          working_directory: ~/repo

      # gem install
      - run:
          command: |
            gem install bundler
            bundle config set path 'vendor/bundle'
            bundle install --jobs=4 --retry=3
          working_directory: ~/repo

      - save_cache:
          key: gem-cache-v1-{{ checksum "~/repo/Gemfile.lock" }}
          paths:
            - ~/repo/backend/vendor/bundle
          working_directory: ~/repo

      # Database setup
      - run:
          command: bundle exec rails db:create
          working_directory: ~/repo
      - run:
          command: bundle exec rails db:migrate
          working_directory: ~/repo

      - run:
          name: create directory to store test results
          command: mkdir /tmp/test-results
          working_directory: ~/repo

      # run tests
      - run:
          name: RSpec
          command: |
            bundle exec rspec --profile 10 \
                              --format RspecJunitFormatter \
                              --out test_results/rspec.xml \
                              --format progress \
                              $(circleci tests glob "spec/**/*_spec.rb" | circleci tests split --split-by=timings)
          working_directory: ~/repo

      # collect reports
      - store_test_results:
          path: /tmp/test-results
      - store_artifacts:
          path: /tmp/test-results
          destination: test-results
      - store_artifacts:
          path: /home/circleci/repo/tmp/screenshots


workflows:
  version: 2
  test:
    jobs:
      - test_backend:
          filters:
            branches:
              ignore: develop
githubにリポジトリを作成すると同時にcircleciのサイトで対称のリポジトリをsetupを押して初期化して自動テストが実行できるように設定します。
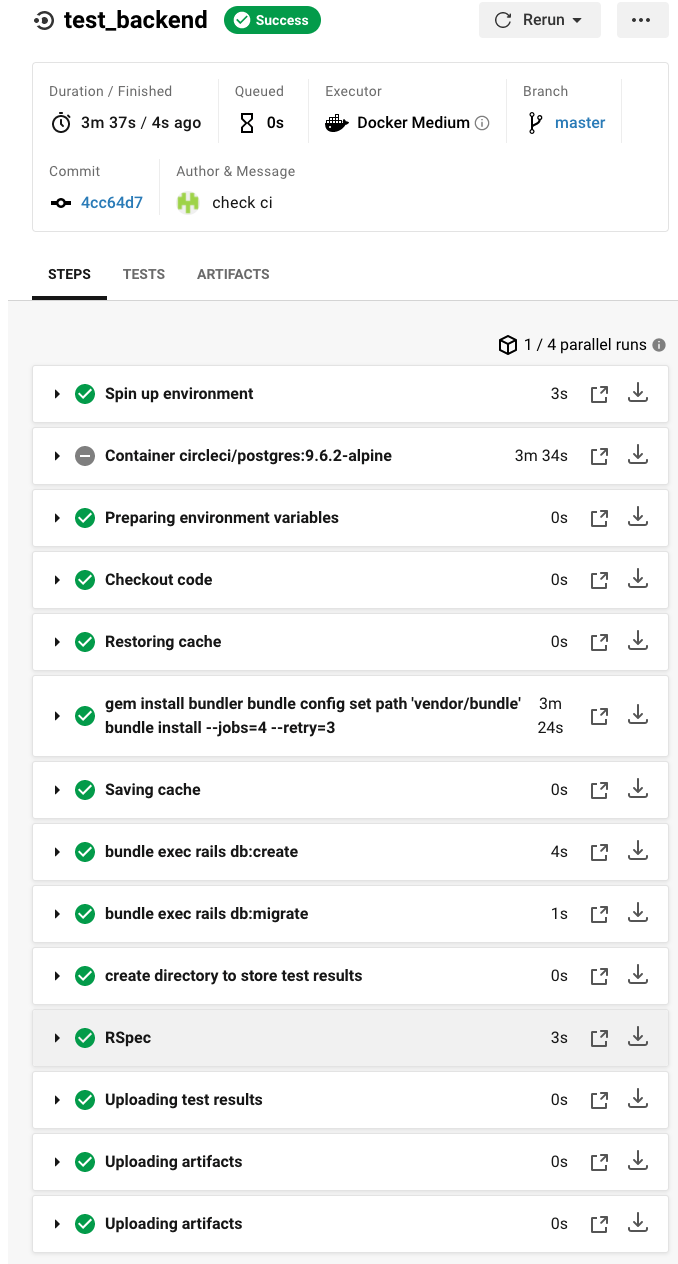
master branchにpushした結果以下のようにsuccessとなれば成功です。
8.本番環境への動作確認
webpackerが効かない問題が発生して大幅に時間を使ってしまいました。
以下の記事のおかげで解決することができました。
結果としてはRAILS_SERVE_STATIC_FILES=1などを予め環境変数に設定してあげないといけないそうです。
本番環境用に新しくdocker-compose.prod.ymlを作成します。
version: '3.5'
services:
  web:
    build: .
    container_name: rails-web
    command: bash -c "rm -f tmp/pids/server.pid && bundle exec rails s -p 3000 -b '0.0.0.0'"
    volumes:
      - .:/app
      - /var/tmp
    environment:
      RAILS_ENV: production
      RAILS_SERVE_STATIC_FILES: 1
    ports:
      - 3000:3000
    depends_on:
      - db
    tty: true
    stdin_open: true
    networks:
      - sample

  db:
    image: postgres:9.6.2-alpine
    container_name: rails-db
    environment:
      POSTGRES_PASSWORD: 12345678
      TZ: "Asia/Tokyo"
    volumes:
      - pg-data:/var/lib/postgresql/data
    restart: always
    ports:
      - 5432:5432
    networks:
      - sample

networks:
  sample:

volumes:
  pg-data:
以下のコマンドでコンパイルしていきます。
docker-compose -f docker-compose.prod.yml up -d

# コンテナに入る
docker-compose exec web bash

bin/rails assets:precompile RAILS_ENV=production

rails db:create
rails db:migrate
ちなみにデータベースの設定は以下のように変えています。
production:
  <<: *default
  database: app_production
  username: <%= ENV['DB_USERNAME'] || 'postgres' %>
  host: <%= ENV['DB_HOST'] || 'db' %>
  password: <%= ENV['DB_PASSWORD'] || '12345678' %>
また、routes.rbにrootを設定しないとアクセスされた際のはじめに表示するページが迷子になってしまします。
以下のように適当にrootを設定してあげましょう。
Rails.application.routes.draw do
  root  'hello#index'  #この1行を追加
  get 'hello/index', to: 'hello#index'
  # For details on the DSL available within this file, see https://guides.rubyonrails.org/routing.html
  post 'hello/create', to: 'hello#create'
end
本番環境でも実際に動いているのを確認できました。

9.herokuへのデプロイ
最後にherokuにデプロイしていきます。
ここが一番つまりました。
まずは以下のコマンドを叩いてherokuアプリの基本設定をしていきます。
heroku login

heroku container:login

heroku create つけたいアプリ名
次に、precompileをしてwebpackでコンパイルします。
docker-compose run --rm web rails assets:precompile RAILS_ENV=production
次にDockerfileを本番用に書き換えます。
FROM ruby:2.6.5

RUN curl -sL https://deb.nodesource.com/setup_12.x | bash - && apt-get update && \
    apt-get install -y nodejs --no-install-recommends && rm -rf /var/lib/apt/lists/*

RUN apt-get update -qq && apt-get install -y build-essential libpq-dev

RUN apt-get update && apt-get install -y curl apt-transport-https wget && \
    curl -sS https://dl.yarnpkg.com/debian/pubkey.gpg | apt-key add - && \
    echo "deb https://dl.yarnpkg.com/debian/ stable main" | tee /etc/apt/sources.list.d/yarn.list && \
    apt-get update && apt-get install -y yarn

RUN apt-get update -qq && \
    apt-get install -y build-essential \
    libpq-dev \
    sudo  \
    vim

RUN yarn add node-sass

WORKDIR /app
RUN mkdir -p tmp/sockets
COPY Gemfile /app/Gemfile
COPY Gemfile.lock /app/Gemfile.lock
RUN bundle install
COPY . /app

# COPY entrypoint.sh /usr/bin/
# RUN chmod +x /usr/bin/entrypoint.sh
# ENTRYPOINT ["entrypoint.sh"]

# 以下の記述を追加
ENV RAILS_ENV=production

# この記述を追加
CMD bash -c "rm -f tmp/pids/server.pid && bundle exec puma -C config/puma.rb"
次にデータベースの追加をします。
以下のコマンドを叩き、アプリにデータベースを設定します。その際に、productionの設定のためにdatabase.ymlも変更します。
heroku addons:create heroku-postgresql:hobby-dev
production:
  <<: *default
  database: app_production
  username: <%= ENV['DB_USERNAME'] || 'postgres' %>
  host: <%= ENV['DB_HOST'] || 'db' %>
  password: <%= ENV['DB_PASSWORD'] || '12345678' %>
  url: <%= ENV['DATABASE_URL'] %>
または (いずれかで動作確認済み)
production:
  <<: *default
  database: app_production
  url: <%= ENV['DATABASE_URL'] %>
そして、コンテナをアップします。
# データベースのmigrate (createは必要なし)
heroku run rails db:migrate
# webpackを反映させる
heroku run rails assets:precompile
# コンテナを起動する
heroku container:release web
# アプリを開く
heroku open
エラーハンドリング
herokuでのアプリの起動の際にいくつかのエラーに悩まされたのでその解決法を書きます。
Web process failed to bind to $PORT within 60 seconds of launch
flaskの記事で書いたのと同様、herokuに静的にportを割り当てていたのが問題。
以下のようにすることで解決しました。
- CMD rails server -b 0.0.0.0

+ CMD bash -c "rm -f tmp/pids/server.pid && bundle exec puma -C config/puma.rb"
Failed binding port to Ruby application on Heroku
を参考
Blocked host
こちらのエラーはRails6から発生するエラーらしくアクセスできるホストが限定されるために起きるエラーらしいです。
config/environments/development.rbに以下の記述を追記することで解決できます。
config.hosts.clear
Rails6の本番環境でBlocked hostエラーが発生したときの対処法
Webpackがproductionでコンパイルされない問題
これが一番つらかったです。
結論から言うとconfig/environments/production.rbノ設定が問題だそうです。
RAILS_SERVE_STATIC_FILESという環境変数が設定されていないとコンパイル後のファイルの読み込みができないそうです。そのため、Dockerfileに環境変数を設定するかそもそもconfig.public_file_server.enabledをtrueにしておくのが良いかと思われます。
# RAILS_SERVE_STATIC_FILESを適当に環境変数として設定する
ENV RAILS_SERVE_STATIC_FILES=1
- config.public_file_server.enabled = ENV['RAILS_SERVE_STATIC_FILES'].present?
+ config.public_file_server.enabled = true
以上をすべてすれば、以下のようにheroku上でもアプリが展開できているのが確かめることができます。
10.CircleCIで自動でプロイする
masterブランチにpushされた際にherokuへのデプロイが完了するようにcircleciを変更する。
最終的に作成した.circleci/config.ymlは以下のようになる。
version: 2.1


jobs:
  test_backend:
    docker:
    # dockerイメージで使っているrubyバージョンと一致させる
      - image: circleci/ruby:2.6.5-stretch-node
        environment:
          RAILS_ENV: test
          DB_HOST: 127.0.0.1
          DB_PASSWORD: ''
      - image: circleci/postgres:9.6.2-alpine
        environment:
          POSTGRES_USER: root
          POSTGRES_DB: circleci_testdb
          POSTGRES_HOST_AUTH_METHOD: trust # パスワードなし

    working_directory: ~/repo

    steps:
      - checkout

      # restore gem from cache
      - restore_cache:
          keys:
            - gem-cache-v1-{{ checksum "~/repo/Gemfile.lock" }}
            - gem-cache-v1-
          working_directory: ~/repo

      # gem install
      - run:
          command: |
            gem install bundler
            bundle config set path 'vendor/bundle'
            bundle install --jobs=4 --retry=3
          working_directory: ~/repo

      - save_cache:
          key: gem-cache-v1-{{ checksum "~/repo/Gemfile.lock" }}
          paths:
            - ~/repo/backend/vendor/bundle
          working_directory: ~/repo

      # Database setup
      - run:
          command: bundle exec rails db:create
          working_directory: ~/repo
      - run:
          command: bundle exec rails db:migrate
          working_directory: ~/repo

      - run:
          name: create directory to store test results
          command: mkdir /tmp/test-results
          working_directory: ~/repo

      # run tests
      - run:
          name: RSpec
          command: |
            bundle exec rspec --profile 10 \
                              --format RspecJunitFormatter \
                              --out test_results/rspec.xml \
                              --format progress \
                              $(circleci tests glob "spec/**/*_spec.rb" | circleci tests split --split-by=timings)
          working_directory: ~/repo

      # collect reports
      - store_test_results:
          path: /tmp/test-results
      - store_artifacts:
          path: /tmp/test-results
          destination: test-results
      - store_artifacts:
          path: /home/circleci/repo/tmp/screenshots


  deploy:
    docker:
      - image: circleci/ruby:2.6.5-stretch-node
        environment:
          RAILS_MASTER_KEY: ${RAILS_MASTER_KEY}
    working_directory: ~/repo
    steps:
      - checkout
      - run:
          name: 'Install Heroku CLI, if necessary'
          command: |
            if [[ $(command -v heroku) == "" ]]; then
              curl https://cli-assets.heroku.com/install.sh | sh
            else
              echo "Heroku is already installed. No operation was performed."
            fi
      - run:
          name: heroku maintenance on
          command: heroku maintenance:on --app ${HEROKU_APP_NAME}
      - run:
          name: Deploy to Heroku_Production
          command: |
            git push https://heroku:$HEROKU_API_KEY@git.heroku.com/$HEROKU_APP_NAME.git master
      - run:
          name: export rails master key
          command: |
            export RAILS_MASTER_KEY=${RAILS_MASTER_KEY}
      - run:
          name: db migration
          command: |
            heroku run rails db:migrate --app ${HEROKU_APP_NAME}
      - run:
          name: heroku maintenance off
          command: heroku maintenance:off --app ${HEROKU_APP_NAME}

workflows:
  version: 2
  test:
    jobs:
      - test_backend:
          filters:
            branches:
              ignore: master
  deploy:
    jobs:
      - deploy:
          # masterブランチへのpushでのみ反応
          filters:
              branches:
                  only:
                  - master
CircleCIの環境変数をいかに以下のものを設定します。
HEROKU_API_KEY : herokuのapiトークン (heroku authorizations:create で取得できる値)
HOROKU_APP_NAME : herokuのアプリにあなたがつけた名前
RAILS_MASTER_KEY : masterkeyの値
以下のようにherokuにもRAILS_MASTER_KEYの環境変数を設定しておきます。
heroku config:set RAILS_MASTER_KEY="$(< config/master.key)"
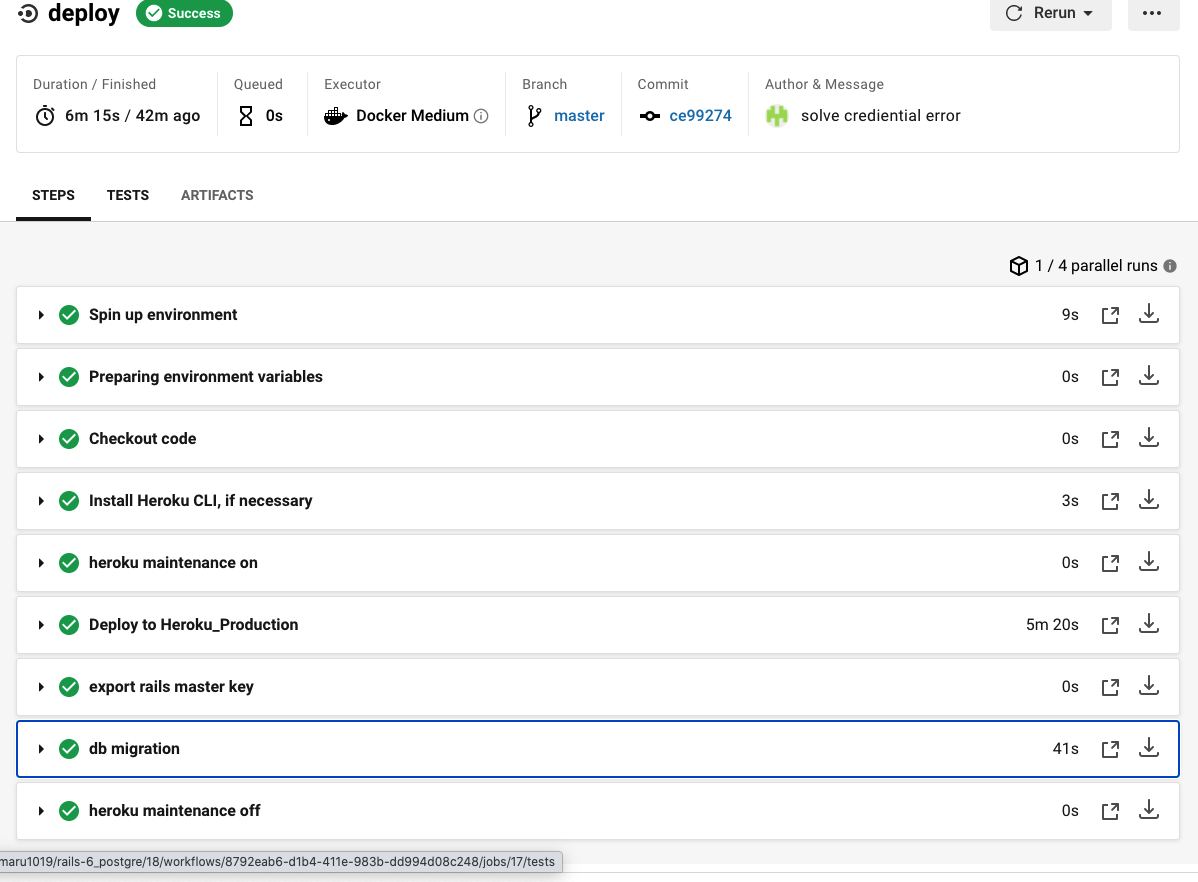
masterブランチへpushして滞り無く
エラーハンドリング
この流れをする際に以下のエラーにハマったので解決法を記します。
Rails: How to fix “Missing secret_key_base for 'production' environment”
このエラーが発生した際にはconfig/environments/production.rbで以下の記述を追記します。
config.require_master_key = true
ActiveSupport::MessageEncryptor::InvalidMessage
なにかの拍子にcredentials.yml.encの内容が置き換わったのが原因だと思われます。
以下のコマンドを叩き再度credentials.yml.encを作成することで解消できます。
# -eがないとエラーになる可能性あり
docker-compose run -e EDITOR=vim web bin/rails credentials:edit
Missing encryption key to decrypt file with. Ask your team for your master key and write it to /app/config/master.key or put it in the ENV['RAILS_MASTER_KEY'].
gitにSecurity上の問題からmasterkeyが送られないことが起因するエラーです。
以下のようにherokuの環境変数にRAILS_MASTER_KEYを設定してあげれば大丈夫です。
heroku config:set RAILS_MASTER_KEY=`cat config/master.key`
以下のように無事にcircleciが通っていることが確認できればokです。
heroku status=500 エラーについて
herokuのログを見るとstatus=500のエラーになっており特定のページが見れないErrorが出ていることを発見しました。
しかし、これだけだと何のErrorか分からない為困っていたのですが、以下の記事を参考にすることでくわしくError内容が見れるようになりました。
RailsアプリをHerokuにデプロイして、エラーがでたけど、1行しか出なくて困った時・・
やり方としてはGemfileに以下の記述を追加して、bundle updateするだけです。
gem 'rails_12factor', group: :production
bundle update
最後にherokuにpushするとError内容が具体的に見れるようになります。
参考文献
Railsのパフォーマンス調査でrack-mini-profilerを使ってみました。
PostgreSQL pgAdmin 4の使い方(起動からデータ参照)
CircleCI config.yml ひな型 Rails 6 / PostgreSQL / Rspec