Splunk と python の関係を見ると以下の2つがあるかと思います。
- Splunk のサーチコマンド内で、python プログラムを実行する場合
- Pythonコードから、splunkに問い合わせてサーチ結果を取り出す場合
1)については、カスタムサーチコマンドとして Splunk上で作成したpythonを実行できます。すでに他の方の記事もあるので、今回は 2) の pythonから、splunk内のデータをサーチ文を投げて、その結果を取り込んでみたいと思います。また今回はその後のコーディングが簡単になるように pandas の DataFrame形式で取り込むところまで jupyter notebookを使ってやってみます。
これで pythonから、Splunkデータを扱いやすくなります。
ちなみに今回のコードは、こちらのblog を参考にしました。
https://www.splunk.com/blog/2019/03/18/leveraging-external-data-science-stacks-with-splunk-today.html
全体の流れ
- jupyter notebook を利用し、splunk サーバに接続
- サーチの実行
- dataframe にデータを変換
1) jupyter notebook を利用し、splunk サーバに接続
まずは、ローカルPC上で jupyter notebookを起動してください。(あるいは、google のcolaboratoryでも大丈夫です)
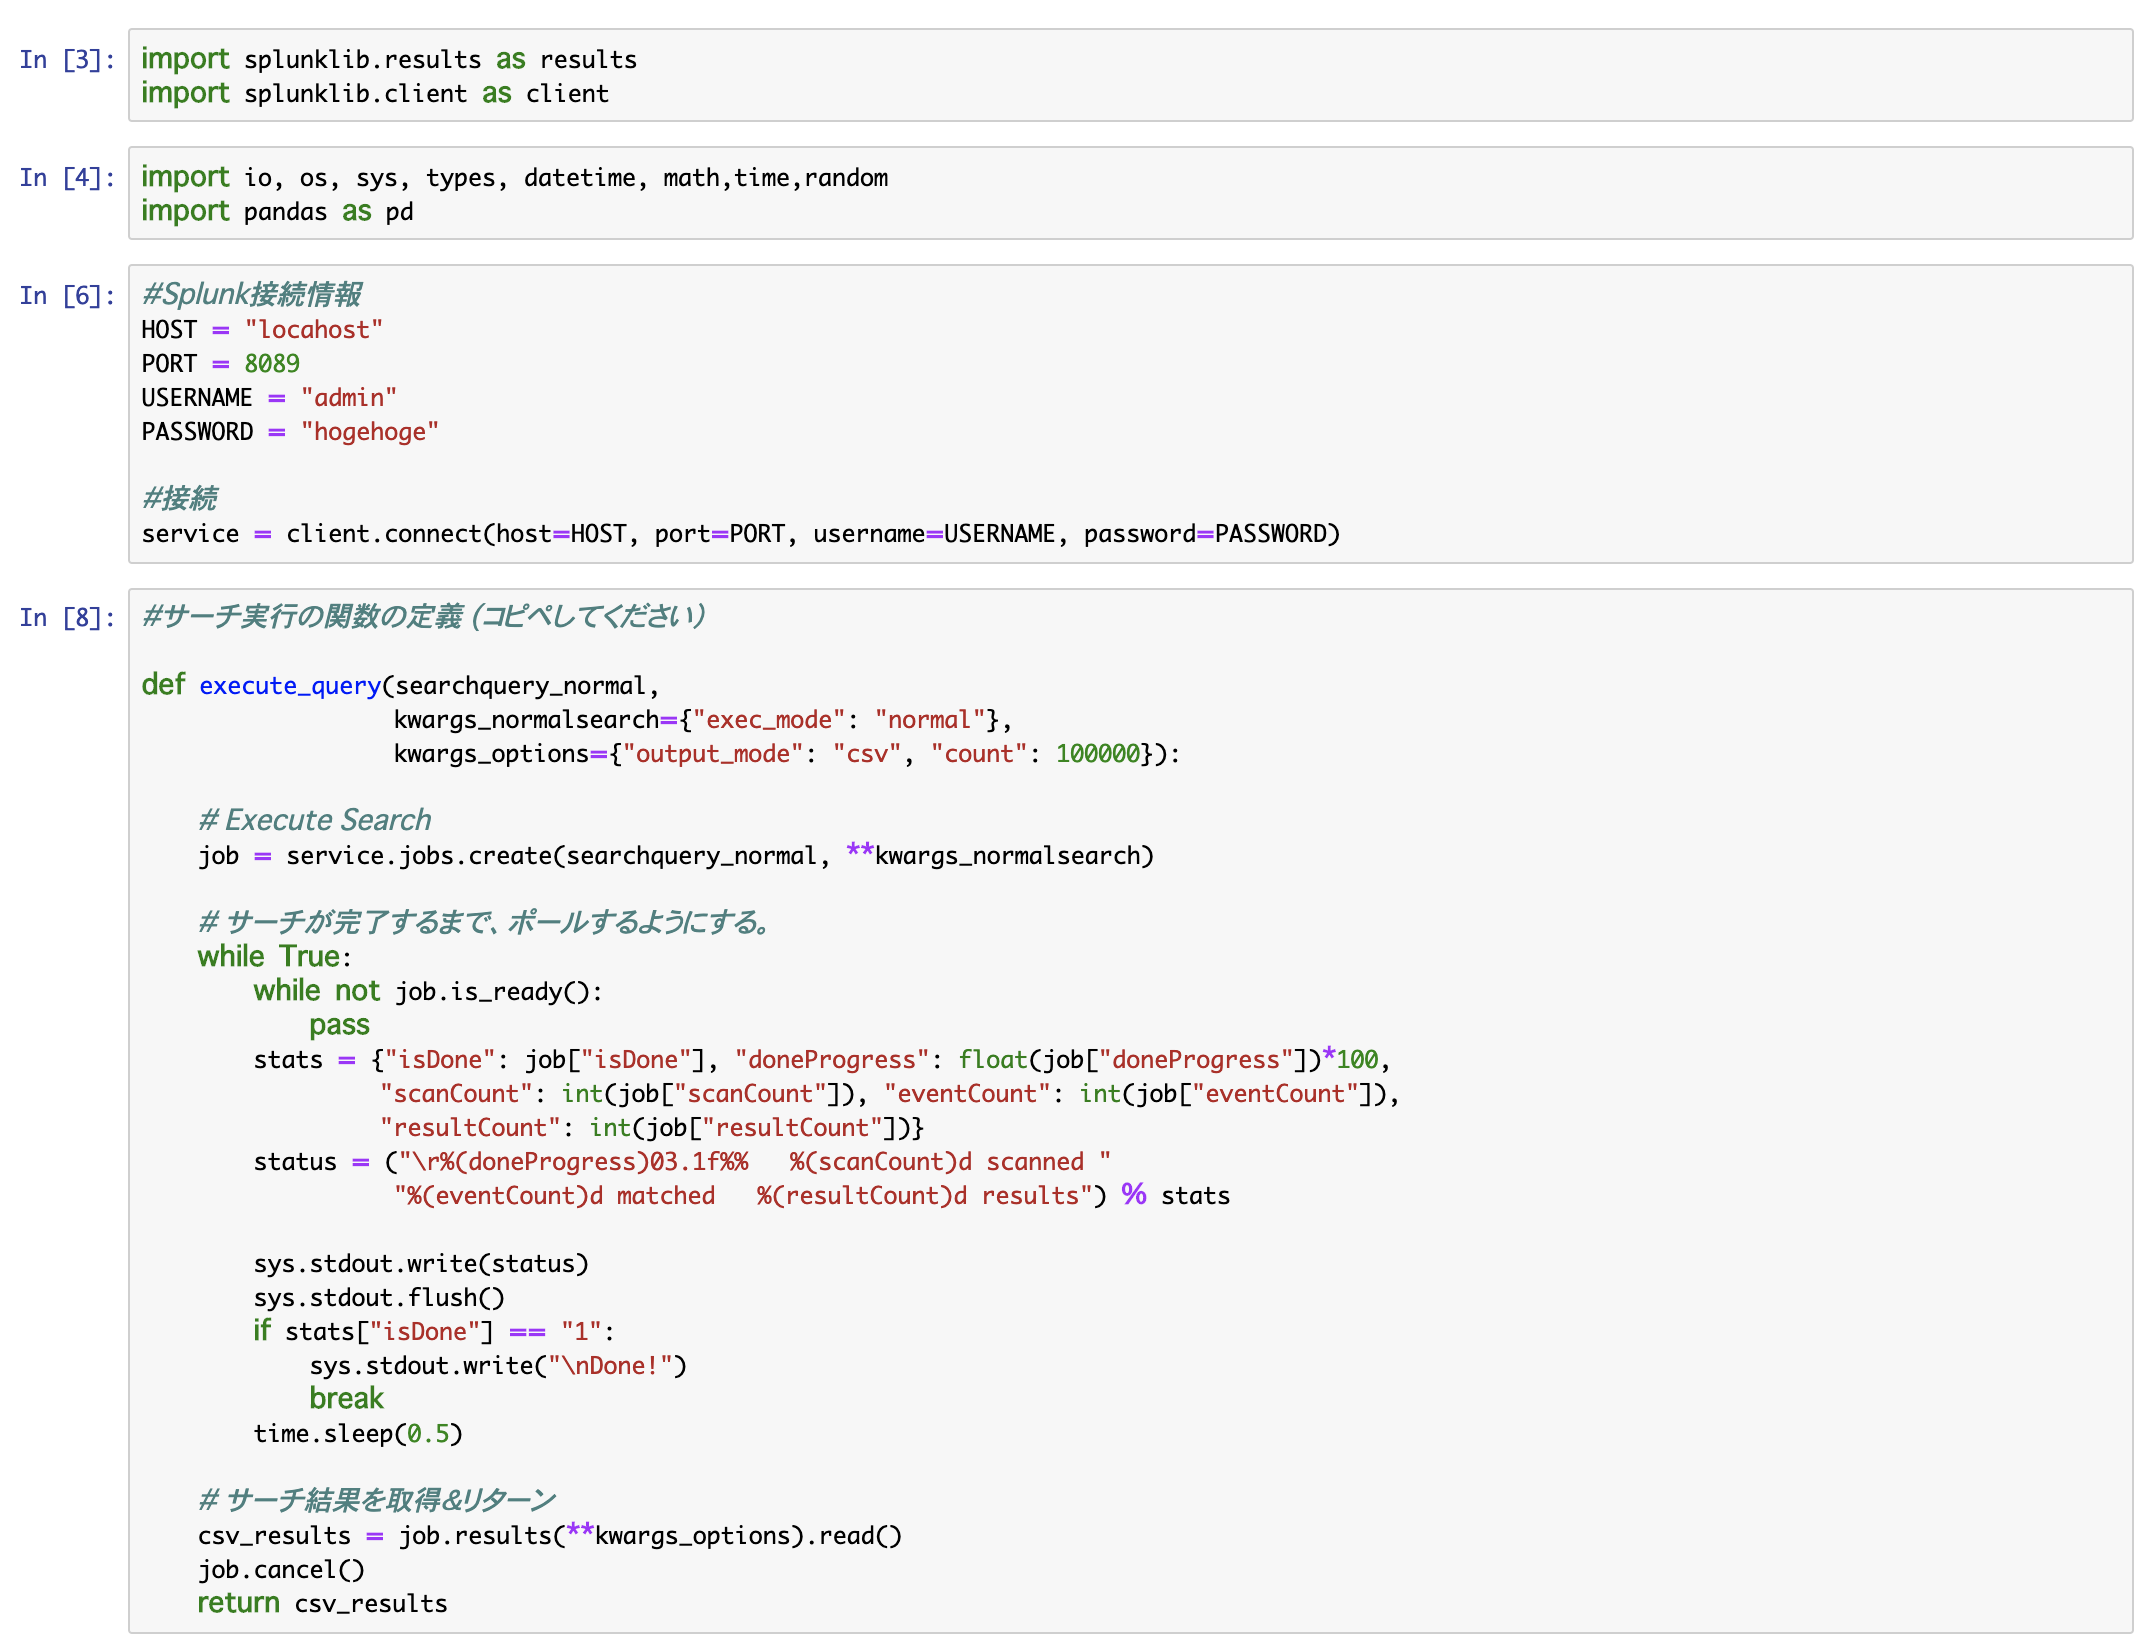
まず splunk-sdk をインストールし、モジュールをインポートします。
!pip install splunk-sdk
 import splunklib.results as results
 import splunklib.client as client
他に import するモジュールは適当に。 (ioと pandasは、今回必須)
import io, os, sys, types, datetime, math,time,random
import pandas as pd
次に spluk サーバーに接続します。
#Splunk接続情報
HOST = "localhost"
PORT = 8089
USERNAME = "admin"
PASSWORD = "hogehoge"

#接続
service = client.connect(host=HOST, port=PORT, username=USERNAME, password=PASSWORD)
##2) サーチの実行
まずは、サーチ実行のための関数を作成します。
ここは、あまり深く考えずコピペして利用ください。中身はサーチが完了するまで待ったり、完了の表示をしたり、カウント数を表示したりしてくれます。
#サーチ実行の関数の定義 (コピペしてください)

def execute_query(searchquery_normal,
                  kwargs_normalsearch={"exec_mode": "normal"},
                  kwargs_options={"output_mode": "csv", "count": 100000}):

    # Execute Search
    job = service.jobs.create(searchquery_normal, **kwargs_normalsearch)

    # サーチが完了するまで、ポールするようにする。
    while True:
        while not job.is_ready():
            pass
        stats = {"isDone": job["isDone"], "doneProgress": float(job["doneProgress"])*100,
                 "scanCount": int(job["scanCount"]), "eventCount": int(job["eventCount"]),
                 "resultCount": int(job["resultCount"])}
        status = ("\r%(doneProgress)03.1f%%   %(scanCount)d scanned "
                  "%(eventCount)d matched   %(resultCount)d results") % stats

        sys.stdout.write(status)
        sys.stdout.flush()
        if stats["isDone"] == "1":
            sys.stdout.write("\nDone!")
            break
        time.sleep(0.5)

    # サーチ結果を取得&リターン
    csv_results = job.results(**kwargs_options).read()
    job.cancel()
    return csv_results
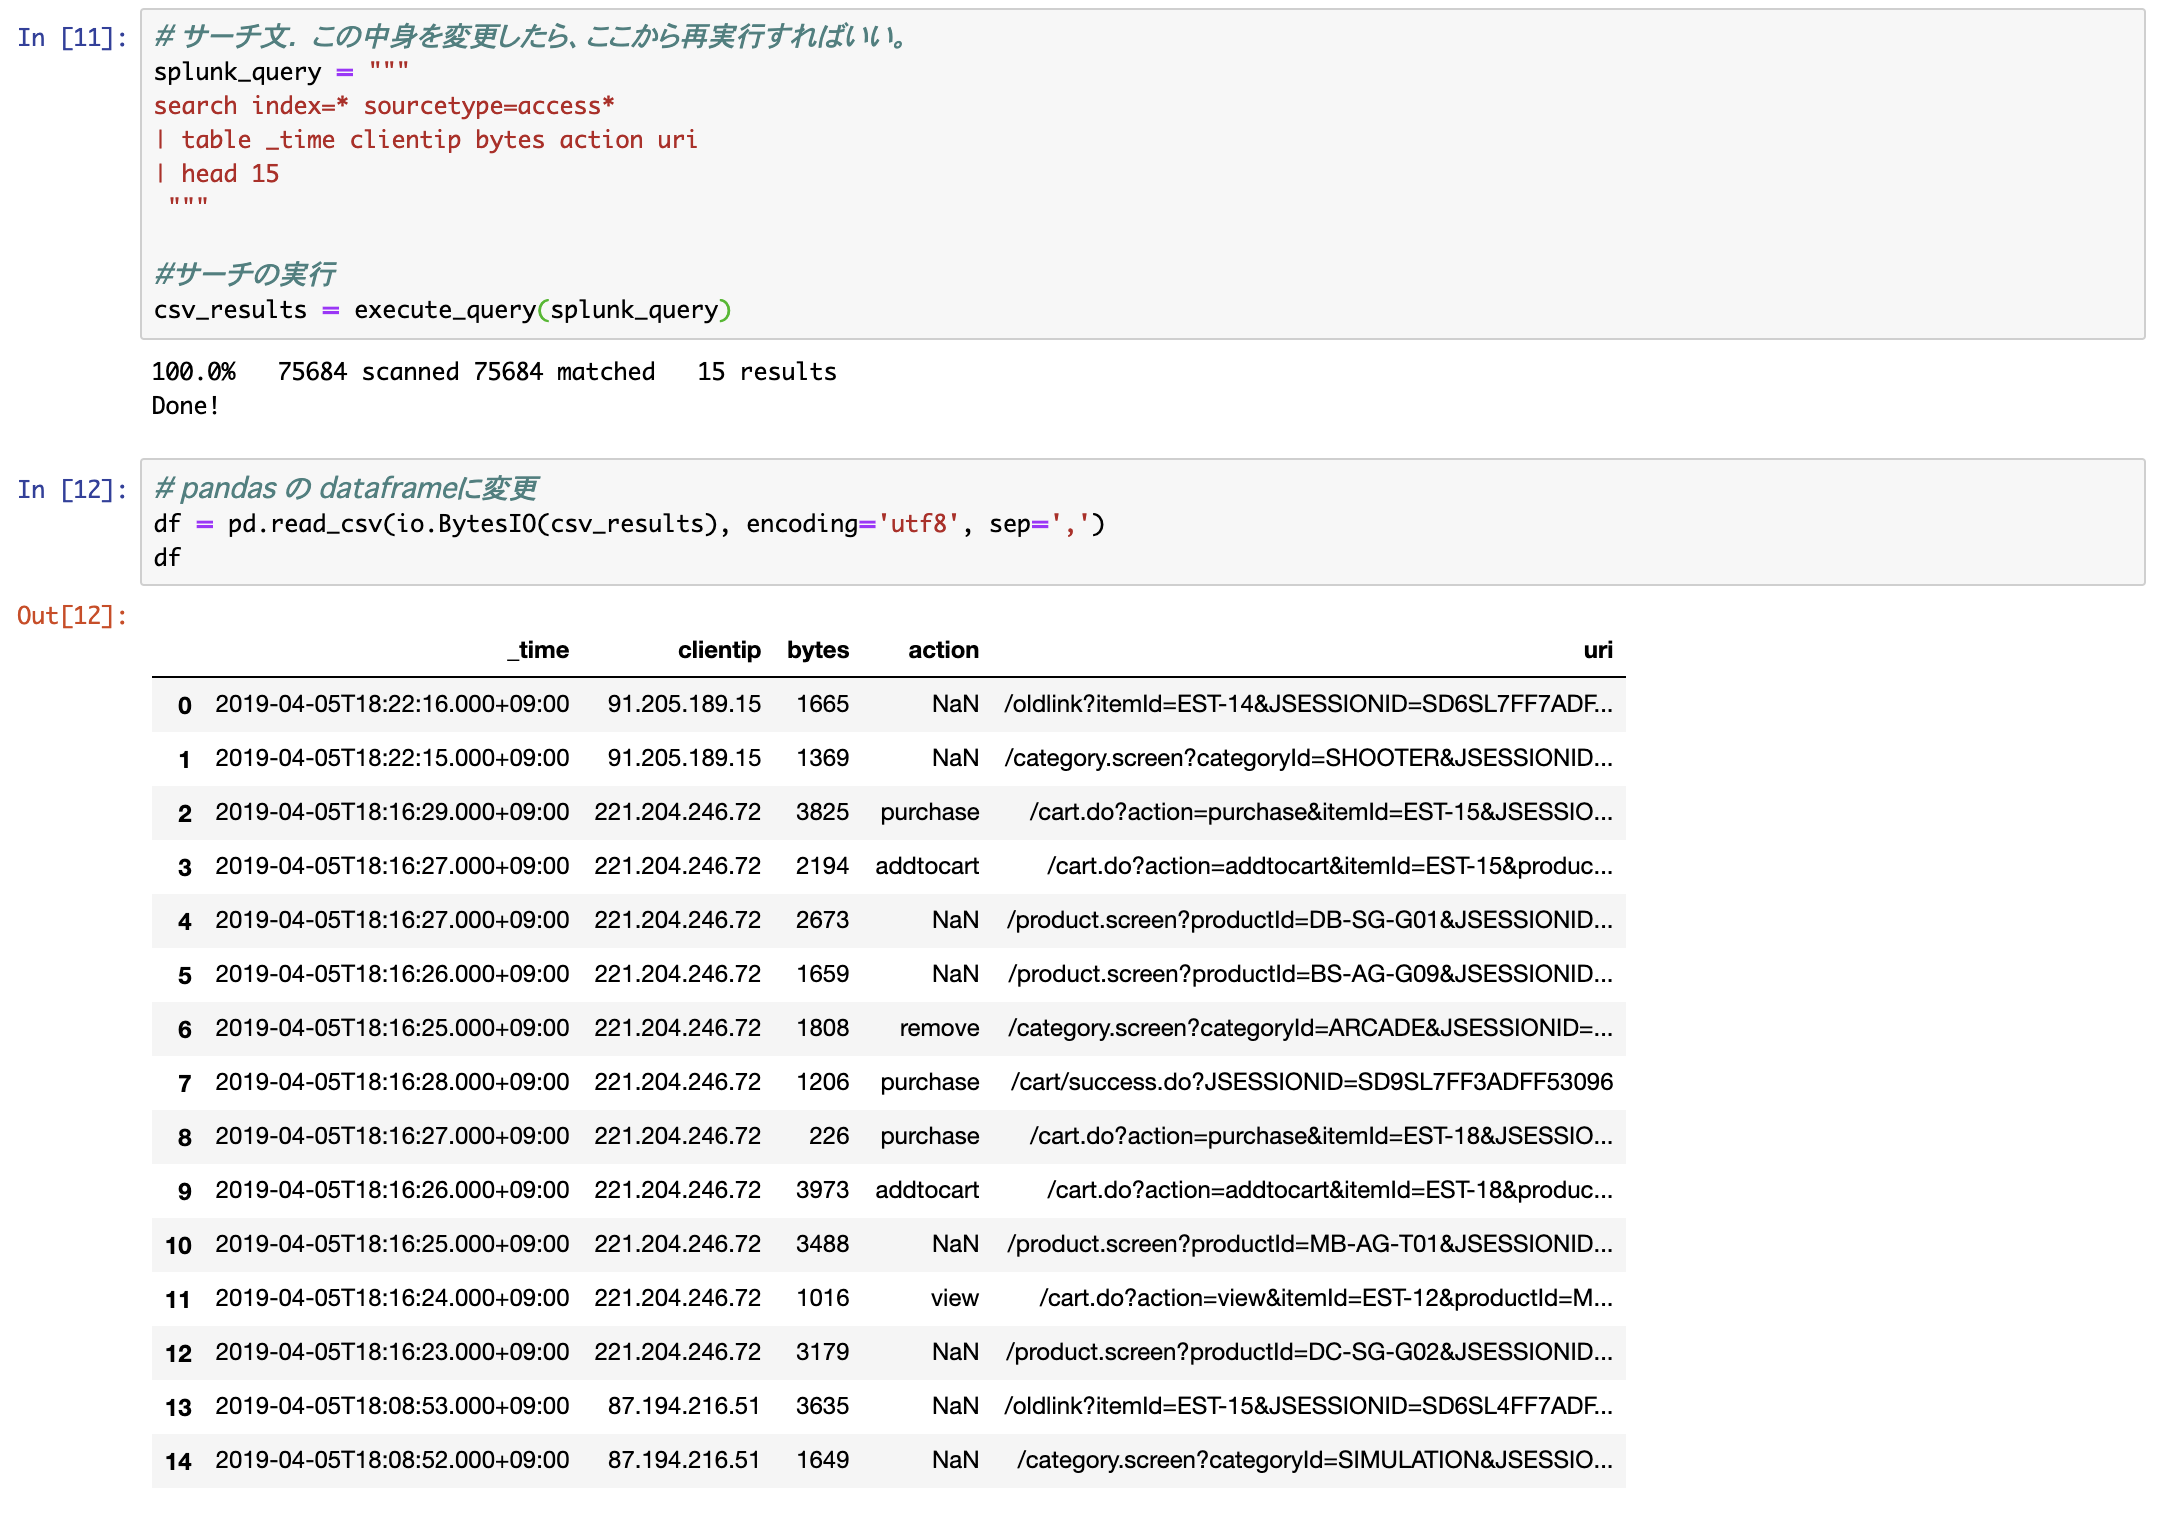
実際のサーチ文を記述し、実行。
jupyter notebook (or colaboratory) のいいところは、このサーチ文の箇所を変更し、途中からなんども実行し、結果をすぐに確認できるところですね。
# サーチ文.  この中身を変更したら、ここから再実行すればいい。

splunk_query = """
search index=* sourcetype=access*
| table _time clientip bytes action uri
| head 15
 """

#サーチの実行
csv_results = execute_query(splunk_query)

3) 最後に、取得したサーチ結果を、pythonで扱いやすくするため pandasのdataframeに変換
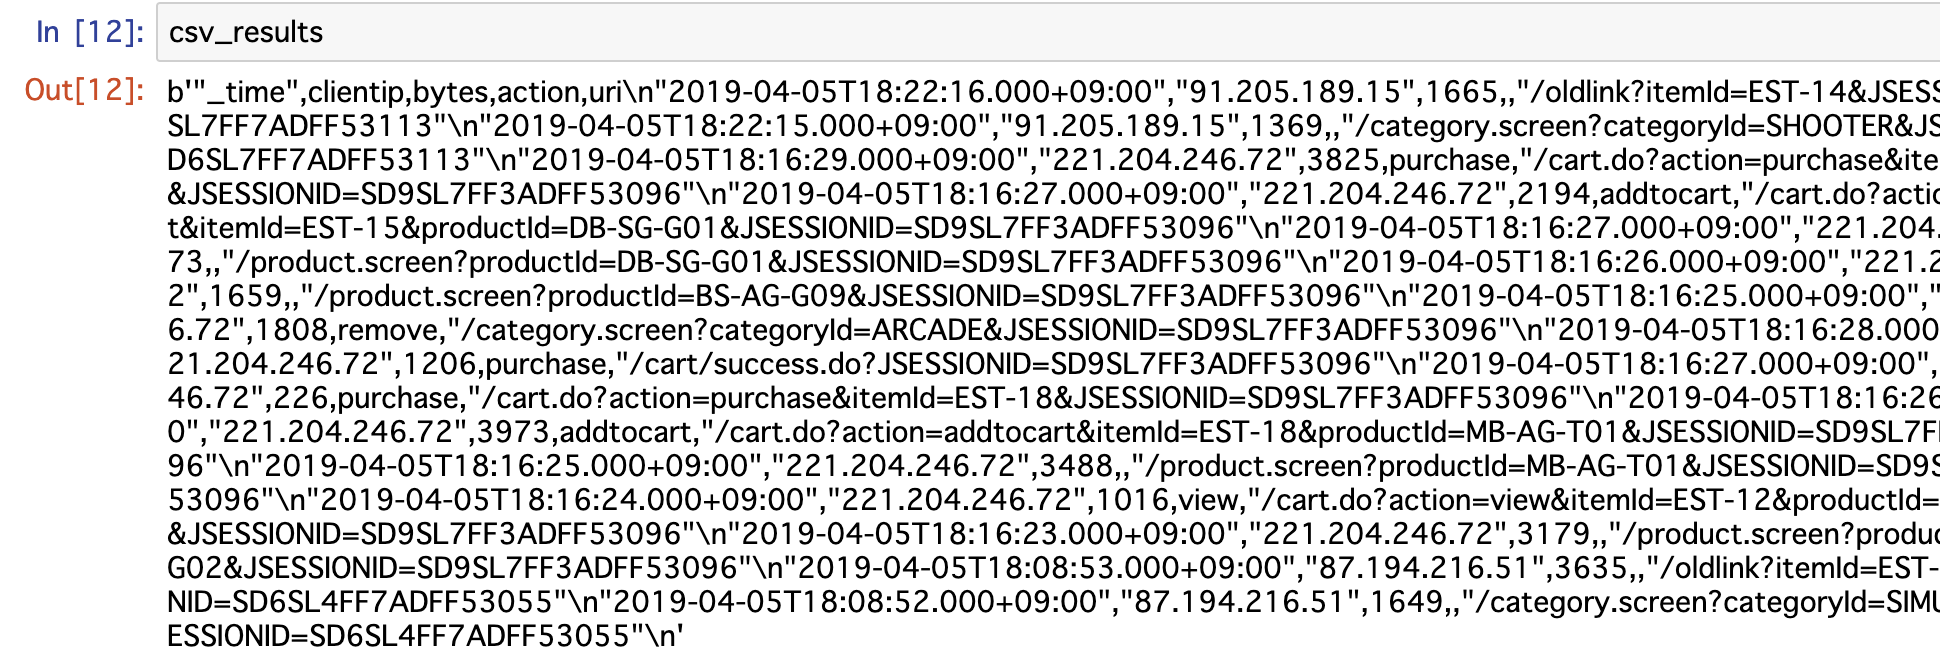
このまま、取得データをみると、まさにログデータのようになっている。(今回はcsv形式で指定している)
そこで DataFrame 形式に変換
df = pd.read_csv(io.BytesIO(csv_results), encoding='utf8', sep=',')
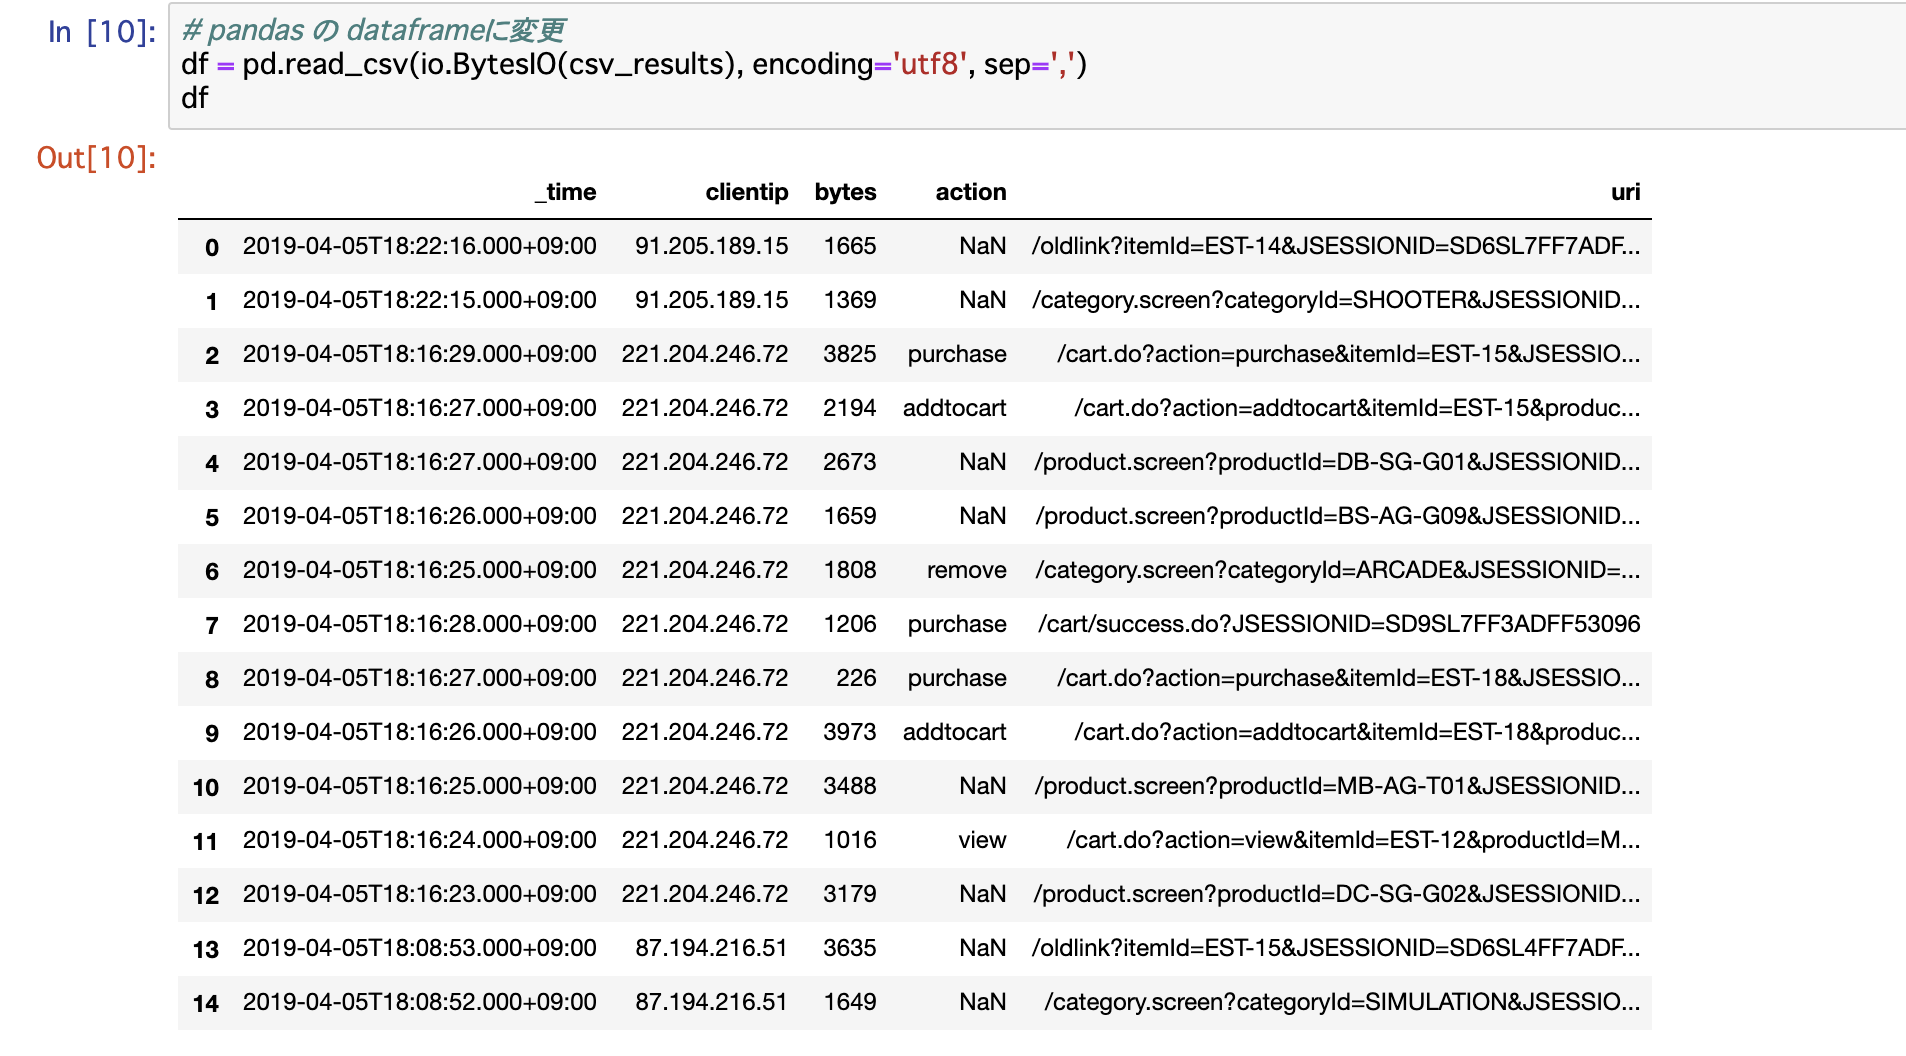
これで、pythonで処理しやすくなりますね。
まとめ
##最後に、今回実行したものをまとめて書いておきます。
!pip install splunk-sdk   # 一度インストールしたら、2度目は不要
import splunklib.client as client
import splunklib.results as results
import io, os, sys, types, datetime, math,time,random
import pandas as pd

#Splunk接続情報
HOST = "localhost"
PORT = 8089
USERNAME = "admin"
PASSWORD = "hogehoge"

#接続
service = client.connect(host=HOST, port=PORT, username=USERNAME, password=PASSWORD)

#サーチ実行のメソッドの定義

def execute_query(searchquery_normal,
                  kwargs_normalsearch={"exec_mode": "normal"},
                  kwargs_options={"output_mode": "csv", "count": 100000}):

    # Execute Search
    job = service.jobs.create(searchquery_normal, **kwargs_normalsearch)

    # サーチが完了するまで、ポールしたり、カウント数を表示したり
    while True:
        while not job.is_ready():
            pass
        stats = {"isDone": job["isDone"], "doneProgress": float(job["doneProgress"])*100,
                 "scanCount": int(job["scanCount"]), "eventCount": int(job["eventCount"]),
                 "resultCount": int(job["resultCount"])}
        status = ("\r%(doneProgress)03.1f%%   %(scanCount)d scanned "
                  "%(eventCount)d matched   %(resultCount)d results") % stats

        sys.stdout.write(status)
        sys.stdout.flush()
        if stats["isDone"] == "1":
            sys.stdout.write("\nDone!")
            break
        time.sleep(0.5)

   # サーチ結果を取得&リターン
    csv_results = job.results(**kwargs_options).read()
    job.cancel()
    return csv_results

# サーチ文.  この中身を変更したら、ここから再実行すればいい。
splunk_query = """
search index=* sourcetype=access*
| table _time clientip bytes action uri
| head 15
 """

#サーチの実行
csv_results = execute_query(splunk_query)

# pandas の dataframeに変更
df = pd.read_csv(io.BytesIO(csv_results), encoding='utf8', sep=',')