はじめに
最終的に仕上がったものは以下のリポジトリで公開してあります。
分からないことがあったときは参考にしてみてください。
手順
UnityとGitHub Actionsを使ってunitypackageのエクスポートを行う手順です。
1. パッケージをエクスポートするC#を記述する
GitHub Actions上でパッケージを出力するためのC#スクリプトを追加します。
プロジェクトリポジトリのEditorフォルダ下に、UnityPackageExporter.cs(名前はなんでもいい)を追加し、以下のように記述します。(パッケージ名などの定数はプロジェクトに合わせてください)
using System.IO;
using UnityEditor;

namespace ExportPackageExample.Editor {
	public static class UnityPackageExporter {

		// 出力するunitypackageの名前
		const string k_PackageName = "ExportPackageExample";

		// `Assets/`フォルダ下にあるパッケージのパス
		const string k_PackagePath = "ExportPackageExample";

		// エクスポート先のパス
		const string k_ExportPath = "Build";

		public static void Export () {
			ExportPackage($"{k_ExportPath}/{k_PackageName}.unitypackage");
		}

		public static string ExportPackage (string exportPath) {
			// Ensure export path.
			var dir = new FileInfo(exportPath).Directory;
			if (dir != null && !dir.Exists) {
				dir.Create();
			}

			// Export
			AssetDatabase.ExportPackage(
				$"Assets/{k_PackagePath}",
				exportPath,
				ExportPackageOptions.Recurse
			);

			return Path.GetFullPath(exportPath);
		}

	}
}
かなり簡潔に書いたものなので、もし「もっと細かくパッケージをカスタマイズしたい」という場合は、公式のドキュメントを参考にしてください。
https://docs.unity3d.com/ScriptReference/AssetDatabase.ExportPackage.html
2. ULFファイルを入手する
GitHub Actions上でUnityライセンスをアクティベートするためのULFファイルを入手します。
この手順に関しては別の記事として書かせてもらいました。(GUIのみで簡単にできます)
3. ULFファイルをSecretsに登録する
- プロジェクトリポジトリの
Settings > Secretsメニューを選択する。 -
New repository secretボタンをクリックする。 - Nameに
"UNITY_LICENSE"と入力し、ValueにULFファイルの中身をコピペする。 -
Add secretボタンをクリックする。
これでULFファイルの中身は非公開のまま、環境変数として扱うことができます。
4. GitHub ActionsでunitypackageをエクスポートするYAMLを記述する
- リポジトリの
.github/workflows/下にpackage.yamlファイルを追加します。 -
package.yamlに以下のように記述します。
name: Export Package

on:
  pull_request: {}
  push: { branches: [main] }

env:
  UNITY_LICENSE: ${{ secrets.UNITY_LICENSE }}

jobs:
  build:
    name: Build UnityPackage
    runs-on: ubuntu-latest
    steps:
      # Checkout
      - name: Checkout repository
        uses: actions/checkout@v2
        with:
          lfs: true

      # Cache
      - name: Cache
        uses: actions/cache@v2
        with:
          path: Library
          key: Library
          restore-keys: Library-

      # Build
      - name: Build .unitypackage
        uses: game-ci/unity-builder@v2
        with:
          unityVersion: 2020.3.1f1 # Secretsに登録したULFのUnityバージョン
          buildMethod: ExportPackageExample.Editor.UnityPackageExporter.Export # 名前空間を含むエクスポート関数の名前

      # Upload
      - name: Upload .unitypackage
        uses: actions/upload-artifact@v2
        with:
          name: Unity Package
          path: Build
5. エクスポートしてみる
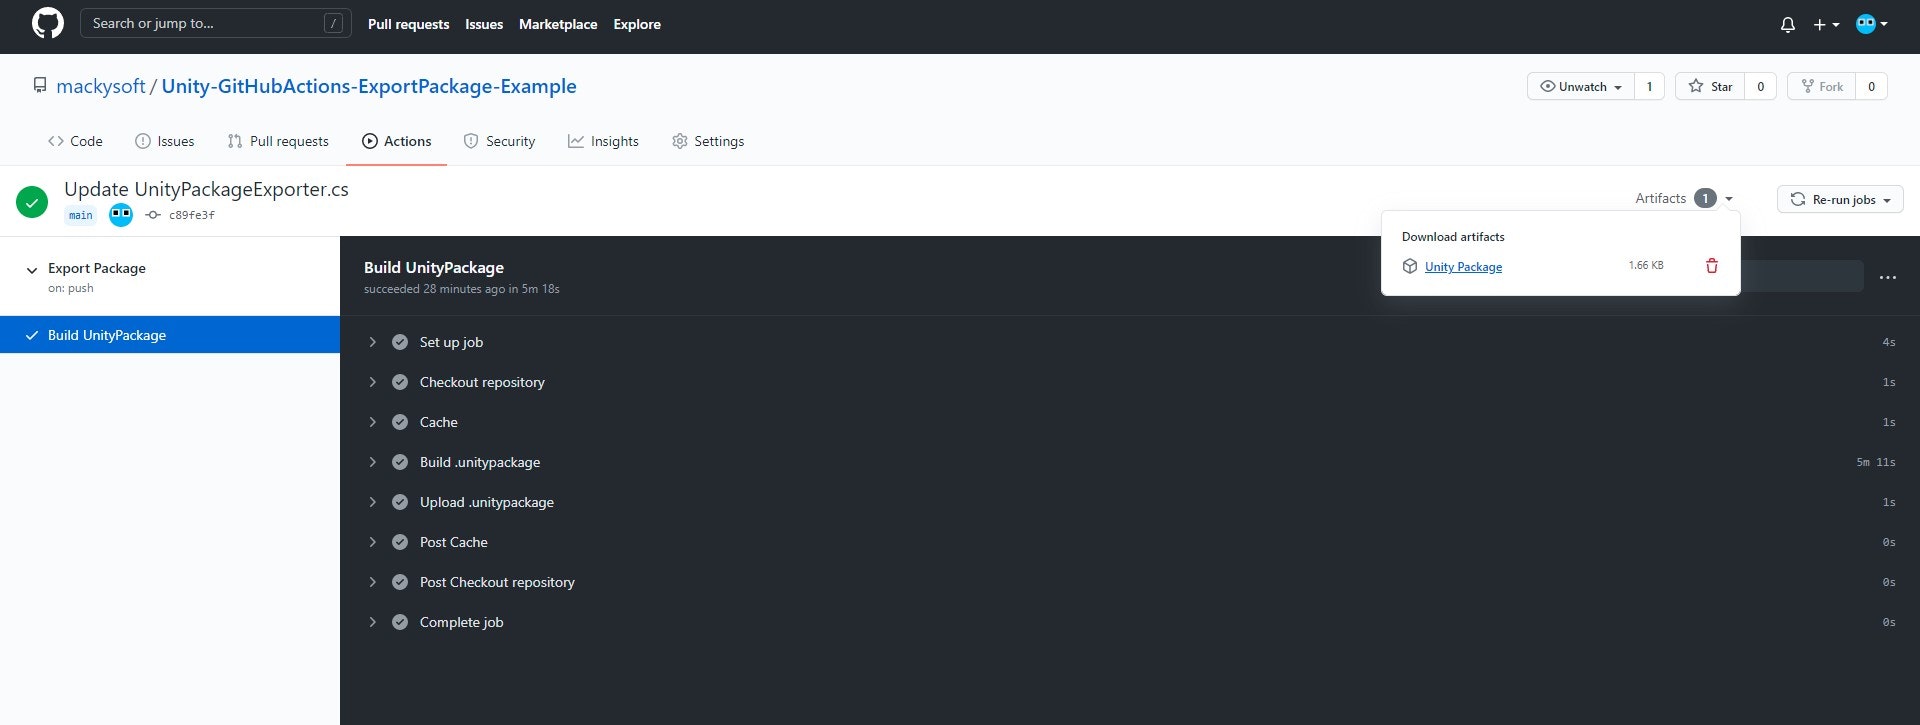
リポジトリにPush及びPull Requestを行うことで、unitypackageをエクスポートするワークフローが走ります。
以下のように✔マークが表示されていれば成功です。出力されたunitypackageは右上のArtifactsから入手できます。
さいごに
最終的に仕上がったリポジトリです。詰まったときは参考にしてみてください。
CIは初めてであまり詳しくないので、間違えているところがあれば教えてもらえると幸いです。
