はじめに
Watson Studioでscikit-learn機械学習モデルをWebサービス化するの記事でご紹介したように、IBMのクラウドサービスであるWatson StudioとWatson Machine Learningの組み合わせで、sckit-learnの機械学習モデルを簡単にWebサービス化することができます。
当記事は、そのKeras版となります。
(scikit-learnは本当に簡単にWebサービス化できたのですが、それに比較するとモデル登録の手順にちょっとしたコツがあります)
[2020-04-25] セットアップ手順修正
前提
無料でなんでも試せる! Watson Studioセットアップガイド
により、IBM Cloud上にアカウント登録がされ、Watson Studioのプロジェクトも作成済みであること。
一番後ろのオプション設定も必要です。
(正確にいうと、Watson Machine Learningは必要でSparkは不要)
手順
登録までに具体的手順は次のとおりです。
モデルの作成・学習
モデルはなんでもいいのですが、簡単にするため、隠れ層2層の全結合型ニューラルネットとしました。普通のKerasのモデルなので解説は省略します。
たまたまFunctional APIで組んでいますが、Sequentialでも大丈夫なはずです。
# データ準備

# 変数定義

# D: 入力ノード数
D = 784

# H: 隠れ層のノード数
H = 128

# 分類クラス数
num_classes = 10

# Kerasの関数でデータの読み込み
from keras.datasets import mnist
(x_train_org, y_train), (x_test_org, y_test) = mnist.load_data()

# 入力データの加工 (次元を1次元に)
x_train = x_train_org.reshape(-1, D) / 255.0
x_test = x_test_org.reshape((-1, D)) / 255.0

# 教師データの加工 (One Hot Vectorに)
from keras.utils import np_utils
y_train_ohe = np_utils.to_categorical(y_train, num_classes)
y_test_ohe = np_utils.to_categorical(y_test, num_classes)

from keras import optimizers
# モデルの定義

# 必要ライブラリのロード
from keras.layers import Dense
from keras.layers import Input
from keras.models import Model

# モデルの定義
inputs = Input(shape=(D,))
# 隠れ層1の定義
h1 = Dense(H, activation='relu')(inputs)
# 隠れ層2の定義
h2 = Dense(H, activation='relu')(h1)
# 出力層
predictions = Dense(num_classes, activation='softmax')(h2)
# モデル
model = Model(inputs=inputs, outputs=predictions)
# モデルのコンパイル
sgd = optimizers.SGD(lr=0.01, decay=1e-6, momentum=0.9, nesterov=True)
model.compile(loss = 'categorical_crossentropy',
              optimizer = sgd,
              metrics=['accuracy'])

# 学習

# 学習の単位
batch_size = 512

# 繰り返し回数
nb_epoch = 20

# モデルの学習
history1 = model.fit(
    x_train,
    y_train_ohe,
    batch_size = batch_size,
    epochs = nb_epoch,
    verbose = 1,
    validation_data = (x_test, y_test_ohe))
Watson ML管理クライアントの生成
ここからが、Watson Studio / Watson Machine Learing固有の話になります。
まず、以下のコードでWatson Machine Learing管理クライアントを生成します。
wml_credentials内の設定情報をどうやって入手するかについては、上で紹介した記事Watson Studioでscikit-learn機械学習モデルをWebサービス化するを参照して下さい。
wml_credentials={
  "url": "https://ibm-watson-ml.mybluemix.net",
  "username": "***",
  "password": "***",
  "instance_id": "***"
}

from watson_machine_learning_client import WatsonMachineLearningAPIClient
client = WatsonMachineLearningAPIClient(wml_credentials)
アップロード用圧縮ファイルの準備
Kerasモデルをリポジトリに登録するためには、いったんモデルをh5形式のファイルに落とし、更にそのファイルをgz圧縮する必要があります。
(APIドキュメントで読み取りにくいコツの部分)
具体的なコードとしては以下の形になります。
h5file = 'mnist-keras.h5'
gzfile = 'mnist-keras.tar.gz'

model.save(h5file)
import tarfile
 with tarfile.open(gzfile, 'w:gz') as tf:
    tf.add(h5file)
モデルの保存
これで必要な準備は整ったので、モデルの保存ができます。ただ、scikit-learnの時と違って、メタ情報をいくつか設定する必要があります。
(APIドキュメントで読み取りにくいコツその2)
具体的なコードは以下のとおりです。
metadata = {
client.repository.ModelMetaNames.NAME: 'Keras MNIST Test',
client.repository.ModelMetaNames.FRAMEWORK_NAME: 'tensorflow',
client.repository.ModelMetaNames.FRAMEWORK_VERSION: '1.5',
client.repository.ModelMetaNames.RUNTIME_NAME: 'python',
client.repository.ModelMetaNames.RUNTIME_VERSION: '3.5',
client.repository.ModelMetaNames.FRAMEWORK_LIBRARIES: [{'name':'keras', 'version': '2.1.3'}]
}
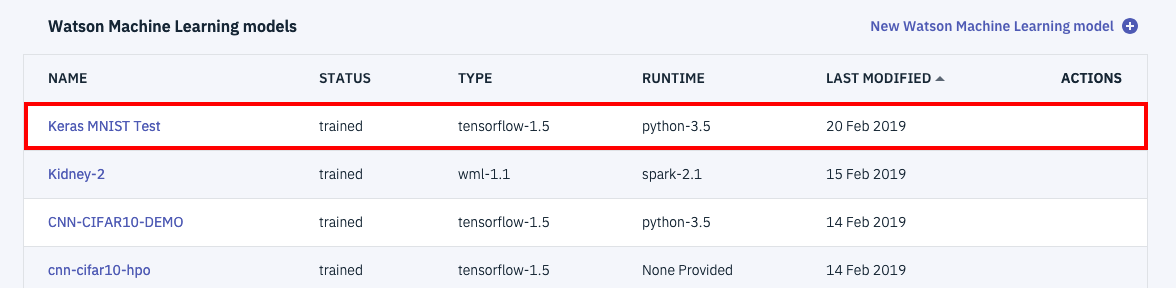
published_model = client.repository.store_model(model=gzfile, meta_props=metadata)
最後のstore_model関数呼び出しが正常終了していれば、下の図のようにWatson Studio上で管理可能なモデルになっています。
あとは、Watson Studioでscikit-learn機械学習モデルをWebサービス化するとまったく同じ手順でWebサービス化やWebサービスのテスト、Webサービス呼出しのアプリ開発が可能です。詳細は上の記事を参考にして下さい。