はじめに
SwiftUIでMapkitとFirebaseを使用し、位置情報をデータベースに保存することを目的とする。
前回記事までにSwiftUIで取得した現在地から逆ジオコーディングし、都道府県名と市区町村名を取得するところまでを記載した。
今回は取得した情報をFirebaseに保存するところを記載する。
Mapkitを使った逆コーデイングについては前回記事を参考にしてください。
参考記事
【SwiftUI】Mapkitを使った位置情報の取得と逆ジオコーデイング
開発環境
OSX 10.15.7 (Catalina)
Xcode 12.2.0
CocoaPods 1.10.0
本日の記事内容まとめ
- Mapkitを使用して取得した位置情報をfirebaseに保存する。
- ボタンを押したときにデータベースを更新できるようにする
- 異なるView間でのデータのやり取りをできるようにする
今回記事で実装・更新したところ
今回記事で更新、追加修正した箇所は主にmapView、Contentview内になります。
それぞれ実装した内容については以下に記載します。
MapView内
異なるView間のデータのやり取りを行う場合は、取得元は@binding、取得先は@stateで変数を定義しなくてはいけません。そこが理解し切れていなかったため、何度もエラーが出て、実装にとても時間がかかりました。
以下の記事がとても参考になりました。
【SwiftUI】@Stateとか@Bindingて何
新たに実装した箇所
・ContentViewへのデータを送信のために@Bindingの定義
・latitudeとlongitudeを定義
// 以下の行を追加
// MKMapViewの設定
struct mapView : UIViewRepresentable {
    typealias UIViewType = MKMapView

    // 以下の行を追加
    @Binding var manager : CLLocationManager
    @Binding var alert : Bool
    // ここまで

    @Binding var latitude : Double
    @Binding var longitude : Double

...略...

    class Coordinator: NSObject, CLLocationManagerDelegate {

        var parent : mapView

        init(parent1 : mapView) {

            parent = parent1
        }

        func locationManager(_ manager: CLLocationManager, didChangeAuthorization status: CLAuthorizationStatus) {

            if status == .denied{

                parent.alert.toggle()
                print("denied")
            }
        }

        func locationManager(_ manager: CLLocationManager, didUpdateLocations locations: [CLLocation]) {

            let location = locations.last

            // ここから追加
            // ContentView内で呼び出すために、緯度と軽度をそれぞれ取得
            self.parent.latitude = (location?.coordinate.latitude)!
            self.parent.longitude = (location?.coordinate.longitude)!
            // ここまで

            let point = MKPointAnnotation()

            let georeader = CLGeocoder()
ContentView内
・MapViewからのデータの受け取り
→@Stateで定義。
・Firebaseの更新にはaddDocumentを使用する。
・ボタンを設定し、クリック時にデータベースを更新
struct ContentView: View {

    @State var title = ""
    @State var subtitle = ""

    // ここから追加
    @State var latitude : Double
    @State var longitude : Double
    // ここまで

    @State var manager = CLLocationManager()
    @State var alert = false

    var body: some View {

        // ContentViewに地図を表示
        ZStack(alignment: .bottom, content: {
            // latitudeとlongitudeを追加
            mapView(manager: $manager, alert: $alert, latitude: $latitude, longitude: $longitude, title: $title, subtitle: $subtitle).alert(isPresented: $alert) {

                Alert(title: Text("Please Enable Location Access In Setting Panel!!!"))
            }

            // 地名を取得した場合に表示
            if self.title != "" {
                HStack(spacing: 12) {
                    Image(systemName: "info.circle.fill").font(.largeTitle).foregroundColor(.black)
                    VStack(alignment: .leading, spacing: 5){
                        Text(self.title).font(.body).foregroundColor(.black)
                        Text(self.subtitle).font(.caption).foregroundColor(.gray)
                    }
                    Spacer()

                    // ここから追加
                    Button(action: {

                        // firebaseの定義
                        let db = Firestore.firestore()
                        db.collection("locations").addDocument(data: [ "administrativeArea" : self.title, "locality" : self.subtitle, "Geopoint" : GeoPoint(latitude: self.latitude, longitude: self.longitude), "date": Timestamp(date: Date()),]) { (err) in

                            if err != nil{

                                print((err?.localizedDescription)!)
                                return
                            }
                            print("success")
                        }

                    }) {
                        Image(systemName: "tray.and.arrow.up").font(.largeTitle).foregroundColor(.black)
                    }
                    // ここまで
                Spacer()
                }
                .padding()
                // "Color"はAssets.xcassetsで設定
                .background(Color("Color"))
                .cornerRadius(15)
                .offset(y: -30)
            .padding()
            }
        })
    }
}
ContentView_PreviewsとSceneDelegateのContentView部分に追記
それぞれにlatitudeとlongitudeを記載しました。
因数としてTokyoの緯度・経度を記載していますが、位置情報が取得できた場合は更新され、現在地を表示します。
struct ContentView_Previews: PreviewProvider {
    static var previews: some View {
        // "latitude"と"longitude"を追記
        // 場所はTokyoで設定。現在地を取得した場合に更新される。
        ContentView(latitude: 35.6804, longitude: 139.7690)
    }
}
class SceneDelegate: UIResponder, UIWindowSceneDelegate {

    var window: UIWindow?


    func scene(_ scene: UIScene, willConnectTo session: UISceneSession, options connectionOptions: UIScene.ConnectionOptions) {
        // Use this method to optionally configure and attach the UIWindow `window` to the provided UIWindowScene `scene`.
        // If using a storyboard, the `window` property will automatically be initialized and attached to the scene.
        // This delegate does not imply the connecting scene or session are new (see `application:configurationForConnectingSceneSession` instead).

        // Create the SwiftUI view that provides the window contents.

        // "latitude"と"longitude"を追記
        // 場所はTokyoで設定。現在地を取得した場合に更新される。
        let contentView = ContentView(latitude: 35.6804, longitude: 139.7690)

        // Use a UIHostingController as window root view controller.
        if let windowScene = scene as? UIWindowScene {
アプリのフロー
- アプリ立ち上げ
- Mapkitを用いて位置情報の取得→逆ジオコーディングを行い、都道府県名・市町村名を取得
- ContentViewに地図とインフォセクションの表示
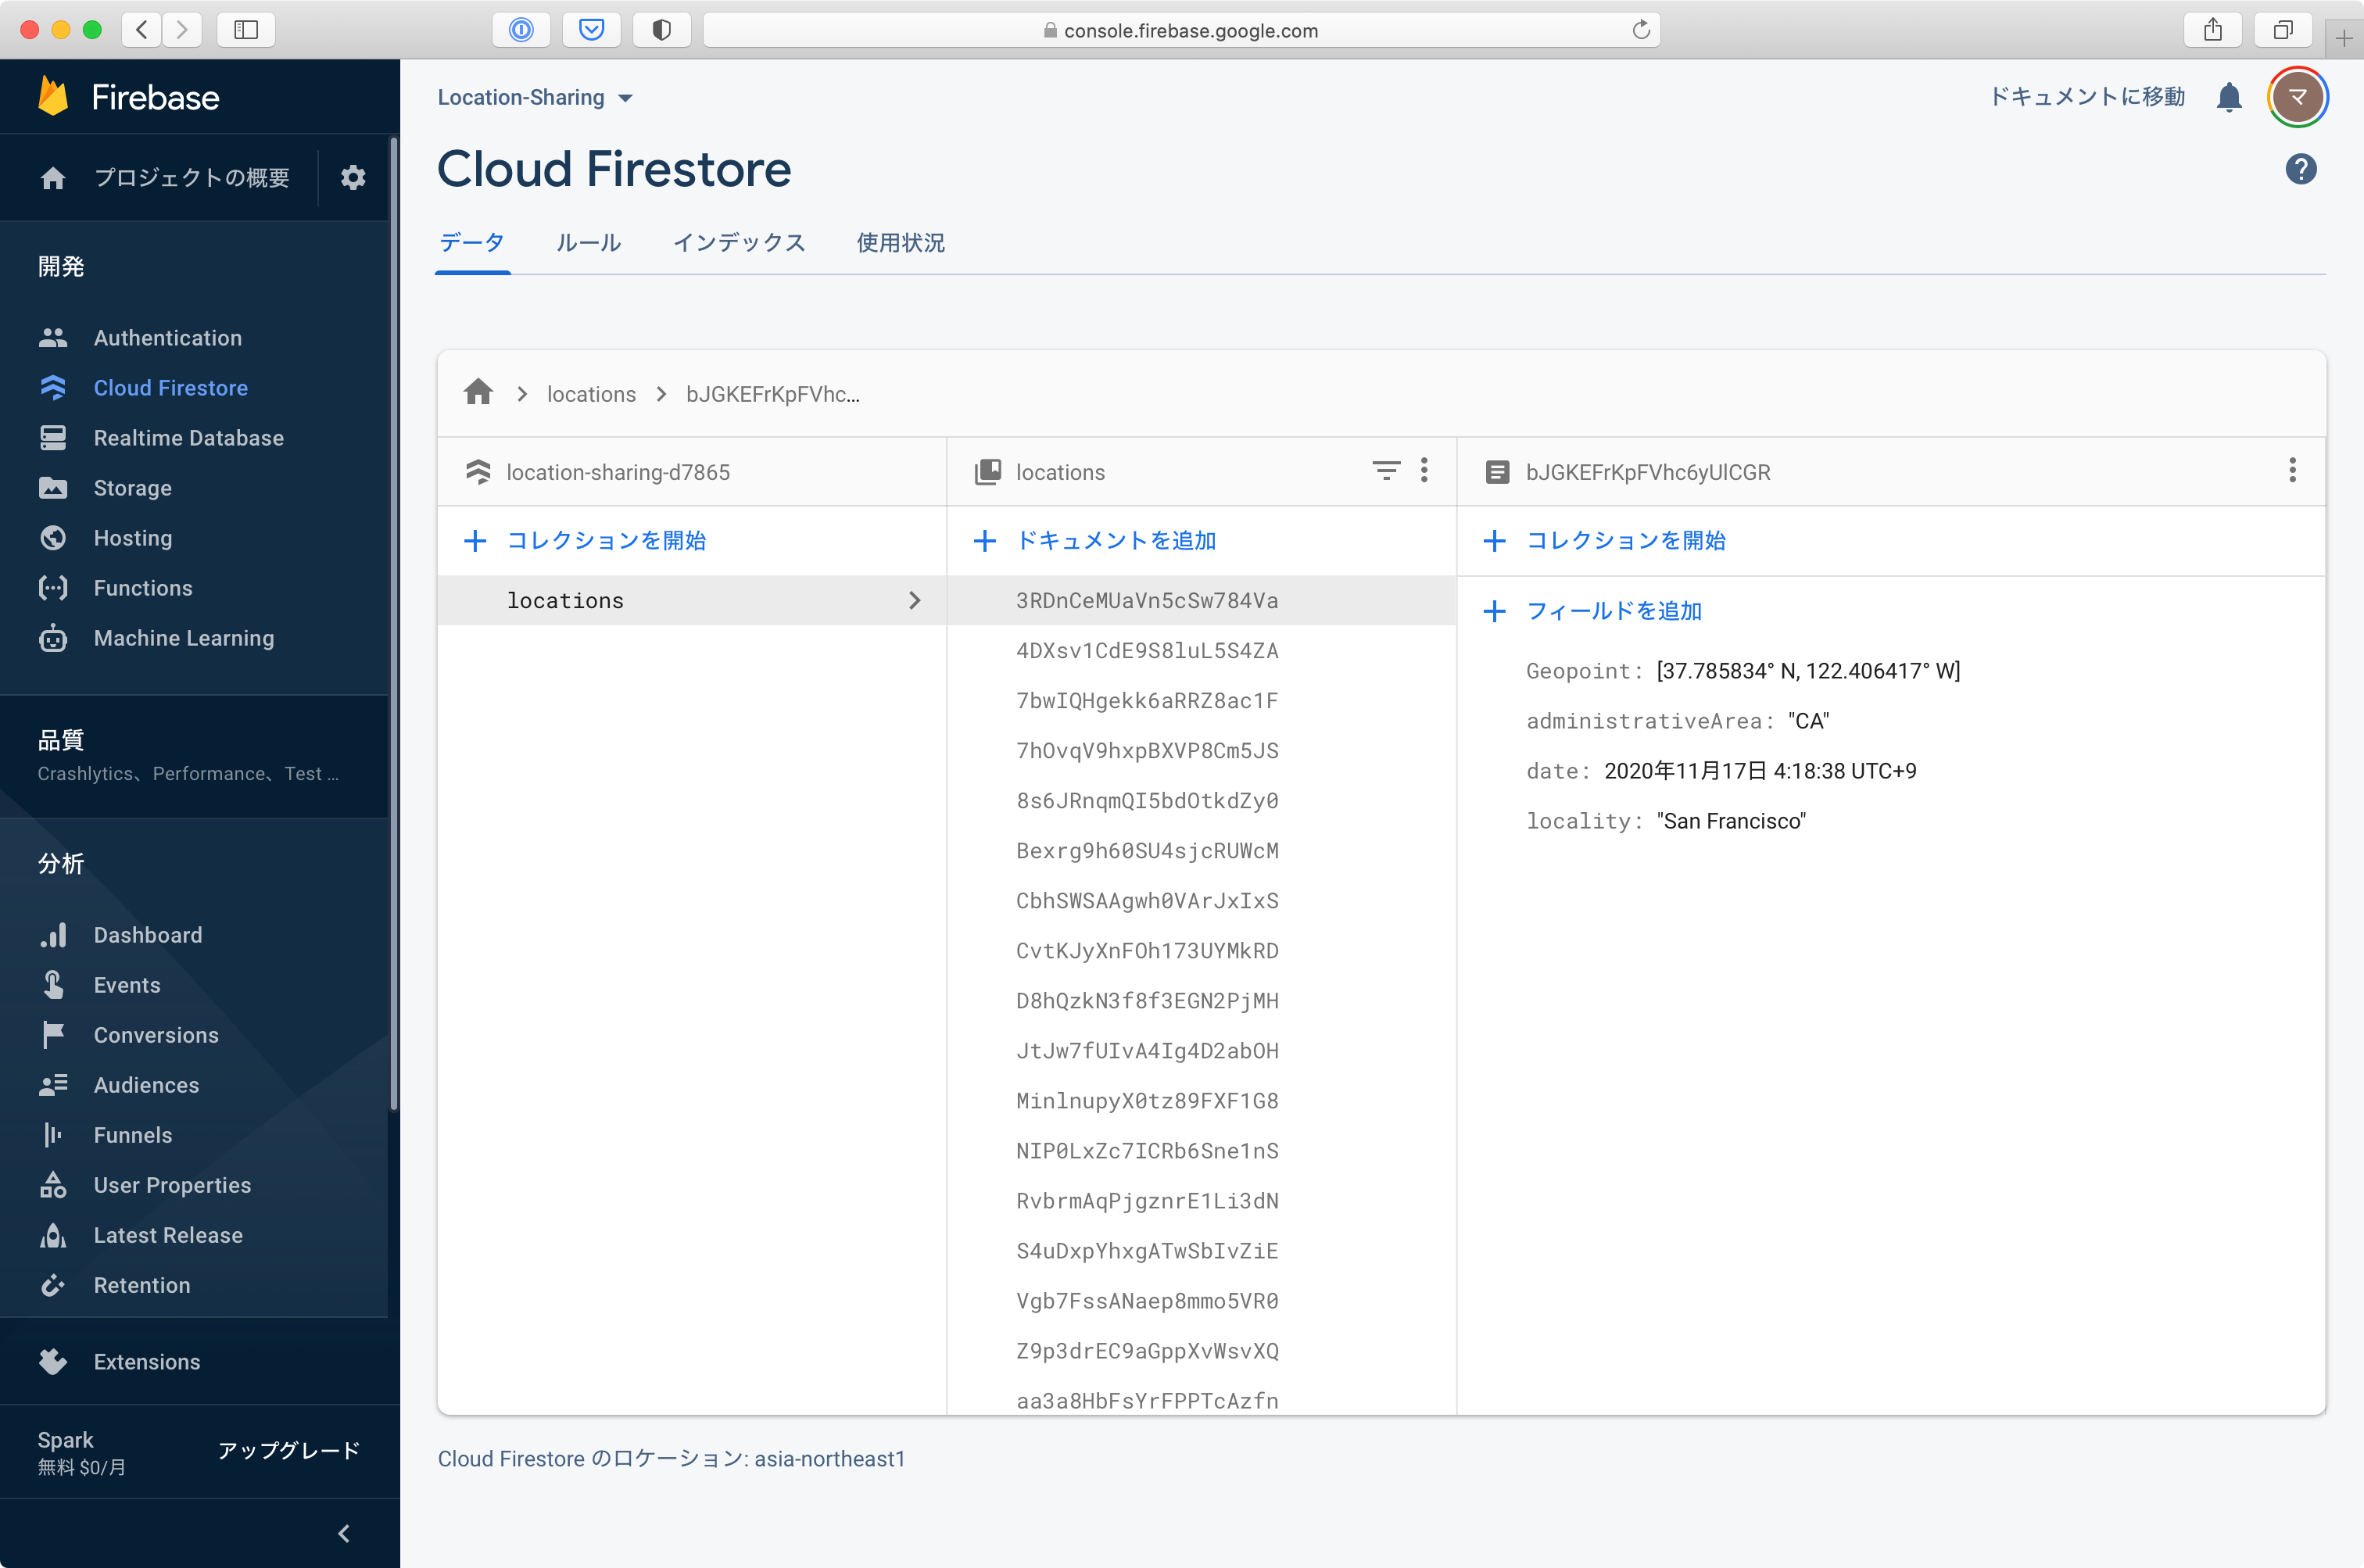
- インフォセクション内のボタンを押し、Firebaseのデータベースを更新
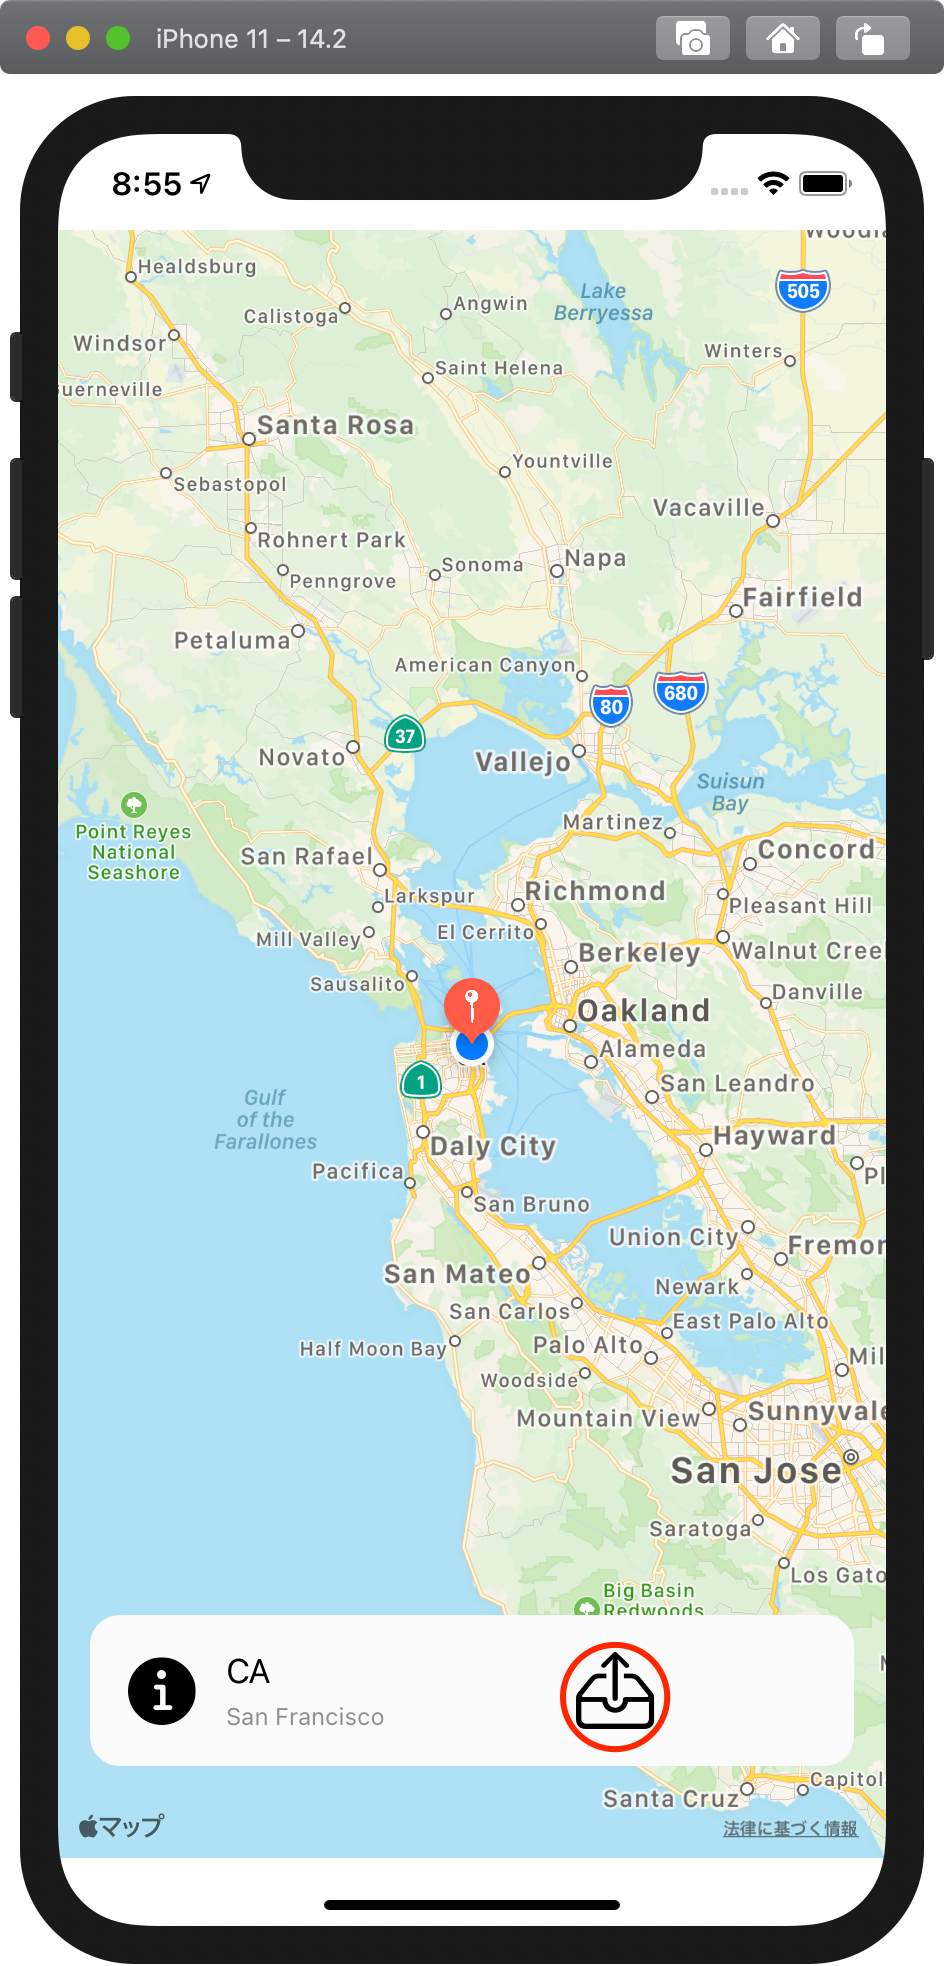
Simulatorを起動し、インフォセクション内のボタンを押すと、Firebaseのデータベースが更新されます。
実機で確認したところ、実機を使用した場合も現在地を取得し、逆ジオコーディングし、データベースを更新できました。
今後実装予定の部分
・Firebaseからのデータの受け取り
・受け取ったデータを表示するViewの実装
→listViewで表示。RowViewも作成する
・TabViewを実装
→地図表示と保存したデータを出力するViewを作成
以上です。